Blog Posts

Money Bouquets| A Trendy Gift Giving Method

What are money bouquets?

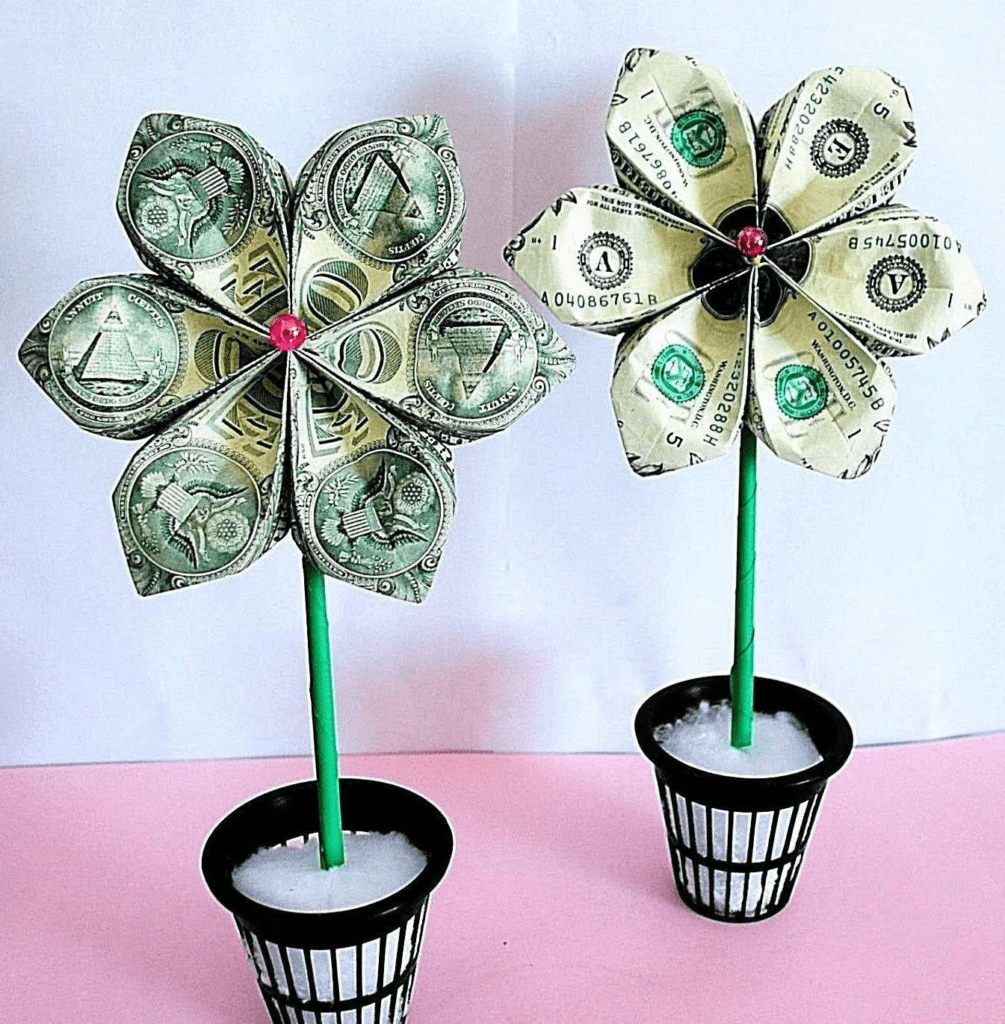
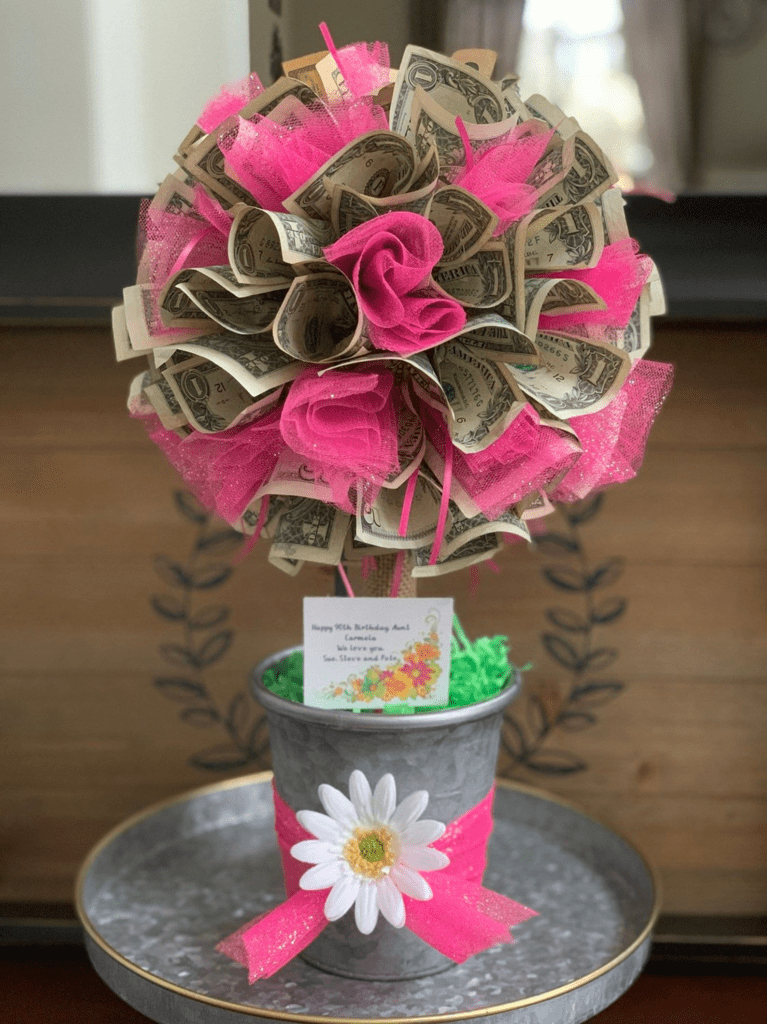
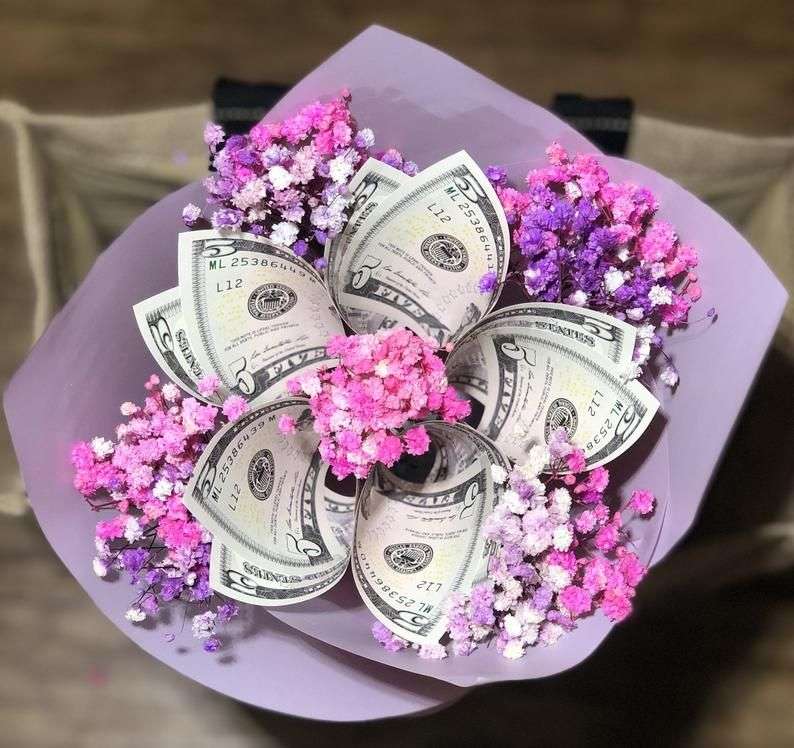
Money bouquets are made from real or artificial flowers that have been wrapped in money. The money can be bills or coins, and the flowers can be any type of flower that you like. Money flower bouquets can be made in any size, and they can be decorated with ribbons, bows, and other embellishments.

Rose Money Bouquet

Money Bouquets: A Unique and Creative Gift

Money bouquets are a unique and creative way to give money as a gift. They are perfect for any occasion, such as birthdays, graduations, weddings, and holidays. Money bouquets are also a great way to give a gift that is both practical and beautiful.

These unique and creative flower arrangements are a unique and stylish way to give cash. They are perfect for graduations, weddings, birthdays, and any other occasion where you want to give a gift that is both thoughtful and practical.

There are many different ways to make money flower bouquets. You can use real or fake flowers, and you can incorporate other elements into the design, such as ribbons, candy, or even lottery tickets. If you’re not sure how to make a money flower bouquet, there are many tutorials available online. You can also find pre-made money flower bouquets at some florists and gift shops

Rose Bouquet with single dollar bills and chocolate

How to make a money flower bouquet

There are many different ways to make a money flower bouquet. You can find instructions online or in craft books. If you are not crafty, you can also purchase a pre-made money flower bouquet from a florist or online retailer.

To make a money flower bouquet, you will need the following materials:

  • Flowers: You can use real or artificial flowers.
  • Money: You can use bills or coins.
  • Skewers: These will be used to attach the money to the flowers.
  • Wire cutters: These will be used to cut the wire.
  • Floral tape: This will be used to wrap the stems of the flowers.
  • Ribbon: This will be used to decorate the bouquet.

Money flowers

Here are the basic steps to make a money flower bouquet:

  1. Cut the wire into pieces that are about 6 inches long.
  2. Fold a bill in half and then fold it in half again.
  3. Wrap the bill around the wire and secure it with floral tape.
  4. Repeat steps 2 and 3 until you have enough money flowers to make a bouquet.
  5. Arrange the money flowers in a vase or other container.
  6. Decorate the bouquet with ribbon or other embellishments.

Tips for making money flower bouquets

  • Use a variety of different flowers to add interest to your bouquet.
  • Use different denominations of money to create a more unique look.
  • Decorate your bouquet with ribbons, bows, and other embellishments to make it stand out.
  • Add a personal touch by including a card or note with the bouquet.
  • Consider the personality of the recipient when choosing flowers and bills.
  • Add a personal touch with a card or message.
  • Make sure the money is securely attached to the flowers.
  • Money flower bouquets are a fun and creative way to give a gift.
Money Flowers

Where to buy money flower bouquets

If you don’t want to make your own money flower bouquet, you can purchase one from a florist or online retailer. Many florists offer pre-made money flower bouquets, or they can custom-make one for you. You can also find money flower bouquets online from a variety of retailers.

Money flower bouquets are a unique and creative way to give money as a gift. They are perfect for any occasion and are sure to be appreciated by the recipient. With a little creativity, you can easily make your own money flower bouquet at home. So next time you need to give a gift, consider giving a money flower bouquet.

10 Of The Most Popular Painters In History

The art world is vast and constantly evolving, with countless talented individuals adding their unique perspectives to the canvas. Among these artists, a few have achieved a level of recognition that transcends time and culture. This group of popular painters has not only produced masterpieces that continue to inspire and captivate audiences but has also left an indelible mark on the history of art. Embark on a journey with us as we delve into the lives and works of some of the most celebrated painters in history.

Popular painters, Leonardo da Vinci

Popular Painters During the Renaissance Era

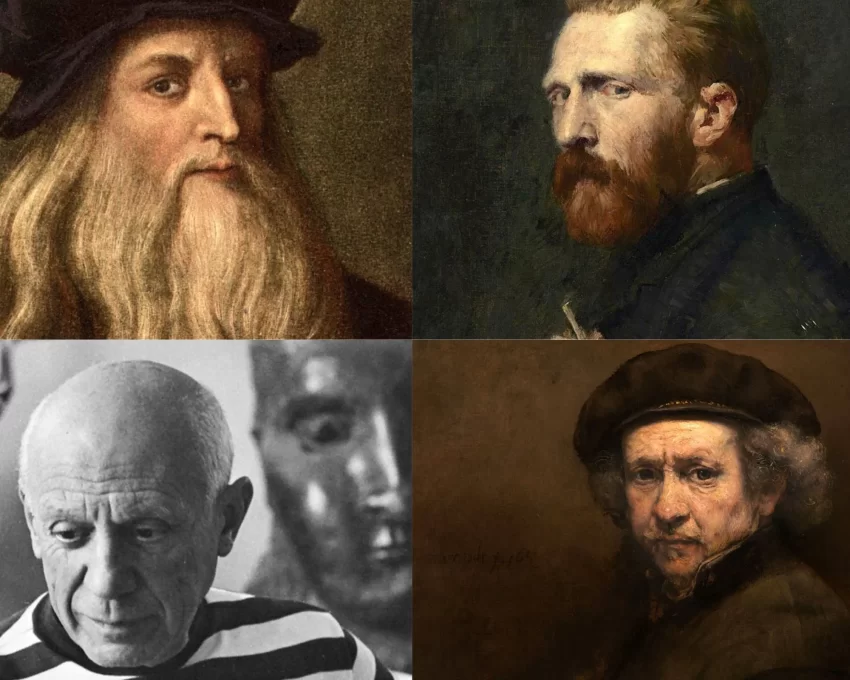
  1. Leonardo da Vinci (1452-1519)

Leonardo da Vinci was a true Renaissance man. He was a master of many crafts including being a skilled painter, sculptor, architect, and musician. He was also a scientist, inventor, anatomist, geologist, cartographer, botanist, and writer. His versatility and insatiable curiosity led him to make groundbreaking contributions in various fields, but his artistic genius undoubtedly stands out.

His paintings, such as the Mona Lisa and The Last Supper, are considered masterpieces of the Italian Renaissance, admired for their technical mastery, psychological insight, and enduring beauty. Leonardo da Vinci is widely considered one of the greatest painters of all time. His most famous paintings are the Mona Lisa, The Last Supper, and the Vitruvian Man.

2. Jackson Pollock (1912-1956)

Jackson Pollock was an American abstract expressionist painter who is known for his drip paintings. His most famous paintings include Number 1, Blue Poles, and Lavender Mist.

Vincent Van Gogh
  1. Vincent van Gogh (1853-1890)

Vincent van Gogh was a Dutch Post-Impressionist painter who is known for his bold, expressive brushwork and vibrant colors. His most famous paintings include The Starry Night, Sunflowers, and The Bedroom.

  1. Rembrandt (1606-1669)

Rembrandt was a Dutch Baroque painter who is known for his use of light and shadow to create dramatic effects. His most famous paintings include The Night Watch, The Mill, and The Jewish Bride.

image

5. Pablo Picasso (1881-1973)

Pablo Picasso was a Spanish painter who is considered one of the most influential artists of the 20th century. He is best known for co-founding the Cubist movement, which broke down the traditional representation of objects in art. His most famous paintings include Guernica, Les Demoiselles d’Avignon, and The Old Guitarist.

6. Michelangelo (1475-1564)

Another towering figure of the Renaissance era was Michelangelo. He was a sculptor, painter, architect, poet, and engineer. He was best known for his sculptures, such as David and Pietà, which are renowned for their anatomical accuracy, emotional intensity, and sheer artistic brilliance. His paintings, particularly the frescoes on the ceiling of the Sistine Chapel, are considered landmarks in Western art, showcasing his profound understanding of human form and movement. They are considered some of the greatest masterpieces of Western art.

Andy Warhol

7. Andy Warhol (1928-1987)

Andy Warhol was an American pop artist who is known for his silkscreen paintings of celebrities and everyday objects. His most famous paintings include Marilyn Monroe, Campbell’s Soup Cans, and The Velvet Underground & Nico.

8. Claude Monet (1840-1926)

Claude Monet was a French Impressionist painter who is known for his landscapes and his use of light and color to capture the fleeting effects of nature. His most famous paintings include Impression, Sunrise, and Water Lilies.

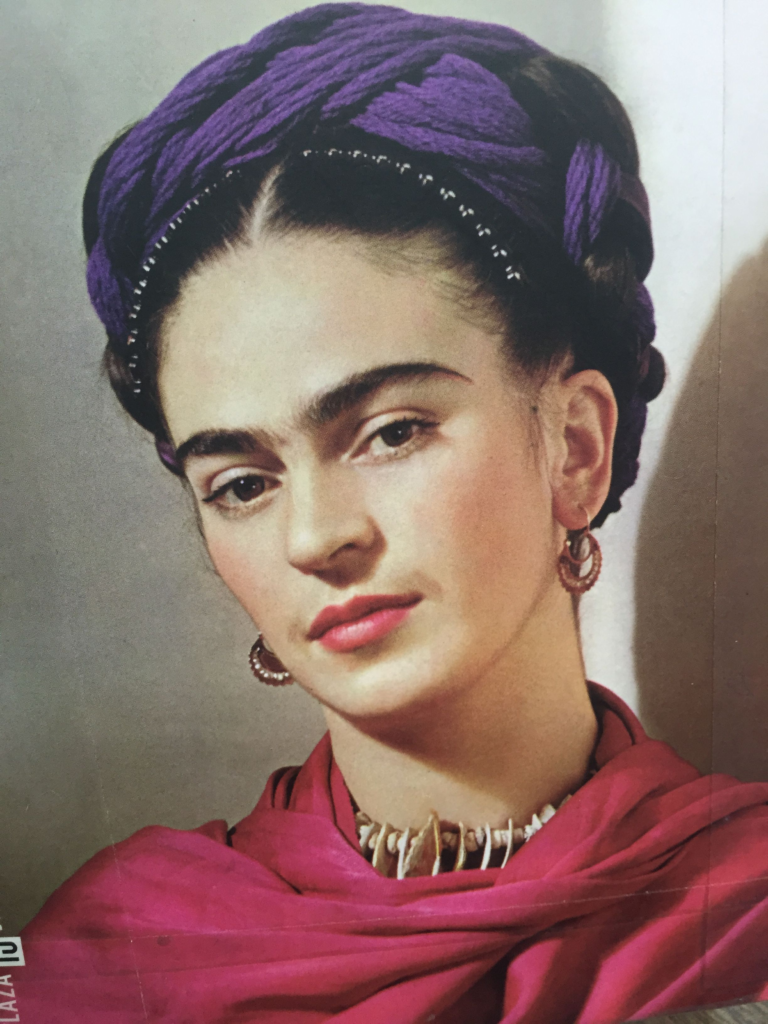
Freida Kahlo

9. Frida Kahlo (1907-1954)

Frida Kahlo was a Mexican painter who is known for her self-portraits and her exploration of themes of identity, pain, and the female body. Her most famous paintings include The Two Fridas, Self-Portrait with Thorn Necklace and Hummingbird, and The Broken Column.

  1. Johannes Vermeer (1632-1675)

Johannes Vermeer was a Dutch Golden Age painter who is known for his domestic scenes and his use of light and color to create realistic and intimate paintings. His most famous paintings include Girl with a Pearl Earring, The Milkmaid, and The Concert.

5 Of The Most Popular Paintings In Art History

The world of art is a vast and fascinating kingdom that is home to a treasure trove of masterpieces. These popular paintings are a testament to the creativity and skill of the artists who created them. Each brushstroke in these paintings is embedded with emotion, historical significance, and sheer artistic brilliance. Thus, making them a feast for the eyes and the soul.

A Journey Through Masterpieces:

While personal preferences play a role in determining individual favorites, certain paintings have transcended time and captivated audiences worldwide, earning them a place among the most popular artworks in art galleries. These iconic creations have become a part of our cultural heritage, and they continue to inspire and delight art enthusiasts across generations.

Embarking on a journey through these popular paintings is a captivating experience that allows us to explore their artistic merits, the stories behind them, and the reasons they continue to mesmerize audiences. From the enigmatic smile of the Mona Lisa to the vibrant colors of Van Gogh’s Starry Night, each painting has a unique story to tell and a message to convey.

By delving into the world of popular paintings, we can gain a deeper appreciation for the beauty and complexity of art. We can also learn about the historical and cultural context in which these paintings were created, and the impact they have had on the world of art and beyond.

Unveiling The Most Popular Paintings In Art Galleries

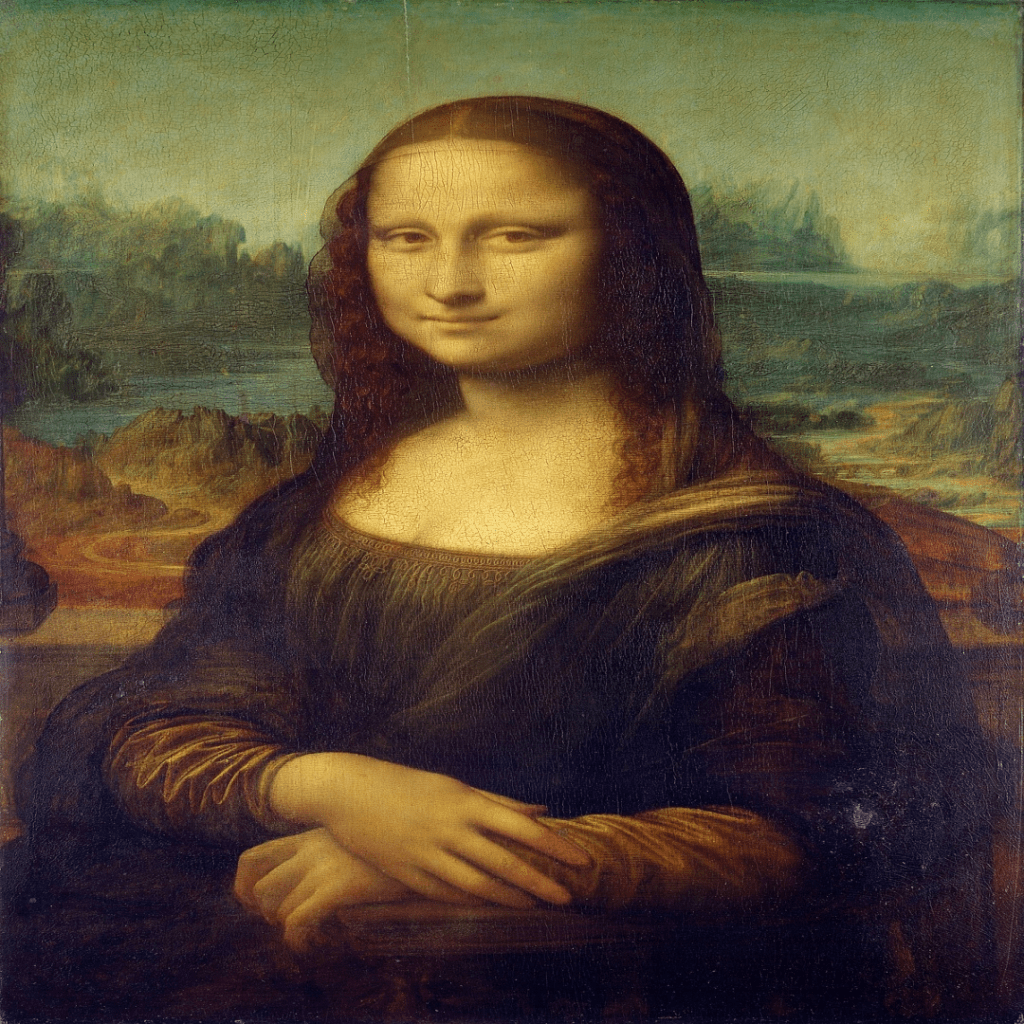
Popular paintings The Mona Lisa

1. The Mona Lisa (Leonardo da Vinci)

Undoubtedly one of the most famous paintings in existence, Leonardo da Vinci’s Mona Lisa stands as an enigma. With her enigmatic smile and captivating gaze this image has enchanted viewers for centuries. The sfumato technique employed by Leonardo da Vinci, consists of the layering of thin glazes of paint. This methodis used to create a hazy, atmospheric effect, that contributes to the portrait’s enduring allure.

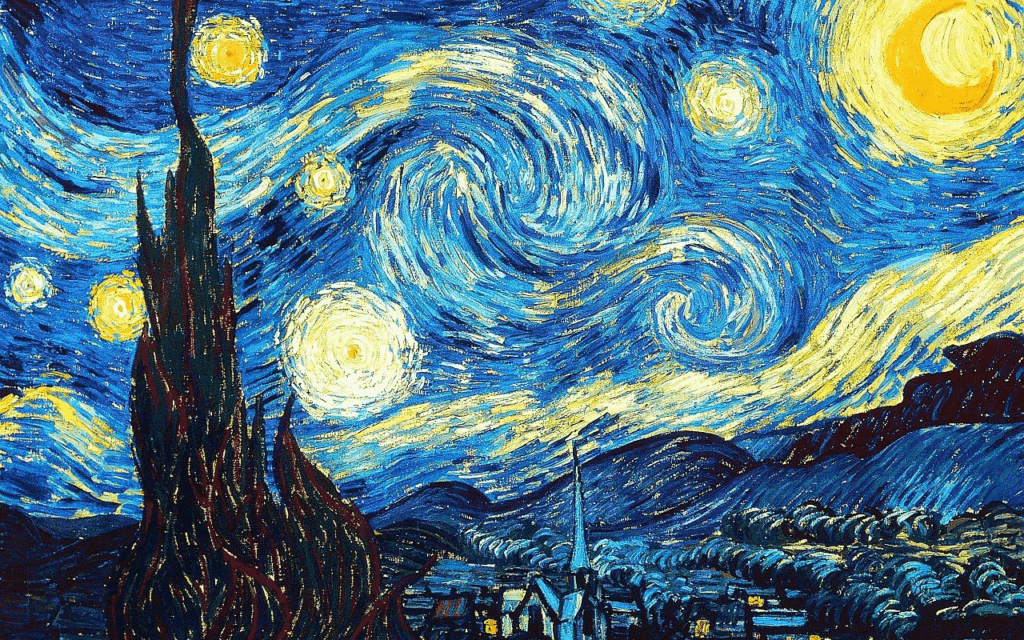
The Starry Night

2. The Starry Night (Vincent van Gogh)

Vincent van Gogh’s The Starry Night is a swirling symphony of vibrant colors and bold brushstrokes, depicting a swirling night sky over a small village. The expressive nature of van Gogh’s brushwork and the intense blue hues capture the artist’s emotional state and offer a glimpse into his unique vision of the world.

The Birth Of Venus Famous paintings

3. The Birth of Venus (Sandro Botticelli)

Sandro Botticelli’s The Birth of Venus is a Renaissance masterpiece that embodies the ideals of beauty and grace. The goddess Venus emerges from the sea, her delicate form illuminated by a soft light. The painting’s harmonious composition and delicate brushwork evoke a sense of serenity and elegance.

Guernica painting

4. Guernica (Pablo Picasso)

Pablo Picasso’s Guernica is a stark and powerful condemnation of the bombing of the Basque town of Guernica during the Spanish Civil War. The fragmented figures and distorted forms reflect the brutality of war, while the black and white palette adds to the somber mood.

Girl with a pearl earring

5. Girl with a Pearl Earring (Johannes Vermeer)

Johannes Vermeer’s Girl with a Pearl Earring is a captivating portrait of a young woman, her gaze and enigmatic smile drawing the viewer into the painting. The interplay of light and shadow, the rich velvety textures, and the enigmatic expression of the subject contribute to the painting’s enduring fascination.

These iconic paintings represent just a small fraction of the artistic treasures housed in art galleries worldwide. Each masterpiece offers a unique window into the artistic genius of its creator, providing a glimpse into the history, culture, and emotions of the era in which it was created. As we continue to appreciate these artworks, we not only deepen our understanding of art but also connect with the shared human experience that transcends time and cultural boundaries.

Edible Fashion| Clothing Made For Consumers

Feast for the Eyes: A Delectable Journey into Edible Fashion Made from Food

In the world of fashion, designers and artisans are constantly pushing the boundaries of creativity and materials. A surprising trend that has emerged is the use of food items in fashion design. From edible adornments to edible fashion garments made from plant-based fibers, food is proving to be a versatile and sustainable material in the fashion industry.

Edible Fashion: A Culinary Delight

Edible fashion is a unique concept that has been around for centuries. It involves creating garments that are not only visually appealing but also edible. The idea of edible fashion dates back to medieval times when bakers and pastry chefs would create elaborate sugar sculptures and edible decorations for feasts and celebrations.

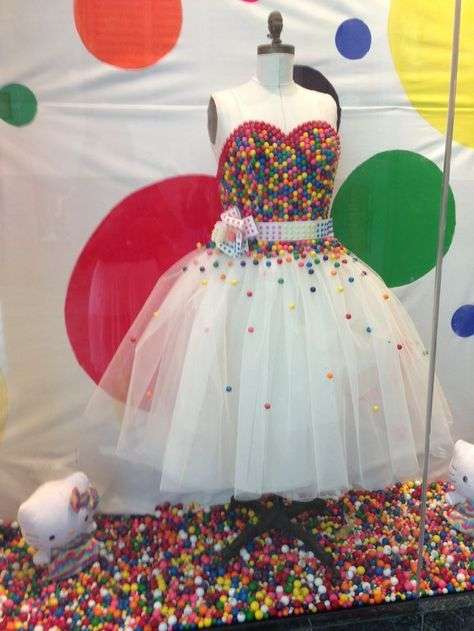
Extra gum dress

In recent years, edible fashion has gained renewed popularity, with designers embracing the idea of creating garments that can be eaten.The process of creating edible fashion involves using food items such as fruits, vegetables, chocolate, and sugar to create intricate designs and patterns on the garments. The garments are carefully crafted to ensure that they are not only visually stunning but also safe to eat.

The materials used in the creation of edible fashion are carefully selected to ensure that they are edible, non-toxic, and safe for consumption. Edible fashion has been showcased in various fashion shows and events around the world, and it has become a popular trend among food and fashion enthusiasts. The concept of edible fashion has also been used in advertising campaigns and product launches, with companies using edible fashion to promote their food products.

Overall, edible fashion is a unique and creative concept that combines the worlds of food and fashion. It is a testament to the creativity and innovation of designers and chefs who are constantly pushing the boundaries of what is possible in the world of fashion.

One notable example is the work of Dutch designer Jacqueline de Bruyn, who creates intricate dresses made entirely from fruits, vegetables, and flowers. Her edible creations are meant to be worn for short periods and then consumed, blurring the lines between fashion and food.

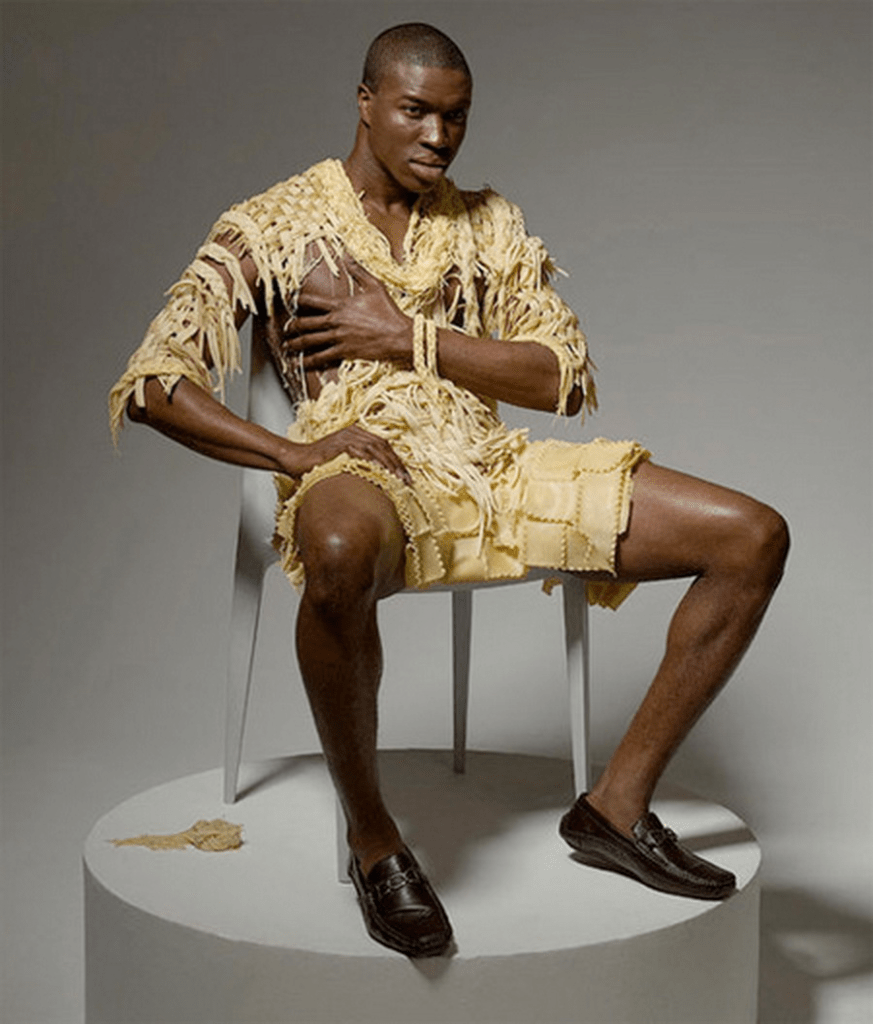
Edible fashion pasta garments

Another designer, Israeli-born Roza Ciorny, explores the concept of edible fashion through her “Cake Couture” collection. Her elaborate gowns are adorned with edible embellishments, such as sugar flowers, fondant sculptures, and even macarons.

Edible Fashion dress

Sustainable Fashion from Food Sources

Beyond the realm of edible fashion, food items are also being used to create sustainable and eco-friendly alternatives to traditional fabrics. Plant-based fibers, derived from sources such as pineapple leaves, banana peels, and even mushroom mycelium, are gaining traction in the fashion industry.

Piñatex, a leather-like material made from pineapple leaf fibers, is one such example. Developed by designer Carmen Hijosa, Piñatex offers a durable and stylish alternative to animal leather, reducing the environmental impact of the fashion industry. Another innovative material is BananaSilk, derived from banana peels. This silky fabric is not only soft and luxurious but also biodegradable, making it a sustainable choice for eco-conscious consumers.

Edible fashion dress

The Allure of Food-Inspired Fashion

The appeal of food-inspired fashion lies in its novelty, creativity, and sustainability. It challenges traditional notions of fashion and offers a playful and innovative approach to garment design. Moreover, the use of food items in fashion often carries deeper meanings, conveying themes of environmental consciousness, celebration of nature, and the ephemeral beauty of life.

As designers continue to experiment with food items in fashion, we can expect to see even more innovative and thought-provoking creations emerge. From edible accessories to garments crafted from sustainable plant-based fibers, the world of food-inspired fashion is a tantalizing feast for the eyes and a testament to the boundless creativity of human expression.

15 Profitable Nail Business Ideas For Techs

Are you passionate about nails and looking for some innovative nail business ideas to turn your passion into a profitable venture? Starting a nail business can be a great idea for those who love to experiment with different nail designs and techniques. From opening a nail salon to starting a mobile nail service, there are many ways to turn your passion for nails into a successful business. In this blog, we’ll explore some exciting nail business ideas that you can consider to start your entrepreneurial journey.

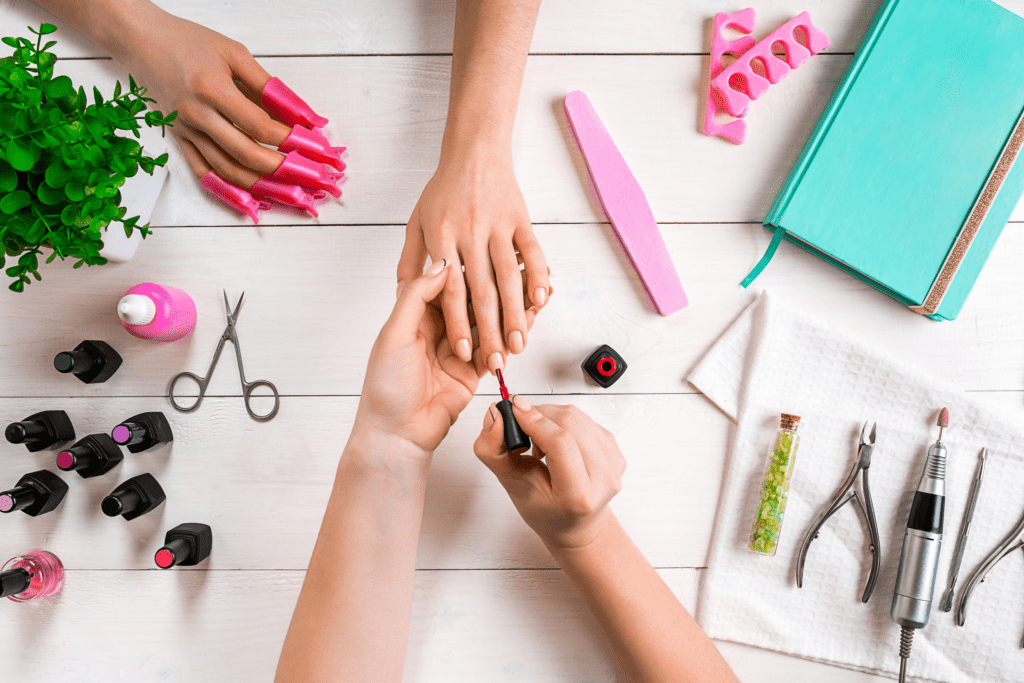
Nail business ideas, create a nail salon

Here are 15 profitable nail business ideas:

1. Open a traditional nail salon:

A traditional nail salon offers a variety of nail services, such as manicures, pedicures, and nail art. This is a classic business model that can be very profitable if you have a good location and offer high-quality services.

2. Start a mobile nail salon:

A mobile nail salon is an excellent option for customers who are unable to visit a physical salon due to various reasons such as a busy schedule, health issues, or transportation constraints. With a mobile nail salon, you can offer a wide range of nail care services, including manicures, pedicures, nail art, and more, right at the comfort of your customer’s preferred location.

The flexibility of a mobile salon allows you to reach customers at their homes, offices, or even events such as weddings, corporate events, and parties. This makes it easier for customers to schedule appointments without worrying about travel time or waiting in line at a traditional salon. Additionally, a mobile nail salon offers a personalized experience to customers, as you can tailor your services to meet their unique needs and preferences.

You can also provide a more comfortable and private setting for customers who may feel uncomfortable in a traditional salon environment. A mobile nail salon is a great way to expand your customer base and offer convenience and flexibility to your customers.

3. Specialize in a particular type of nail service:

If you have a particular skill or interest, you can specialize in a certain type of nail service, such as acrylic nails, gel nails, or nail art. This can help you establish yourself as an expert in your field and attract clients who are looking for specific nail business ideas or specific services.

4. Offer home nail parties:

Home nail parties are a fun and social way to earn money as a nail technician. You can host parties at your own home or at the homes of your clients.

teaching a nail class

5. Teach nail art classes:

If you have a talent for creating beautiful and intricate nail art designs, you can share your skills and knowledge by teaching classes to others. Teaching nail art classes can be a fun and rewarding experience that allows you to connect with others who share your passion for this art form. There are several options available when it comes to teaching nail art classes and sharing a few tips and nail business ideas.

You can choose to offer classes online using video conferencing software, which allows you to reach a wide audience and connect with students from all over the world. Alternatively, you can offer classes in-person, either in your own home or in a rented space like a community center or salon. When teaching nail art classes, it’s important to have a clear plan and structure for your lessons.

Consider breaking down your lessons into different skill levels, starting with basic techniques and gradually building up to more advanced designs. You may also want to provide students with a list of necessary materials and tools, as well as any recommended brands or suppliers. Teaching nail art classes can be a fulfilling and exciting way to share your passion with others and expand your own skills and knowledge.

nail business ideas

6. Create and sell your own nail polish line:

If you have a passion for creating unique nail polish shades and a flair for marketing, starting your own nail polish line can be a lucrative business opportunity. However, it’s important to note that this venture will require a significant investment upfront, as you’ll need to source high-quality ingredients, create unique and appealing packaging, and invest in marketing efforts to promote your brand.

To start, you’ll need to research the market to identify gaps in the industry and determine what unique value your brand can offer. Then, you’ll need to develop a strong brand identity and create a range of colors that appeal to your target audience. Once you’ve perfected your product, you’ll need to invest in packaging and labeling that reflect your brand’s personality and sets it apart from competitors.

It’s also essential to establish an online presence and invest in marketing efforts to promote your brand through social media, influencer partnerships, and targeted advertising. With dedication and hard work, your nail polish line can become a profitable and rewarding business venture.

YouTube Channel nail business ideas

7. Write a nail art blog or YouTube channel:

If you have a ton of nail business ideas you have tried and tested, with a knack for writing or creating videos, you can start a nail art blog or YouTube channel. You can monetize your blog or channel by selling advertising, creating sponsored content, or offering products or services for sale.

8. Develop a nail art app:

If you are someone who enjoys both technology and nail art, developing a nail art app could be the perfect project for you. An app that caters to nail art enthusiasts can offer a wide range of features, from tutorials on various nail art designs to interactive 3D models that allow users to try out different nail polish shades and designs virtually.

The app can also include a community section where users can share their own nail art creations and connect with fellow nail art enthusiasts. Creating a nail art app can not only be a fun and rewarding project, but it can also be a lucrative one, with the potential to generate revenue through in-app purchases, advertising, and partnerships with nail polish brands.

9. Offer nail-related products for sale:

If you’re a nail technician, you can expand your business by offering nail-related products for sale. These products could include a wide range of items, such as nail polish, nail files, and nail care kits. Not only will this help you supplement your income, but it can also provide added convenience for your clients who may appreciate being able to purchase these items from you directly.

Additionally, selling these products can help you build stronger relationships with your clients, as you’ll be able to offer them personalized advice on which products are best suited to their individual needs. By adding product sales to your service offerings, you can increase your brand recognition, attract new clients, and ultimately grow your business.

10. Partner with other businesses:

One effective strategy to grow your business is to collaborate with other businesses, such as salons, spas, or boutiques, to offer your nail services. By partnering with other businesses, you can increase your visibility and gain access to a larger customer base that you might not have been able to reach otherwise.When you partner with another business, you can offer your nail services either on a regular basis or as a special promotion.

This could include providing a special discount to customers who visit the partnering business and book an appointment with you. Additionally, you might consider providing free samples or demonstrations to help attract interest and build trust.To make the most of this strategy, it’s important to choose partners that complement your business. For instance, if you specialize in high-end nail designs and treatments, it might make sense to partner with a luxury spa or boutique that caters to a similar clientele.

On the other hand, if you offer affordable, everyday nail services, partnering with a more casual salon or retail store might be a better fit. By partnering with other businesses, you can tap into their existing customer base and leverage their marketing and promotional efforts to attract new clients. This can be an effective way to grow your business while also building valuable relationships with other local businesses.

image

11. Create and sell nail art stencils:

If you have a knack for design, you can create and sell nail art stencils. This is a relatively low-cost business that can be very profitable.

12. Offer corporate nail services:

You can offer corporate nail services to businesses. This could include offering on-site manicures and pedicures or providing gift certificates for employees.

13. Offer bridal nail services:

You can offer bridal nail services to brides and their wedding parties. This is a special occasion that often requires more elaborate nail designs.

14. Offer nail services for kids:

You can offer nail services for kids. This could include manicures, pedicures, and nail art.

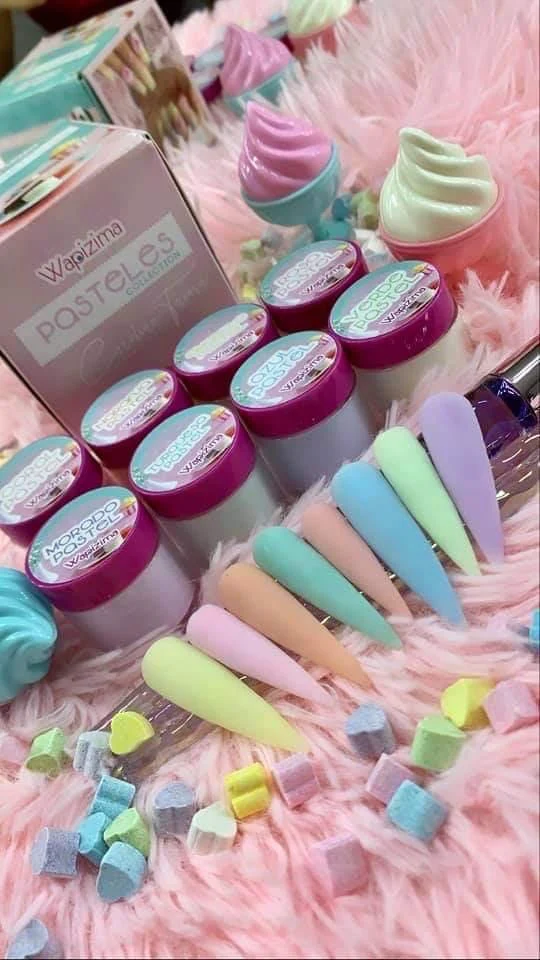
Nail dip powder swatches

15. Become a nail product distributor:

Starting a business as a nail product distributor can be a lucrative venture. As a distributor, your role would involve sourcing and supplying nail products to salons and spas. This could include a variety of products such as nail polish, nail art supplies, nail tools, and equipment. To become a successful nail product distributor, it is essential to have a strong network of contacts in the beauty industry.

You will need to establish relationships with salon owners, nail technicians, and other professionals in the industry to promote and sell your products effectively. You may also need to invest in marketing and advertising to increase brand awareness and attract new customers. This could include developing a website, social media presence, or attending beauty industry trade shows.

Overall, becoming a nail product distributor can be a rewarding and profitable career choice if you have a passion for the beauty industry and are willing to put in the effort to build a successful business.

Are Stirrup Spandex Pants Trend Or Fad?

From their origins in the 1980s to their resurgence in recent years, stirrup spandex pants have captivated the fashion world with their unique blend of style and comfort. These versatile garments, characterized by their attached foot loops, exude a retro-chic vibe while offering a secure and flattering fit. Whether you’re seeking a comfortable athleisure look or a stylish addition to your everyday wardrobe, stirrup spandex pants can seamlessly adapt to your personal style.

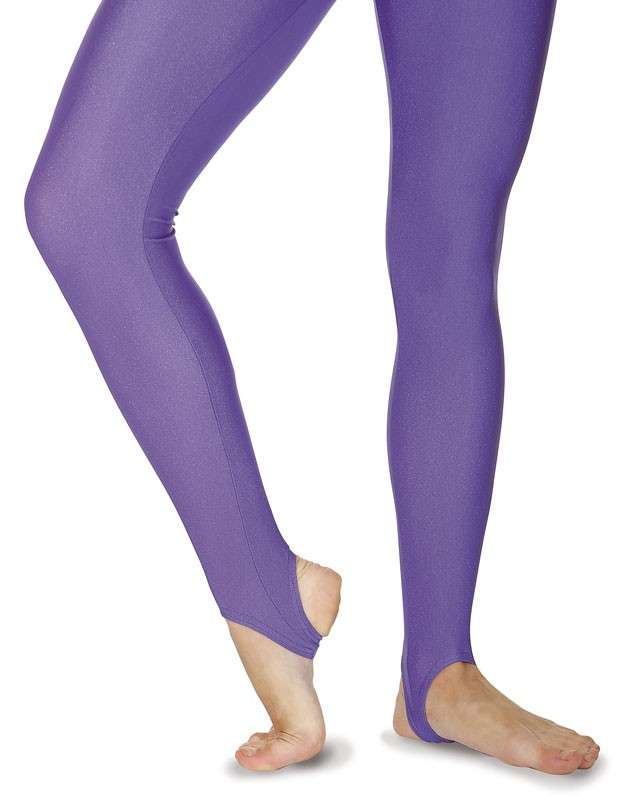
Spandex leggings, also known as stirrup pants, are a type of legging that has a loop or strap at the bottom of each leg that goes under the foot. They were originally designed for horseback riding, as they helped to keep riders’ legs in place and prevent them from chafing. However, they have since become a popular fashion item, worn by people of all ages for both everyday and special occasions.

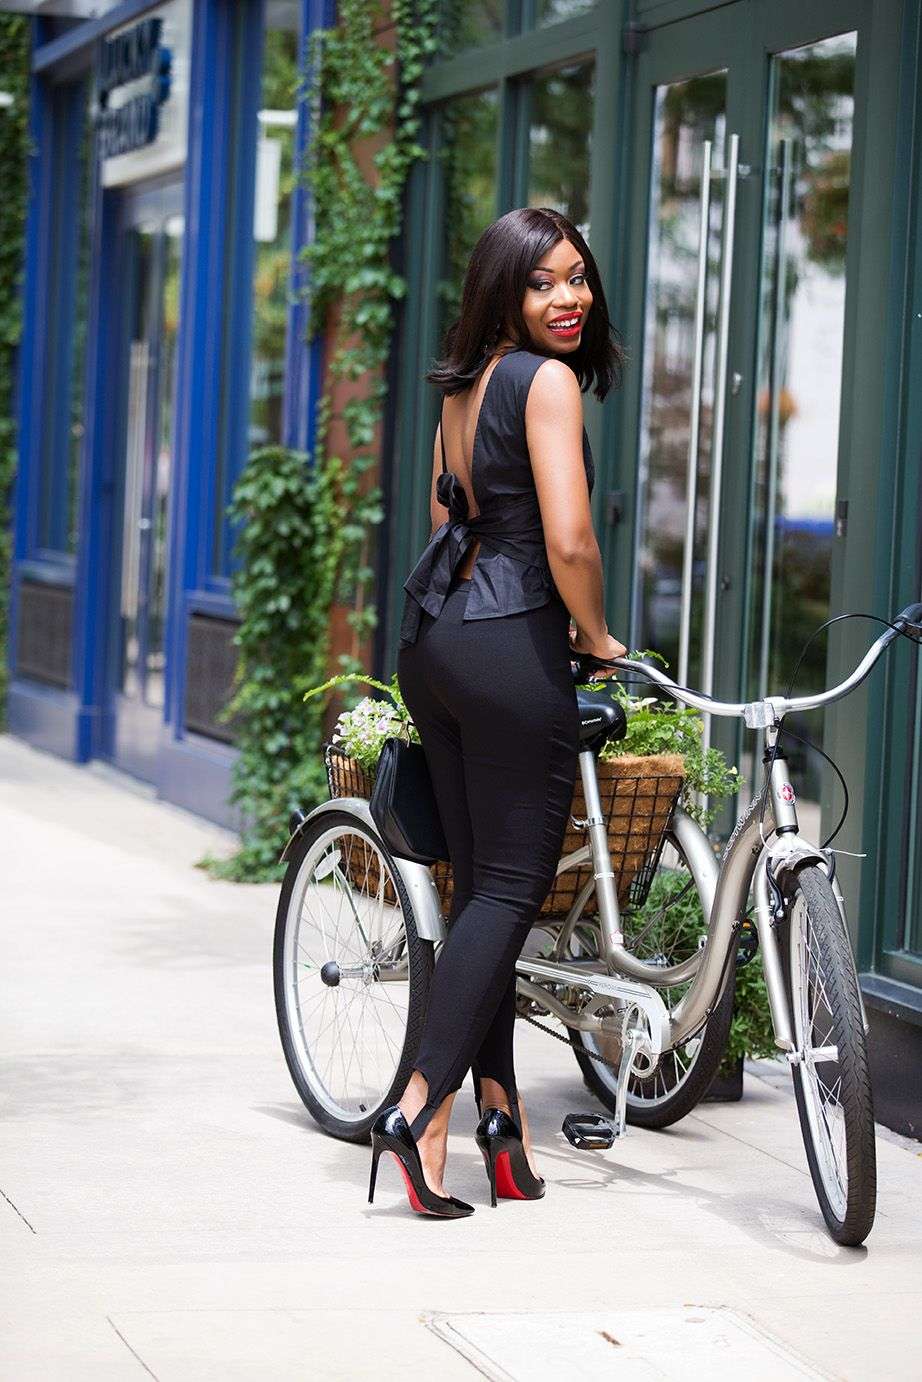
Black stirrup spandex

How Did Stirrup Spandex Get Their Name?

The name “stirrup spandex” is derived from the stirrups that are used in horseback riding. Stirrups are loops that are attached to the saddle, and riders place their feet in them to help them stay in place and control the horse. The loops on stirrup spandex pants are similar to stirrups, and they help to keep the pants from riding up when the wearer is walking or running.

Why Do People Wear Stirrup Spandex in Everyday Fashion?

There are many reasons why people wear stirrup spandex in everyday fashion. Some of the most popular reasons include:

  • Comfort: Stirrup spandex are very comfortable to wear, as they are made from stretchy, soft materials. They are also close-fitting, which can help to keep you warm in cold weather.
  • Versatility: Stirrup spandex can be dressed up or down, making them a versatile wardrobe staple. They can be worn with sneakers for a casual look or with heels for a more dressy look.
  • Style: Stirrup spandex can add a touch of style to any outfit. They come in a wide variety of colors, patterns, and styles, so you can find a pair that suits your personal taste.
Stirrup Spandex
Stirrup Spandex

How to Wear Stirrup Spandex

There are many ways to wear stirrup spandex. Here are a few ideas:

  • With a tunic or sweater: Pair stirrup spandex with a tunic or sweater for a casual and comfortable look.
  • With a skirt or dress: Wear stirrup spandex under a skirt or dress for a layered look.
  • With workout gear: Stirrup spandex are a great choice for working out, as they are comfortable and provide a full range of motion.

A Fashionable Comeback: Embracing Stirrup Spandex

The enduring appeal of stirrup spandex pants lies in their ability to transcend the boundaries of trends and seasons. Their timeless design complements a variety of body types, flattering silhouettes with their stretchy and form-fitting construction. The attached foot loops provide a sense of security, preventing the pants from riding up or bunching around the ankles.

Styling For Diverse Occasions

The versatility of stirrup spandex pants allows them to seamlessly transition from casual settings to more formal occasions. For a sporty and laid-back look, pair them with a fitted tank top or a cropped sports bra and complete the ensemble with sneakers or slides. Elevate their style by teaming them with a sleek blouse or a fitted sweater and finish the look with heels or pointed-toe flats.

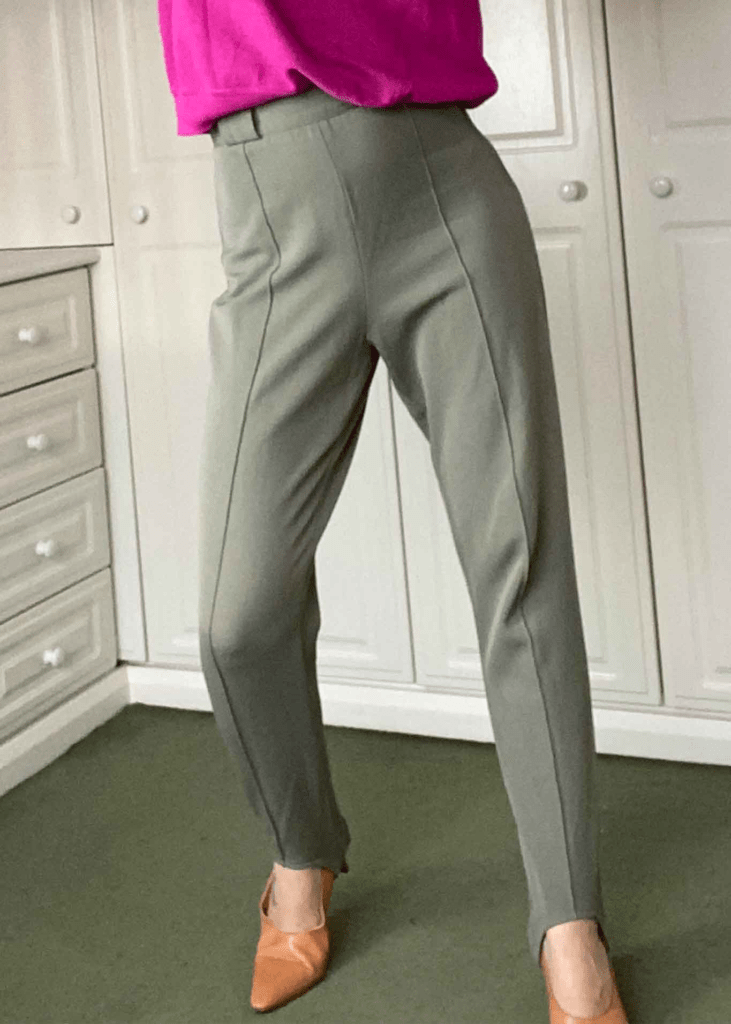
Stirrup Spandex pants

Unleashing Your Creativity

The world of fashion is all about embracing individuality and experimenting with personal style. Stirrup spandex pants serve as a blank canvas for showcasing your creativity. Play with bold patterns and vibrant colors to make a statement or opt for neutral tones for a more understated look. Accessorize with belts, scarves, and jewelry to further personalize your outfit.

Embracing the Retro-Chic Flair of Stirrup Spandex Pants

Stirrup spandex pants embody the nostalgia of the 1980s, seamlessly blending retro charm with modern sensibilities. Channel the fashion icons of that era by pairing them with oversized sweaters, leg warmers, and headbands. Embrace the bold and unapologetic style of the decade, adding a touch of vintage flair to your contemporary wardrobe.

Stirrup Spandex Pants: A Versatile Fashion Staple

Whether you’re seeking a comfortable athleisure piece or a stylish addition to your everyday wardrobe, stirrup spandex pants have something to offer everyone. Their versatility, flattering fit, and endless styling possibilities make them a true fashion staple, ready to elevate your look with their retro-chic appeal. So, embrace the allure of stirrup spandex pants and unleash your creativity, adding a touch of timeless style to your wardrobe.

Cardboard Box Shelves Easy DIY Furniture

In the era of DIY projects, cardboard box shelves stand out as a versatile and eco-friendly solution for organizing your belongings and enhancing your interior décor. These ingenious creations offer a surprising level of durability and adaptability, making them a popular choice among DIY enthusiasts and savvy storage seekers alike.

Reimagine Your Storage with DIY Cardboard Box Shelves

Cardboard box shelves can be tailored to fit any space, whether you’re seeking a compact unit for a nook or a grand structure to fill an entire wall. Their modular design allows for easy customization, enabling you to adjust the height, width, and depth of your shelves to accommodate your specific needs.

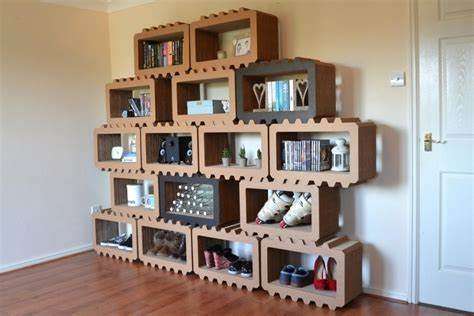
image

Transforming Waste into Functional Furniture

The beauty of cardboard box shelves lies in their ability to transform everyday waste into functional furniture. By repurposing discarded cardboard boxes, you not only contribute to environmental sustainability but also unleash your creativity by crafting unique and personalized storage solutions.

Crafting Your Custom Cardboard Box Shelves

To embark on your cardboard box shelves and DIY cardboard furniture creation journey, gather a few essential supplies:

  • Sturdy cardboard boxes: Select boxes that can support the weight of your intended items.
  • Utility knife: This tool will be your faithful companion for cutting and shaping the cardboard pieces.
  • Duct tape or hot glue: These adhesives will bind the cardboard components securely.
  • Ruler and pencil: These tools will aid in precise measurements and marking.
  • Cutting board and work surface: Protect your workspace from accidental scratches or marks.
image

Embarking on the Construction Process

  1. Design and Planning: Visualize the desired dimensions and layout of your cardboard box shelves. Sketch a plan to guide your construction process.
  2. Cutting and Shaping: Using your utility knife, carefully cut the cardboard boxes according to your plan. Create individual panels for the shelves, sides, and back of your structure.
  3. Assembling the Framework: Begin by constructing the main framework of your shelves. Use duct tape or hot glue to securely attach the side panels and back support.
  4. Adding the Shelves: Attach the individual shelf panels to the framework, ensuring they are evenly spaced and securely fastened.
  5. Reinforcing and Enhancing: Apply additional layers of duct tape or hot glue to reinforce stress points and enhance the overall stability of your shelves.
  6. Personalizing Your Creation: Unleash your creativity by decorating your shelves with paint, fabric, or other embellishments that match your décor style.
DIY Cardboard Box Shelves
20 DIY Cardboard Shelves

Additional Tips For Shelving Success

  • Choose strong and thick cardboard boxes for optimal support.
  • Consider reinforcing the shelves with cardboard dividers or additional layers of cardboard.
  • Apply multiple layers of tape or glue to create strong and durable joints.
  • Test the weight capacity of your shelves before placing heavy items.

Embrace the versatility and eco-friendliness of cardboard box shelves, and transform your home into a haven of organized beauty. With a touch of creativity and a dash of DIY ingenuity, you can create functional and visually appealing storage solutions that perfectly complement your living spaces.

DIY Cardboard Box Furniture| Cardboard Chairs

If you’re searching for a fun and budget-friendly way to spruce up your home furniture, you might want to consider making simple DIY cardboard box furniture. Cardboard boxes are an excellent option to create one-of-a-kind and trendy furniture pieces that are affordable and effortless to assemble.

Cardboard boxes are a versatile and inexpensive material that can be transformed into unique and stylish furniture pieces. With a little bit of creativity and some basic tools, you can create a variety of furniture items, such as chairs, tables, bookshelves, and even beds.

DIY cardboard box furniture, Cardboard bed

Here are some tips to help you get started:

  1. Choose the right boxes: Look for sturdy and durable cardboard boxes that can support your weight and withstand wear and tear. You can find boxes at your local hardware store, or you can reuse boxes from your recent move or online shopping.
  2. Plan your design: Sketch your furniture design on paper or use a 3D modeling software to visualize your creation. Make sure to measure your space and consider the size and shape of your boxes.
  3. Gather your tools: You’ll need some basic tools, such as a box cutter, ruler, glue, and tape. You can also use paint, fabric, or wallpaper to decorate your furniture and give it a personal touch.
  4. Assemble your furniture: Follow your design plan and cut your boxes to the right size and shape. Use glue or tape to secure the boxes together and reinforce the joints. You can also add cushions or pillows to make your furniture more comfortable.
  5. Enjoy your creation: Once your furniture is assembled, you can use it to decorate your home and impress your guests. You can also share your DIY project on social media and inspire others to create their own cardboard box furniture.

DIY cardboard box furniture is a fun and affordable way to update your home and express your creativity. With some cardboard boxes, tools, and imagination, you can create unique and stylish furniture pieces that reflect your personality and style. So why not give it a try and see what you can create?

With a little creativity and some basic tools, you can turn cardboard boxes into bookshelves, chairs, beds, and more. Cardboard furniture is also surprisingly durable and can be used for a variety of purposes.

What You’ll Need For Your DIY Cardboard Box Furniture

The best thing about DIY furniture using cardboard boxes is that it is very affordable. All you need are cardboard boxes and some basic tools. You can usually find free cardboard boxes at your local grocery store or retail shop.

Cardboard BoxesHot Glue Gun
RulerGlue Sticks
PencilCutting Board
ScissorsWork Surface
Utility KnifeDuct Tape

How to Make a Cardboard Chair

One of the simplest pieces of DIY furniture you can make is a cardboard chair. Here are the steps on how to make a cardboard chair:

  1. Collect some cardboard boxes. You will need at least two boxes for the seat and back of the chair, and you may need additional boxes for the sides and arms of the chair.
  2. Use a utility knife to cut the cardboard boxes into the desired shape of the chair.
  3. Assemble the pieces of the chair using duct tape and hot glue. Be sure to use a lot of adhesive to make the chair strong and stable.
  4. Test out your new cardboard chair!
cardboard box furniture
DIY Cardboard Shelf Tutorial

How to Make a Cardboard Bookcase

A cardboard bookcase is a great way to store your books, magazines, and other small items. Here are the steps on how to make a cardboard bookcase:

  1. Collect some cardboard boxes. You will need at least three boxes for the shelves of the bookcase, and you may need additional boxes for the sides and back of the bookcase.
  2. Use a utility knife to cut the cardboard boxes into the desired shape of the bookcase.
  3. Assemble the pieces of the bookcase using duct tape and hot glue. Be sure to use a lot of adhesive to make the bookcase strong and stable.
  4. Fill your new cardboard bookcase with your favorite books and magazines!
image

Other DIY Cardboard Furniture Ideas

There are many other DIY cardboard furniture ideas that you can try. Here are a few more ideas:

  • Cardboard bed
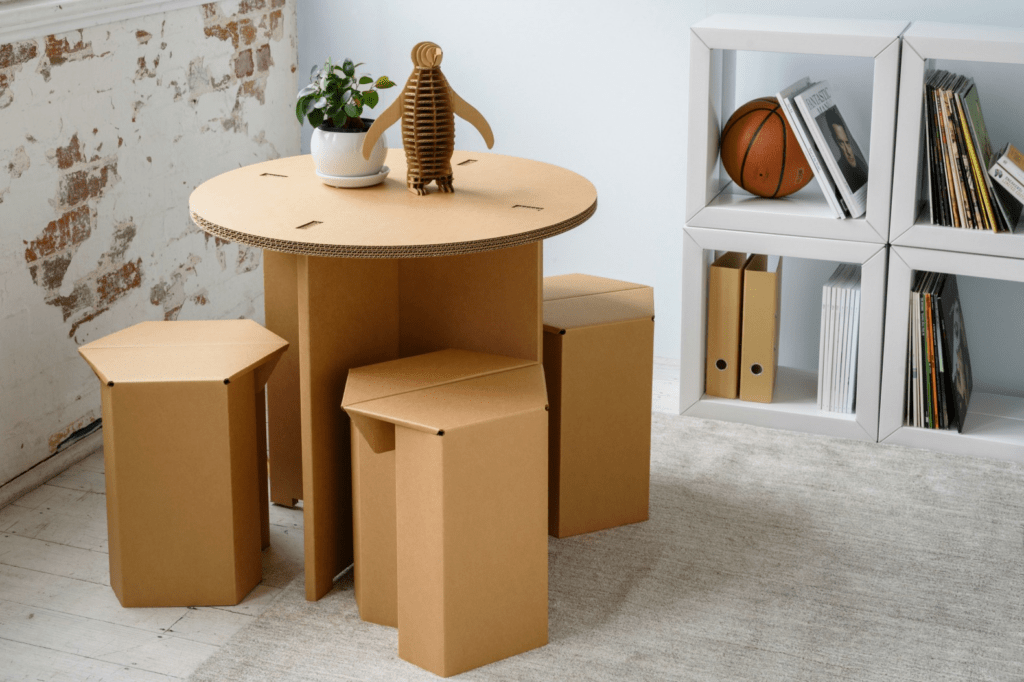
  • Cardboard table
  • Cardboard dresser
  • Cardboard desk
  • Cardboard room divider

Tips for Making DIY Cardboard Furniture

Here are a few tips for making DIY cardboard furniture:

  • Use strong cardboard boxes.
  • Be sure to use a lot of adhesive to make the furniture strong and stable.
  • Test out your furniture before you use it.
  • Add decorative touches to your furniture, such as paint, fabric, or ribbon.

I hope these ideas inspire you to create your own DIY cardboard furniture!

DKNY Fashion, Donna Karen New York

Donna Karen New York is a well-known American clothing brand that has been around since 1984. The brand was founded by Donna Karan and is known for its urban and sophisticated designs that cater to the modern woman. Donna Karen offers a wide range of clothing and accessories, including ready-to-wear, jeans, sportswear, fragrances, and home décor.

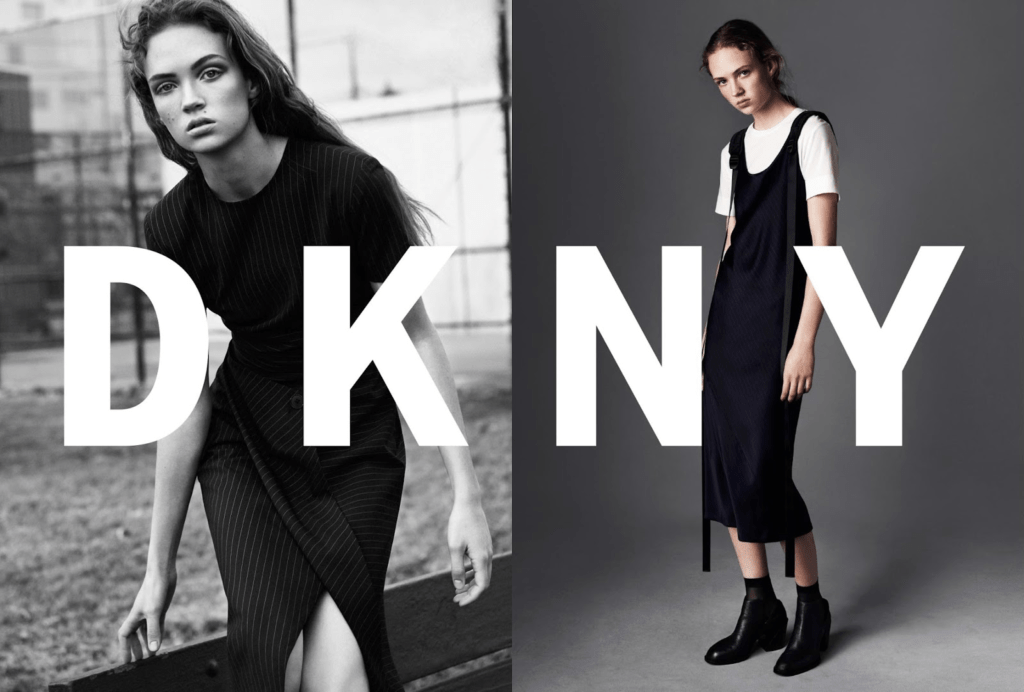
DKNY Fashion Ads

DKNY: A Fashion Icon

One of the things that sets DKNY apart from other clothing brands is its focus on creating designs that are both stylish and practical. The brand’s clothing is designed to be comfortable and easy to wear, while still looking fashionable and on-trend. The clothing line includes a variety of pieces that are perfect for any occasion.

From casual wear to formal attire, DKNY has something for everyone. The brand’s ready-to-wear collection includes dresses, skirts, pants, and tops that are perfect for everyday wear. The sportswear collection includes activewear and athleisure pieces.

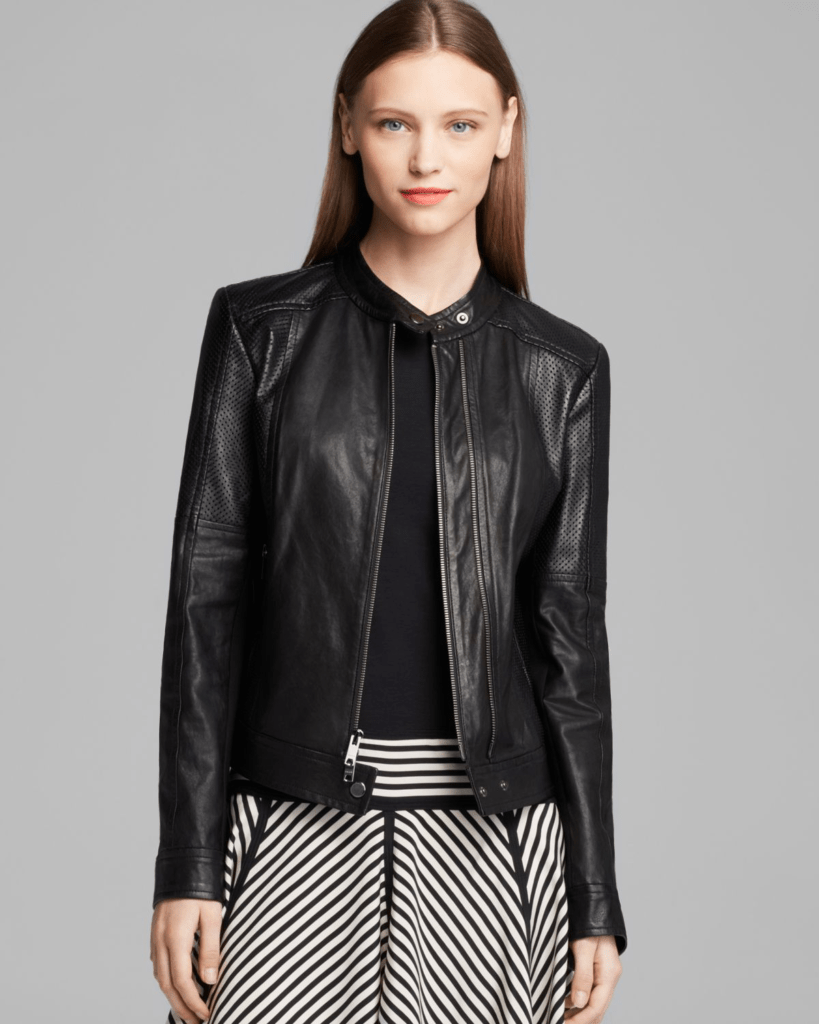
Donna Karen New York DKNY Fashion

The Brand’s Beginnings

Donna Karan is an American fashion designer who is known for her sleek and sophisticated designs. She founded DKNY in 1984 as a diffusion line of her luxury brand, Donna Karan New York. DKNY was intended to be a more affordable and accessible line of clothing for the modern woman.

The Brand’s Style

DKNY clothing is characterized by its urban and sophisticated style. The brand’s designs are often sleek and minimal, with a focus on clean lines and tailoring. DKNY also uses a lot of black and white in its designs, which gives the brand a chic and modern look.

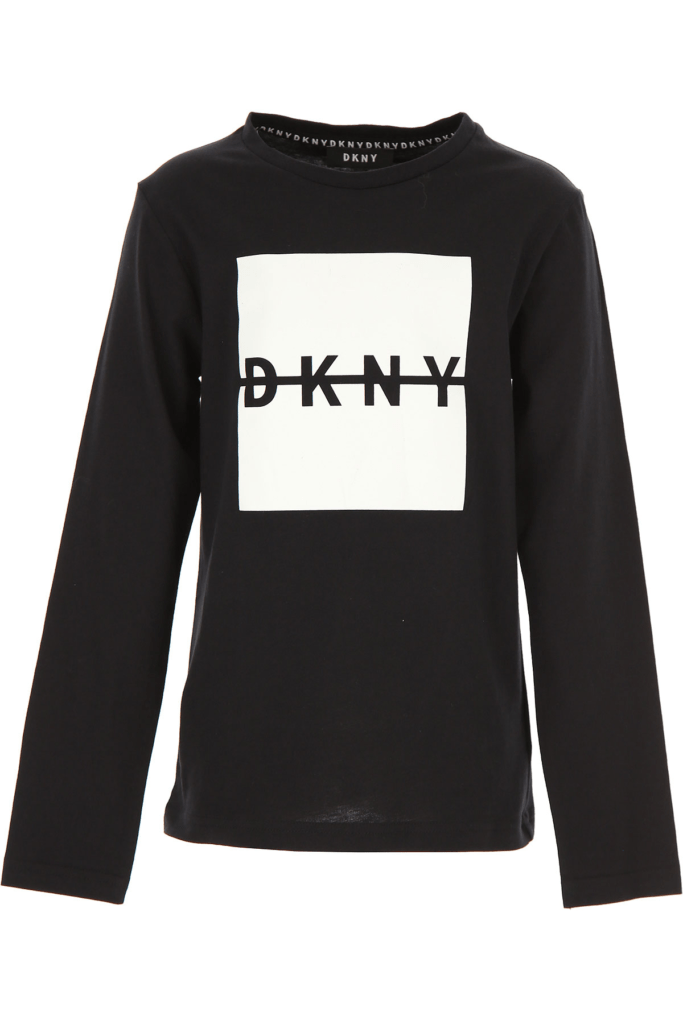
Donna Karen Long Sleeve Shirt

The Brand’s Impact

DKNY has had a significant impact on the fashion industry. The brand is credited with popularizing the “urban casual” trend of the 1990s, and its designs have been worn by some of the most iconic women in the world, including Madonna, Sarah Jessica Parker, and Victoria Beckham.

Today, Donna Karen New York is a global fashion brand with a loyal following. The brand continues to be a popular choice for women who want to look and feel their best.

Additional Donna Karen Facts

  • The brand has been featured in several popular movies and TV shows, including “Sex and the City” and “Gossip Girl.”
  • Donna Karen has been nominated for and won numerous awards, including several CFDA Awards.
  • The brand has a flagship store in New York City on Madison Avenue.

GUESS Brand Clothing: A Fashion Legacy

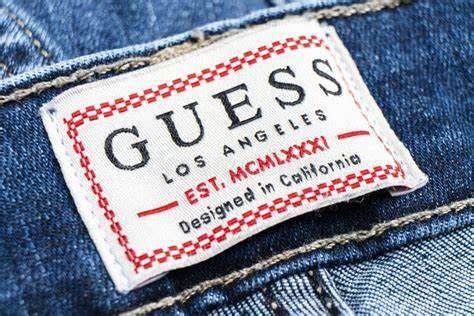
GUESS brand is an American clothing line that was founded in 1981 by the Marciano brothers, Maurice, Georges, Armand, and Paul. The brand is known for its sexy and provocative advertising campaigns, which have featured some of the most iconic models in the world, including Claudia Schiffer, Anna Nicole Smith, and Kate Upton.

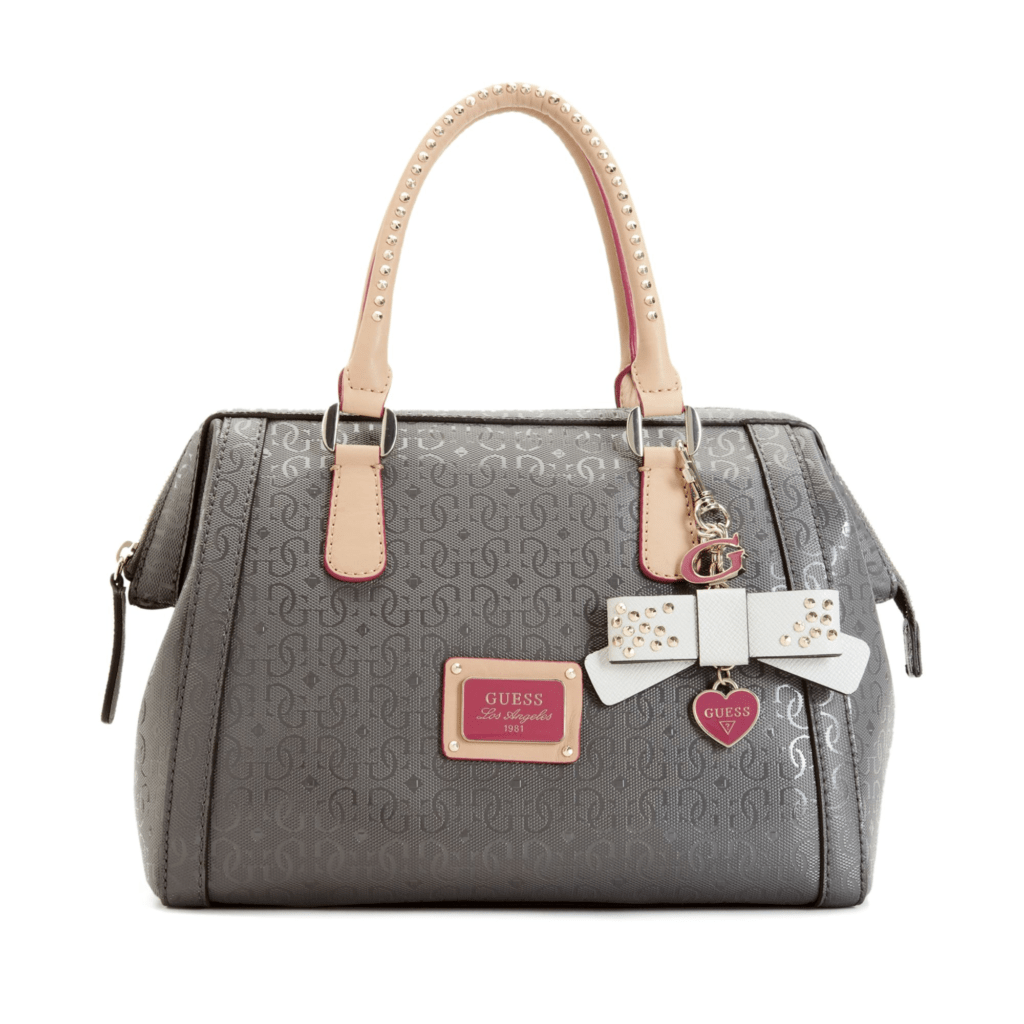
The brand quickly became a global success, and its clothing is now sold in over 80 countries around the world. The brand is known for its denim jeans, but it also produces a wide range of other fashion trends. These trends include clothing and accessories, including dresses, skirts, tops, shoes, bags, and jewelry.

The GUESS brand clothing line has been praised for its innovative and trendsetting designs. Their clothing has been worn by some of the biggest celebrities in the world, including Jennifer Lopez, Beyoncé, and Rihanna.

Guess Brand Clothing Ad Featuring Jennifer Lopez

The GUESS Brand Style

GUESS clothing is typically characterized by its bold and glamorous style. The brand’s designs are often edgy and provocative, and they often feature sexy silhouettes and revealing necklines. GUESS clothing is also known for its high-quality materials and construction.

The Brand’s Impact

GUESS has had a significant impact on the fashion industry. The brand is credited with popularizing the “supermodel” era of the 1990s, and its advertising campaigns have been cited as an inspiration for many other fashion brands. The brand has also been praised for its commitment to diversity, and its campaigns have featured models of all races, ethnicities, and body types.

Guess Brand Jeans

Today, GUESS is a global fashion empire with a legacy of innovation and style. The brand continues to be a popular choice for consumers of all ages, and it is sure to remain a major player in the fashion industry for many years to come.

Guess purse

The Latest Trends from GUESS

GUESS is constantly evolving its designs to stay ahead of the latest trends. In recent years, the brand has focused on sustainable fashion, and it has launched a number of eco-friendly initiatives. The brand is also committed to social responsibility, and it has partnered with a number of charitable organizations.

  • Recycled materials: GUESS is using recycled materials in a number of its clothing items, such as denim jeans and T-shirts.
  • Organic cotton: GUESS is using organic cotton in a number of its clothing items, such as dresses and sweaters.
  • Water-saving techniques: GUESS is using water-saving techniques in its manufacturing processes.
  • Ethical sourcing: GUESS is committed to ethical sourcing of its materials
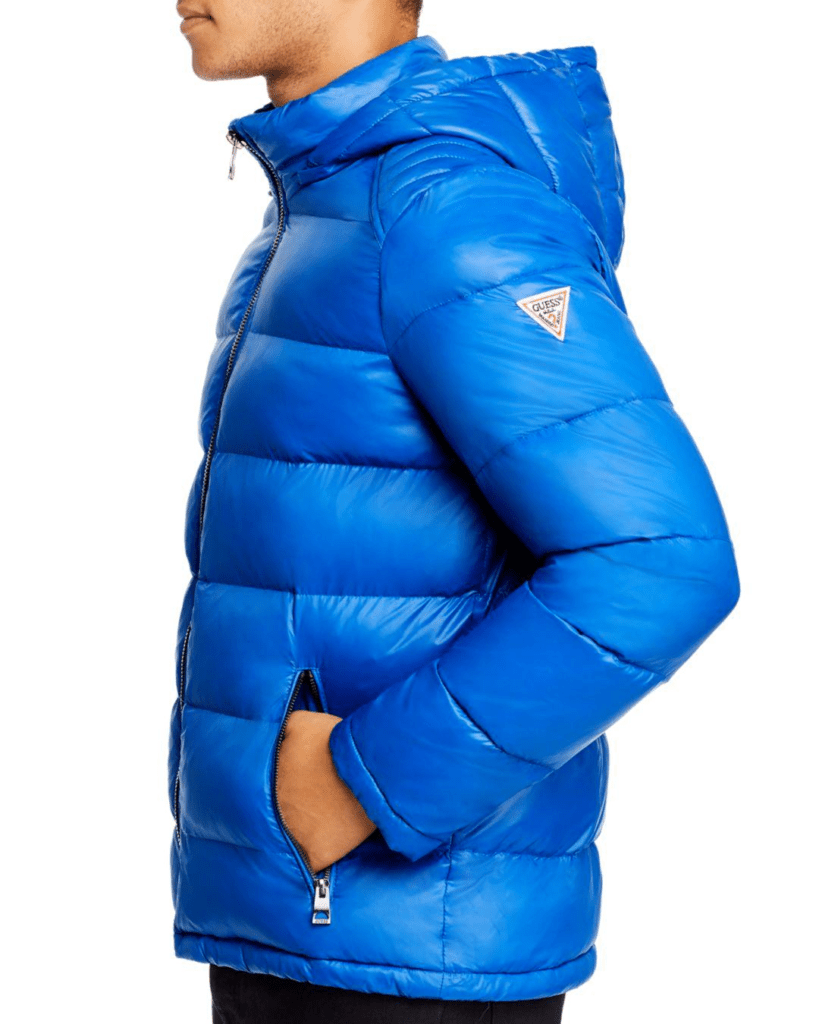
Guess Bubble coat

The Future of GUESS

GUESS is well-positioned for continued success in the future. The brand has a strong track record of innovation and style, and it is committed to sustainability and social responsibility. It is also one of the most popular fashion brands among young consumers.

Using Iron-On Transfer Paper For Art Designs

Iron-on Transfer Paper: Transform Photos and Designs into Fabric Art

Iron-on transfer paper, also known as heat transfer paper, is a versatile tool that allows you to transfer images and designs onto fabrics. It’s a simple and fun way to personalize clothing, accessories, home décor, and other items with your own creative touch. Whether you’re transferring a cherished photo, a unique design, or a quirky slogan, iron-on transfer paper makes it easy to put your stamp on a variety of materials.

photo transfer paper

What Is Iron-On Transfer Paper?

Iron-on transfer paper is a type of paper that has been specifically treated to allow images or designs to be transferred onto fabrics using heat. The paper comes in two main varieties: light transfer paper for use on light-colored fabrics and dark transfer paper for use on dark-colored fabrics.

How to use iron-on photo transfer paper

How to Use Iron-on Transfer Paper

Using iron-on transfer paper is a straightforward process that can be accomplished with a few simple steps:

  1. Choose your image or design: Select the image or design you want to transfer onto the fabric. Ensure the image is high-quality for optimal results.
  2. Print the image: Print the image or design onto the iron-on transfer paper using an inkjet printer. Follow the instructions provided with the transfer paper for specific printing settings.
  3. Cut out the image: Once the image is printed, carefully cut it out around the edges using scissors or a craft knife.
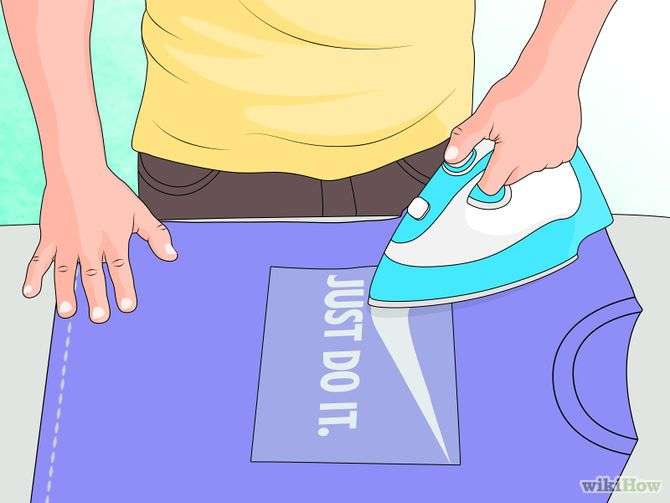
  4. Position the image: Place the image face down onto the desired area of the fabric. Ensure the image is positioned correctly as it will be difficult to reposition once ironed.
  5. Iron the transfer: Preheat your iron to the highest heat setting recommended for the fabric. Press the iron firmly over the image for approximately 30-60 seconds, following the specific instructions provided with the transfer paper.
  6. Peel off the backing paper: Once the iron-on transfer has cooled, carefully peel off the backing paper. The image should now be transferred onto the fabric.
  7. Enjoy your creation: Admire your personalized fabric item and showcase your creativity.

Creative Ideas for Iron-on Transfer Paper

Iron-on transfer paper opens up a world of creative possibilities for personalizing fabrics. Here are a few ideas to get you started:

  • Create personalized T-shirts, sweatshirts, and hoodies with your own designs or photos.
  • Design custom tote bags, hats, and aprons with unique patterns or slogans.
  • Craft personalized gifts for friends and family by transferring meaningful images or messages onto pillows, blankets, and other items.
  • Decorate your home with DIY throw pillows, wall hangings, and curtains featuring your own artwork or photography.
  • Personalize school supplies, bags, and accessories with iron-on transfers of your favorite characters or designs.
Cotton T Shirt transfer paper

Iron-on transfer paper is a simple yet powerful tool for adding a personal touch to fabrics. With a little creativity, you can transform ordinary items into cherished keepsakes and statement pieces that reflect your unique style and personality.

Iron-On Photo Transfering In 8 Simple Steps

Iron-on Photo Transfers: Capture Memories on Fabric

Iron-on photo transfers are a great way to add a personal touch to your fabric items. Whether you want to create unique gifts, home décor, or clothing items, iron-on photo transfers make it easy to do so. The process of using iron-on photo transfers is simple, and it can be done by anyone. All you need is a printer, transfer paper, and an iron. The transfer paper has a special coating that allows the ink to transfer to the fabric when heat is applied.

To start, you first need to choose the photo you want to transfer onto your fabric item. Once you have your photo, you need to print it onto the transfer paper. Make sure to follow the instructions on your transfer paper package, as different brands may have slightly different instructions. Next, you need to cut out the image from the transfer paper, leaving a small border around the edges.

This border will help to prevent the transfer from peeling off once it’s applied to the fabric item. Now it’s time to apply the transfer to your fabric item. Place the transfer face down onto the fabric where you want it to be, and then apply heat with an iron set to the appropriate temperature. Again, make sure to follow the instructions on your transfer paper package for the correct temperature setting and time.

Once the transfer has been applied, let it cool for a few minutes before gently peeling off the transfer paper. And there you have it – a personalized fabric item with your favorite photo! Iron-on photo transfers can be applied to a variety of materials, including cotton, polyester, and blends. They are perfect for creating unique gifts, such as personalized t-shirts, tote bags, and pillows.

They can also be used to add a personal touch to your home décor, such as photo quilts or wall hangings. In conclusion, iron-on photo transfers are a fun and easy way to personalize your fabric items. With a little creativity, you can create one-of-a-kind pieces that are sure to impress. So why not give it a try and see what you can come up with?

Materials Needed

  • Inkjet printer
  • Iron-on transfer paper
  • Scissors
  • Iron
  • Fabric item
Iron-on photo transfers

Instructions:

  1. Choose your photo: Select a high-quality photo that you want to transfer. The quality of the photo will affect the quality of the transfer.
  2. Print the photo: Print the photo onto iron-on transfer paper. Make sure to follow the instructions that come with the transfer paper.
  3. Cut out the photo: Cut out the photo around the edges. If you want to create a distressed look, you can leave some of the edges rough.
  4. Preheat the iron: Preheat your iron to the highest setting that is safe for the fabric you are using.
  5. Position the photo: Place the photo face down onto the fabric. Make sure that the photo is where you want it to be, as it will be difficult to move once it is ironed on.
  6. Iron the photo: Iron over the photo for 30-60 seconds, using firm pressure. Do not move the iron while you are ironing.
  7. Peel off the backing paper: Once the photo has been ironed on, carefully peel off the backing paper.
  8. Enjoy your creation: Your iron-on photo transfer is now complete! Enjoy your personalized fabric item.
image

Iron-On Transfer Tips

  • If you are using a light-colored fabric, you can use a dark transfer paper. If you are using a dark-colored fabric, you can use a light transfer paper.
  • If you are having trouble peeling off the backing paper, try using a damp cloth to help loosen it.
  • If you want to make your transfer more durable, you can spray it with a fabric sealant.

Creative Ideas

  • Create a personalized T-shirt or sweatshirt with a photo of your family or friends.
  • Make a tote bag with a photo of your favorite pet.
  • Create a pillow with a photo of a special memory.
  • Design a quilt with photos of your loved ones.
  • Personalize a pair of jeans with a photo of your favorite band.

Iron-on photo transfers are a fun and easy way to add a personal touch to your fabric items. With a little creativity, you can create one-of-a-kind gifts, home décor, and clothing items that will be cherished for years to come.