Blog Posts

Learn How To Draw Skirts Using These 5 Easy Steps

Learning how to draw skirts can be a very simple and easy process. Of course, starting your skirt designs may not be perfect. That is to be expected with anything you are creating. The more you practice, the better you will become at drawing skirts. This article will give you tips on how to draw a simple basic skirt design.

How To Draw Skirts:

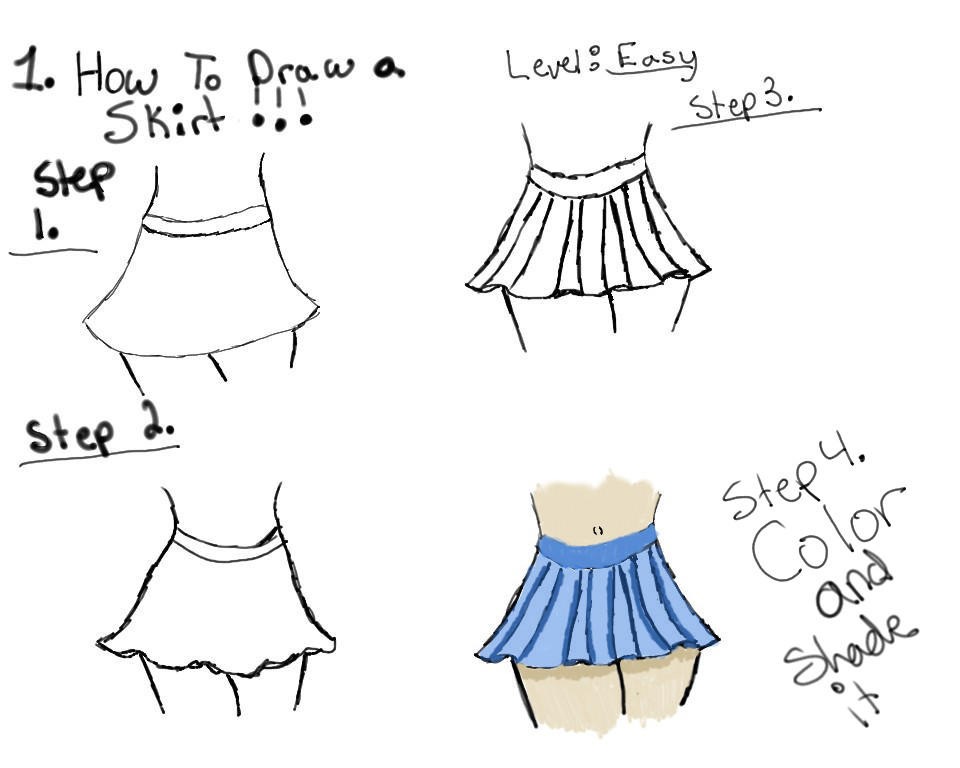
  1. Start by drawing a basic shape for the skirt. The simplest way to draw a skirt is to start with a basic shape, such as a circle, rectangle, or triangle. You can then add details to the shape to create the desired style of skirt.
  2. Add details. Once you have the basic shape of the skirt drawing, you can add details to make it more realistic. This could include things like folds, pleats, or ruffles. You can also add details to the waistband and hem of the skirt. Pay attention to the folds and pleats of the skirt. These can help to add realism to your drawing.
  3. Add unique line patterns. Use different line weights to create depth and interest in your drawing. Use light lines when you are first sketching the skirt. This will make it easier to erase any mistakes.
  4. Add shading. Shading can help to add depth and realism to your drawing. You can use a pencil or marker to add shading to the skirt. Be sure to blend the shading so that it looks smooth.
  5. Add color. Once you are happy with the shading, you can add color to your drawing. You can use markers, colored pencils, or watercolors to add color. Don’t be afraid to experiment with different colors and textures.

Here are some additional tips for drawing skirts:

  • Before beginning your skirt drawing, consider the type of skirt you want to draw. Is it a long, flowing skirt or a short, A-line skirt? The type of skirt will affect the shape and details of your drawing.
  • Pay attention to the folds in the skirt. Folds can add a lot of interest to a drawing, so take some time to study how they work.
  • Use a variety of line weights to create depth and interest in your drawing. Thicker lines can be used for the main parts of the skirt, while thinner lines can be used for details like folds and pleats.
  • Don’t be afraid to experiment with different colors and textures. Skirts can be made from a variety of materials, so have fun with your choices.
  • When you’re finished, add some shading to complete your skirt drawing. Shading can help to create a sense of volume and realism in your drawing.
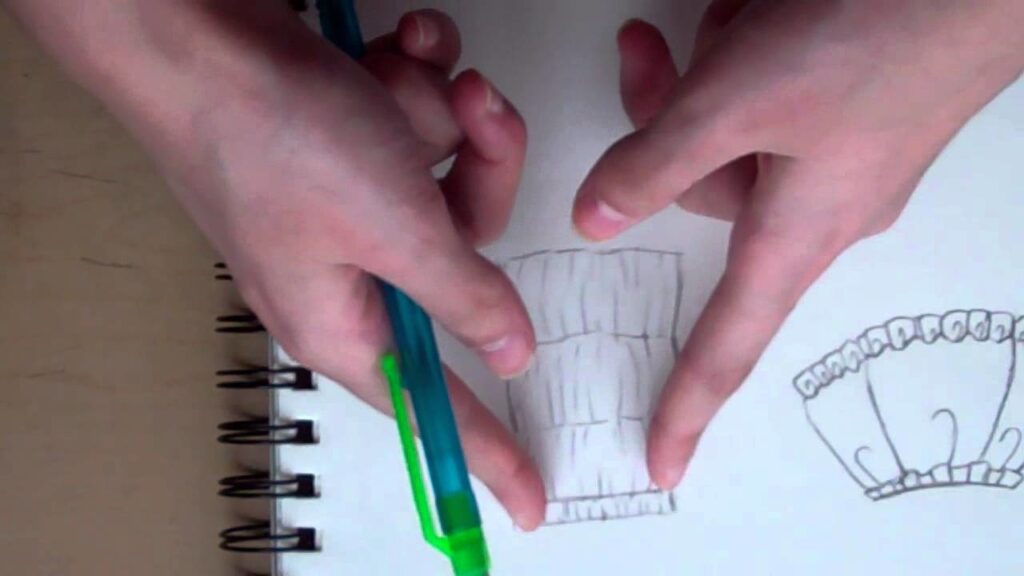
How to draw skirts 5 different ways

Different Types Of Skirt Drawings:

  • Maxi skirt: This type of skirt is long and falls past the knee.
  • Mini skirt: This type of skirt is short and falls above the knee.
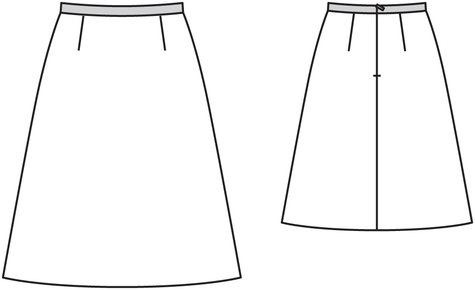
  • A-line skirt: This type of skirt is straight at the top and flares out at the bottom hemline. It is a versatile style that can be dressed up or down. To draw an A-line skirt, start by drawing a circle. Then, draw a straight line down the center of the circle. This will be the waistline of your skirt. Finally, add folds to the skirt by drawing curved lines that follow the shape of the skirt.
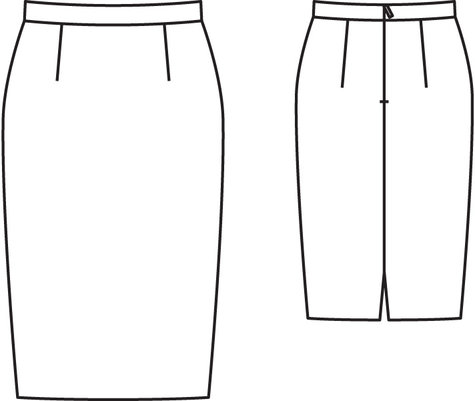
  • Pencil skirt: This type of skirt is fitted at the waist and hips, and then flares out slightly at the knee. It is a classic style that is perfect for work or a night out. This type of skirt is fitted and straight. To draw a pencil skirt, start by drawing a rectangle. Then, round off the corners of the rectangle. This will give the skirt a more natural shape. Finally, add folds to the skirt by drawing curved lines that follow the shape of the skirt. These skirts are also easy to draw because they are just a straight line with a waistline. You can add details like a hemline or pockets.
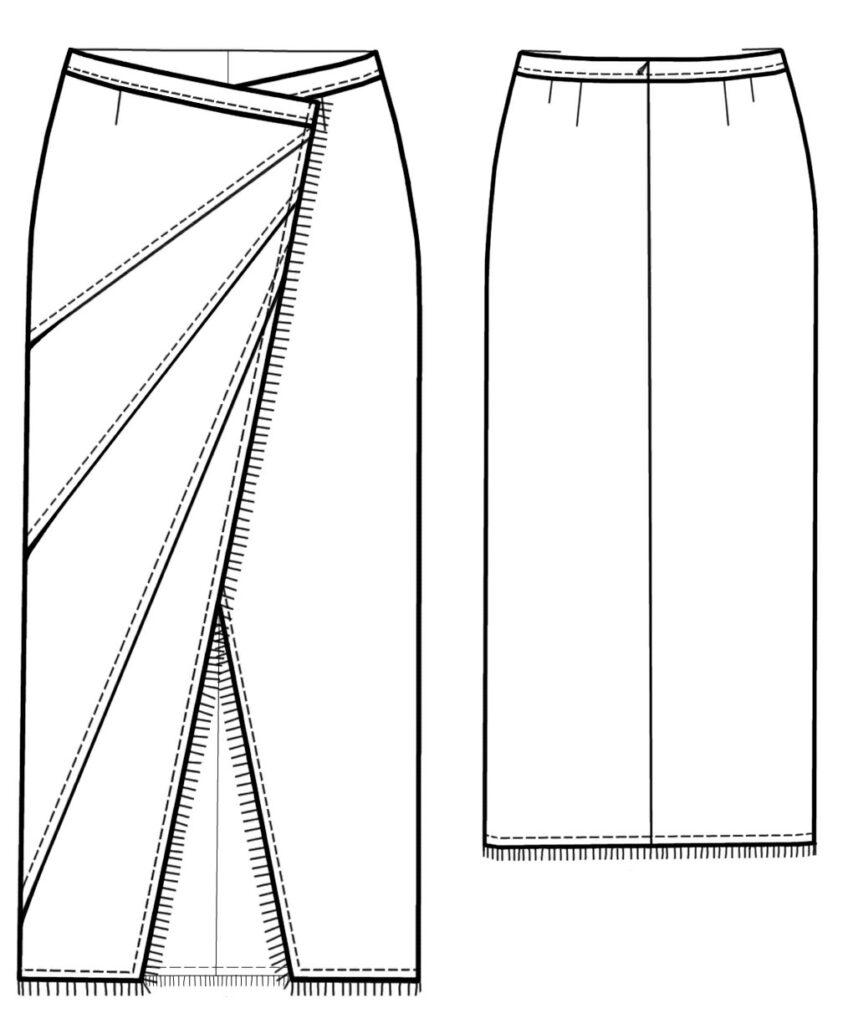
  • Wrap skirt: This type of skirt is made from a single piece of fabric that is wrapped around the body and tied at the waist. It is a versatile style that can be dressed up or down. They can be a bit challenging to draw, but they are a great way to create a more dynamic and interesting pose. Start by drawing a rectangle. This will be the basic shape of your skirt. Next, draw a line down the center of the rectangle. This will be the waistline of your skirt. Now, start adding folds to the skirt. You can do this by drawing curved lines that follow the shape of the skirt. Once you are happy with the folds, start adding shading. You can do this by using a darker pencil to shade the folds. Finally, add any final details, such as buttons or a zipper.
  • Skater skirt: This type of skirt is short and full, with a gathered waist. It is a casual style that is perfect for a day out. This type of skirt is short and full. To draw a skater skirt, start by drawing a circle. Then, draw a straight line down the center of the circle. This will be the waistline of your skirt. Finally, add folds to the skirt by drawing straight or curved lines that follow the shape of the skirt.
  • Pleated skirt: This type of skirt has pleats running down the front, back, or both sides. It is a formal style that is perfect for special occasions. They can be a bit challenging to draw, but they are a great way to add detail to your drawings.

how to draw skirts, how to draw plated skirts

These are just a few suggestions, and there are many other types of skirts that you can draw. The best way to find skirt drawing inspiration is to look at fashion magazines, websites, and Pinterest. Using these methods can serve as skirt-drawing references for creators. Once you have an idea of what you want to draw, start by sketching a basic shape. Then, add details such as folds, pleats, and embellishments. Finally, add shading to create the illusion of depth. I hope these tips help you to draw some beautiful skirts!
Using Sunscreen For Better Health Of Your Skin

How important is sunscreen in your daily routine? Many people are unaware of the importance of this particular product. When shopping we look for products that w want, like, or saw on tv. We don’t typically pay attention to the actual ingredients in most of our favorite products. Some form of sunscreen is included in many lipsticks, lip glosses, foundations, creams, lotions, and facial moisturizers. But what exactly should we be using if it’s not included?

Reading product labels is very important even though it may be a missed step most of the time. If you are interested in protecting your skin, having sunscreen on hand will help you do just that. Let’s get started by finding out a few simple facts about what it actually is and how to use it.

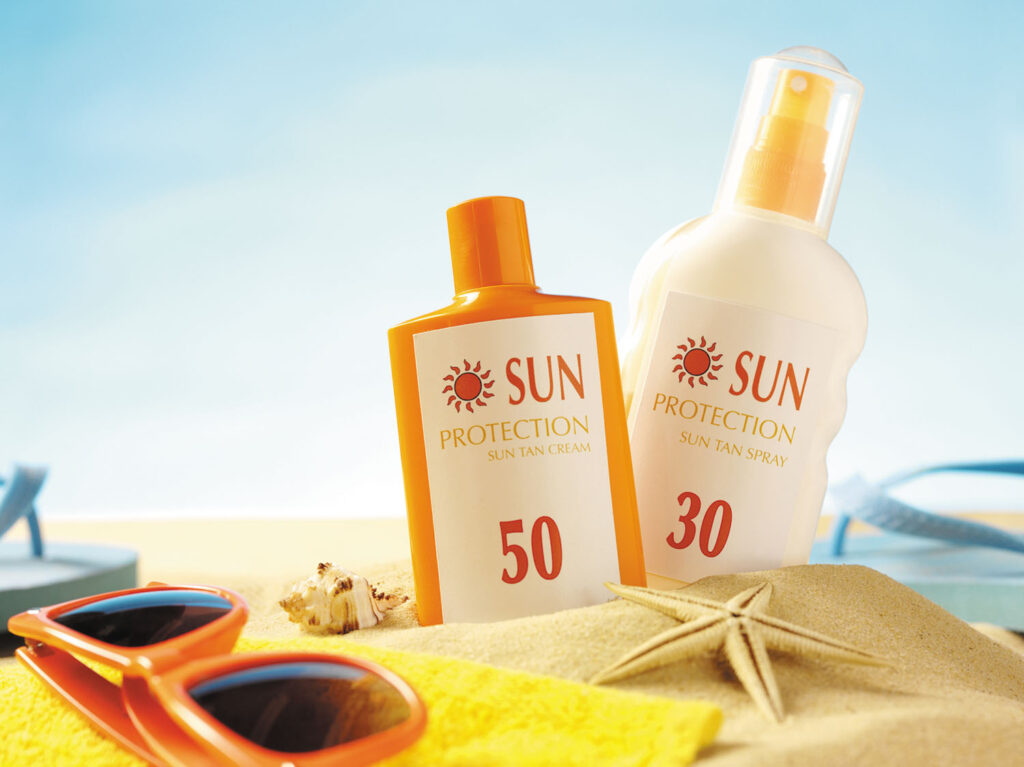
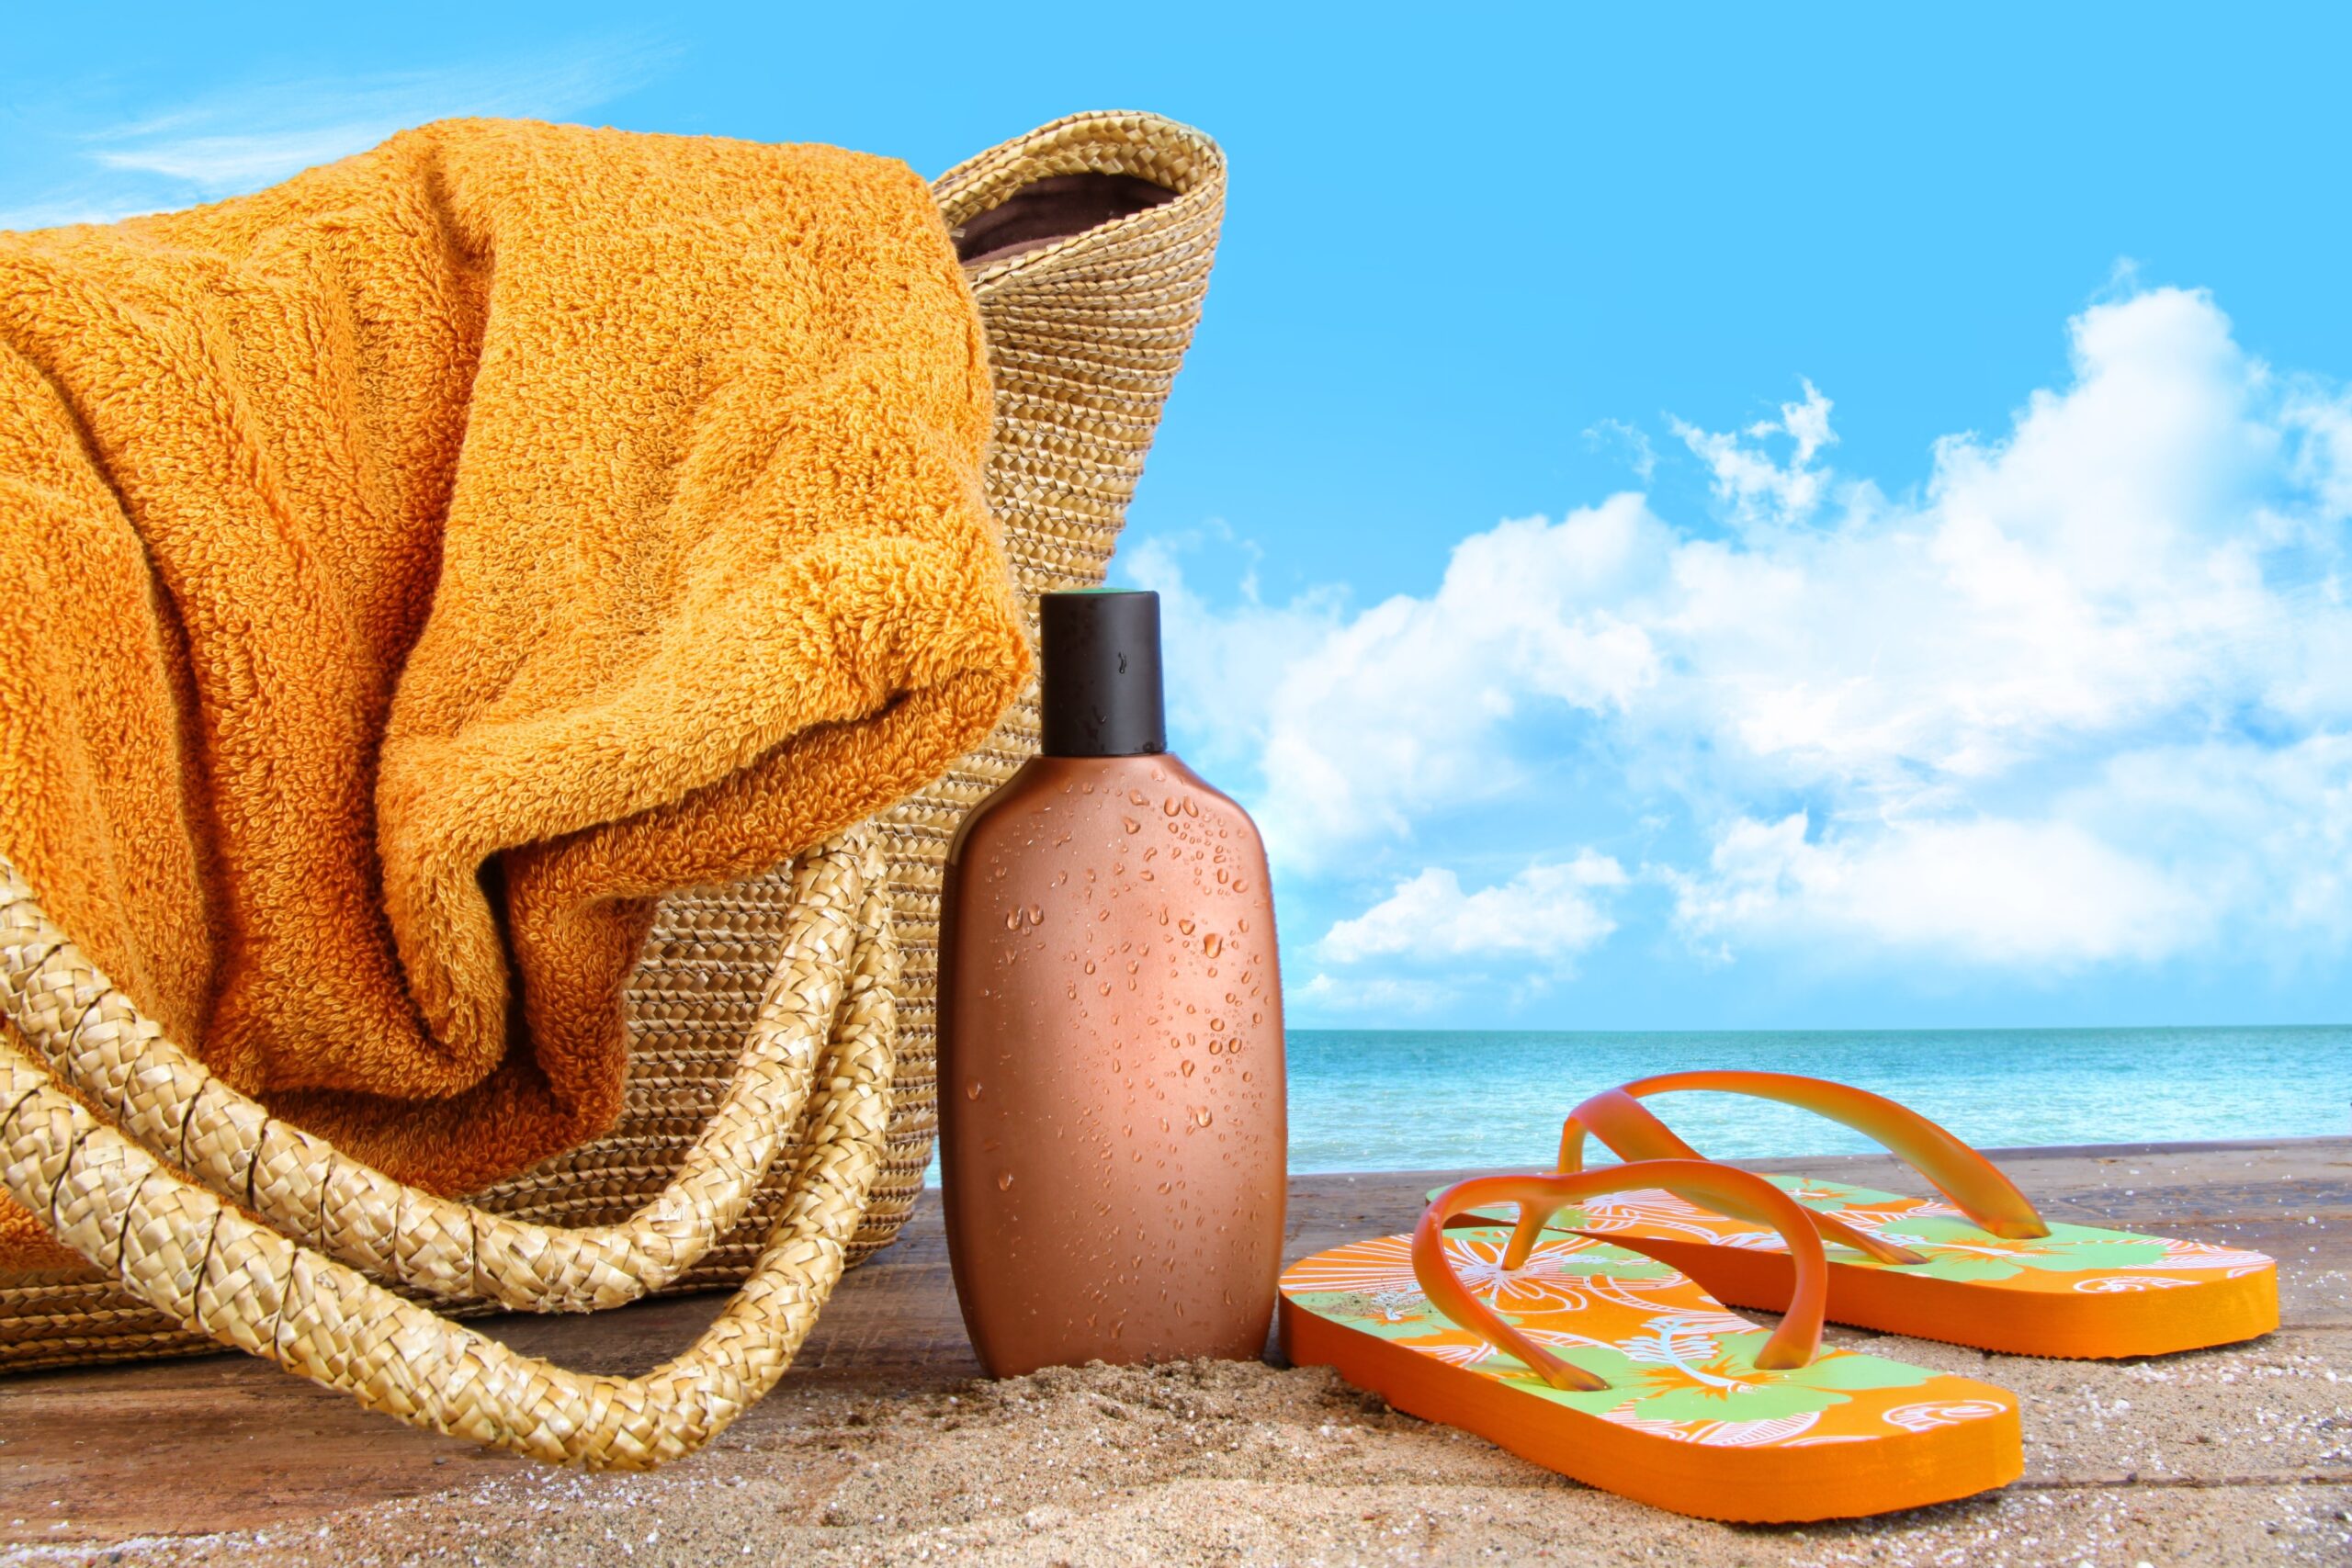
Sandy Beach with blue flip flops and sun cream protection on the sand with a starfish and sunglasses on a yellow beach towel. The sun cream label is factious and was designed and made up for this shot.

What is Sunscreen?

Sunscreen is a substance typically found in a cream, lotion, or spray form. It is designed to help protect the skin from the sun’s harmful rays. Sunscreen can also be referred to as sunblock or sun skin cream. It’s a product that should be applied topically to prevent the skin from damage. (Topically is just a fancy word to describe applying product onto the skin externally). It can help eliminate sunburn, and premature aging and prevent wrinkling of the skin. It assists with keeping your skin plump, soft, and healthy looking. This is important because too much sun exposure can cause dry, cracked, reddened, or uneven skin tones.

The Benefits Of Using Sunscreen

  • Apply sunscreen approximately 30 minutes before being in the sun for the best results. This is so that it can be absorbed by the skin and less likely to wash off when you perspire or sweat. When using this product shake it well before use to mix the particles that might be clumped up in the container. This method applies for use with a spray. A hand cream or lotion may not require this step since it should already be mixed to the correct consistency.
  • Consider using the new spray-on or stick types of sunscreen. This form allows you an easier and more concise application.
  • Be sure to apply enough sunscreen. As a rule of thumb, use an ounce (a handful) to cover your entire body. You should always apply this layer of protection to any exposed areas but overall coverage is best so that you don’t have an even skin texture in the future.

Quick Story: There was a time when I was unaware of the harmful effects of the sun on my skin. I had been wearing my favorite type of ripped jeans one summer. At first, I hadn’t taken notice of my skin changing during that summer but once the summer had begun to come to a close I noticed that the skin was a lot darker in the areas where my jeans had the cutouts and my skin was exposed. This caused me to have a very noticeable uneven skin tone with hyperpigmentation.

  • Use on all parts of your skin exposed to the sun, including the ears, back, shoulders, and the back of the knees and legs.
  • Apply thickly and thoroughly.
  • Be careful when applying sunscreen around the eyes. As you all should know when any product containing chemicals not intended for the eyes can cause irritation.

Is Sunscreen the same thing as suntan lotion?

Tanning lotion is a specially formulated product that helps people achieve and maintain a tan. Suntan lotions and tanning oils have an SPF of less than 15 and aren’t safe to use as sunscreen. Some dark tanning oils do not contain any sunscreen ingredients at all, and may even include a tanning accelerator.

Which Product Should I Choose?

There are a few things to keep in mind when choosing a sunscreen for your skin needs. When deciding which one is right for you find a product that has any of the following conditions:

  • Has an SPF of at least 15 to 30. You could go for a higher SPF, but experts believe that they give people a false sense of security. Sunscreens with SPFs as high as 100+ are available. However, there is little difference in their UV filtering ability: While SPF 30 blocks 97% of UVB rays, SPF 50 blocks 98%.
  • Offers protection against UVA rays as well as UVB rays. Several sunscreens do not offer protection against UVA rays, though experts have learned that UVA can be as damaging as UVB. It’s important to be familiar with the sunscreen ingredients that help protect against UVA radiation.
  • Is water-resistant. Even if you aren’t going swimming, your child may be sweating outside, so a water-resistant sunscreen might provide better protection than a regular sunscreen.
  • Is hypoallergenic and fragrance-free, especially if your child has sensitive skin.
  • Is in a form that is easy to use on your child, whether that means it is a stick, gel, lotion, or spray.

Sunscreen use can help prevent melanoma and squamous cell carcinoma, two types of skin cancer.

Wikipedia

Is Cuticle Oil Really Necessary For My Nails?

Having an interest in nail care and cosmetology entails more in-depth research on how products and services affect the human body. While watching numerous nail videos and looking at photographs, I noticed many people either using cuticle oil or leaving this step out. So I wanted to know if it was really a necessary step in the manicure process. I would say that I have pretty healthy cuticles. They are smooth and intact with little to no skin tears, cracks, or thickening skin around the cuticle area or nail bed.

When purchasing manicure kits and acrylic sets, they would always include them in the package, but I would rarely use them. This could have been because I really didn’t know what it was or what I should be using it for. I just assumed that it was sort of like a hand cream or lotion and not a product intended to grow or strengthen your nails. Let’s begin this journey into nail care by finding out a few simple facts about what this product is, how it’s supposed to work for you, and the health of your hands and feet.

What Is Cuticle Oil?

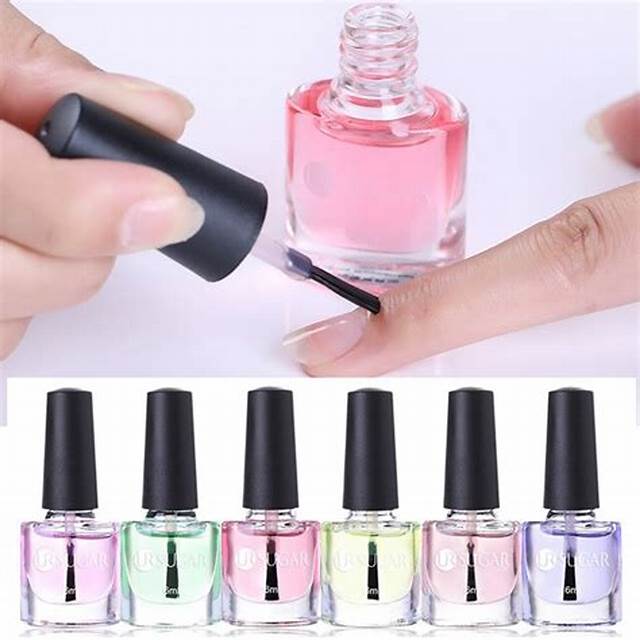
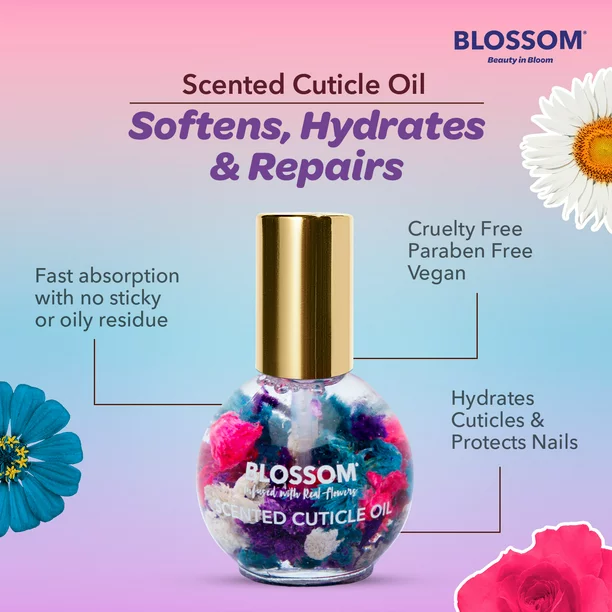
Cuticle oil is a product that is used to moisturize and protect the skin around the nails. The skin around the nails is usually soft and smooth, unless you are showing signs of wear and tear or damage. Once it is applied to the nails and cuticles, it hydrates, nourishes, stimulates, and repairs. The cuticles are the soft tissues that surround the nails and nail beds. The oil is absorbed into the matrix of the nail and surrounding skin. When it penetrates these areas, all of the nutrients get distributed, and the moisture is locked into the nail plate.

Most nail oils are made from natural oils, such as jojoba oil, almond oil, or vitamin E oil. Using this oil on the nails helps to moisturize and protect the cuticles. It can prevent them from becoming dry, cracked, and susceptible to infection. This type of oil can also help promote nail growth and strengthen the nails.

These oils are all highly rated by users and professionals, and they contain a variety of nourishing ingredients to help keep your cuticles and nails healthy. Some of the key ingredients to look for in a cuticle oil include:

  • Jojoba oil: This oil is very similar to the natural oils produced by your skin, so it absorbs easily and doesn’t leave a greasy residue.
  • Argan oil: This oil is rich in vitamin E and other antioxidants, which can help to protect and strengthen your nails.
  • Sweet almond oil: This oil is also rich in vitamin E and fatty acids, which can help to moisturize and soften your cuticles.
  • Vitamin E: This vitamin is an antioxidant that can help to protect your nails from damage.

When choosing a cuticle oil, it’s also important to consider your individual needs. For example, if you have dry cuticles, you may want to choose an oil that is more hydrating. If you have brittle nails, you may want to choose an oil that is strengthening.

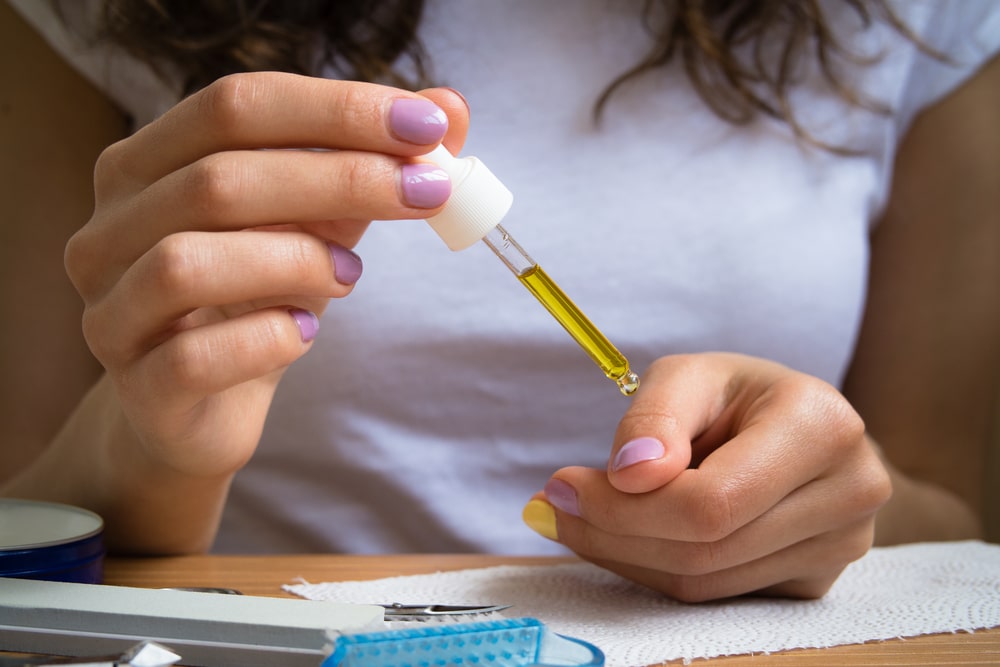
woman placing cuticle oil on her polished nails

How To Apply

  • Apply a small amount of the oil to the cuticles and surrounding skin.
  • Massage the oil into the skin until it is absorbed.
  • You can apply the product to your nails multiple times a day, or as needed.
  • Massage the oil into the skin and cuticles.
  • Use it regularly, especially after washing your hands or taking a shower.
  • You can also use this type of oil as a massage oil.
  • Massage the oil into the skin and cuticles.

Best Products To Use

This oil type can be purchased at most drugstores or beauty supply stores. Choose a cuticle oil that is made from natural ingredients. Although most women tend to gravitate toward fragrant cuticle oils, be mindful of skin allergies. If you have a skin allergy, you should avoid using oils containing fragrances, as these can irritate the skin. If you have sensitive skin, test a small amount of the oil on a patch of skin before using it on your cuticles. You can also use cuticle oil to moisturize and protect your hands and feet. In addition, cuticle oil can also be used to massage the skin and relieve tension.

Making sure your cuticles are always fully hydrated is the secret to possessing beautiful nails. Your cuticles can be moisturized with a variety of products, including creams, oils, conditioners, and sticks. Make sure the products you use are designed specifically for cuticle usage. Not only is it important to moisturize your cuticles frequently, but it’s also important to avoid overly aggressive cuticle care. These actions can seriously damage your cuticles and greatly increase the risk of infection in your nail beds.

Best Oils By Brand

Cuticle oil is a simple and effective way to keep your nails looking and feeling their best. By using the oil regularly, you can prevent dry, cracked cuticles and promote healthy nail growth. Nail oil is a simple way to improve the health and appearance of your nails. It can help to moisturize, protect, and promote nail growth and strength. This oil can also help prevent nail fungus and keep nails looking shiny and healthy.

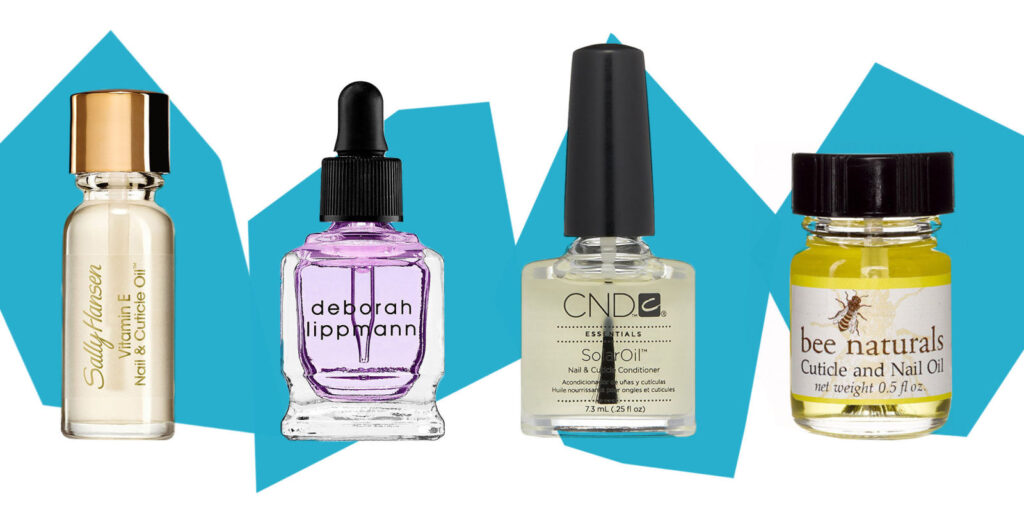
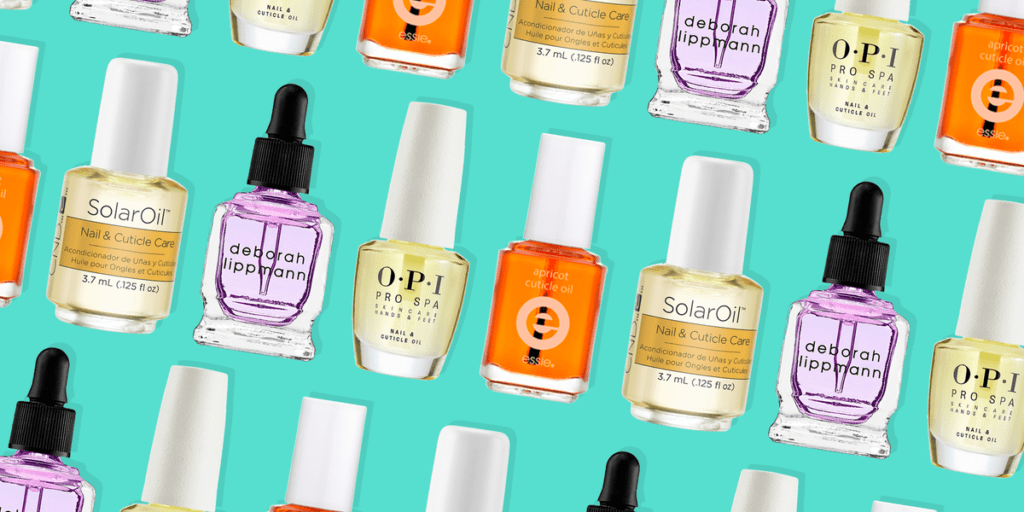
  • Best Overall: L’Occitane Shea Nail And Cuticle Oil
  • Best Budget: Sally Hansen Vitamin E Nail & Cuticle Oil
  • Best Splurge: JINsoon Extract Cuticle Oil
  • Best Dropper: OPI ProSpa Nail & Cuticle Oil
  • Best Roll-On: Sundari Neem Treatment Oil
  • Best Serum: Olive & June Cuticle Serum Duo
  • Best Cream: Dior Huile Abricot
  • Best Moisturizing: Cuccio Milk and Honey Revitalizing Cuticle Oil
  • Best Conditioning: Orly Argan Oil Cuticle Drops
  • Best On-the-Go: CND SolarOil
  • Best for Brittle Nails: Deborah Lippmann It’s A Miracle Pen
  • Best for Nail Growth: Tenoverten The Rose Oil Cuticle Oil
  • Best Natural: French Girl Organics Cuticle Oil

When choosing a cuticle oil, it is important to consider your individual needs. If you have dry or cracked cuticles, you may want to choose an oil that is particularly moisturizing, such as the L’Occitane Shea Nail and Cuticle Oil or the Cuccio Milk and Honey Revitalizing Cuticle Oil. If you have brittle nails, you may want to choose an oil that is formulated to strengthen and protect them, such as the Deborah Lippmann It’s A Miracle Pen or the Tenoverten Rose Oil Cuticle Oil.

No matter which cuticle oil you choose, be sure to apply it regularly to keep your cuticles and nails healthy and hydrated. You can apply cuticle oil once or twice a day, or more often if your cuticles are particularly dry. Simply massage a small amount of oil into your cuticles and nail beds, using your fingers or a cotton swab.

How To Use Blooming Gel For Your Nail Art Designs

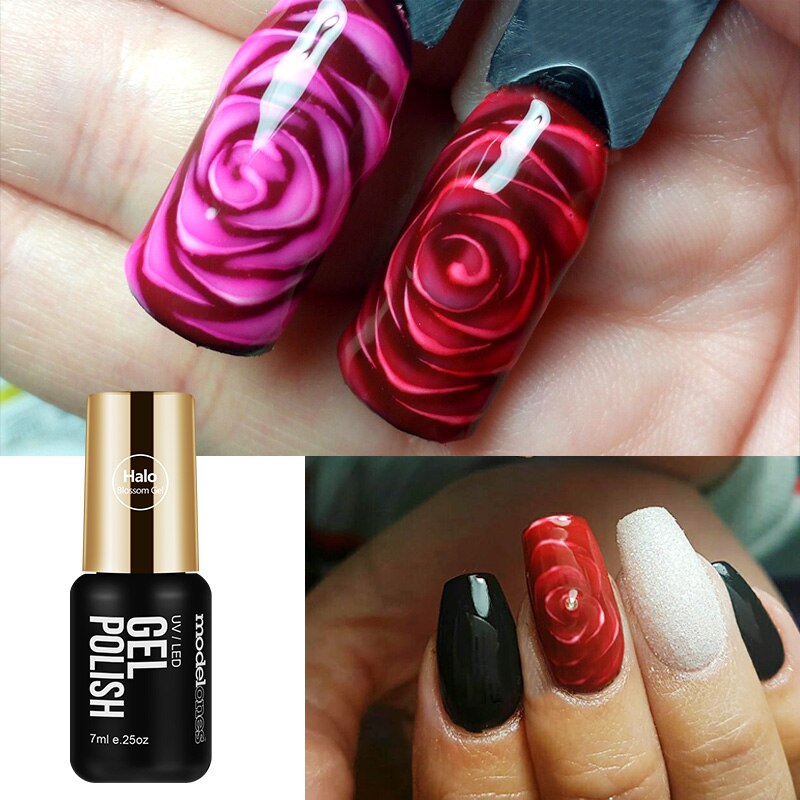
Blooming gel nail polish is a new type of gel polish that creates a blooming effect when exposed to UV light. The polish starts off as a solid color, but when it is exposed to UV light, it blooms into a beautiful flower pattern. You can use this polish to create a multitude of designs without being limited to a flower design.

How To Use Blooming Gel

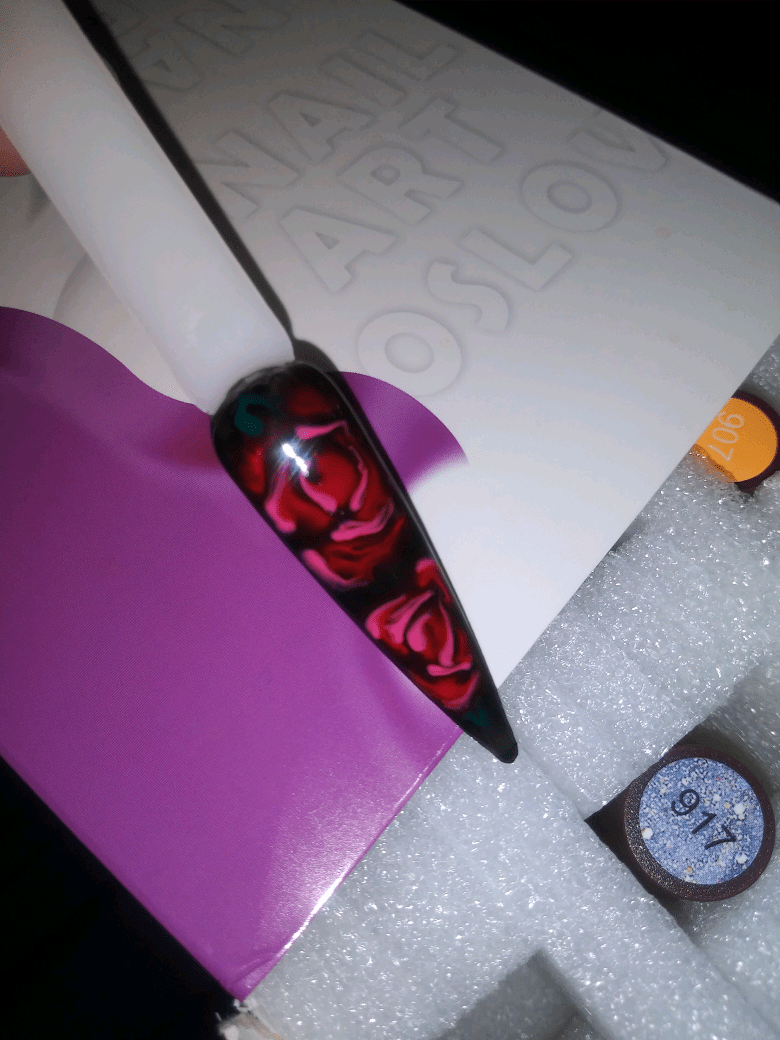
Blooming gel nail polish is easy to use. Simply apply it like any other gel polish, and then cure it in a UV lamp. Once it is cured, the polish will bloom into your design. The photo below is a simple, quick, and easy design I created using the blooming gel polish. This was also my first time using the polish and technique I learned from watching a video on youtube.

Blooming gel nail art, JosLove Gel nail polish

How To Create The Blooming Gel Rose Design

To create the design you would need a few additional items. You would need a base coat, color coat, blooming gel polish, top coat, nail art brush, and a UV-LED lamp to cure the polish. As always with using any type of polish you would want to apply your base coat onto the nail first. If you are using a gel polish cure the base coat under your UV lamp. After you have done that wipe off the sticky layer before moving on to applying your color coat. If your polish is a no-wipe base coat this step is not required.

Apply your solid color nail polish over your curd base coat. You can use any color coat for your solid base but most people use either a white or black solid color when using the blooming polish. If you are using a gel polish you will need to cure the solid base under your UV lamp until it is dry before applying the blooming gel polish.

After your color base is cured apply your blooming gel polish. You do not want to cur your blooming gel until after you have completed your design. To create this design I used two different color gel polishes. I used JosLove gel nail polish in shades #904 and #909. I started off with a small dot using the red shade #909 and using half-moon-shaped swipes along the sides. Then I filled the rose in using the pink shade #904 polish to add a pop of color.

Once the design is to your liking cur it under your UV lamp before sealing it with a top coat. My design isn’t as clean and defined as it should be due to my creating the design quickly while unboxing my polishes. The video below will be a better fit for anyone attempting to create a look similar to the one shown.


Best Types Of Blooming Gel Polish

When choosing a blooming gel nail polish, it is important to consider the following factors:

The Gel Bottle Blooming Gel: This is a high-end option that is perfect for those who want the best of the best. It is made with vegan and cruelty-free ingredients, and it is also free of phthalates and other harmful chemicals.

  • Price: Blooming gel nail polishes can range in price from around $10 to $50.
  • Color selection: Many brands offer a variety of colors to choose from, so you can find the perfect one to match your style.
  • Quality: Some polishes are better quality than others. Look for a polish that is thick and opaque, and that dries smoothly.
  • Long-lasting wear: Blooming gel nail polishes should last for at least 2 weeks with proper care.
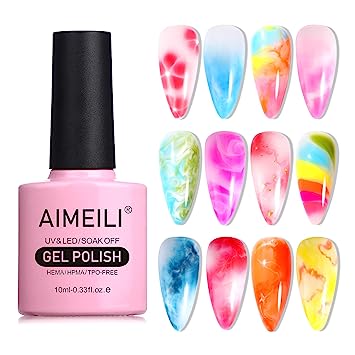
AIMEILI blooming gel nail polish

AIMEILI Blooming Gel Nail Art Blossom Gel: This gel polish is known for its high quality and long-lasting wear. It comes in a variety of colors, including some unique shades that you won’t find elsewhere.

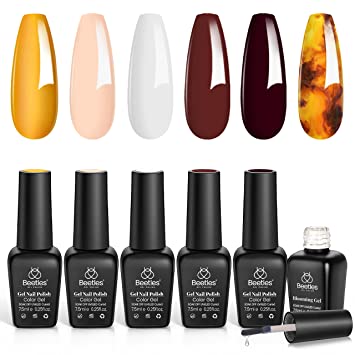
Beetles Blooming Gel Nail Polish

Beetles Blooming Gel Nail Polish: This is a popular option that is affordable and easy to use. It comes in a variety of colors, so you can find the perfect one to match your style.

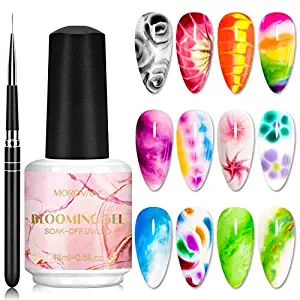
Morovan Blooming Gel Nail Polish

Morovan Blooming Gel Nail Polish: This kit comes with everything you need to create beautiful blooming nail art, including a clear blooming gel, a variety of colored gel polishes, and a nail brush.

With so many great options available, you’re sure to find the perfect blooming polish to create beautiful and long-lasting nails.

10 Simple And Easy Nail Art Design Techniques

Nail art is a fun and creative way to express yourself. There are many different techniques that you can use to create beautiful nail designs. In this blog post, we will discuss some of the most popular nail art techniques. Nail art is a fun and creative way to express yourself. There are many different nail art techniques that you can use to create beautiful and unique designs.

In this blog post, we will discuss some of the most popular nail art techniques. Nail art is a fun and easy way to add a touch of personality to your look. There are many different nail art techniques that you can use to create beautiful and unique designs. In this blog post, we will discuss some of the most popular nail art techniques and provide tips on how to do them yourself.

1. Marbling

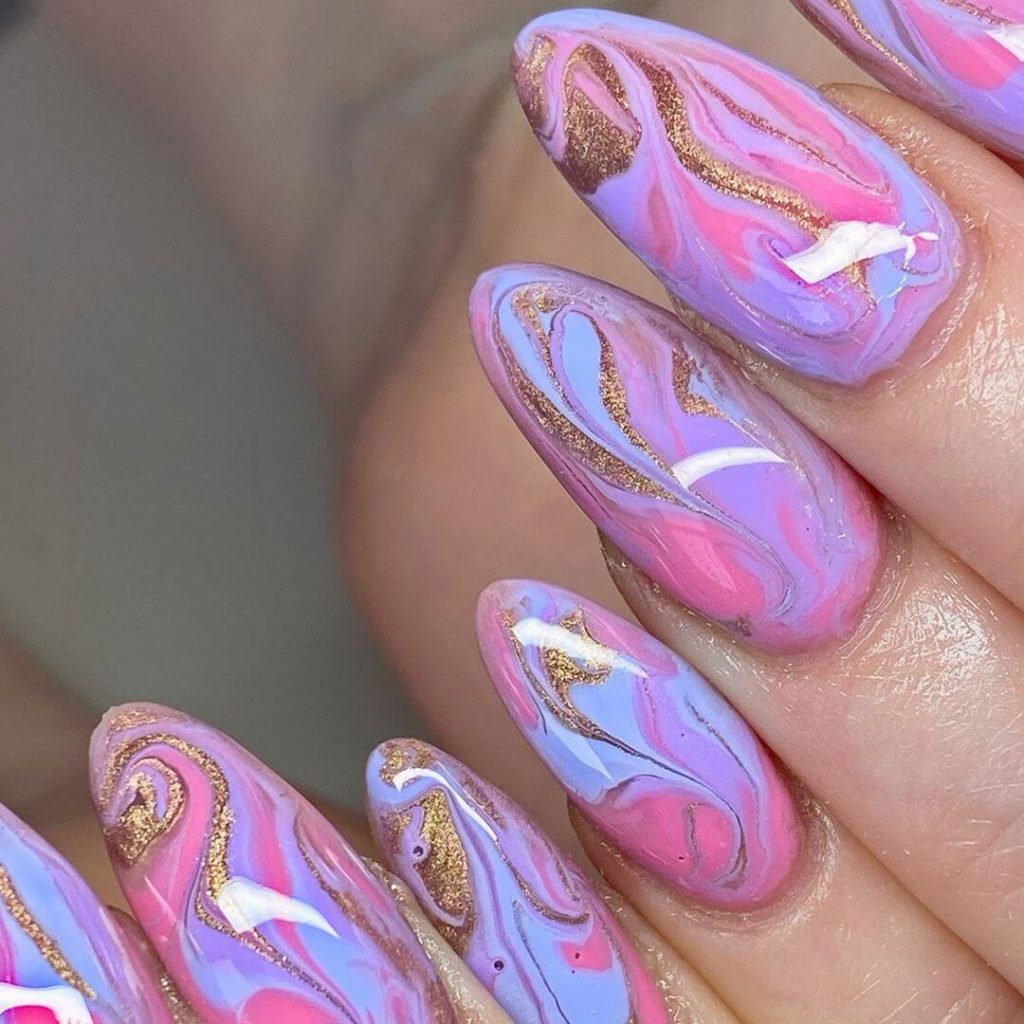
Marbling is a more advanced nail art technique that can be used to create beautiful and unique designs. To marble your nails, you will need a base coat, nail polish, and a top coat. First, apply a base coat to your nails. Then, use a toothpick to drop a few drops of different colors of nail polish onto a piece of plastic wrap. Next, use the toothpick to swirl the nail polish together. Finally, press the plastic wrap onto your nails and hold it there for a few seconds. Once you remove the plastic wrap, you will have a marbled design on your nails.

2. Freehand Painting

Freehand painting is a great way to create unique and personal nail art designs. To freehand paint your nails, you will need nail polish, a brush, and a top coat. First, apply a base coat to your nails. Then, use the brush to paint your desired design on your nails. Once the nail polish is dry, apply a top coat to seal in the design.

3. Polka Dots

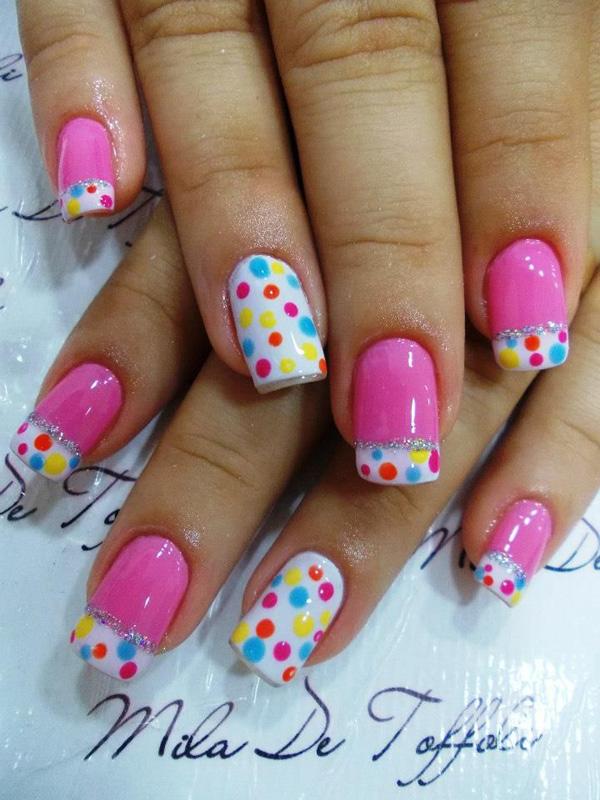
Polka dots are a classic nail art technique that can be used to create a variety of looks. To create polka dots on your nails, you will need nail polish, a dotting tool, and a top coat. First, apply a base coat to your nails. Then, use a dotting tool to apply the desired number of polka dots to your nails. Finally, apply a topcoat to seal your design. This is another fun and easy nail design that involves painting polka dots on your nails.

4. Stenciling

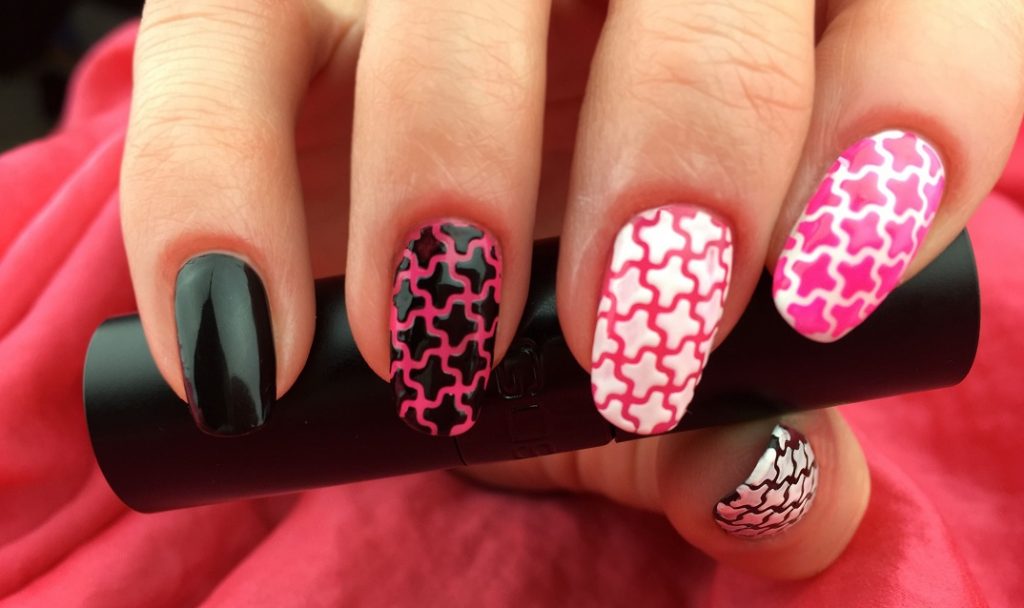
Stenciling is a simple nail art technique that can be used to create a variety of designs. To stencil your nails, you will need a stencil, nail polish, and a topcoat. First, apply a base coat to your nails. Then, use the stencil to apply the desired nail polish to your nails. Finally, apply a topcoat to seal your design. Stenciling is a simple nail art technique that is perfect for beginners.

To stencil your nails, you will need a stencil, nail polish, and a top coat. First, apply a base coat to your nails. Then, use the stencil to apply the nail polish to your nails. Once the nail polish is dry, apply a top coat to seal in the design.

Nail Painting Art for Nail Polish Lovers

5. Sponging

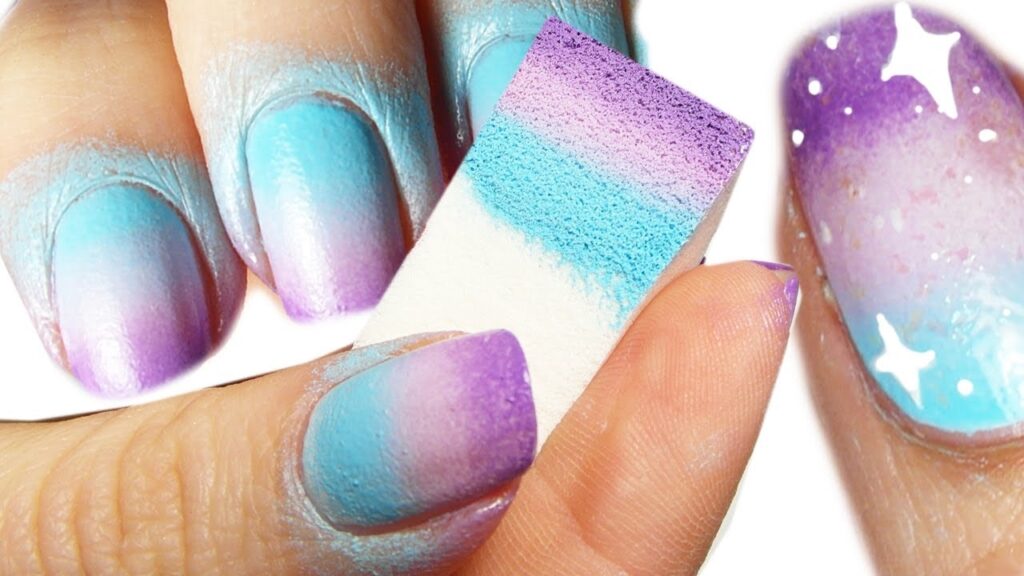
Sponging is another easy nail art technique that can be used to create a variety of looks. To sponge your nails, you will need a sponge, nail polish, and a top coat. First, apply a base coat to your nails. Then, dip the sponge into the nail polish and dab it onto your nails. You can use different colors of nail polish to create different designs. Once the nail polish is dry, apply a top coat to seal in the design.

6. Splatter Nails

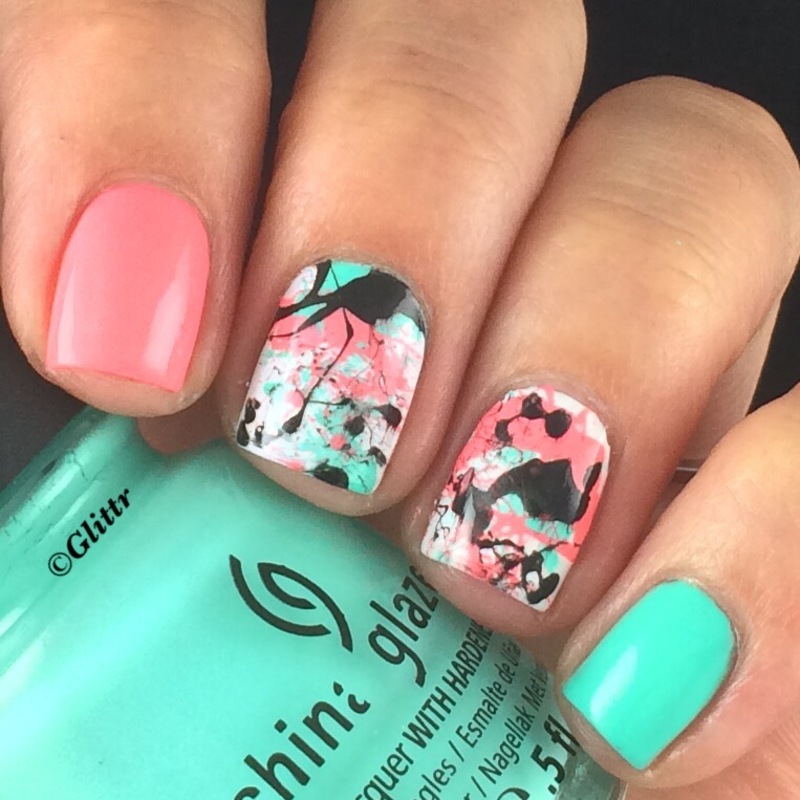
Splatter nails are a fun and easy way to create a unique look. To splatter your nails, you will need nail polish, a toothpick, and a top coat. First, apply a base coat to your nails. Then, use a toothpick to splatter the desired nail polish onto your nails. Finally, apply a topcoat to seal your design.

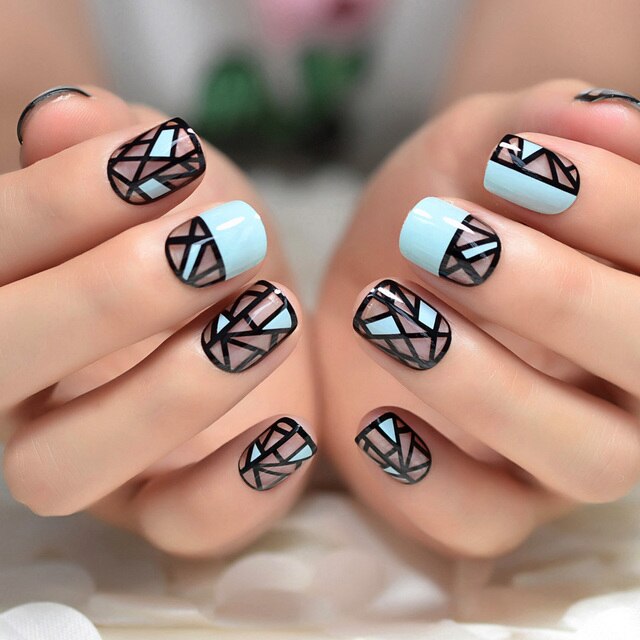
7. Geometric Designs

Geometric designs are a classic nail art technique that can be used to create a variety of looks. To create geometric designs on your nails, you will need nail polish, tape, and a top coat. First, apply a base coat to your nails. Then, use the tape to create the desired geometric design on your nails. Finally, apply a topcoat to seal your design.

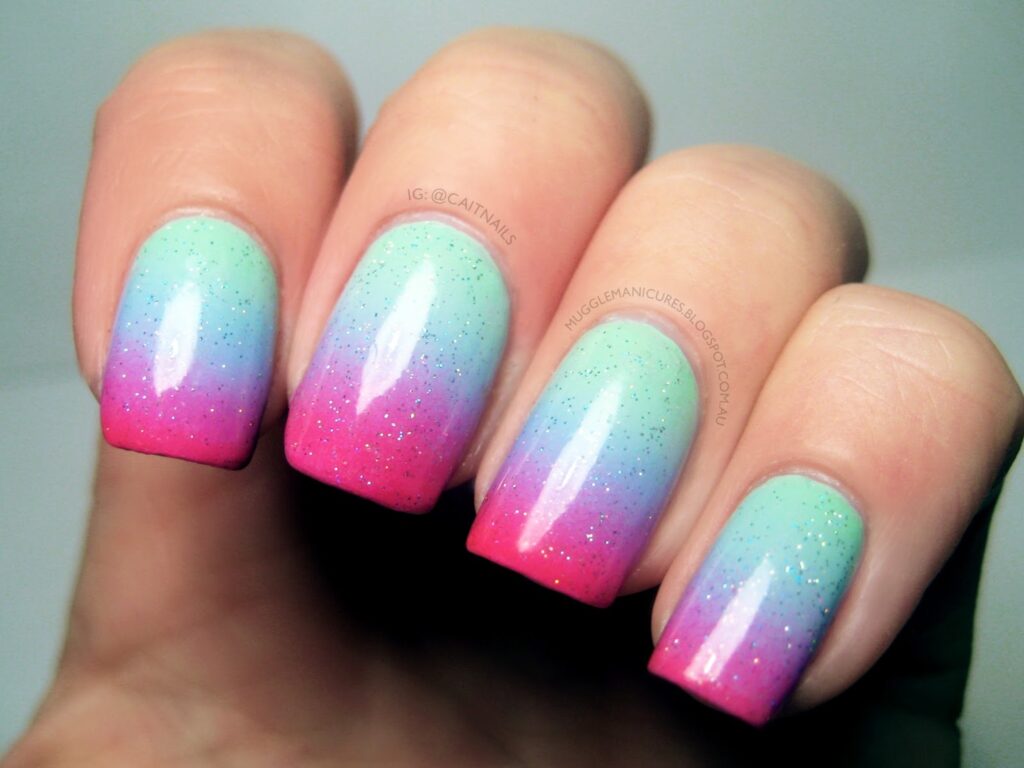
8. Gradient Effect

The gradient effect is a beautiful and easy nail art technique. To create a gradient effect on your nails, you will need nail polish, a sponge, and a top coat. First, apply a base coat to your nails. Then, use a sponge to apply a gradient of nail polish colors to your nails. Finally, apply a topcoat to seal your design.

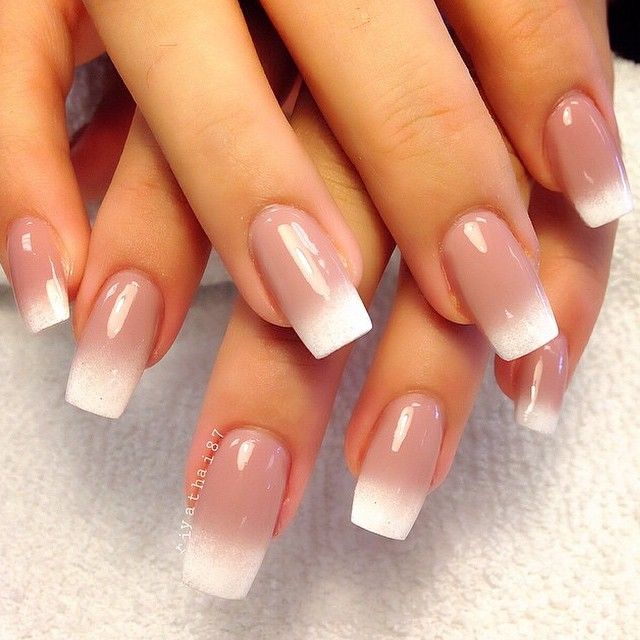
9. French Manicure

This is a classic nail design that involves painting the tips of your nails white and the rest of your nails a nude or pink color. French manicures are very popular and are a great alternative to solid-colored nail polish. It is one of th simplest of nail art designs and can be painted in several different colors.

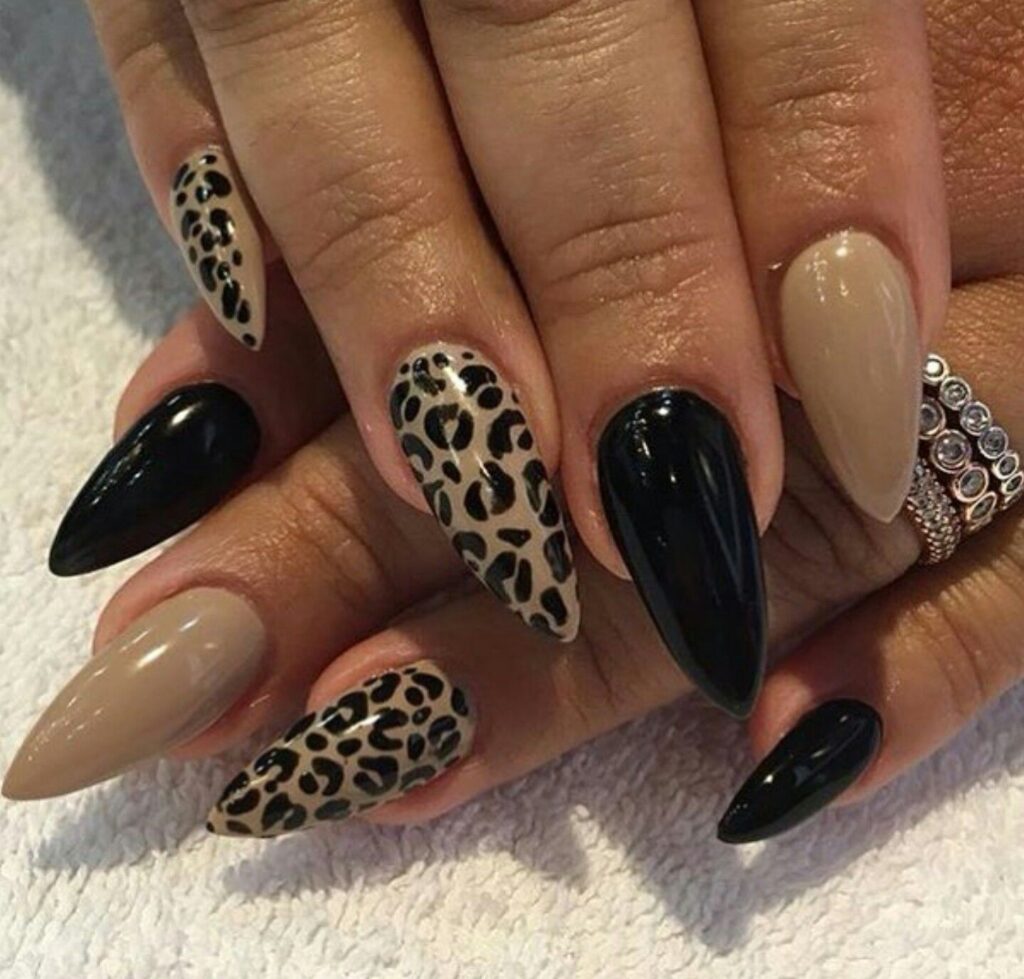
10. Animal Prints

This is a great way to add some personality to your nails. You can use animal prints to create a variety of different designs. Animal prints are great to wear for any occasion and are very popular nail designs. Crating this type of pattern is very easy and can be done in several different ways.

Do You Really Need A Base Coat On Your Nails?

What Is A Base Coat?

A base coat is a layer of polish applied to the nails before the color polish. Base polish can help to protect the nails from the chemicals in the color polish, and it can also help to improve the adhesion of the color polish to the nails.

The Benefits Of Using A Base Polish

Base coats can provide a number of benefits, including:

  • Protecting the nails from staining
  • Prolonging the life of the manicure
  • Making the nails look smoother and more even

Some nail polishes contain pigments that can stain the nails. Using a base coat nail polish can help to protect your nails from staining. The base coat can help the stains they may create by creating a barrier between the nails and the pigment. By doing this it allows the color of the polish adheres better to the nails. This type of polish helps to smooth the surface of your nails while parenting chipping and peeling. Base coats can prolong the life of your manicure or nail service. It can help to fill in any cracks or ridges on the nails and help to protect the nails from the harsh chemicals in nail polish remover.

Some base coats are specifically designed for use with certain types of nail polish. For example, there is a base polish that is designed for use with gel nail polish. If you use many different types of nail polish, you may want to choose one that is compatible with all of them. Some people prefer base coats that are clear, while others prefer ones that have a tint. Ultimately, the best way to find the right base is to experiment and see what works best.

What To Look For In A Base Coat

When choosing a base polish, try to look for one that is non-toxic and made from natural ingredients. Also, make sure that you are choosing one that is compatible with the type of nail polish you will be using. Before the application process take into consideration the nails you have, the polishes that you will be using, and your personal preferences.

If you have weak, brittle, or peeling nails or are coming off of many gel polish manicures, look out for things like keratin, vitamin E, soy protein, calcium, bamboo, and castor oil.

Byrdie.com

Best Base Coat Brands

OPI Natural Base Coat

OPI Natural Base Coat. This clear base is a favorite among nail technicians and beauty bloggers alike. It helps to smooth the nail surface, prevent staining, and extend the wear of your polish. This clear base polish is a great option for anyone looking for a non-sticky, fast-drying base that will help their nail polish last longer. It is also free of harsh chemicals and it’s vegan!
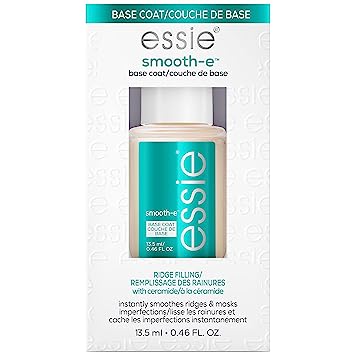
Essie Smooth-E. This coat is formulated with strengthening ingredients that help to protect your nails from damage. It also helps to create a smooth, even surface for your polish to adhere to, which can help to prevent chipping. This base polish is designed to strengthen and protect nails, while also providing a smooth surface for polish to adhere to. It is also free of formaldehyde, toluene, and DBP.

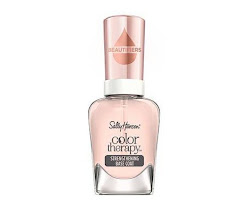
Sally Hansen Strengthening Base Coat nail polish

Sally Hansen Strengthening Base Coat. This base polish is enriched with calcium and keratin to help strengthen weak, brittle nails. It also helps to smooth the nail surface and prevent chipping. It also contains vitamin E to help strengthen and nourish your nails.

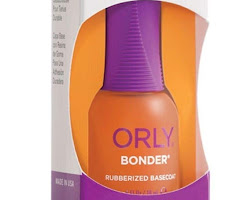
Orly Bonder nail polish

Orly Bonder. This rubberized base polish is designed to create a strong, long-lasting bond between your nail and your polish. It also helps to prevent chipping and peeling. This base polish is a favorite among professional nail technicians for its ability to prevent chipping and peeling. It is also clear and dries quickly.

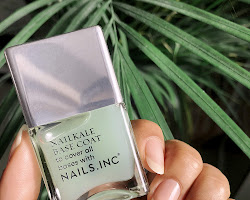
Nails Inc. Nailkale Base Coat Nail Polish

Nails Inc. Nailkale. This base polish is infused with kale and keratin to help strengthen and nourish nails. It also helps to smooth the nail surface and prevent chipping. It is also vegan and cruelty-free.

How To Apply Your Base Coat

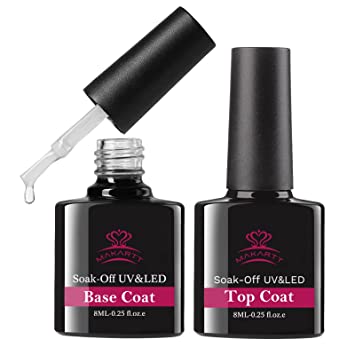
Apply a thin layer onto your nail. If you are using a gel polish base coat, cure the coat under a UV light for at least 60-90 seconds. Some base polishes require you to wipe off the sticky layer and others do not. If you are using a standard base polish allow it to dry completely before moving on to the color coat.

These are just a few of the many great base coat brands on the market. When choosing a base polish, it is important to consider your individual needs and preferences. If you have weak or brittle nails, you may want to choose a base polish that is formulated with strengthening ingredients. If you are looking for a base coat that will help to prevent chipping, you may want to choose a rubberized base coat. With so many great options to choose from, you are sure to find the perfect base polish to help you achieve your desired nail look.

The Best Nail Polish Colors For Spring And Summer

The spring and summer seasons are ideal for experimenting with new nail polish colors. You can find the ideal color to suit your mood and personal style thanks to the wide variety of vibrant and upbeat tones available. The best seasons to experiment with nail color are spring and summer.

There are so many happy, uplifting hues available that you can always find one that suits your mood. We’ll talk about some of the best nail polish hues for the spring and summer in this blog post. Here are a few of the best nail polish colors for Spring and Summer:

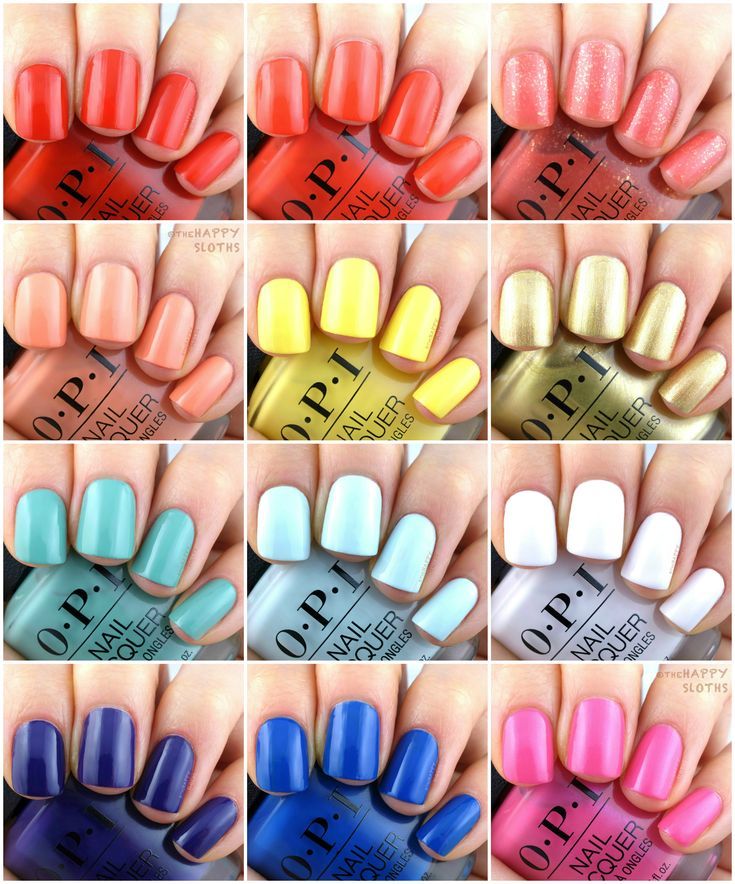
nail polish colors

Pastel colors:

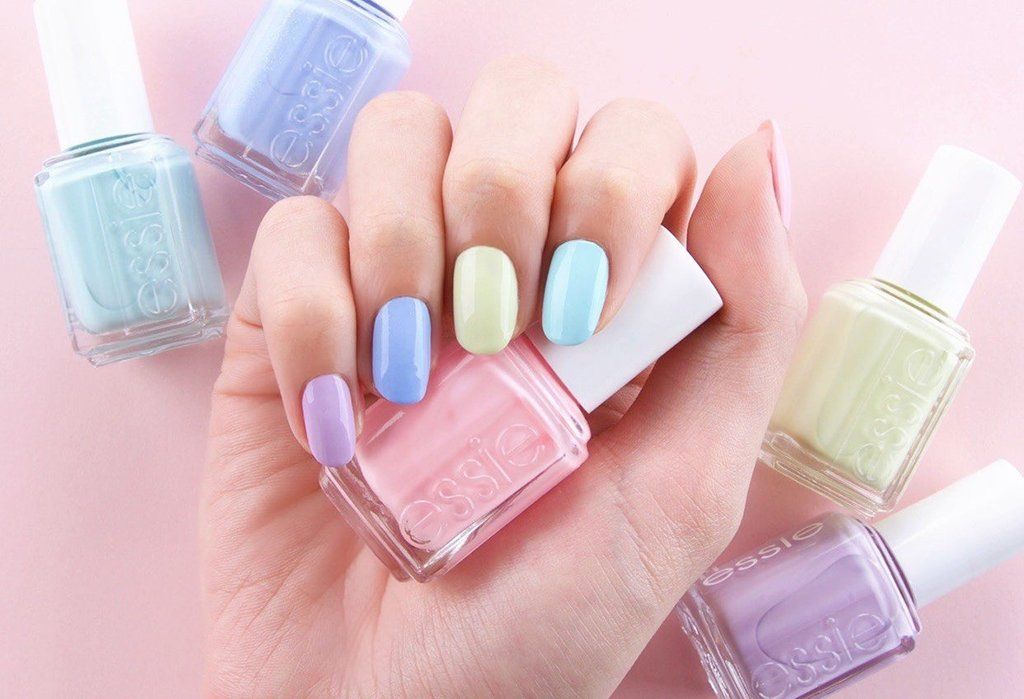
Pastel shades are perfect for a light and airy look. Try a pastel pink, blue, or green for a touch of femininity. Pastel colors are perfect for the Spring and Summer months. They’re soft and pretty and will go with almost anything you wear.

Bright colors:

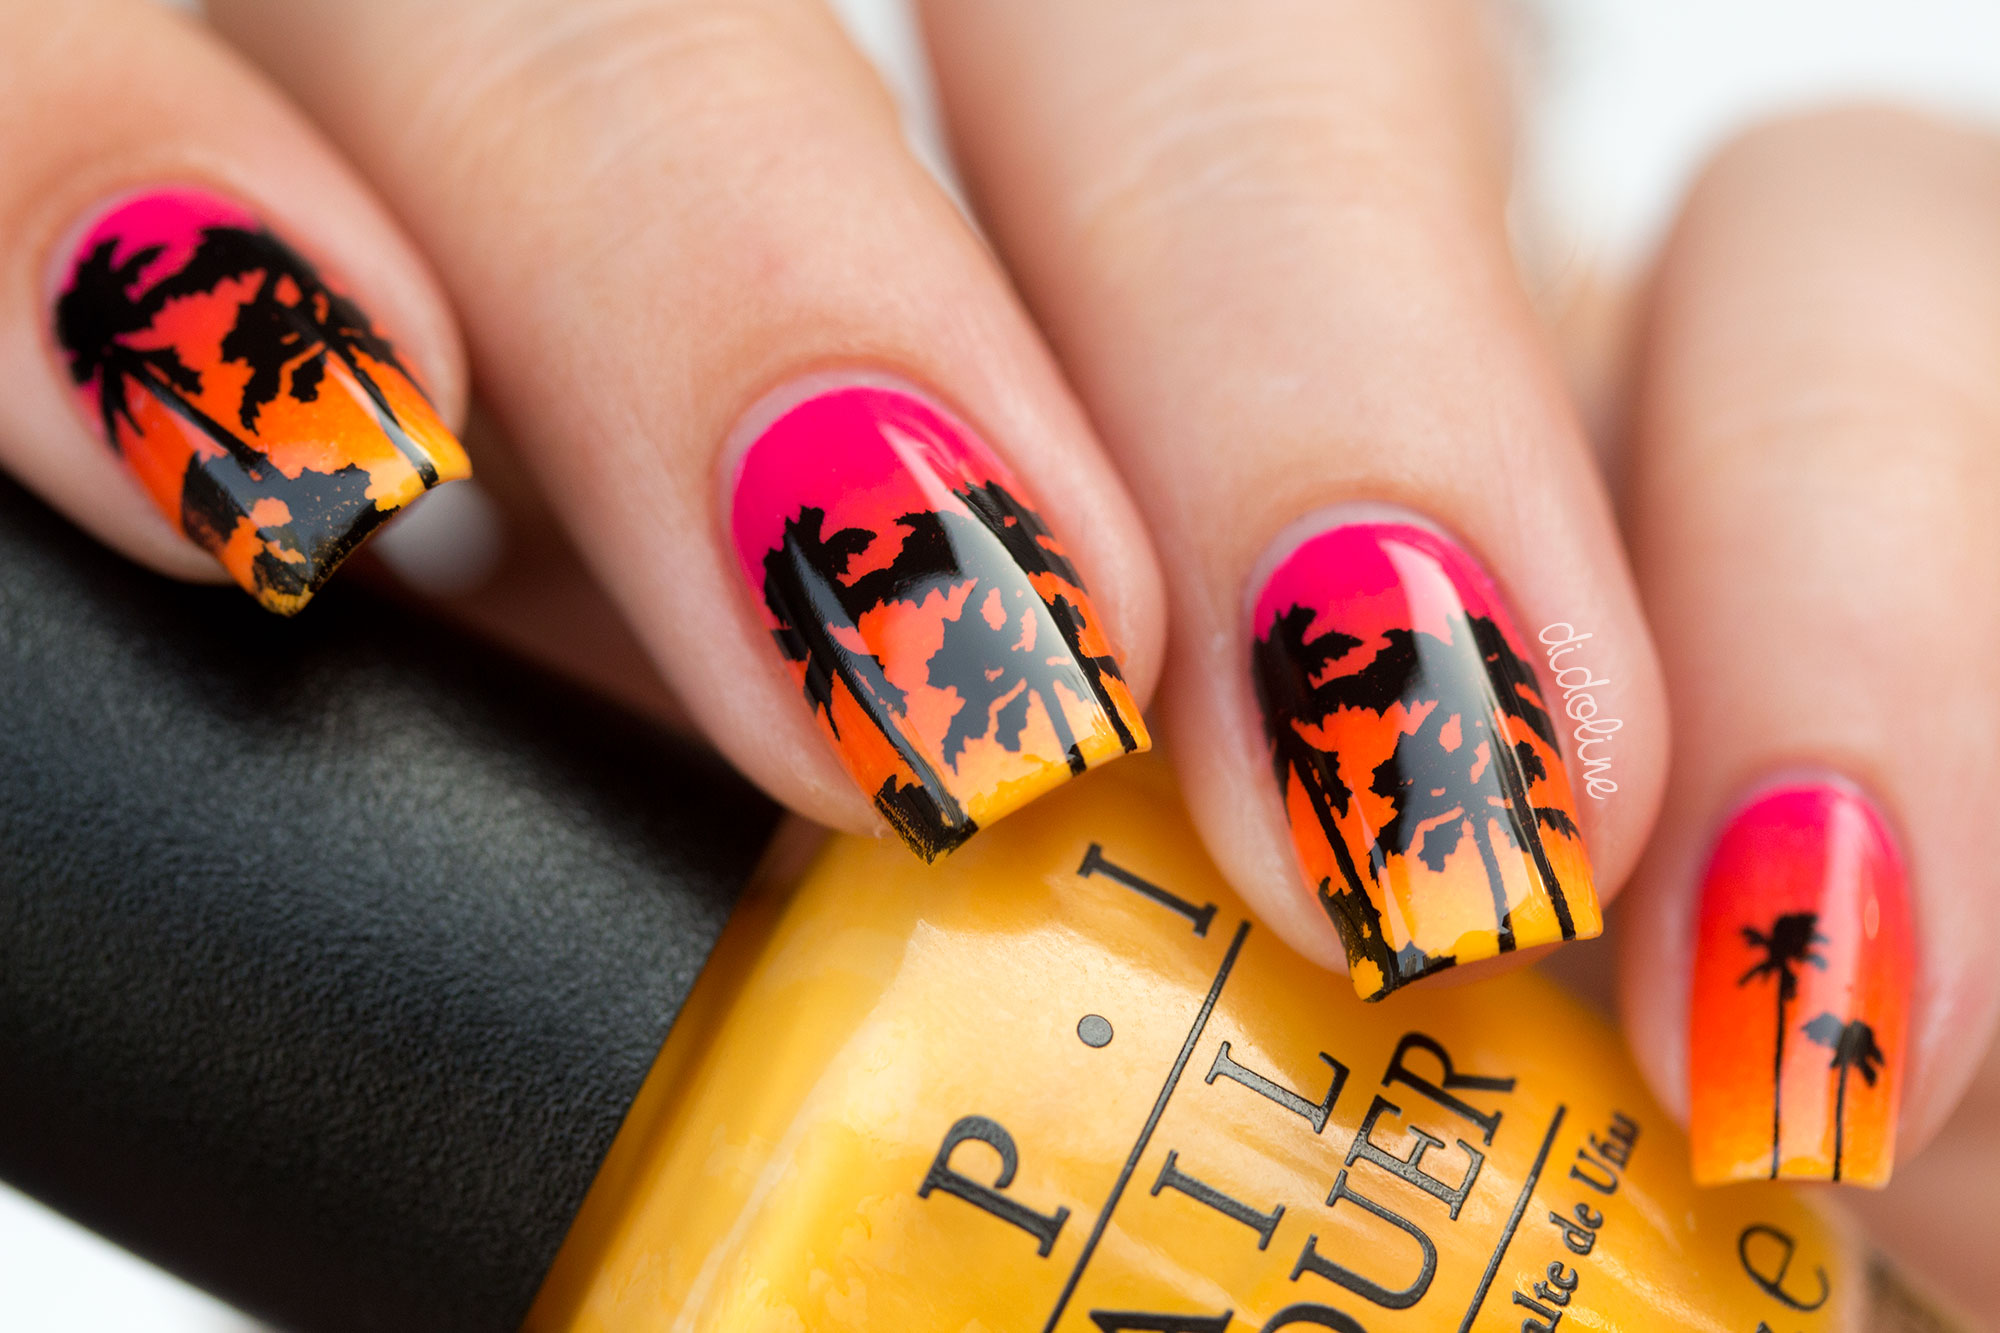
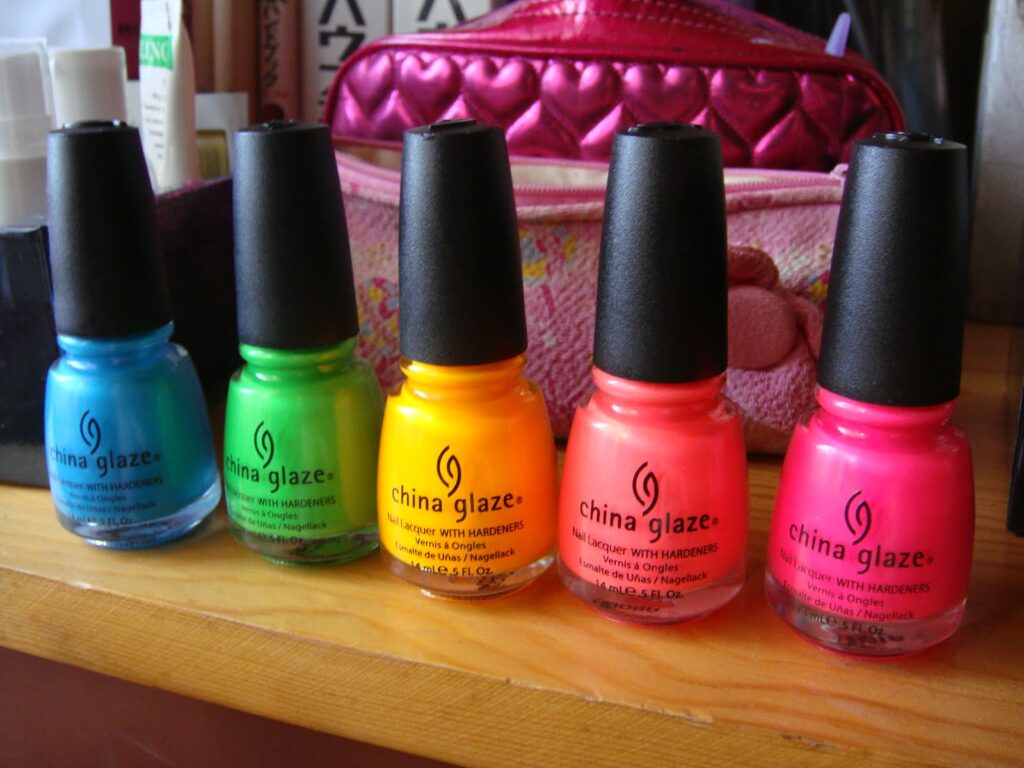
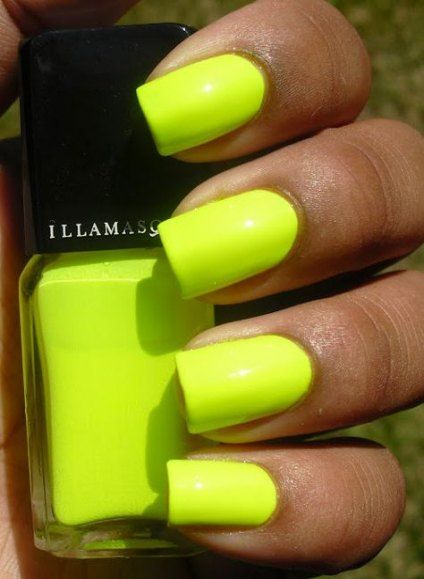
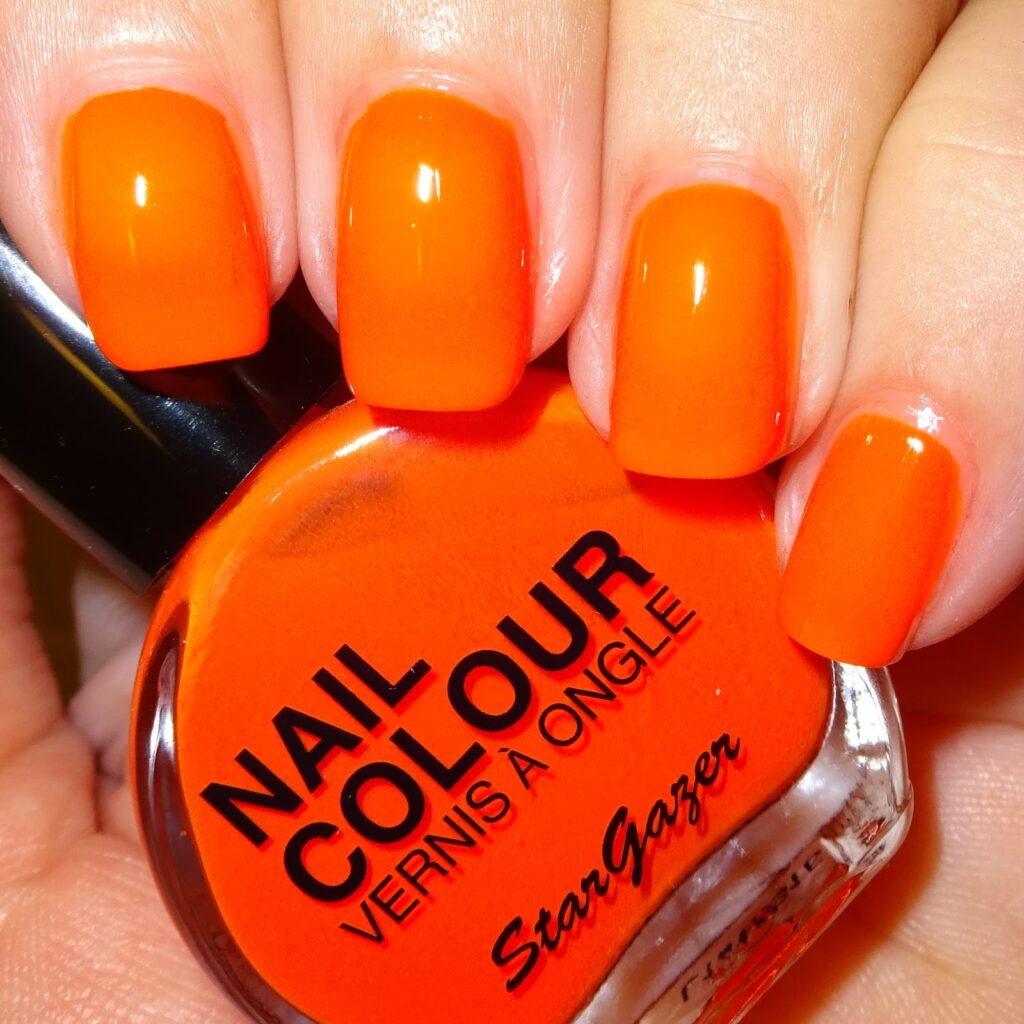
Bright colors are colors that command attention due to their hue, brightness, or both. Bright colors are perfect for the Summer months. They’re fun and festive, and they’ll help you stand out from the crowd. Try a bright red, orange, or yellow for a pop of color. Contrast a bright color against a black background or darker hue. You can use gold foil for a touch of luxury or combine it with white for a bold and simple statement.

Neutral colors:

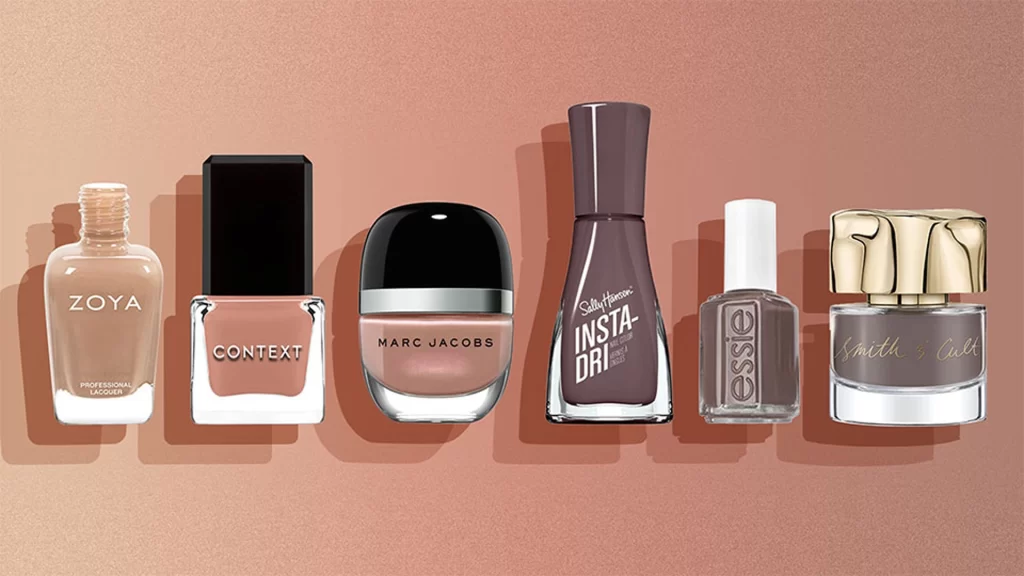
Neutral colors are always a good choice, but they’re especially popular during the Spring and Summer months. They’re versatile and easy to wear and will go with almost anything in your wardrobe. If you prefer a more understated look, you can always go with neutral colors like white, beige, or gray. These colors are perfect for any occasion and will never go out of style

nail polish colors

Light pinks and blues:

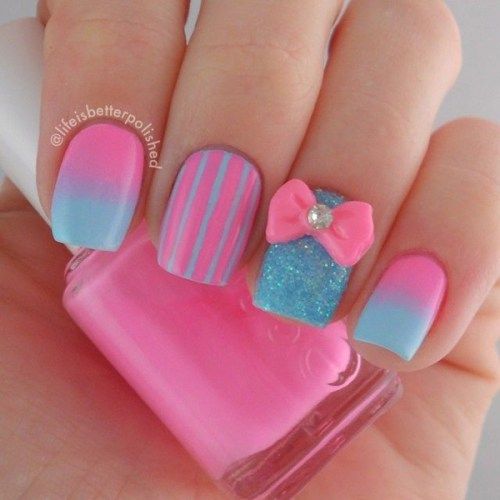
Although very different hues, these colors can appear complementary together. Light blue and light pink colors are perfect for a day at the beach or a picnic in the park. They are also very flattering on all skin tones. These colors are very versatile and can be incorporated into a multitude of designs.

nail polish colors

Yellows and greens:

Yellow and green are both colors that can be associated with freshness, positivity, and optimism. When used together, these colors can create cheerful and energetic designs. Yellow and green colors are perfect for a day at the zoo or a hike in the woods. They are also very cheerful and eye-catching.

Oranges and reds:

These colors are perfect for a day at the amusement park or a barbecue in the backyard. They are also very bold and attention-grabbing.

Metallics:

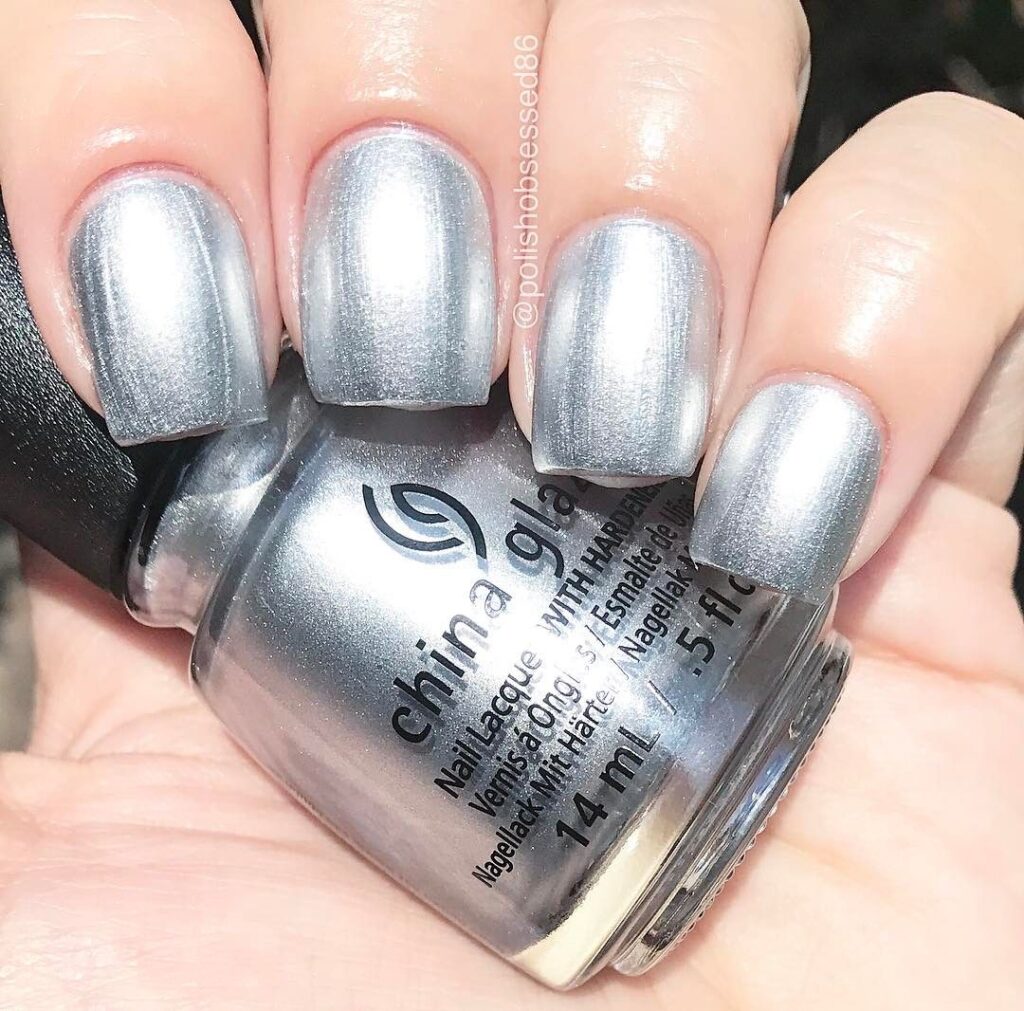
Metallics are perfect for a glamorous look. Try metallic gold, silver, or rose gold for a touch of luxury. Metallic colors are usually cool silvery and platinum tones. They can also be found in warm tones of gold, copper, and bronze. Using these colors in your nail designs will allow you to create a wide variety of bold sophistication and elegance.

How to choose the right nail polish colors

When choosing a nail polish color, there are a few things you should keep in mind. These things include the following:

Your skin tone:

Skin tones will affect how the nail polish color looks on you. If you have fair skin, you’ll want to choose light colors. If you have dark skin, you can choose brighter colors. Some colors will look better on certain skin tones than others. If you’re not sure what colors to choose, ask a friend or family member for advice. Remember that personal preference also plays a role in choosing colors, so don’t be afraid to experiment and find what works best for you. Additionally, consider the occasion and setting when choosing colors as some may be more appropriate than others. Always be sure to wear what makes you feel confident and comfortable.

Your personal style:

Consider the occasion and dress appropriately. For example, if you’re going to a job interview, opt for more formal attire. If you’re going to a casual outing with friends, choose something more relaxed and comfortable.” If you’re not sure what colors to choose, experiment with different colors until you find one that you love.

Nail polish colors

The occasion:

If you’re attending a formal or special event, you’ll want to choose a more muted, neutral, or formal color.  If you are just running errands or going out with friends, you can choose a more casual color. For a casual event, you can choose a brighter or more fun color.

Your mood:

If you are feeling happy and cheerful, you might want to choose a light and airy color. If you are feeling more serious or sophisticated, you might want to choose a darker or more muted color.

Eye color:

Your eye color will also affect how the nail polish color looks on you. If you have blue eyes, you’ll want to choose colors that complement blue. If you have brown eyes, you can choose any color.

Hair color:

Your hair color will also affect how the nail polish color looks on you. If you have blonde hair, you’ll want to choose colors that complement blonde hair. If you have brown hair, you can choose any color.

You’re sure to find the ideal color to suit your mood and style among the great nail polish shades available. So feel free to experiment with various hues until you discover the ideal one for you. There is a nail polish color out there that is ideal for you, no matter what your mood or the occasion. Whether you prefer bold and bright shades or more subtle and muted tones, there is a wide variety of nail polish colors available to choose from. Don’t be afraid to step out of your comfort zone and try something new – you might just discover your new favorite color! This is a great way to keep your look fresh and exciting.

The Benefits Of A Milk Bath For Better Skin Health

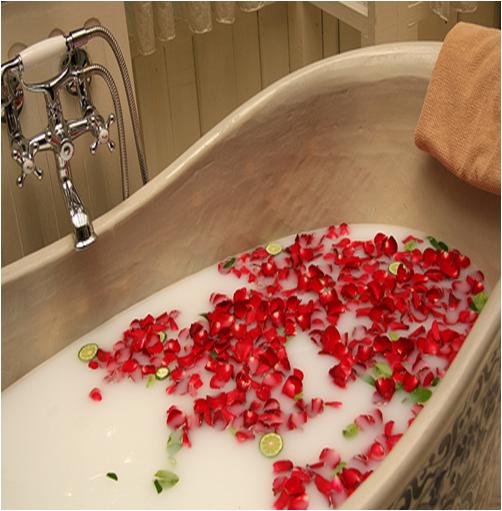
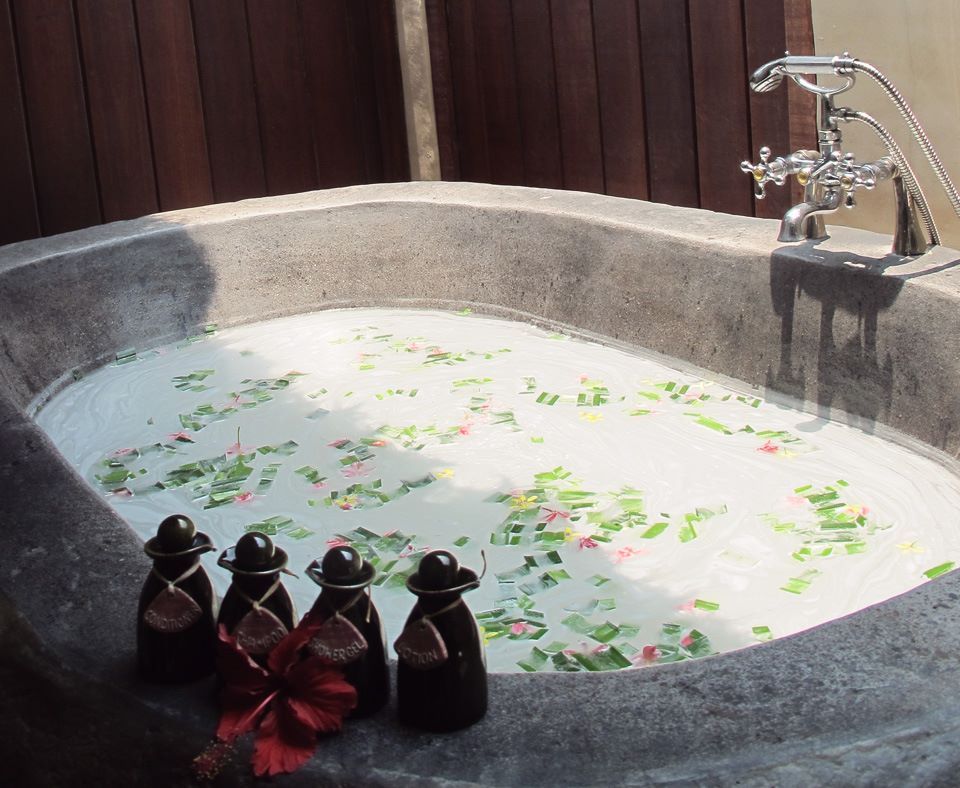
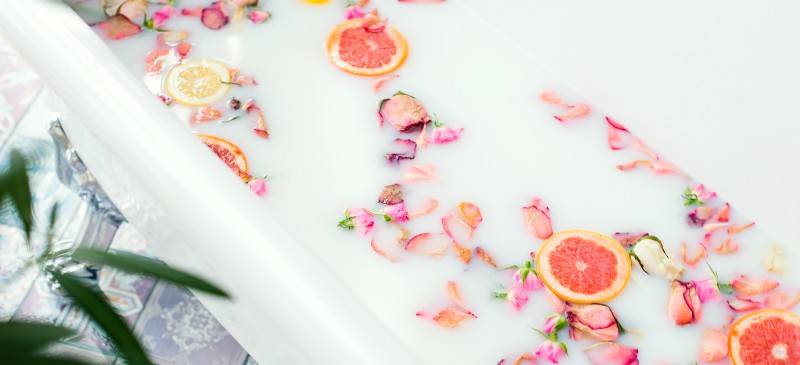
Milk baths have been used to bathe and care for skin since the beginning of time. Milk is thought to benefit the skin in a number of ways, including calming, exfoliating, and moisturizing. The benefits of your bath will vary depending on the milk you use. Taking a milk bath is an alternative to bathing in water. There are also frequently added scents like honey, rose, daisies, and essential oils.

How Does Milk Benefit The Skin?

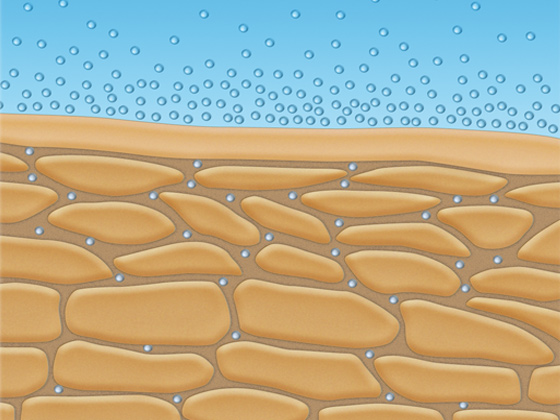
There are many health benefits of milk on the skin. Lactic acid, an alpha hydroxy acid, is used in milk baths to dissolve the proteins holding together dead skin cells. A common DIY treatment for a number of skin conditions is a milk bath. They are reputed to be helpful for soothing, healing, and moisturizing the skin.

There are many benefits to taking milk baths. Some of the benefits include:

Moisturization:

The milk in your bath can help to moisturize the skin and keep it hydrated. Milk is a good source of fat and protein, which can help to moisturize the skin. Milk is a good source of water, which can help to hydrate the skin. Milk can help to soften the skin.

Milk also contains lactic acid, which can exfoliate and brighten the skin, making it a popular ingredient in skincare products. Additionally, the proteins in milk can help to strengthen and nourish the skin. Raw milk is rich in sodium, potassium, and calcium. These minerals tighten the skin, prevent skin cell damage, and keep the skin younger.

Exfoliation:

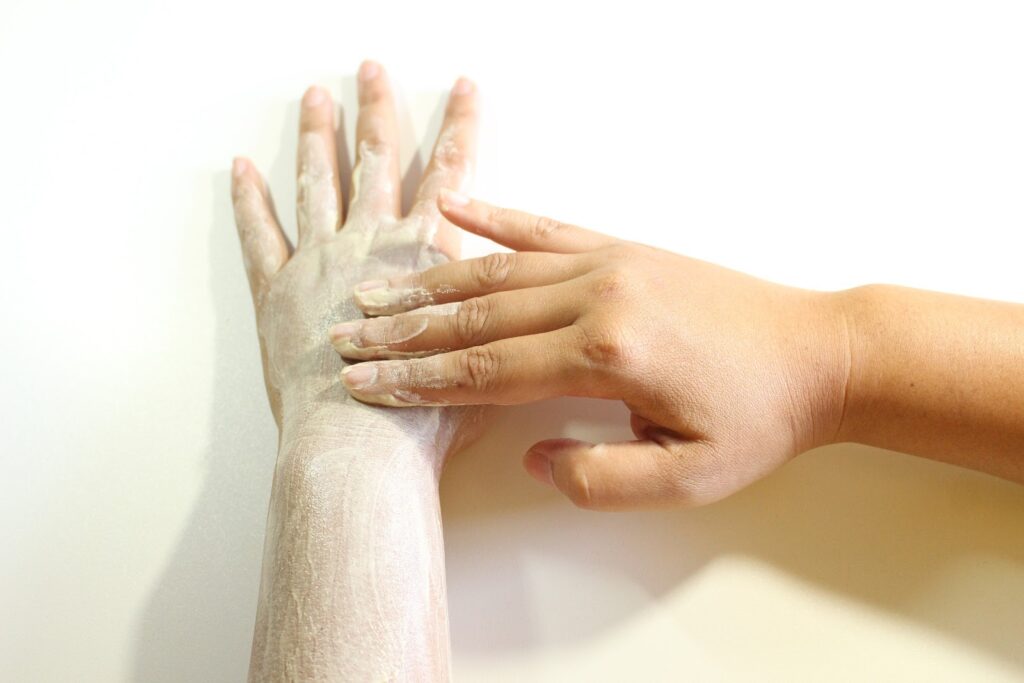
The use of milk in your bathtime regimen can help exfoliate and remove dead skin cells from the skin. A smoother, more radiant complexion may result from this. For people with sensitive or irritated skin, adding milk to your bath water is a great option because they are also known to have a calming effect on the skin. Milk can assist in exfoliating the skin, removing old, unhealthy skin cells to reveal fresh, new skin.

A milk bath’s use of milk can help exfoliate and remove dead skin cells from the skin. A smoother, more radiant complexion may result from this. For people with sensitive or irritated skin, milk baths are a fantastic option because they are also known to have a calming effect on the skin. Milk can assist in exfoliating the skin, removing old, unhealthy skin cells to reveal fresh, new skin. A raw milk scrub is helpful for removing dead skin cells, lightening skin tone, and removing blackheads and whiteheads.

Soothing:

In a milk bath, the milk can calm the skin and lessen inflammation, causing a calming effect. “The protein found in dairy products can help promote skin elasticity as we age,” says Dr. Beall. Milk also contains retinol, a known anti-aging and skin-restoring antioxidant.

Relaxation: Milk baths can be relaxing and help to reduce stress. Milk baths can be a relaxing and calming experience.

Healing: Milk can help to heal and repair the skin. Milk contains a number of nutrients that can benefit the skin, including protein, calcium, and vitamin D.

Improving elasticity: Milk can help to improve the elasticity of the skin, making it more firm and youthful-looking.

How to take a milk bath

A milk bath is a bath that uses milk as the primary liquid. Milk baths are a popular way to relax and rejuvenate the skin. To take a milk bath, simply add milk to a warm bath and soak for 15-20 minutes. You can also add essential oils or other skin-care products to the bath.

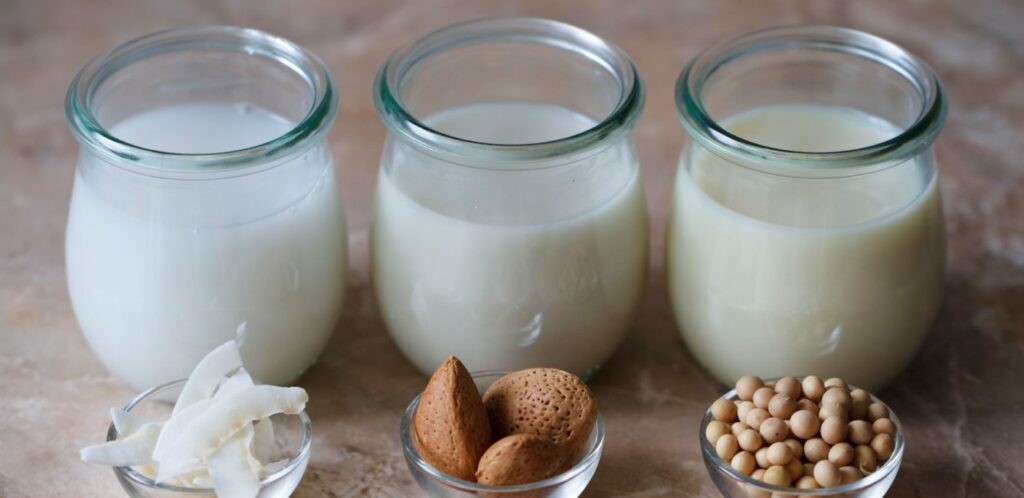
Types of Milks you can use:

  • Coconut
  • Almond
  • Oat milk
  • Goat milk
  • Buttermilk
  • Breast Milk

To take a milk bath, you will need

A pitcher
Bathtub
Water
Towel
1 cup of milk or powdered milk
1 tablespoon of honey
Bath Soap
10 drops of essential oil (optional)

Other Items You May Want To Add To Your Bath

Almond MealBergamot oilLavender
OatmealGeranium oilNutmeg
Corn StarchVitamin E oilSea salt
SeaweedEssential OilsHoney

Preparing Your Bath

  1. Fill a bathtub with warm water.
  2. Fill a pitcher with milk.
  3. Add enough water to the pitcher to make it the desired consistency.
  4. Add the honey, and essential oil if it is being used to the pitcher.
  5. Stir your mixture to blend the elements together.
  6. Add your bath soap to the bathtub.
  7. Pour the milk and water mixture into the bathtub.
  8. Soak in the bath for 15-20 minutes.
  9. Rinse off with warm water.

Milk baths are a popular home remedy with many benefits for the skin. They can be a relaxing and calming experience, and they can help to moisturize, soothe, and heal the skin. Milk baths are a great way to relax and rejuvenate the skin. There are many benefits to taking a milk bath, including hydration, nutrition, softening, moisturizing, healing, soothing, and relaxation. Milk baths are a great way to moisturize, exfoliate, and soothe the skin. They can also be relaxing and help to reduce stress. If you are looking for a way to pamper your skin, a milk bath is a great option.

Risks

People with a milk allergy should avoid milk baths. Simply coming into contact with milk can lead to allergy symptoms like itchy skin, a rash, and even hives. Opting for plant-based milk may be a safe alternative if you know that you aren’t allergic to that type of milk.

For the lactose-intolerant, taking a milk bath is likely safe because it’s not being ingested. To be sure, try a patch test with the milk you’d like to use first to be sure it won’t cause any adverse skin reactions. You can also go with lactose-free milk, like coconut or almond milk.

If you’re making a milk bath for a baby, skip the essential oils and other add-ons, like honey and salts. Simply add breast milk and warm water.

Superstitious Is As Superstitious Does, But Don't Split The Post!

Are you superstitious?

Are You Superstitious?

Yes, I am a very superstitious person. A lot of people don’t believe in superstitions but I do. It’s not necessarily the fact that I believe in them, it’s the fact that I don’t want the incorrect outcome to be due to my disbelief and superstitions. If that makes any sense.

What is a superstition?

According to Wikipedia, superstition is a term commonly used to refer to a religion that may not typically be practiced by the majority of the given society. A superstition is also stated to be any belief or practice considered to be irrational, supernatural, or attributed to fate or magic. It can also be proceeded by supernatural influence or fear of that which is unknown.

10 Superstitions You Have Probably Already Heard

1. Don’t Split The Pole.

The one superstition that I do not break is the one where you are not supposed to split the pole. Splitting the pole is an event in which two or more people are walking together in one direction. This superstition requires a pole to be nearby in which they will need to walk around. Splitting the pole happens when one or more people in the group walk in opposite directions of the pole. It’s supposed to be the bearer of bad news splitting the pole. We will go do some more research on the meaning of this.

Are you superstitious about superstitions?

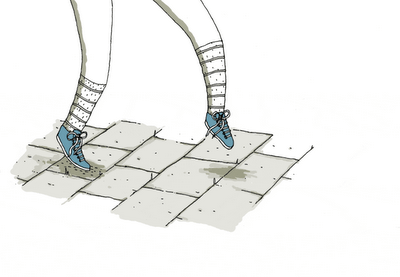
2. Step on a crack and break your mother’s back.

This superstition was intended to prevent you from stepping on cracks in the street or pavement. Upon further research, I came across an article that stated that the original saying was “Step on a crack and your mother will turn black”. I don’t have any ideas as to why this saying came about and what it may actually mean. I have heard this superstition plenty of times growing up as a child but never understood it. It could be a pregnancy saying. Meaning childbirth and labor pains. That’s the only explanation I can give without going too much into detail about conception and labor.

superstitions of itchy palms

3. If your palm is itching that means you are coming into money.

It said that when your right palm itches that are a sign of gain and if your left palm is itching that is a sign of loss. An itchy palm can mean that you are coming into some money but it could also be an itch. I’m not so sure about the truth of this superstition because there may be plenty of wealthy people in the world who never noted an itchy palm.

Are you superstitious about superstitions?

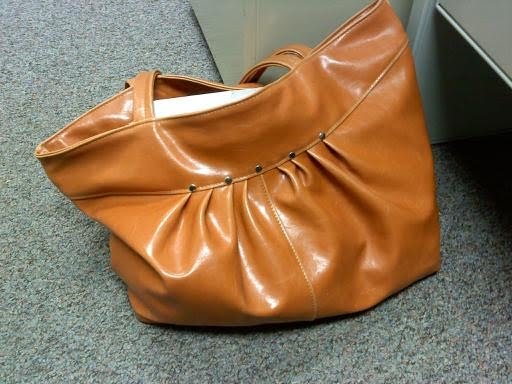
4. If you put your purse on the floor you’ll stay broke.

This would mean that putting your purse on the floor could signal that there’s nothing valuable in it. This also goes without saying. I don’t usually put my purse on the floor because I kinda believe this superstition. I also think that it could be a great way to keep the thieves away. Having your purse on the floor could indicate that you don’t really care about it. Basically, this saying in my opinion means that you like throwing your money in the trash. It could signal that you are irresponsible and don’t take care of your things. You may also be wasteful with money and careless with your possessions.

Are you superstitious about superstitions?

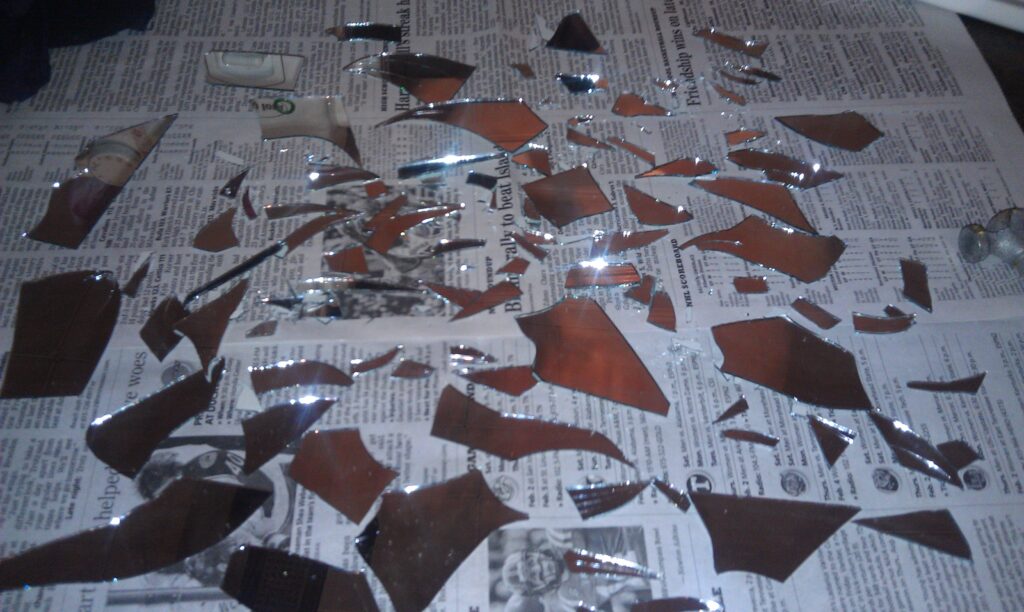
5. If you break a mirror you will have 7 years of bad luck.

This superstition is pretty much self-explanatory but we will go more in detail about this. If you break a mirror it could mean that you will start to look ugly. This is especially true if it was the only mirror that you had. Most people use a mirror to perfect their appearance so not having it could mean you may look less attractive. The mirror may have been an heirloom so not having it could be very disappointing. Perhaps it was a very expensive item and replacing it will cost you a fortune. That could seem like a bit of bad luck having to replace it.

Breaking a mirror depending on the type size and location can also cause injury. Getting a cut, a bruise, or being pierced by the broken glass is never a good thing. Many people would equate that with bad luck as well. While this is a known superstition it’s more likely common sense in my opinion. I still try my best not to break a mirror.

Are you superstitious about superstitions?

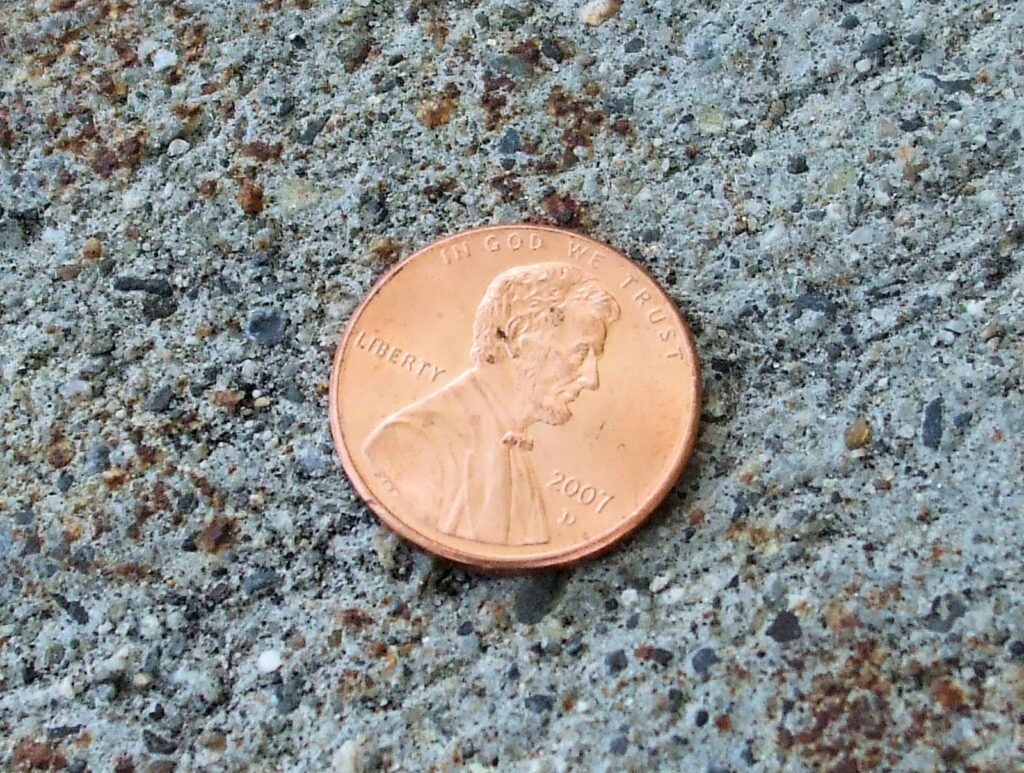
6. Find a penny and pick it up, all day long you’ll have good luck.

This is another one of my favorite superstitions. I don’t think this is much of a superstition but more of a old wives tale so to speak. Many people loose change on a daily basis. So dropping a penny would constitute bad luck since you are essentially losing money. But picking it up could bring you good luck since you actually realized you dropped it. In the same way, a person finding a penny or other loose change on the ground can indicate an increase in funds. Even if it’s only a penny it’s more than you started out with.

This saying also has an additional twist. It is alleged that when you do find the penny you are only supposed to pick it up when it’s on heads. If you pick it up when it’s on tails it is also a signal of bad luck. I make sure that I always flip the penny over to heads before I pick it up.

Are you superstitious about superstitions?

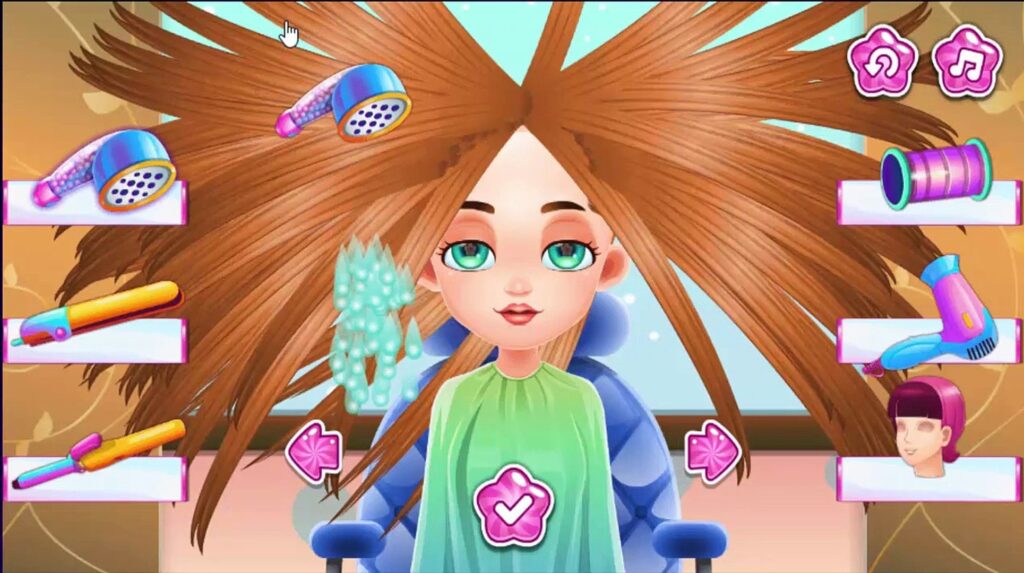
7. If you let people play in your hair, your hair will fall out.

I have heard this superstition a number of times. It is partially true to my knowledge. It is basically stating that you shouldn’t have a lot of people doing your hair. If you do it may begin to fall out. This is true because nobody knows your hair better than you do. And many hair stylists care for your hair differently. One stylist may care about the health of your hair and another may just be trying to rush through to get a paycheck. Some stylists may actually damage your hair intentionally to ensure that you will return for additional services.

Are you superstitious about superstitions?

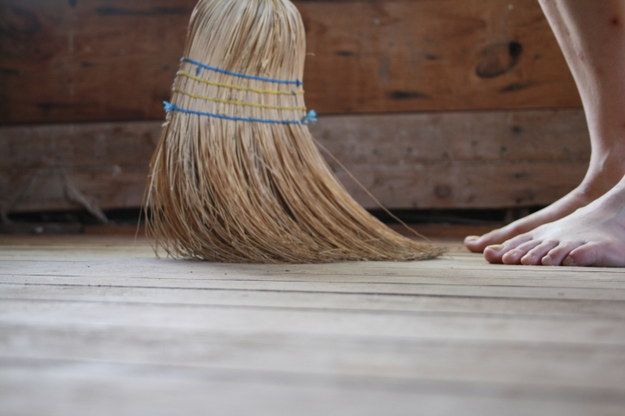
8. If you let someone sweep your feet you’ll never get married.

This is basically someone sweeping you off your feet. Once you get swept off your feet I’m pretty sure you’ll never get married. That is pretty much all the information that I have on that superstition. I just assumed that much since they say that once you are married your spouse should carry you through or across the threshold.

If you read the Bible it states that a woman should never divorce her husband and vice versa. So after being carried over the threshold, similar to being “swept off your feet” you wouldn’t get married after that. I could go into more detail about my thoughts on the subject but I rather not get too deep into religion and things that matter in this article.

Some other common superstitions include suspicions tied to specific animals such as black cats not crossing your path. If one does cross your path or walk across your feet it is supposed to give you bad luck. Other superstitions include certain numbers such as the number six and Friday 13th bringing you bad luck. Walking under a ladder, throwing salt over one shoulder, or opening an umbrella indoors is also believed to bring bad luck. This could also include wearing a hat indoors.

If you’re getting your hair done it said that counting the number of braids you have on your head can also be a sign of bad luck. Superstitions that aren’t as extreme can include knocking on wood to prevent bad luck when two people say the same thing at the same time. Crossing your fingers will bring you good luck.

For example, let’s say you split the pole earlier in the day. Then you realize that you left your lunch at home when it comes time for you to take your break. Now the “bad luck actually occurred before you split the pole. Your subconscious mind will tell you that the reason you left your lunch at home was due to you splitting the pole earlier that day.

After creating this post I realized that I may be a bit more superstitious than I originally thought I was. Superstitions are not actual factual events that are known to occur. They are more likely instances that could trigger other events if you believe in those types of things.

A Raging Sumatran Tiger Basking In The Sun

Which animal would you compare yourself to and why?

If I had to compare myself to an animal I will compare myself to a tiger. This is due to many reasons but the first one is because it is my favorite animal. I would have one other choice to compare myself to an animal and that will be a snake. I know this seems like a very unsettling answer but there are many reasons why I would compare myself to a snake. The first reason will be to shed the skin that I just outgrew.

The second reason I would want to compare myself to a Sumatran tiger is that we share similar facial features. I know this may sound weird but I feel as if we look like relatives. Meaning that if I had to choose an animal to look like this would be a close resemblance. I also feel as if I share similar behavior patterns as a Sumatran tiger. I like the colors of these animals and their popularity according to society. Those are just a few factors that inspired my choice. Below are a few fun facts about this particular tiger species and what we can do to preserve their existence.

What is a Sumatran Tiger?

The Sumatran tiger is a population of Panthera tigris sondaica on the Indonesian island of Sumatra.It is the only surviving tiger population in the Sunda Islands, where the Bali and Javan tigers are extinct. Analysis of DNA is consistent with the hypothesis that Sumatran tigers became isolated from other tiger populations after a rise in sea level that occurred at the Pleistocene to Holocene border about 12,000–6,000 years ago. Sumatran tigers are solitary animals that live in dense forests.

Sumatran Tiger Conservation

The smallest and most vulnerable tiger subspecies are Sumatran tigers. They are listed as Critically Endangered on the IUCN Red List of Threatened Species. The only place where they can be found is on the Indonesian island of Sumatra, where they can be found living in a range of environments like forests, swamps, and mountains. The lone Sumatran tiger is best known for its power, agility, and intelligence. They are solitary creatures who spend the majority of the day sleeping and are most active at night. Currently, the number of wild Sumatran tigers is only between 400 and 500.

Sumatran Tiger Conservation

The description of the Sumatran tiger was based on two zoological specimens that were distinct from specimens of Bengal and Javan tigers in terms of skull size and striping pattern. Compared to the Javan tiger, it has wider stripes and darker coat color. On the back, flanks, and hind legs, there are lines of tiny, dark spots in between the regular stripes that tend to blend into spots near the ends of the stripes. Compared to other subspecies, stripes are more common in this one.

Males have a noticeable ruff, which is particularly noticeable in Sumatran tigers. The ruff in males is a distinguishing feature that helps in identifying them from female tigers. It serves as a visual sign of their dominance and plays a role in attracting mates during mating season. It also serves as a form of protection during fights with other males.

Sumatran Tiger Conservation

Sumatran tigers rarely use acacia and oil palm plantations, even when they are present, and strongly prefer uncultivated forests. The preference for uncultivated forests by Sumatran tigers highlights the importance of preserving natural habitats for their survival. The loss of their habitat and poaching have made them critically endangered. Even though they are in danger of going extinct, they are crucial to the ecosystem. This is accomplished by managing the populations of other species, such as deer and wild boar. Threats to Sumatran tigers include habitat loss, hunting, and conflicts with people.

The biggest danger for these tigers is habitat loss. Development, mining, and logging are destroying their forest homes. They are forced to interact with people more frequently as their habitat gets smaller, which may cause conflict. The fur, bones, and other body parts of Sumatran tigers are still hunted for use in traditional medicine and the production of high-end goods. Conflict with humans can also occur when tigers prey on livestock, which can result in being killed by farmers. They are threatened by habitat loss, poaching, and the illegal wildlife trade.

Sumatran Tiger Conservation

Sumatran tigers are hunted for their fur, which is used to make traditional clothing and accessories. They are also hunted for their body parts, which are used in traditional medicine. Sumatran tigers are losing their habitat due to deforestation and development. The island of Sumatra is home to a rapidly growing human population, which is putting pressure on tiger habitats. They prefer to use areas in natural forests that are higher up, have less annual precipitation, are farther from the edge of the forest, and are closer to the middle of the forest.

They strongly avoid forest areas with high human influence, such as encroachment and settlement, and prefer forests with dense understory cover and steep slopes. These preferences suggest that the species is adapted to living in undisturbed, mature forests with a complex topography and a diverse understory. Conservation efforts should focus on protecting these types of forest habitats to ensure the survival of the species.

Sumatran Tiger Conservation

Sumatran Tiger Conservation

You can help save Sumatran tigers by supporting conservation efforts, raising awareness, and choosing sustainable products. Support an organization that is working to save Sumatran tigers by making a donation. Inform people of what they can do to reduce the poor treatment of Sumatran tigers. You can start by selecting goods that aren’t constructed using tiger parts. Encourage ecologically sound forestry methods and cut back on the meat you eat.

A number of conservation efforts are underway to save Sumatran tigers, but they are still critically endangered. These efforts also include:

Sumatran Tiger Conservation

Creating tiger reserves: Tiger reserves are areas of land that are set aside for the protection of tigers. These reserves provide tigers with a safe place to live and breed. Tiger reserves also play a crucial role in maintaining the ecological balance of the area and preserving the biodiversity of the region. They also serve as a major tourist attraction, generating revenue for the local economy and creating employment opportunities for the locals.

Reducing hunting: Efforts are being made to reduce the hunting of Sumatran tigers. This includes educating people about the importance of tigers and enforcing laws against hunting. In addition, conservation organizations are also working with local communities to provide alternative livelihoods that do not involve hunting, such as ecotourism or sustainable agriculture. These efforts aim to create a sustainable future for both the Sumatran tigers and the people who live in their habitat.

Reforestation: Trees are being planted to help restore the Sumatran tiger habitat. This helps to provide tigers with food and shelter. Reforestation efforts also contribute to reducing carbon emissions and improving the overall health of the ecosystem. This can benefit other wildlife species and local communities who rely on the forest for their livelihoods.

Raising awareness: There are a number of organizations that are working to raise awareness about the plight of Sumatran tigers. This includes educating people about the threats to tigers and what they can do to help. These organizations also collaborate with local communities and governments to implement conservation measures, such as habitat protection and anti-poaching efforts, to ensure the survival of Sumatran tigers in the wild.

Sumatran Tiger Conservation
The Sumatran tigers face perilous future as efforts made to improve breeding in captivity – National – The Jakarta Post

By supporting Sumatran Tiger conservation efforts and raising awareness about the threats to these tigers, we can help ensure their survival. Four important Tiger Conservation Landscapes in Sumatra are the focus of a sizable project led by Fauna & Flora International (FFI). This is in collaboration with the Wildlife Conservation Society (WCS), the Zoological Society of London (ZSL), and Leuser Conservation Partners (FKL). Together, they occupy 69,000 km2, or 76% of the remaining tiger habitat and more than 70% of the Sumatran tiger population. The project improves the landscape’s protection, the ability to spot tiger conflicts, and the ability to provide communities with sustainable means of subsistence.

The World Wildlife Fund (WWF) works with governments across the 13 tiger range countries with wild tiger populations to build and maintain momentum around the conservation of tigers,

What Would My Secret Tattoo Body Art Look Like?

What tattoo do you want and where would you put it?

Let’s start by saying I don’t have any tattoos or body art. Not a single one. I have nothing against people covered in ink or extensive tattoo body art, it’s just something that I’ve never done. I do have two piercings outside of the standard earpiece piercings. One is a cartilage piercing at the top of my ear and the other is a belly button piercing.

Tattoo Body art

Tattoo Body Art Designs

I always fantasized or drummed up the idea of getting a tattoo. Upon my fascination, I actually wrote down a few tattoos that I may possibly like to get. The first tattoo that I dreamed of getting was a tattoo of a penguin sitting on an ice cube. This tattoo actually held sentimental value. When I was thinking about getting this tattoo I pick this for sex appeal as well as male branding in a sense. It will be the closest thing to getting a man’s name tattooed on my skin. This tattoo was going to be on my pelvic bone.

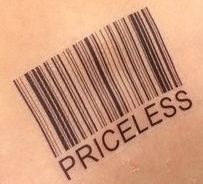
Then I thought of getting another tattoo inspired by the famous song “Treat Her Like A Prostitute” by MC Slick Rick. Now I know what you’re thinking, that this song is very vulgar. Yes, it is but I was attempting to clean that up with the tattoo choice that I’m getting ready to tell you. So this tattoo was going to be a barcode-type tattoo. And the serial number was going to be my date of birth.

This tattoo was going to be placed on the back upper portion of my shoulder. It was very simple and it will be a very quick and inexpensive tattoo. This was actually one of the first tattoo ideas that I had because it was small in nature and I thought it would be the least painful, to get my first tattoo.

Ink Master On TV

The third tattoo that I was thinking about getting was a tattoo that I saw online or on the Ink Master TV show. Ink Master is an American reality competition television series featuring an array of tattoo artists. The tattoo artists who participate in the ink competitions will be evaluated on their tattooing and related artistic abilities.

Each episode involves the elimination of one or more contestants. They will be judged by well-known tattoo artists and connoisseurs. Each season’s victor takes home a $100,000 prize, the title of Ink Master, and an acknowledgment feature in Inked Magazine.

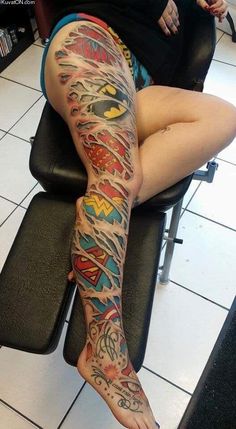
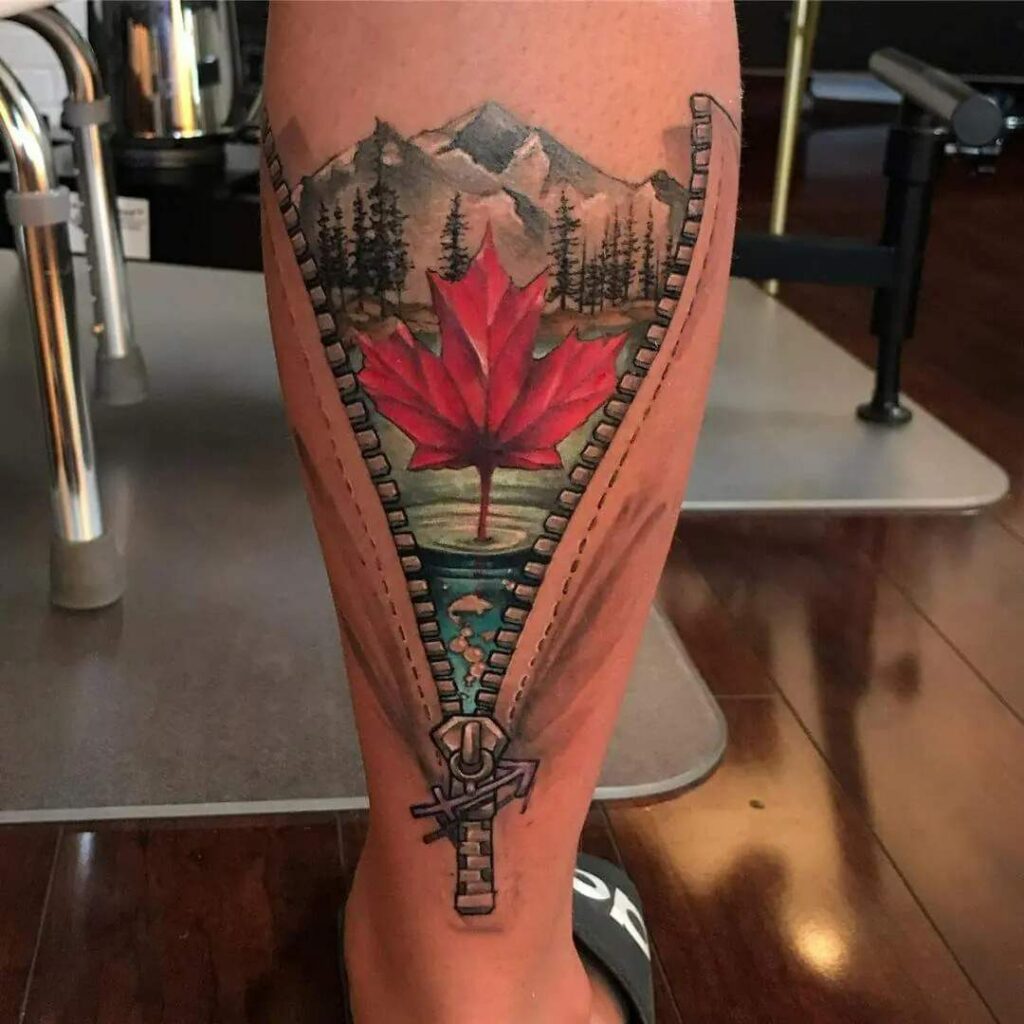
I can’t really remember exactly where I saw the tattoo but I thought it would be cute. This was one of the larger versions of this tattoo and it probably would hurt the most, but it was actually one of my favorite tattoos. When I first saw the tattoo it was like a zipper that was unzipped and inside the unzipped part of the tattoo there were various stars and colorful ribbons and things coming out of the unzipped part of the tattoo.

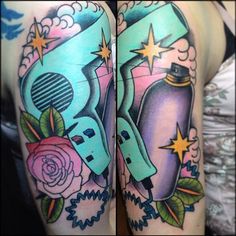
At this time I was just coming out of cosmetology school so instead of using the design of the original tattoo I was thinking of going something along the lines of cosmetology which would be scissors and Combs and brushes and maybe a blow dryer etc forming the inside of the unzipped part of the tattoo. This tattoo was going to be along my rib cage winding down towards my hip. The picture below isn’t the actual design I had visioned but the concept of the tattoo is very similar.

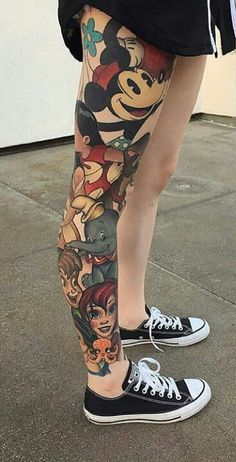
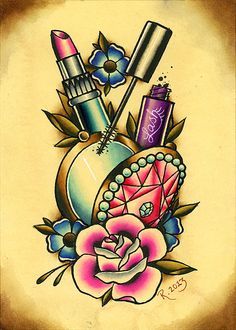
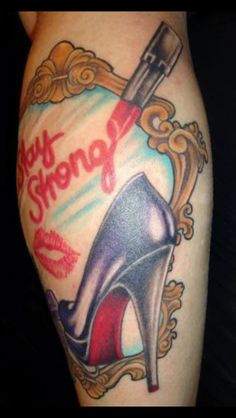
I believe these were the only tattoo that I had considered at the time. There could be more I just really can’t remember them right this second. While writing this post I ended up going to one of my favorite sites for more inspiration. Pinterest is a great website to use for all your out-of-this-world visual arts ideas. If you are in the market for a new tattoo or extreme body art head over there ASAP. I included a few photos of some of my favorite Tattoo designs and body art.

Is Snail Mucin For Skin A Real Thing?

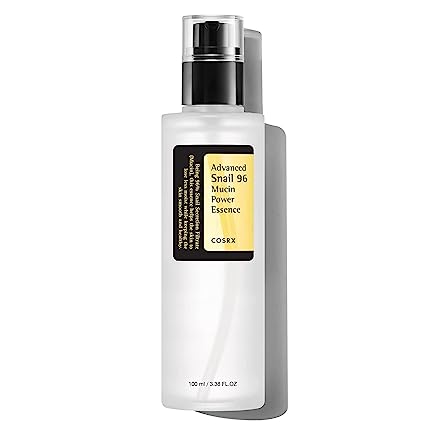
So I just happened to be on Amazon this morning and I came across a power-repairing face serum. This was while browsing for lipsticks and lip glosses. I clicked on the link and viewed the product. The product was a hydrating serum for your face. Created with “snail secretion filtrate” which is known as snail mucin for skin.

Now, this was a bit alarming but it was also intriguing. I have sensitive skin and I can’t use too many products that have foreign ingredients.

This is due to plenty of acne breakouts and skin irritations. The label states that it’s to be used for dark spots and fine lines. Created for all skin types such as oily, combination, sensitive, dry, and normal skin.

Snail Mucin For Skin Care

The Advanced Snail 96% Mucin Power Essence also has many benefits associated with snail secretion filtrate. Some of these include skin repair, hydration, and soothing. Using this product will rejuvenate your skin and prevent dryness while also rewinding the aging process. It’s intended to reduce dullness while soothing dehydrated skin.

Snail mucin for skin, snail secretion filtrate

What Is Snail Mucin?

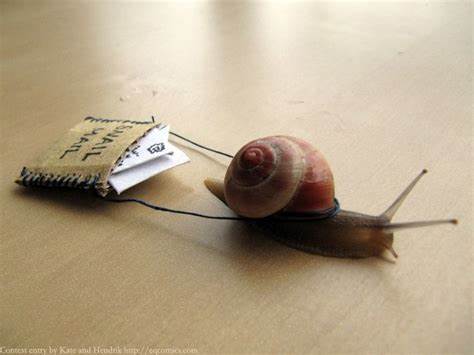
While most of those qualities listed above are typical in face serums, what is snail secretion filtrate anyway? So in order to find out I performed a quick Google search. Snail mucin or snail slime is a kind of mucus produced by snails. Yes, you read that right SNAIL SLIME. Similar to the mucus that comes from an actual snail seen crawling about the ground after a rainy day or hot and humid summer night.

“Although the use of snail mucin is a recent trend for beauty consumers, the use of snails and their slime date far back to ancient Greece, where they used the mucus to help reduce inflammation and help prevent skin aging,” says Dr. Anna Chacon, a board-certified dermatologist.

By Elaine K. Howley
Medically reviewed by Jeffrey Fromowitz, MD

Snail mucin is a substance excreted from snails, which is then used to create skincare serums, moisturizers, and creams. Products such as Cosrx Advanced Snail 96 Power Essence and Benton Snail Bee High Content Essence, are trending on social media. My query shows that there isn’t much research on the benefits of snail mucin for skin.

It’s said to contain hyaluronic acid, antioxidants, zinc, and all those other growth factors. Many of them are designed for hydrating, plumping, soothing the skin, and building collagen. It’s also good for clearing wrinkles and smoothing the skin’s texture. Wound healing purposes such as scabs and minor cuts.

Products that contain this snail mucin filtrate should be followed by your normal cleanser, toner, and moisturizer. If you want to add extra plumping or a hydration boost adding this snail mucin filtrate will be a good addition to your skincare routine.

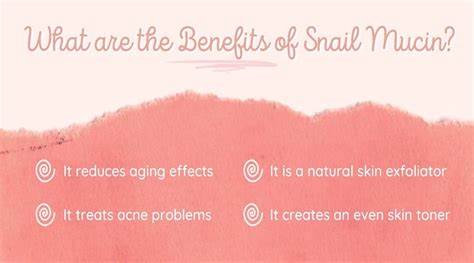
What are the benefits of a snail secretion filtrate?

  • It has great anti-inflammatory properties
  • It’s known to treat most dry skin conditions
  • It firms and plumps your skin
  • Eliminates most acne, scars and skin blemishes
  • It’s perfect for fighting eye wrinkles and smile lines
  • Also known to treat skin infections and eliminate blackheads

With all that being said, I’m all for healthy skin and scientific research. I don’t think I will actually go out and purchase a product that contains a snail secretion filtrate per se. In the event you happen to sneak this ingredient into my facial products, I’m not saying I would turn it down. Honestly speaking most people don’t actually read the ingredients in the products they use on their face and skin. I think that this is actually an interesting idea and may be worth a try.

COSRX Snail Mucin 96% Power Repairing Essence

Formulated with 96.3% Snail Secretion Filtrate, this essence repairs and rejuvenates the skin from dryness and aging. It improves skin vitality by reducing dullness and soothing dehydrated skin.

Placenta is another weird skin trend that I’ve heard about but never tried. I know plenty of people use placenta in skincare and anti-aging creams. I’ve just never tried it. If you’re in the market for a blemish-fighting, anti-aging, skin plumping, facial product I have listed the best-selling snail secretion holy grail in the boxes below. If you are willing to try these items be sure to have a field day! If it actually works leave your comments, recommendations, and skin care tips down below.