In the world of nail art, achieving intricate designs and patterns can often seem like an art form reserved for professionals. With the introduction of nail striping tape, even the most novice nail artists can create captivating nail art designs with ease. This versatile tool has revolutionized the way we approach nail art, making it accessible and fun for everyone.
What is Nail Striping Tape?
Nail striping tape is a thin adhesive tape with varying widths and colors. It offers a user-friendly approach to nail art, allowing you to create crisp, clean lines and geometric patterns with minimal effort. It is typically applied to the nail before painting, creating clean lines and precise designs that would be difficult to achieve with a freehand brush. Once the polish is dry, the tape is simply peeled off, leaving behind a perfectly defined pattern.
With the introduction of nail striping tape, even the most novice nail artists can create captivating nail art designs with ease. This versatile tool has revolutionized the way we approach nail art, making it accessible and fun for everyone.

Benefits Of Using Nail Striping Tape
The benefits of using nail striping tape are numerous:
- Ease of Use: Even beginners can create intricate designs with ease.
- Precision: Nail striping tape produces clean, precise lines and shapes.
- Versatility: It can be used to create a wide variety of designs, from simple stripes to complex patterns.
- Variety: Nail striping tape comes in a wide array of colors and widths to suit any style.
- Cost-Effective: Nail striping tape is an affordable way to create stunning nail art designs.
Essential Tools for Nail Striping Tape
To get started with nail striping tape, you will need a few essential tools:
- Nail striping tape: Choose a variety of colors and widths to suit your needs.
- Scissors or nail art tweezers: These are used to cut the tape to the desired length and apply it precisely.
- Base coat and top coat: These are essential for protecting your nails and ensuring the longevity of your design.
- Nail polish: Choose colors that complement the striping tape you have selected.
- Cotton swabs or acetone: These are used to clean up any mistakes.
Getting Started with Nail Striping Tape
Once you have gathered your tools, you are ready to create your first nail art design using nail striping tape. Here’s a step-by-step guide:
- Prep your nails: Apply a base coat to protect your nails and create a smooth surface for the tape to adhere to.
- Apply striping tape: Cut a piece of striping tape to the desired length and apply it to your nail. You can use a variety of techniques, such as creating stripes, chevrons, or geometric patterns.
- Apply nail polish: Apply a thin layer of nail polish to your nails, ensuring that the polish covers the tape completely.
- Remove striping tape: Once the polish is dry, carefully peel off the striping tape.
- Apply top coat: Seal the design with a top coat for long-lasting wear and added shine.
Nail Striping Tape Design Ideas
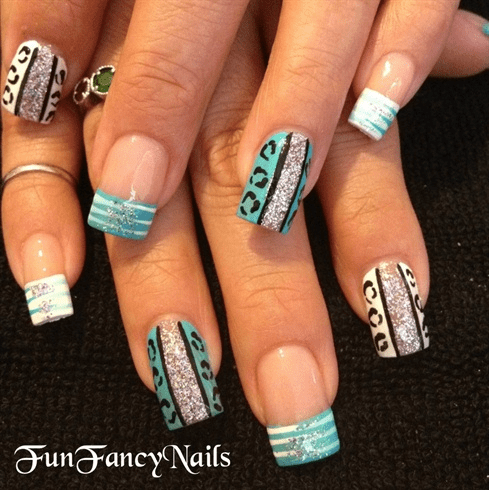
Nail striping tape is incredibly versatile and can be used to create a wide variety of designs. Here are a few ideas to get you started:
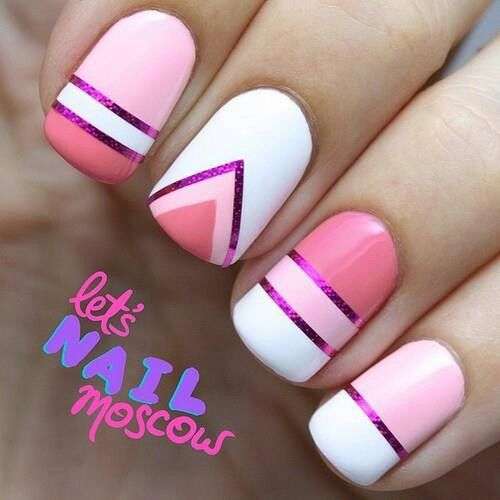
- Classic Stripes: Create simple stripes in various colors for a clean and modern look.
- Chevron Patterns: Create zig-zag patterns using striping tape for a festive and fun look.
- Negative Space Designs: Leave some areas of your nails unpainted to create a negative space effect.
- French Manicure with a Twist: Use striping tape to create a unique twist on the classic French manicure.
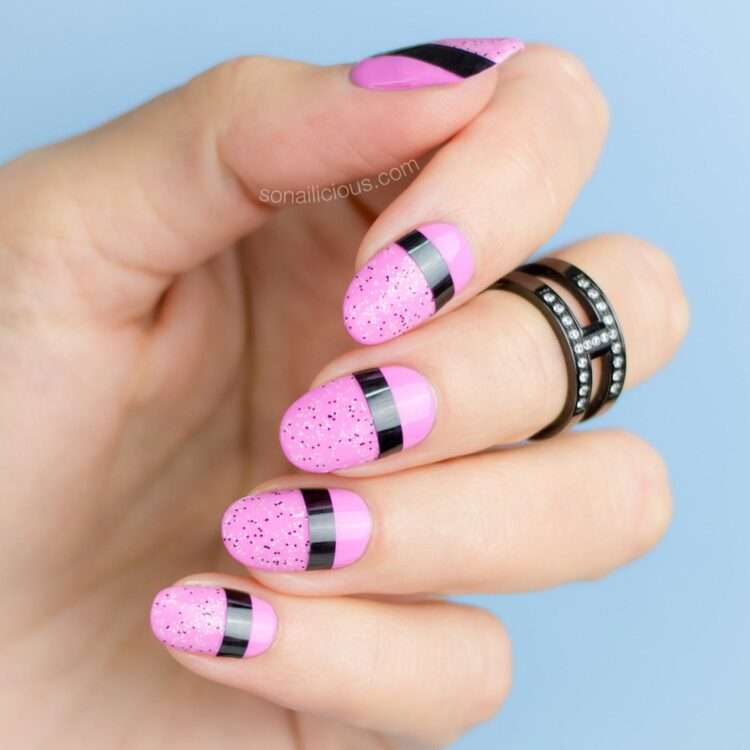
- Color Blocking Extravaganza: Embrace bold color combinations by using striping tape to create color-blocked designs. Divide your nails into sections and fill them with different colors, creating a striking visual impact.
- Classic Pinstripes: Elevate your nails with timeless elegance by adding thin stripes of varying colors. Experiment with different color combinations and stripe widths to create a unique look.
- Geometric Masterpieces: Explore the world of geometry by using nail striping tape to create intricate geometric nail art patterns like triangles, squares, and chevrons. Play with negative space and color combinations to add visual interest.
- French Manicure Twist: Reinvent the classic French manicure by adding a touch of color and flair with nail striping tape. Use thin stripes of contrasting colors to accentuate the tip line or add decorative elements to the base of the nail.
- French Manicure Twist: Reinvent the classic French manicure by adding a touch of color and flair with nail striping tape. Use thin stripes of contrasting colors to accentuate the tip line or add decorative elements to the base of the nail.
- Double French Manicure: Elevate your French manicure with a double stripe twist. Use two thin stripes of contrasting colors to create a double tip line, adding depth and dimension to your manicure.
Tips for Nail Striping Tape Success
- Cut the tape carefully: Use sharp scissors or nail art tweezers to ensure precise cuts.
- Apply the tape smoothly: Avoid wrinkles or bubbles in the tape for a clean design.
- Apply thin layers of polish: This will help prevent the tape from lifting.
- Peel the tape slowly: Be patient to avoid removing the polish along with the tape.
Nail striping tape is an essential tool for anyone who wants to create stunning nail art designs with ease. With its versatility, ease of use, and affordability, nail striping tape is the perfect way to elevate your nail art game and add a touch of personality to your fingertips. So grab your striping tape and let your creativity shine through.