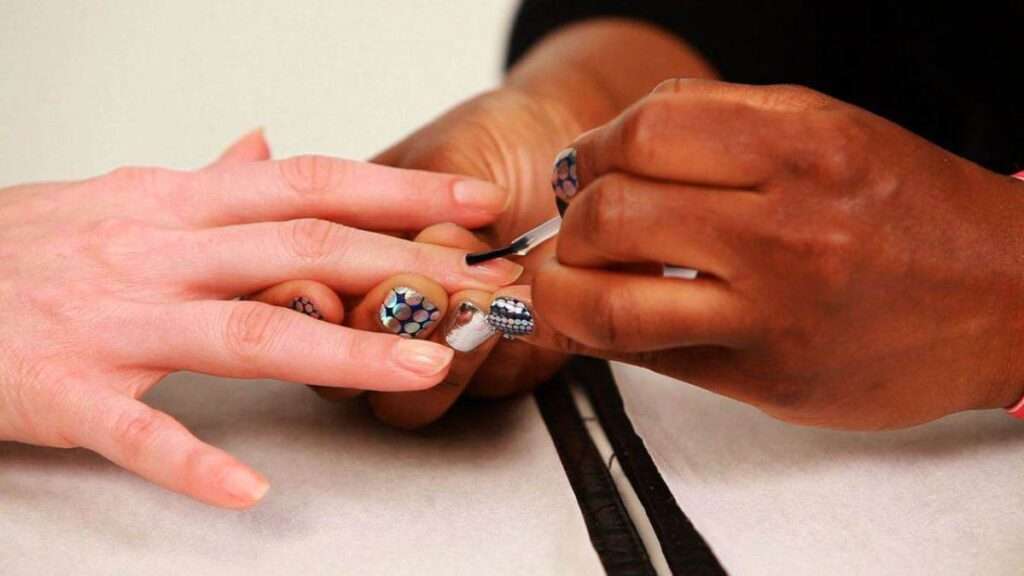
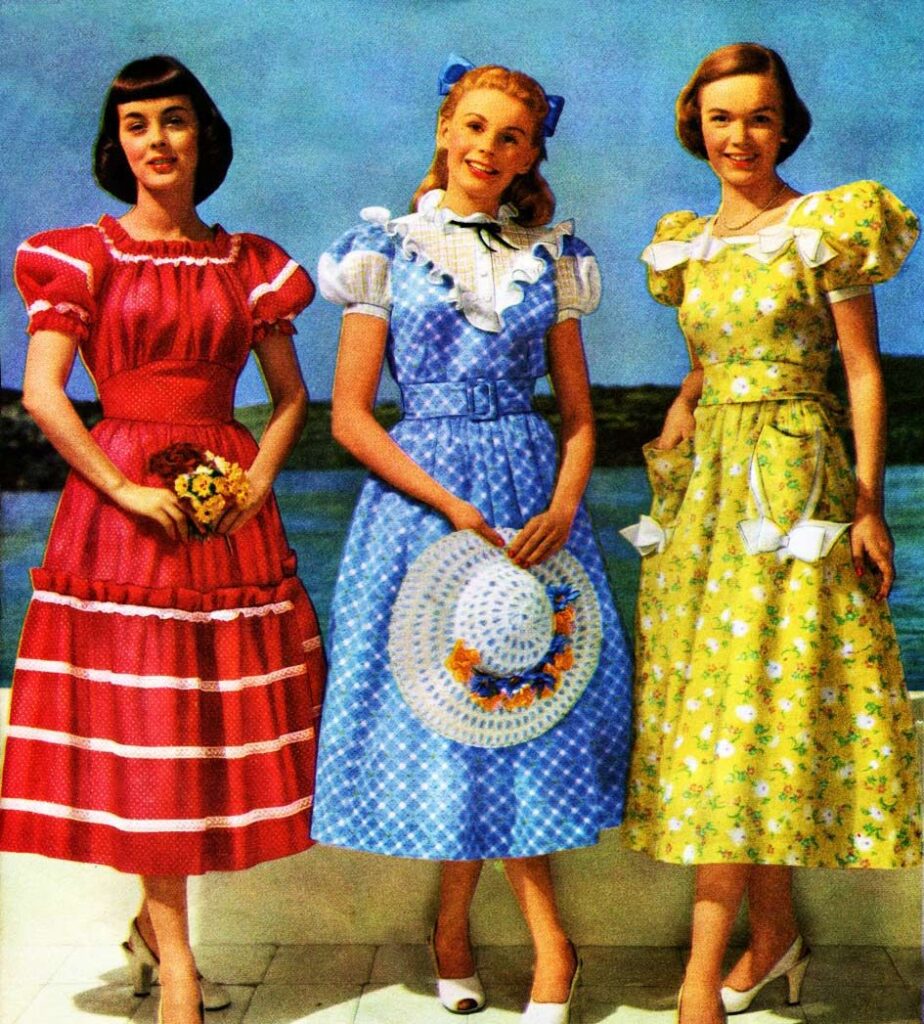
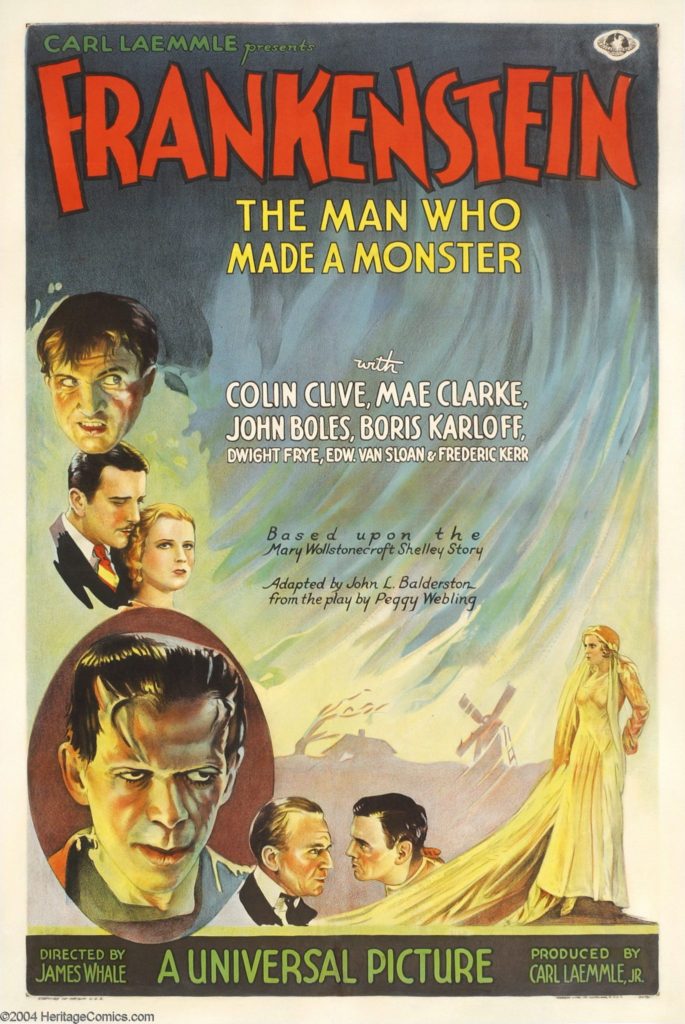
10 Basic Nail Supplies For A Beginner's Tech Needs
8 Mar, 2022
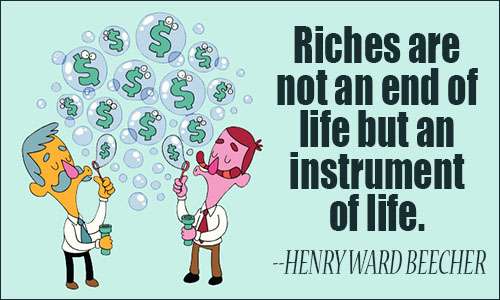
“Your hands and feet are a great way to make a statement about your style. “
All beginner nail techs need plenty of nail supplies. This is simply because we will need to practice working on our nail skills. This can cause you to use more products than an expert nail tech would. Do not be discouraged. Did you know that our hands and feet are noticed more often than we realize? Of course, you did, and that, my friend, is why you are here today! More importantly, our hands take most of the abuse during our daily tasks. This is why we must be sure to take great care of them, just as we do other parts of our bodies.
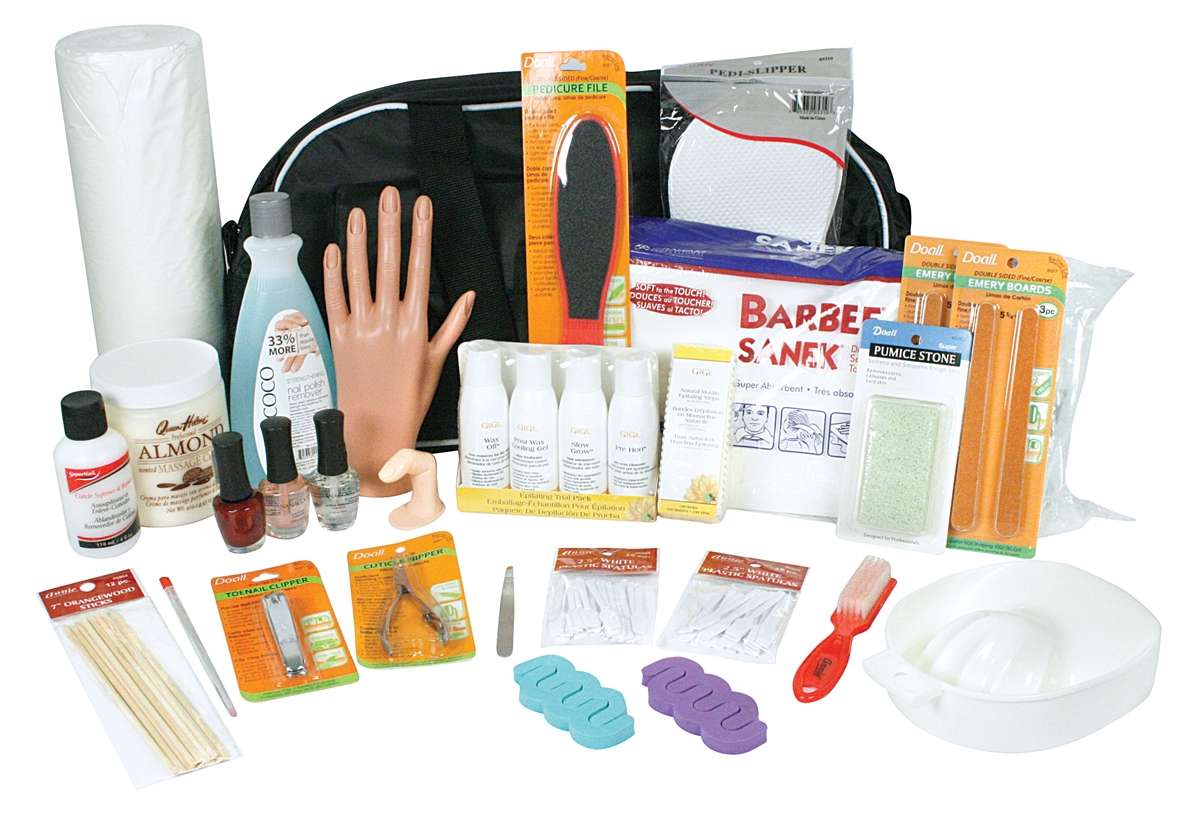
Nail Supplies List
1. Nail polish remover
When it comes to removing nail polish, using an acetone-free nail polish remover is a better option as it is less harsh and won’t damage your nails. Acetone, a solvent commonly found in nail polish removers, can dry out your nails, causing them to become brittle and prone to breakage. On the other hand, acetone-free nail polish removers are gentle on your nails and do not strip them of their natural oils, leaving them healthy and shiny.
While choosing a type of nail polish remover, it is essential to consider your preferences and budget. Some removers may be more expensive than others, but they may offer better quality or come with additional benefits, such as added vitamins or moisturizing agents. Therefore, it is recommended to read labels and reviews before buying a nail polish remover to ensure that it meets your needs and expectations.
2. Cotton balls/pads
Pads made of cotton and can be used for medical or cosmetic purposes. Cotton balls are mainly used in the application and removal of nail polish from the nails. It may also be used in intricate nail art designs.
3. Nail File
Is a tool used to grind and shape the edges of natural or artificial nails. They are often used in manicures and pedicures after the nail has been trimmed using appropriate nail clippers.
4. Nail Clipper
Is a hand tool that is mainly used to trim fingernails and toenails and clip the hanging nails. They allow you to cut nails into sections with minimal tearing.
5. Cuticle Trimmer
A Cuticle trimmer is best used to clip the dead or overgrown skin surrouning the cuticlle area. It creates a smoother nail application and a clean fresh set of nails.
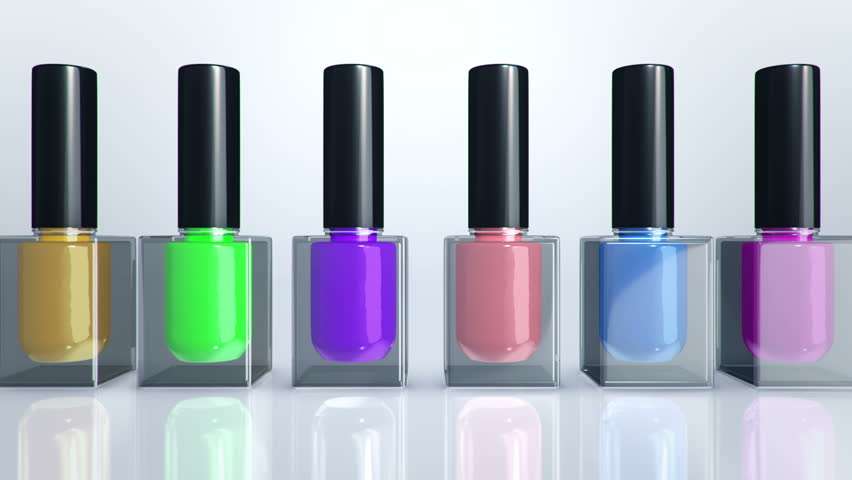
6. Nail polish
Is formally known as a nail lacquer that can be applied to fingers and toes as decoration as well as protecting the nail bed. Nail polishes come in all shades of color and are significant in performing manicures and pedicures.
7. Box of nail tips
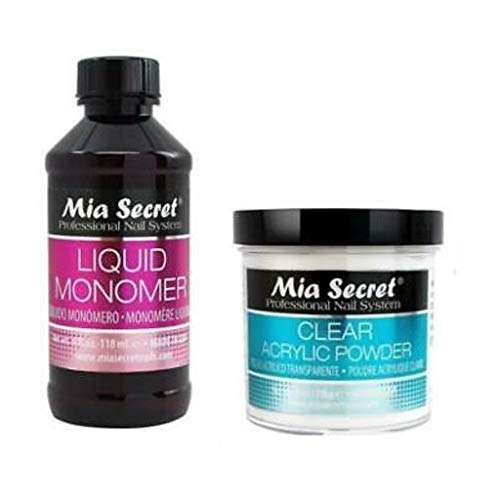
Are lightweight “nail”-shaped plastic plates that can be glued to the end of the natural nail. This may also be called a nail extension, in which a liquid monomer is mixed with an acrylic powder and spread across the nail bed to harden.
8. Nail Glue
Nail glue is any non-metallic substance applied to one or both surfaces of two separate items that binds them both together.
10. Liquid monomer
Is the liquid solution that is used to bond with acrylic powder to bond a nail tip or create an artificial nail.
11. Acrylic powder
Work with monomer liquid to bond a nail tip or create an artificial nail. The standard acrylic powder is white or translucent but also comes in a variety of different colors.
12. Acrylic brushes
13. Paper towels
14. Monomer glass
Is normally known as a small glass that can be used to hold liquid monomers during the acrylic process.
15. Nail buffer
Similar in appearance to a large rubber eraser, it is made with different sides for different levels of coarseness. This buffing is gentle surface abrasion used in the filing and shaping process of a manicure or acrylic nail extension.
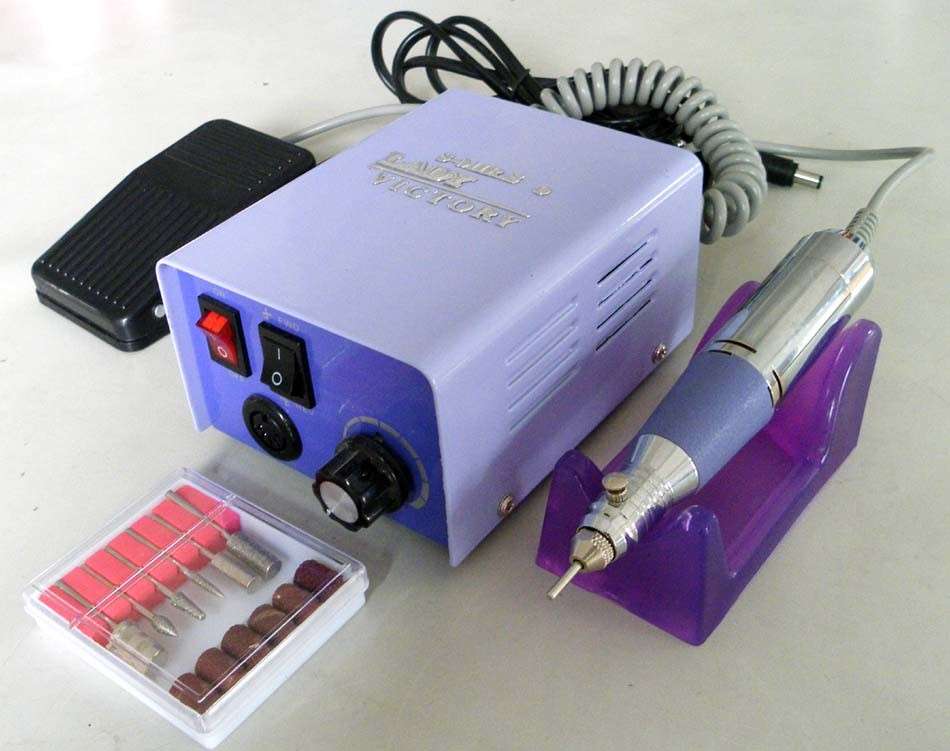
16. Nail drill
Can be used for natural nails as well as artificial nails. Perfect for cutting, sanding, polishing, engraving, milling, grinding, trimming, removing, and drilling. Similar to a Nail buffer and nail file but in the form of an electrical tool.
17. Nail decals
Ornaments, stickers, and other nail jewelry are used to enhance the nail design.
18. Top coat polish
19. Hand oil or cream
Whether you are a beauty on a budget, a beginner nail tech, or a nail guru, these are the top items every nail tech should have handy. I personally have EVERY SINGLE item on the list. I swear by them. My favorite item on this list? Has to be the nail trimmer! My second favorite is the nail file. Third nail polish. We will indulge in the rest of that later. I hope you enjoyed this post, see you on the next one. Toodles.
What Is The Popular History Of Acrylic Nails?
7 Mar, 2022
Health Is Wealth, And Sometimes Plastic:
“The history of acrylic nails and enhancements became a status symbol in certain societies, indicating that, unlike commoners, they did not have to do manual labor. The longer and more ornate the nails, the greater the wealth.”
The First Known Manicurist:
Mary E. Cobb was the first known American manicurist and introduced modern nail manicuring to Britain and the United States. She was a trailblazing figure in the field of nail care and beauty. Mary E. Cobb opened her first Manhattan manicure salon in 1878 as “Mrs. Pray’s Manicure”. The Salon was an extension of her husband’s manufacturing business.
Mary Cobb’s journey in the world of beauty began in 1878, when she opened her first manicure salon in the bustling heart of Manhattan. Known as “Mrs. Pray’s Manicure,” the salon quickly gained a reputation for offering exceptional nail care services that were ahead of their time. This salon, which became a popular destination for women seeking exquisite nail treatments, was an extension of her husband’s thriving manufacturing business.
With her steady hands and artistic flair, Mary Cobb revolutionized the manicure experience. She introduced innovative techniques and tools that elevated nail care to new heights. From shaping and filing nails to applying quality polishes, she meticulously transformed women’s hands into elegant works of art. Her attention to detail and commitment to excellence quickly set a new standard in the world of nail care.
The success of Mary Cobb’s salon soon transcended regional boundaries, catching the attention of beauty enthusiasts across the Atlantic. Her expertise and pioneering work inspired many, leading to the widespread adoption of modern manicuring techniques within the British and American beauty industries.
Today, her influence can still be seen and felt in the countless salons and spas where skilled manicurists continue to create stunning nail designs.
Mary E. Cobb’s legacy as a visionary and pioneer in the field of manicuring lives on, reminding us of the power of innovation and the impact of individuals who dare to challenge the status quo. Her contributions to the beauty industry have left an indelible mark, shaping the way we care for and adorn our nails to this day.
Over time, Mary developed a savvy business manner and focused on a higher-end market, which evolved into operations at two townhouses on West 23rd Street in New York. This also included branches in Chicago, Washington, Boston, and Philadelphia. In addition to manicures, Mary’s salons offered hairdressing and skin care.
She and her ex-husband made their most lasting contribution to the nail care industry with the invention of the emery board. At the turn of the 20th century, Mary E. Cobb and Parker Pray (Her ex-husband) held a monopoly on the production and sale of the emery board, along with many other nail care items such as red and pink nail polish.
What Are Artificial Nails?
“Artificial nails, also known as fake nails, false nails, acrylic nails, nail extensions, or nail enhancements, are extensions placed over the natural nail to be worn as fashion accessories.”
Artificial nails are to be worn as an extension, and not as a replacement for your natural nails. Acrylics, by their chemical nature, are durable and strong. The acrylic nails are made out of acrylic glass. When it is mixed with a liquid monomer, it forms a malleable bead. This mixture begins to cure immediately, continuing until it is completely solid within minutes.
The History Of Acrylic Nails
Acrylic nails have a fascinating history that dates back several decades. The concept of artificial nails can be traced back to ancient civilizations like China, where nail enhancement materials such as gum arabic, beeswax, and egg whites were used to create a form of artificial nails. However, it was not until the 1950s that the modern acrylic nail, as we know it today, began to gain popularity.
In the early 1950s, a dentist named Fred Slack accidentally broke his natural nail. In an attempt to create a replacement, he used dental acrylics and aluminum foil to fashion an artificial nail. This innovation led to the birth of the first acrylic nail system, known as the “Slack System.” Shortly after, professional nail technicians started experimenting with acrylates and other materials to create artificial nails.
By the 1970s, the popularity of acrylic nails started to soar, primarily due to advancements in the nail industry and the increasing demand for nail enhancements. Nail salons began offering acrylic nail services, and more and more individuals embraced the trend. With its durability and versatility, acrylic nails became a favorite choice for those seeking long, beautiful nails.
Over the years, nail technology continued to evolve, leading to significant improvements in the quality and application process of acrylic nails. Nowadays, acrylic nails are made using a combination of liquid monomer and powdered polymer, which, when mixed, create a malleable substance that can be molded onto the natural nail or nail extension. The mixture then hardens when exposed to air, resulting in strong and long-lasting artificial nails.
Acrylic nails have become a staple in the beauty industry, providing individuals with the opportunity to express their creativity through various designs, shapes, and colors. Whether it’s for a special occasion or everyday wear, acrylic nails offer a glamorous and polished look that many people adore.
In conclusion, the history of acrylic nails is a story of innovation and creativity. From humble beginnings to a booming industry, acrylic nails have come a long way and continue to be a popular choice for nail enthusiasts around the world.
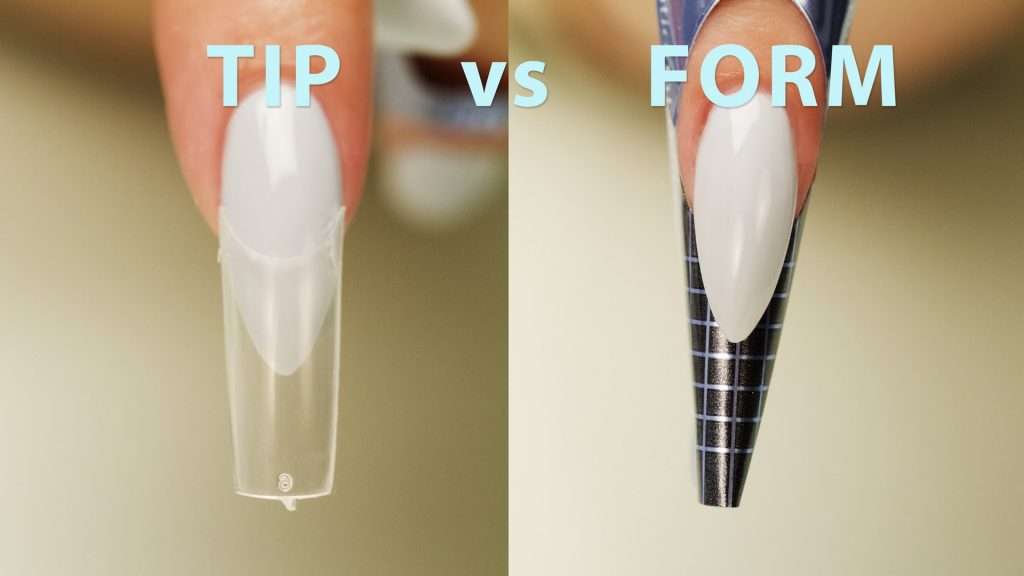
The Types of Acrylic Nails:
There are two main approaches to creating artificial nails—Tips and Forms:
Nail Tips:
Nail Tips are lightweight “nail”-shaped plastic plates glued on the end of the natural nail. After the nail tip is sized and glued to the tip of the nail bed, the acrylic monomer mixture is applied over the entire nail. They can come in many different shapes, sizes, and colors. The most popular ones are usually clear or white.
Nail Forms:
Nail Forms are shaped sheets with a sticky edge that is effectively wrapped around the entirety of the nail. The form acts as the base for layering the acrylic to create the nail. Instead of an artificial nail, forms can be used to create a set of salon-worthy acrylic nails at home.
How To Apply Acrylic Nail Tips:
Acrylic nails are a popular type of artificial nail that can be used to create a variety of looks, from natural to glamorous. Acrylic nails are made from a mixture of liquid and powder that is applied to the natural nail and then cured under a UV lamp.
Acrylic liquid
Cuticle Nippers
Nail Primer
Acrylic Powder
Cuticle Pusher
Nail Bonder
Acrylic Nail Brush
Cuticle Stick
Nail Tips (Optional)
Paper Towels
Nail Buffer
Nail Glue
Nail Polish Remover
Nail File
Dappen Dish
Cotton Balls
Nail Forms (Optional)
UV Lamp
Gather your materials. Create a list of all the items you will need to create an acrylic nail set. If you have to go shopping for supplies that should be completed before you begin. If you don’t want to shop around for the items, purchase a premade nail kit from a department store or beauty supply store.
Prepare your nails. Remove any old nail polish and clean your nails with nail polish remover. Push back your cuticles with a cuticle pusher and trim any excess cuticles with cuticle nippers.
Apply nail primer and bonder. Apply a thin coat of nail primer to your nails and let them dry completely. The primer will be used to protect your nails. This step is optional but many people buff the natural nail so the glue will stick better. Once completed, apply a thin coat of nail bonder or adhesive glue to your nails.
Apply nail tips (optional). If you are using nail tips, apply them to your nails using nail adhesive glue. Make sure that the nail tips fit snugly against your natural nails. Start by selecting your correct nail sizes. The nail tips should be wide enough to cover your entire natural nail. They also should not overlap the edges of your nails. Find the best fit and then lay them out in the order you need them. Be sure not to apply a nail tip that is too small.
Apply a line of adhesive gel to the indented area of the tip.
Make sure you have the right nail before pressing it onto your finger.
Press the nail tip against your natural nail to ensure the adhesive bonds.
Press firmly on the nail for about 5–10 seconds.
Apply the acrylic mixture. Mix together a small amount of acrylic liquid and powder until you form a thick paste. This will typically be in the form of a small, medium, or round ball-like shape. Apply the acrylic mixture to your nails, starting at the base of the nail and working your way up. Be sure to cover the entire nail, including the tip. When performing this step, be sure to work fast. You don’t want the mixture to dry too fast before you can apply it to the nail.
Cure the acrylic mixture. Place your nails under the UV/LED lamp for 2-3 minutes to cure the acrylic mixture.
Shape and buff your nails. Once the acrylic mixture is cured, use nail clippers or a pair of nail scissors to trim the nail down to your desired length. Use a nail file to shape your nails to the desired length and shape. Filing your nails will also shorten them slightly. A nail buffer should be used to smooth out the surface of your nails.
Use a file to shape your nails into your desired shape.
There are many shapes to choose from such as square, almond, coffin, and stiletto.
Apply nail polish (optional). If you want to apply nail polish to your acrylic nails, this will be the final few steps. Wash your hands thoroughly with soap and water before applying the nail polish. Apply a base coat to your nails before you begin painting. After the base coat apply your solid-colored polish, any nail decals, or decorations, and let it dry. If you are using gel polish, cure the polish before applying the top coat as the final step. Be sure to use a top coat to seal in the polish and protect it from chipping.
Tips for applying acrylic nails:
Use a small amount of acrylic mixture at a time. It is better to add more acrylic mixture as needed than to have too much acrylic mixture on your nails.
Be sure to apply the acrylic mixture evenly to your nails. Avoid getting any acrylic mixture on your skin.
If you get any acrylic mixture on your skin, wipe it away immediately with a cotton ball soaked in nail polish remover.
Be careful not to overfile your nails when shaping them. Overfilling can weaken your nails and make them more prone to breakage.
Let the acrylic dry completely before filing and shaping the nails.
If you are new to applying acrylic nails, it is a good idea to practice on a few artificial nails before attempting to apply them to your natural nails.
Instructions For Acrylic Nails Using Nail Forms:
Prepare your nails by washing them thoroughly with soap and water. Remove any old nail polish or gel.
Push back your cuticles with a cuticle pusher.
File your nails to the desired length and shape.
Apply a thin layer of nail primer to each nail.
Apply a thin layer of nail bonder to each nail.
Place a nail form under each nail.
Mix together a small amount of acrylic liquid monomer and acrylic powder in a dappen dish.
Use the acrylic brush to apply a bead of the acrylic mixture to the nail form.
Gently spread the acrylic mixture over the nail form, starting at the cuticle area and working your way down.
Cure the acrylic nail under the UV lamp for 2-3 minutes.
Repeat steps 7-10 for each nail.
Once all of the nails have been cured, remove the nail forms.
File and buff the acrylic nails to the desired shape and smoothness.
Apply a top coat to each nail.
Tips:
For a stronger bond, you can apply a thin layer of base coat before applying the primer.
If you make a mistake, you can wipe away the wet acrylic with a damp cloth.
Be careful not to over-file the acrylic nails, as this can weaken them.
Apply a top coat every few days to keep the acrylic nails looking their best.
Gel Nails Versus Acrylic Nails
With a little practice, you can apply acrylic nails at home that look and feel just as good as salon-applied nails. Whether gel nails are better than acrylic nails is a matter of personal preference. Both types of nails have their own advantages and disadvantages.
Gel nails:
Pros: Gel nails are more flexible than acrylic nails, which makes them less likely to crack or break. They are also easier to remove and less damaging to the natural nails. Gel nails also have a glossier finish than acrylic nails.
Cons: Gel nails can be more expensive than acrylic nails. They also take longer to apply and remove. Gel nails can also be more difficult to repair if they do crack or break.
Acrylic nails:
Pros: Acrylic nails are more durable than gel nails and can last for several weeks with proper care. They are also less likely to chip or peel. Acrylic nails are also more affordable than gel nails and easier to repair if they do crack or break.
Cons: Acrylic nails are more rigid than gel nails, which can make them less comfortable to wear. They can also be more damaging to the natural nails when they are removed. Acrylic nails also have a less glossy finish than gel nails.
Ultimately, the best way to decide which type of nail is right for you is to try both and see which one you prefer. You may also want to consider your lifestyle and budget when making your decision. Here are some additional things to consider when choosing between gel nails and acrylic nails:
Durability: Acrylic nails are more durable than gel nails and can last for several weeks with proper care. Gel nails typically last for 2-3 weeks.
Flexibility: Gel nails are more flexible than acrylic nails, which makes them less likely to crack or break. Acrylic nails are more rigid and can feel less comfortable to wear.
Price: Gel nails are typically more expensive than acrylic nails.
Application time: Gel nails take longer to apply and remove than acrylic nails.
Removal process: Acrylic nails are more damaging to the natural nails when they are removed. Gel nails are easier to remove and less damaging to the natural nails.
Appearance: Gel nails have a glossier finish than acrylic nails. Acrylic nails have a more matte finish.
If you are looking for a durable and long-lasting nail, acrylic nails are a good option. If you are looking for a more flexible and comfortable nail, gel nails are a good option. If you are on a budget, acrylic nails are a more affordable option.
How To Do A French Manicure On Natural Nails
5 Mar, 2022
What is a Manicure?
A manicure, or French manicure, is a cosmetic beauty treatment for the fingers and hands. This procedure is normally performed by a licensed nail technician in a nail salon but can also be done at home. Manicures usually consist of filing and shaping the free edge of nails. It includes pushing and clipping any nonliving tissue but is limited to the cuticle and hangnails.
After the nail clipping and filing, apply cuticle oil and hand lotions with a massage, and then finish with the nail polish application. Most nail polish will last for 2–3 days before another service is required for maintenance if done properly.
French manicures:
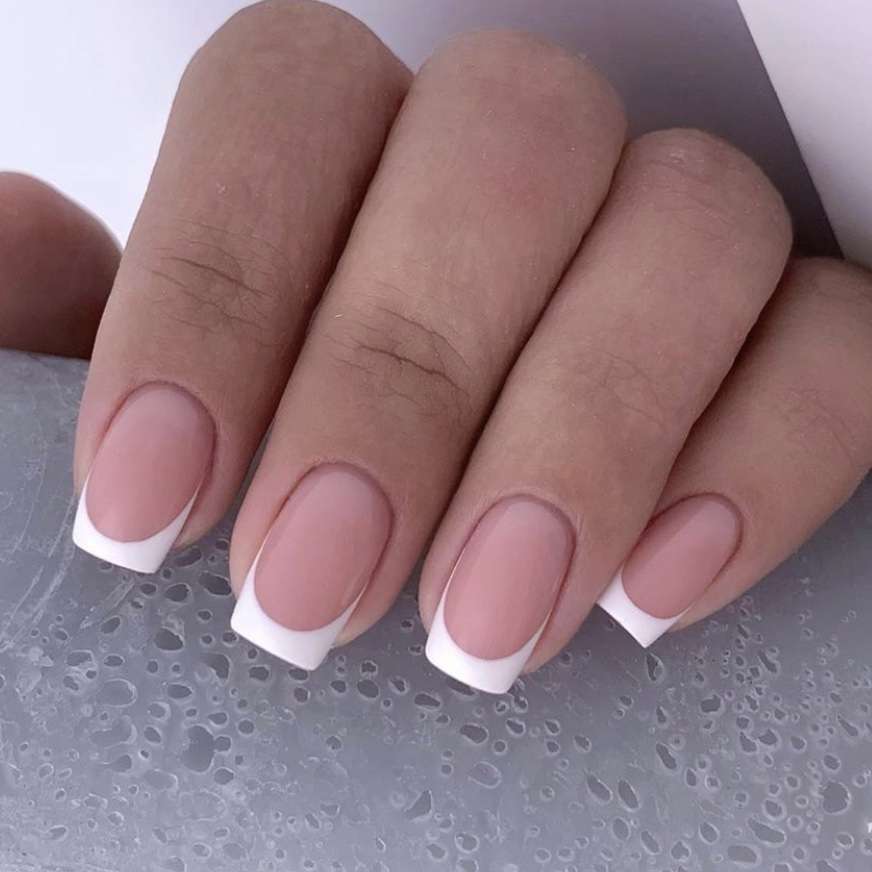
Nails that have undergone a French manicure are characterized by a lack of artificial base color and white tips at the free edge of the nail. For this reason, they are sometimes referred to as French tips. The nail tips are painted white, while the rest of the nails are polished in a pink or a suitable nude shade. As of late, many other colors are being used in place of the original tip coloring. This type of nail care service tends to be among the more expensive salon options.
Basic Manicure:
A basic manicure is your standard manicure. The nail tech will start off by soaking your hands in warm water to soothe and soften dead skin cells. Next, the nail tech will file and buff, clean the cuticle, and massage your hands with hand cream. First, the base coat, color, and top coats are applied, followed by cuticle oil.
Gel Manicure:
Gel manicures include the same basic manicure process but with the addition of a gel polish cured under UV light twice, then the top coat is applied to cure the nail.
Hot oil manicures:
Hot oil manicures are a specific type of manicure that cleans the cuticles and softens them with oil. Mineral oil, olive oil, some lotions, or commercial preparations are types of oils that can be heated in an electric heater.
Dip powder manicures:
Dip-powder manicures are an alternative to traditional acrylic nails and gel polish. Dip powders have become popular due to their ease of application. They are similar to traditional silk or fiberglass enhancements, with the fiber being replaced by acrylic powder.
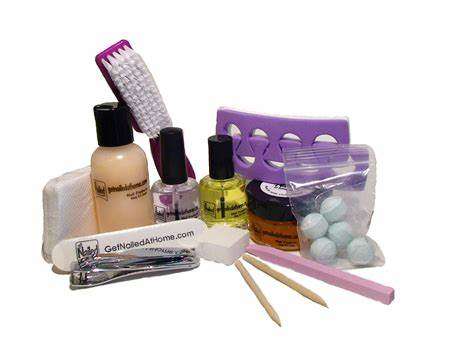
What Products Will I Need?
Bowl
Nail Stencil Stickers
Towel
UV/LED Lamp
Nail Clipper
Nail Polish Remover
Nail File
White Nail Polish
Cuticle Pusher
Nude Nail Polish
Cuticle Oil
Solid Color Polish
Base Coat Polish
Top Coat Polish
Nail Dryer
Hand Lotion
The French Manicure From Start To Finish:
How To Do A French Manicure:
1. Remove Old Nail Polish
Make sure that your nails are prepped and ready to paint. Make sure to remove any old nail polish that may be lingering on your nails.
2. File And Buff Your Nails
Give your nails a quick trim to make sure that they’re even. Follow up by using a nail file to shape your nails to ensure that they have a smooth shape.
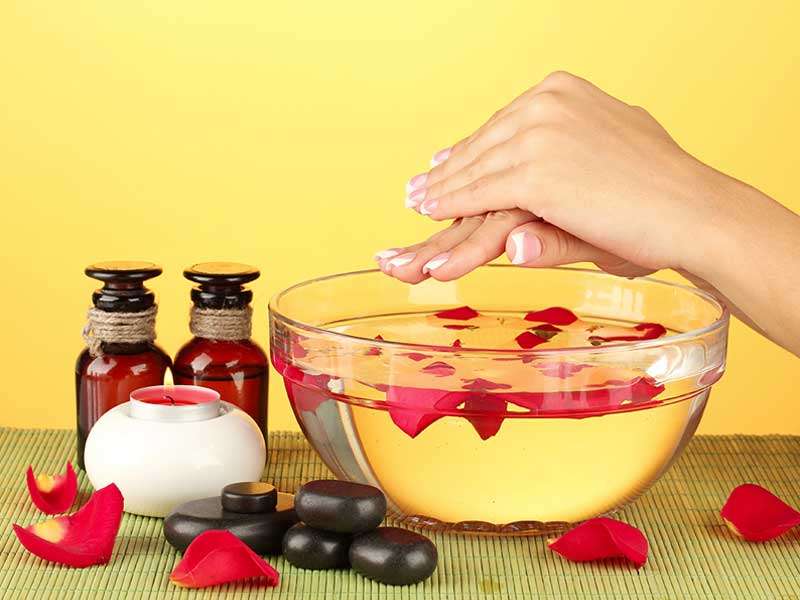
3. Soak Your Nails
Place your hands in a bowl with warm water and soak your nails for three to five minutes. Use an orange stick to push your cuticles out of the way for a clean look, then apply cuticle oil to moisturize the cuticle and help protect your nails.
4. Apply A Base Coat
Start by applying a base coat to your nails. The base coat is applied to prevent the nail polish from staining your nails.
5. Neutral Polish Application
Apply a coat of your pale or neutral nail polish. Start in the middle and work your way outward as you apply. Once this is dry, you can apply a second coat to get rid of any streaks. Allow your nails to dry completely before moving on to the next step.
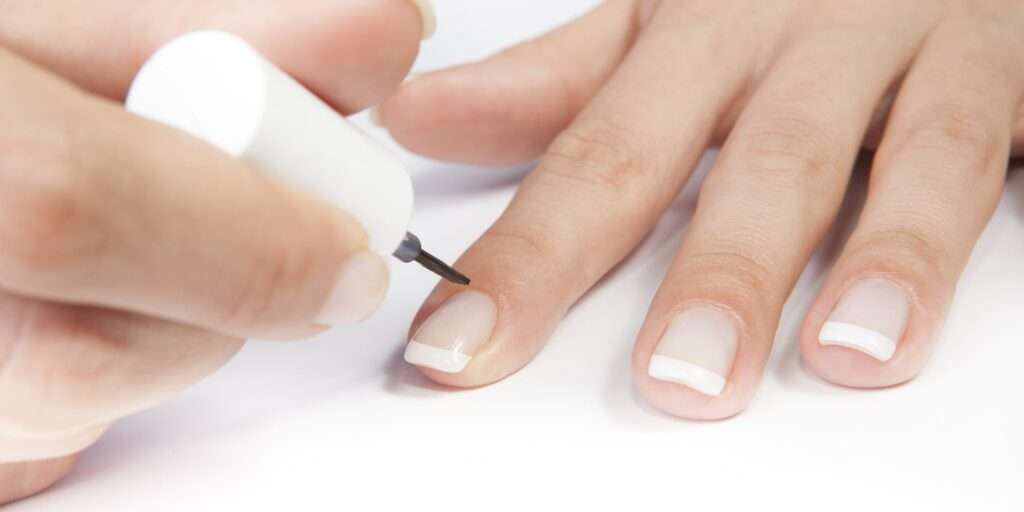
6. Create Your French Tip
At the tips of your nails, where the white crescent-shaped part usually is (the beginning of the nail edge), you’ll want to apply a small line of white nail polish using a liner brush. Work slowly to create a nice, clean line from end to end. Dip your regular nail polish brush into the white polish and coat that tip from the line all the way to the nail edge, filling in the entire tip.
7. Finish With Your Top Coat
Once your nails are painted to perfection, it’s time to seal the deal with a top coat. Apply a layer of top coat to your nails to make sure you get the maximum wear.
18 Ways For You To Get Ready For Spring
4 Mar, 2022
“April Showers bring Spring Flowers.” As you all know Groundhog day is a thing of the past. So was him seeing his shadow. Unfortunately, we were told we would have 6 more weeks of winter. It sure does feel like it too! The cold frost is almost over and we shall waltz into Spring.
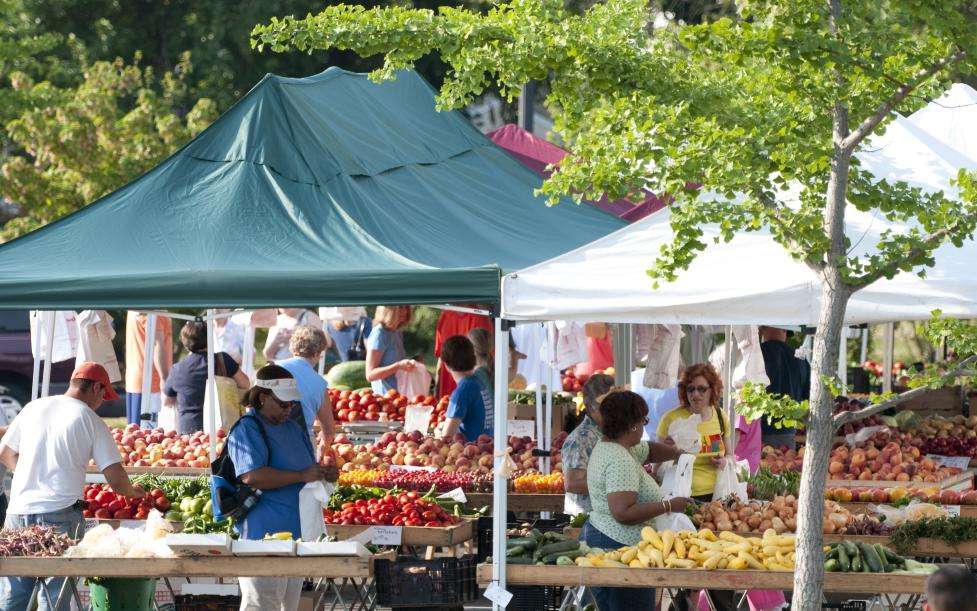
1. Visit your local Farmer’s Market
Farmer’s Markets are any markets or retail outlets that are selling products that are grown, raised, or made locally by area farmers or producers within your local area.
2. Go on a road trip
Don’t forget to pack snacks, games, and a camera to take great photos of your trip. Click HERE for a road trip planning guide.
3. Fly a kite
Kiteflying can provide a wide range of enjoyment and satisfaction – if it’s done in the right manner, correctly, and safely. Be sure to pick the right place, pick the right kite and use the correct flying procedures.
Here are the top 10 most popular food trucks in the United States.
7. Visit a zoo.
A zoo is a facility in which animals are housed within enclosures, cared for, displayed to the public, and in some cases bred for conservation purposes.
8. Attend an outdoor concert
Shop millions of live events and discover can’t-miss concerts, games, theater, and more. Visit Ticketmaster for tickets to these events in your area.
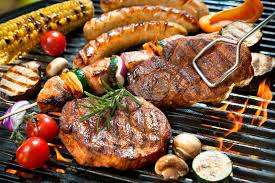
9. Throw a barbeque
Here is a collection of some recipes that will be super tasty on the grill.
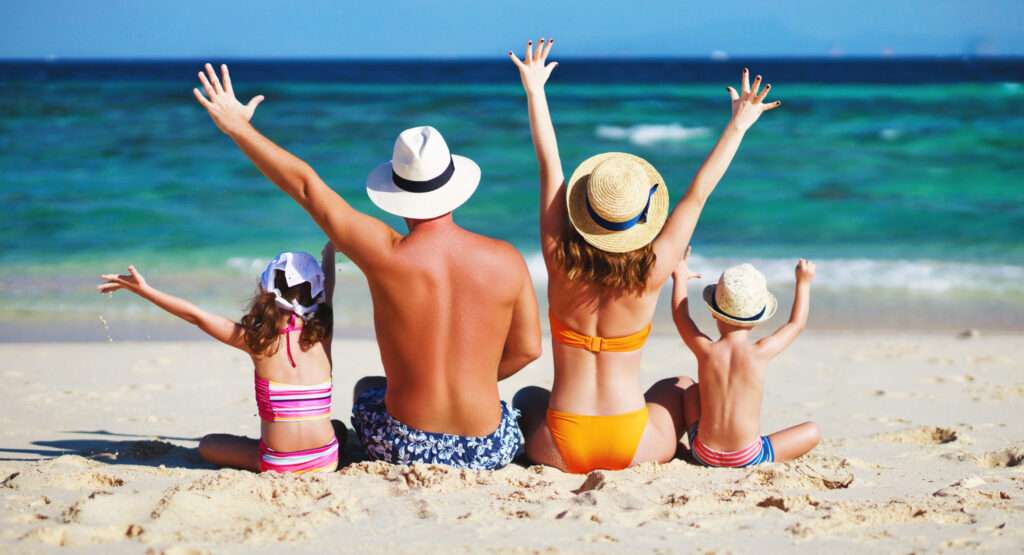
happy family father, mother, and children back on the beach at sea
15. Take a trip to the beach
When choosing affordable beach vacations for families or large groups, think about what everyone wants to do, and factor that into your budget. Young families will likely want to head to beaches that have lifeguards, convenient restrooms, and calm waters. Teenagers will most likely want a little adventure like snorkeling or surfing.
16. Rent a canoe or go tubing.
17. Host a pool party
The Etiquette of Hosting a Spring or Summer Pool Party, in addition to offering plenty of water and light bites, experts say having safety protocols in place is essential. Throwing a pool party is a fun, refreshing way to celebrate summer.
18. Take time to meditate
Put simply, meditation is a tool for stress relief. When we lower our stress levels, we get to know our pain, we connect better, we improve our focus, and we’re kinder to ourselves.
5 Benefits Of Co-Washing Natural Hair We All Need
3 Mar, 2022
Unlock the Secret to Gorgeous Hair: Discover the Top 5 Benefits of Co-Washing
Who doesn’t dream of having gorgeous, shiny, and healthy hair? We all want to look and feel our best, and our hair plays a significant role in that. The good news is that there’s a simple yet effective way to achieve luscious locks: CO WASHING. Co-washing, which is short for “conditioner washing,” is a hair care method that involves using a conditioner instead of shampoo to cleanse your hair. This unconventional technique has been gaining popularity in recent years, and for a good reason.
Co-washing offers numerous benefits that traditional shampooing can’t match, such as retaining natural oils, reducing breakage, and improving hair texture. In this article, we’ll unlock the secret to gorgeous hair and explore the top 5 benefits of co washing and shampooing. Whether you’re a seasoned co-washer or a newbie, you’ll find valuable insights and tips to help you achieve the hair of your dreams.
What is Co-Washing?
To be as simple as possible, Co-washing is the process by which you shampoo your hair using conditioner. Many natural-haired girls and guys assume co-washing is not as effective as using shampoo. This may be true for some depending on the degree of products you already have in your hair. The main benefit of co-washing hair is that you’ll have hydrated your hair during the cleansing process.”
Many natural hair supporters advocate for the use of co-washing curly hair. This is because they feel that shampoos are too drying for natural hair. Usually, when you use shampoo, it is intended to remove all traces of hair products. This includes the removal of oils, dirt, and grime from the hair and scalp. Some people may feel that this method doesn’t clean their hair properly. If this is the case, you can always go behind the co-wash with a clarifying shampoo. Your regular everyday shampoo may also be used after the co-wash.
This process is a hair care technique that involves using a conditioner instead of shampoo to wash your hair. The concept behind co washing is simple: traditional shampoo contains harsh detergents that can strip your hair of its natural oils, leaving it dry, brittle, and prone to breakage. Conversely, Conditioner is designed to moisturize and nourish your hair, leaving it soft, shiny, and healthy. By using a conditioner to cleanse your hair, you can reap the benefits of clean hair without sacrificing its natural oils.
There are many pros and cons of co-washing. It is particularly popular among people with curly or coily hair, which tends to be drier than straight hair. Curly hair is more prone to breakage and frizz, and traditional shampoo can exacerbate these issues by stripping the hair of its natural oils. Co washing can help keep curly hair moisturized and healthy, reducing breakage and promoting growth.
One important thing to note is that not all conditioners are created equal. It’s essential to choose a conditioner that is specifically formulated for co washing, as regular conditioners may not be effective at removing dirt and buildup from your hair.
What Are The Benefits of Co-Washing Natural Hair?
Co-washing is a form of cleaning your hair without using sulfates and other harsh detergents. The benefits include improved hair hydration, better product performance, reduced shampoo costs and time, and reduced damage to the cuticle layer of your hair strand. Doing this can lead to smoother, healthier hair with more elasticity. It’s also great for keeping your hair moisturized without stripping the natural oils. If you use a cleansing conditioner on your hair, you can wash it more frequently than you may when washing with shampoo, because co-washing is gentler than using harsh detergents.
It also offers numerous benefits for hair health. One of the most significant advantages of co-washing is that it helps retain natural oils in the hair. Traditional shampoo can strip the hair of natural oils, leaving it dry and brittle. Co-washing, however, cleanses the hair without stripping it of its oils, leaving it soft, shiny, and healthy. Using this method can also help reduce breakage and promote hair growth. Keeping the hair moisturized and healthy, will help prevent breakage and split ends. This, in turn, can lead to longer, healthier hair.
Another benefit is that it can improve hair texture and manageability. Co-washing can help define curls and reduce frizz, making it an ideal technique for people with curly or coily hair. Additionally, co-washing can help detangle hair, making it easier to manage and style.
What Does The Co-Washing Actually Do To My Hair?
Mousturizes the hair and scalp.
Helps alleviate dandruff and flaking
Moisturizes the hair and scalp.
Decreases single-strand knots and tangling.
Gives you a better curl definition and adds shine to your hair.
Allows you to cut down the time it takes to style your hair.
Helps to eliminate frizzy hair.
The benefits of co-washing for color-treated hair
If you have color-treated hair, co-washing can be an effective way to maintain your hair’s vibrancy and prevent damage. Traditional shampoo can strip the hair of its color, leaving it looking dull and lifeless. Co-washing, however, can help retain the hair’s natural oils, which can help preserve the color and shine.
Co-washing can also help prevent damage to color-treated hair. Traditional shampoos can be harsh on the hair, leading to breakage and damage. Co-washing, on the other hand, is gentle and moisturizing, helping to keep the hair healthy and strong.
How co-washing can help reduce frizz and promote hair growth
Co-washing can be an effective way to reduce frizz and promote hair growth. Frizz is often caused by dry, damaged hair, and traditional shampoos can exacerbate this issue by stripping the hair of its natural oils. Co-washing, however, helps to moisturize and nourish the hair, reducing frizz and leaving it smooth and shiny. Co-washing can also promote hair growth by reducing breakage and split ends. By keeping the hair moisturized and healthy, co-washing can help prevent breakage, leading to longer and stronger hair.
What Products Should I Use To Co-Wash My Hair?
There are many different products that can be used to co-wash hair. Any type of conditioner can be applied directly to your hair before your regular shampoo. This approach has many benefits, including softening your hair strands before stripping it clean. A few of the best Co-washing brand conditioners are listed below.
The advantages of using natural co-washing products
When it comes to co washing, it’s essential to choose the right products. Natural co washing products can offer numerous advantages over traditional products, such as being gentler on the hair and free of harsh chemicals. They are often formulated with ingredients like aloe vera, coconut oil, and shea butter, which can help moisturize and nourish the hair.
These ingredients are also gentle and non-irritating, making them ideal for people with sensitive scalps. Additionally, natural co washing products are often free of sulfates, parabens, and other harsh chemicals that can damage the hair and scalp. By using natural co washing products, you can ensure that you’re treating your hair with the care it deserves.
How to incorporate co washing into your hair care routine
If you’re new to co-washing, it’s important to start slowly and give your hair time to adjust. Begin by co-washing once or twice a week, gradually increasing the frequency as your hair becomes accustomed to the new routine. To co-wash your hair, wet it thoroughly and apply a generous amount of conditioner to your scalp and hair. Massage the conditioner into your scalp, focusing on the roots, and work it through your hair, making sure to distribute it evenly.
Leave the conditioner in your hair for a few minutes, then rinse thoroughly with warm water. It’s also essential to choose the right conditioner for your hair type. If you have curly or coily hair, look for a conditioner that is specifically formulated for co washing and designed to define curls and reduce frizz. If you have fine or straight hair, look for a lightweight conditioner that won’t weigh your hair down.
Gather all the products that will be used for your co-wash. This would include your combs, detangling brushes, shampoos, and conditioners. Don’t forget your Co-wash and drying towel.
Section off your hair before you apply the conditioner. This method will help you avoid your hair being tangled and creating knots. If you have any knots in your hair, the co-wash will assist you with detangling.
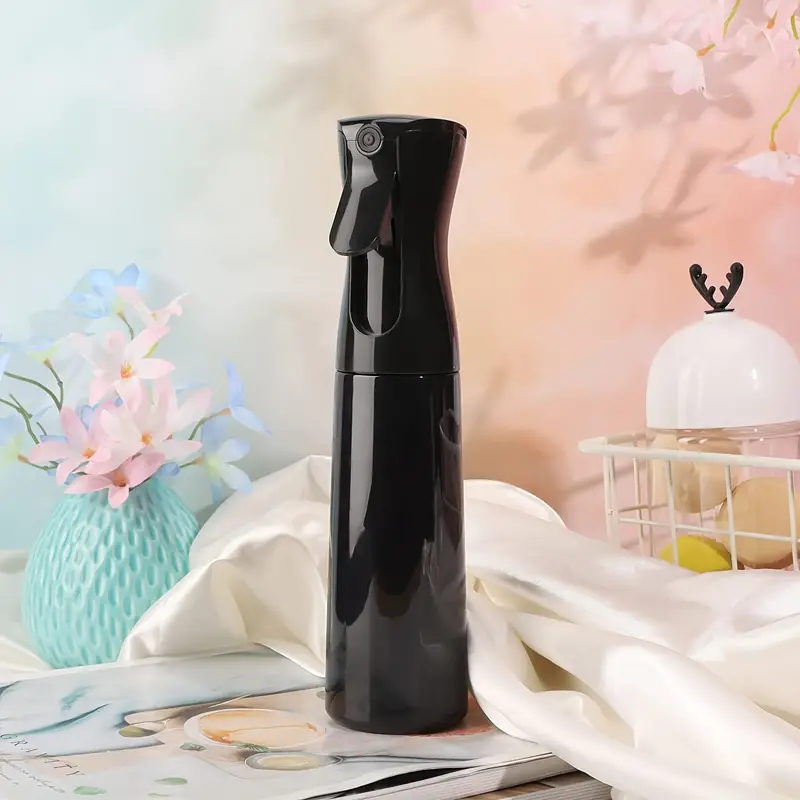
I recommend using a spray bottle to dampen your hair before applying the product. If you don’t have a spray bottle available, dip your hand under the faucet and smooth it over your hair. You can also saturate your hair in the shower. However, if you plan on washing, it is up to you. I tend to co-wash and shampoo my hair in the sink first. I use this method often because I typically spend less time on my shampoo and more time on my conditioning.
Hair Spray Misting Bottle
Get 30% Off Spray Bottles
Visit www.temu.com and use the coupon code FAV8247 to get these super cute and ultra-handy spray bottles for 30% off. This deal is only limited to new accounts. The 30% off applies to your first order. The signup process for the site takes a few seconds and it’s FREE. Take advantage of all the great deals they have to offer. You can thank me later.
Once the hair is wet, apply the conditioner as you would the shampoo. (Many people use more conditioner during the co-wash.)
Scrub the scalp with the conditioner. (NOT the hair!)
After cleansing the scalp area, apply the conditioner to the hair strands. Be sure not to bunch the hair up and smooth the conditioner down the ends. (This will make for an easier wash.)
Use a wide-tooth comb or de-tangling brush to comb through the hair.
Once completed, rinse the hair with cold or lukewarm water. (This will lock in and add shine to your hair.)
Dry, twist, or style the hair.
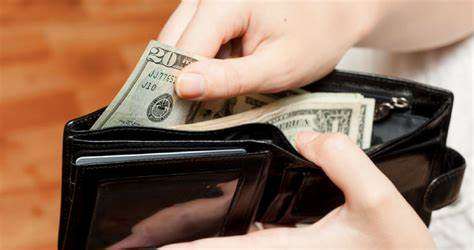
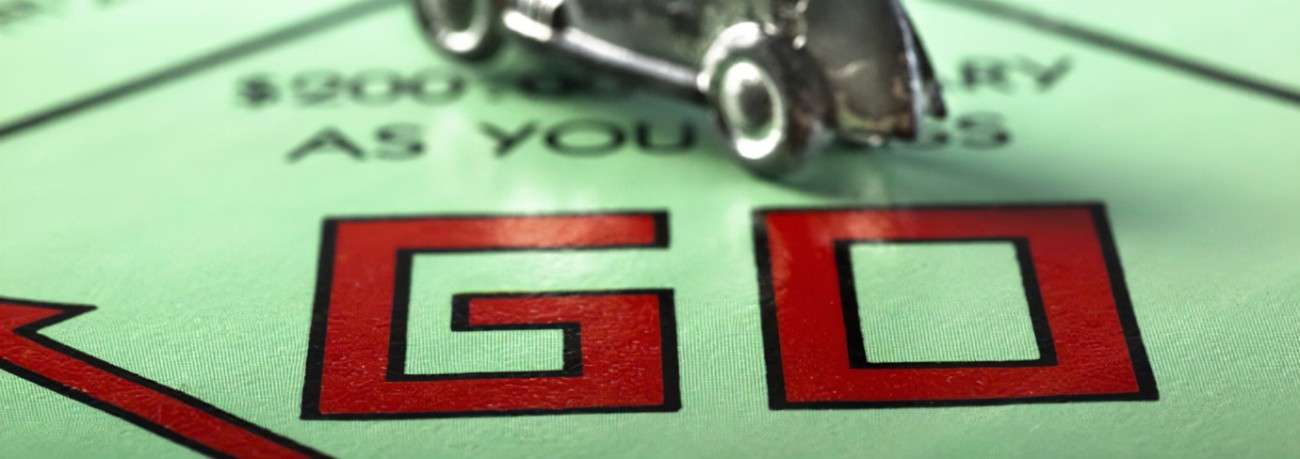
Make Money By Adopting A Money-Saving State Of Mind
2 Mar, 2022
How To Adopt A Money-Saving State Of Mind in 5 Steps:
1. Be Grateful:
“If you’re happy with what you’ve got you will find that you need far less than you did before.”
Learning to be happy with the small things in life is the main principle here. Perhaps you need to save money and can’t afford to purchase new items continuously. You can save extra funds by choosing to re-purpose old items. If you aren’t into repurposing items, saving can easily be done by making an effort to take better care of the things you already own. If you don’t have money to buy new things invest in things that will allow you to maintain the upkeep of those items.
Impulse buying is a momentary adrenaline rush that rarely lasts and you end up having more things and less funds. Usually, people buy things they don’t need and the biggest reason is due to impulse. A huge sale event can be the cause of most impulse buying because people love a good deal. Buying an item you already have at him can sometimes be wasteful spending even if you get it for a great price.
2. Be creative:
Search for DIY projects. Projects that you can do by yourself at home is always a great way to create massive savings. Perhaps you are in the market for home air fresheners. You can create one by filling a spray bottle with water and fabric softener for use instead of buying one from the store. Or maybe you need small trash bags for your bathroom, you can recycle your old shopping bags instead. These simple things can add additional funds to your bank account without you even knowing it.
Learn how to make things, save things, or repair things you already own. Crafting is a great way to pass the time and save money. Fixing things that can be reused is also another way to add more money to your savings account. Perhaps you have a pair of jeans that are torn or tattered. Depending on the damage locations you can wear them as a style or get a small swing kit from the store and stitch them up yourself. A small sewing kit will likely be less expensive than buying a new pair of jeans.
Many times people buy things they like. You should use those items you already like to create something you love. Chances are it may be far better than buying something you may never use.
3. Give:
“Being careful with money does not mean being stingy or selfish.”
Sharing wealth is a good trait to have. When you share or donate good things happen. While sharing is caring thrifting is also a good way to save money. You can find a lot of new or gently used items at a thrift store. Shopping at a second-hand store can also be a great way to donate to a good cause or invest in your community.
There are plenty of places that allow you to trade or barter items you no longer need for something someone else is willing to give up.
4. Know that less need equals more time:
A thrifty lifestyle allows you to refocus on where your money goes. You can refocus your time as well. Having fewer things to worry about can allow you the freedom to not have to work hard.
Maintaining an expensive lifestyle gives you more time to perform money-saving tasks like cooking or making clothes so you don’t have to buy new ones.
Maintenance will give you money to spend on important things.
You won’t be tempted to make purchases used to compare yourself to all the time.
You can enjoy the same time spent without spending money you don’t have to. You are allowed to treat yourself occasionally.
How To Use Witch Hazel In Your Skincare Routine
2 Mar, 2022
Before we get started, I will give you some insight into how we ended up creating this post about witch hazel. So let’s just say I am one of many with sensitive skin. I tend to browse stores and online shops, looking for products to try and review. I LOVE Dollar Tree. I enjoy shopping there, buying a bunch of items I don’t need just because it’s FUN! So, I recently started a new job in a new location with a changing climate. This has been TERRIBLE on my skin.
In my teenage years, I used to struggle with acne in my T-zone area. (I will discuss that in depth in another post, probably.) My forehead, my cheeks, and under my chin have been breaking out. YIKES. So I went to my arsenal of products and began trying to combat my problem areas. Nothing was working this time. I had to find something else to use. I do plan on going back to my normal regimen after this experiment.
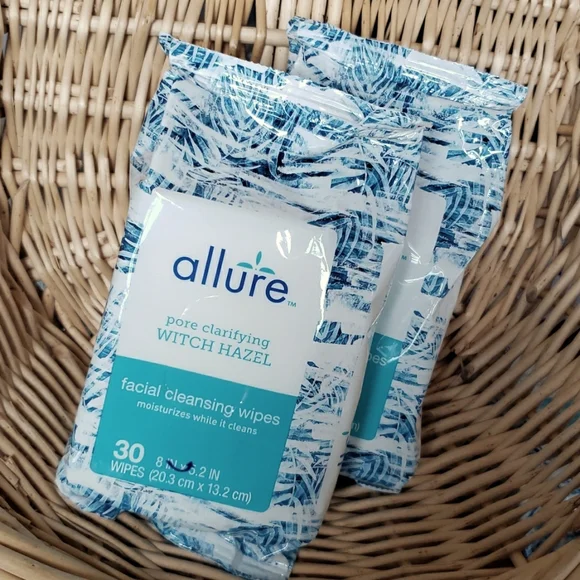
Last week I was at Dollar Tree and saw they had a new line of wipes containing witch hazel. I don’t normally use their wipes on my face. (This is personally due to skin irritation.) Growing up, I knew about the product but never really knew its benefits and uses. So I said, “Let’s go ahead and get these.”
Facial Cleansing Wipes I got from Dollar Tree
Allure Pore Clarifying Wipes Review:
Yall… I have been using these wipes EVERY SINGLE DAY for the past week and have NOT had a breakout since! Let me not jinx myself but I plan on continuing to use this method and decided to write this. It will be a reminder to myself if needed and in appreciation to the product manufacturer.
I only purchased one bag of wipes just because I wasn’t sure if they would work on my skin. I ended up going to 3 different Dollar Trees in the area and could not find this particular set of wipes. A bit frustrated to be honest but I did end up finding a bottle of witch hazel which I thought was rare! I picked it up and placed it right in my basket then headed to checkout after getting a few other items. (Covers Face) See the photo below.
What Is Witch Hazel?
The witch hazel plant is a type of plant native to North America and a member of the Hamamelidaceae plant family. Sometimes also called winter bloom, the bark and leaves of the witch hazel plant are used to make a skin-healing astringent.
Benefits of Using Witch Hazel:
Thanks to its astringent properties, it’s one of the most effective natural acne treatments used today. Witch hazel has been used to relieve swelling, bleeding, itching, minor pain, and discomfort caused by minor skin irritations (e.g., cuts, scrapes, insect bites). It is also used to relieve itching, discomfort, irritation, and burning caused by hemorrhoids. Other benefits include naturally reducing blisters, fighting bacteria, toothaches, and more.
Skin Irritation:
Witch hazel may help reduce skin redness and provide relief for irritated and sensitive skin.
Research suggests that applying witch hazel topically to sensitive skin may be beneficial in the treatment of inflamed, irritated, or broken skin.
Fights Skin Acne:
Due to its powerful anti-inflammatory properties, some research suggests that witch hazel could be useful in the treatment of acne.
It acts as an astringent, causing your tissues to contract to help shrink pores while also soothing your skin and relieving inflammation.
It can be applied directly to your face after cleansing or steaming for maximum effectiveness.
Hair Care:
Witch hazel may help reduce scalp irritation and inflammation.
It’s also sometimes used for treating dandruff and dryness, though more studies are needed to evaluate its effectiveness for these conditions.
Additional Treatments
Skin sores
Acne
Redness and Swelling
Psoriasis or eczema
Oily Skin
Cracked or Blistered Skin
Insect Bites
Irritated Scal and dandruff
Poision Ivy Rashes
Poison Ivy Rashes
How to Safely Use Witch Hazel:
Most people can use witch hazel safely with minimal risk of adverse side effects and body malfunctions.
Ointments and extracts can be applied directly to your skin several times per day and safely administered for the treatment of hemorrhoids after each bowel movement.
Doing an initial skin patch test on a small portion of your skin can help prevent unwanted side effects and skin reactions.
Some people may experience skin irritation or allergic reactions after applying witch hazel topically. Stop use if irritation occurs.
Only use small amounts orally and discuss any side effects or concerns with your doctor.
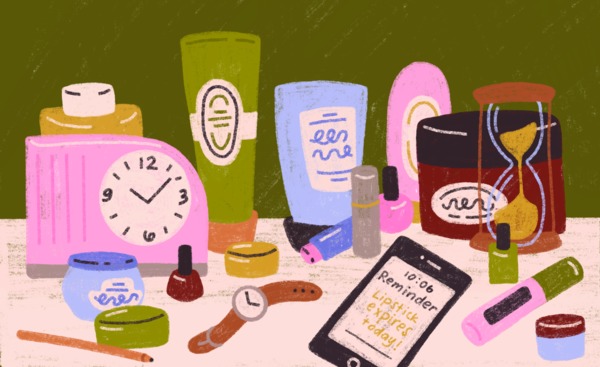
Does Witch Hazel Have an Expiration Date?
Like many other products on the market, they all have a specific shelf life. Although similar to alcohol and hydrogen peroxide, you would assume that they didn’t expire. Witch hazel will typically expire within a 2-year time frame, according to research. If you use this product on a regular basis, I would believe that it would technically expire before then.
When manufacturers produce products and place them in stores, each product is required to have an expiration date whether or not it is accurate. Most people don’t follow strict expiration dates and still use expired beauty products and even some medicines. I would suggest not using expired products more than 2 years after the expiration date. You can find the expiration date for most purchases on or near the cap, underneath the bottles or boxes, and near or around the bar code area.
There are two main indicators that your witch hazel has gone bad. Witch hazel, is clear in its pure liquid form, but once expired, it tends to take on a yellowish tint. It also has a woody scent that smells a bit like a mild beer. Once witch hazel is past its expiration date, it loses the healing benefits you were using it for in the first place. Although witch hazel is astringent, it is not antiseptic. Because witch hazel is primarily used for treating minor skin conditions, using expired witch hazel can possibly worsen those conditions and lead to infection.
Love Rules: How To Find A Real Relationship In A Digital World
28 Feb, 2022
Rule #1: Establish Your Ideal Love Weight
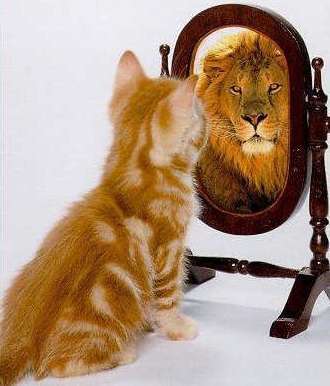
“ Looking Glass Self ”
This Phrase was first coined by the sociologist Charles Horton Cooley in 1902. This Phrase is described as being how we actually define ourselves by our interactions with others. This is a way of comparing ourselves to others and how it can steer our self-esteem and insecurities in the wrong direction.
The book, Love Rules: How To Find Love In A Digital World, quotes a statement taken from another author in which the author claims that “Many people today spend most of their time investing in trying to understand ourselves from the feedback from others rather than actually knowing who we truly are.”
This chapter basically talks about figuring out what you want from a potential partner and your growing relationship moving forward. It is a self-defining chapter that allows you to dig deep within yourself and be realistic about the person you are searching for to complete you after you have grown to be content within yourself.
The main goal in this chapter is to establish your ideal love goal. There are separate sections of the book which allow you spaces to gather your thoughts. I will be realistic and share my goals with you. This mainly will be so that you can get to know me and what I am looking for as well as help me create reader-worthy content and possibly find my forever love. Let’s read this book together. If you need to find the book to read along click HERE for a book link.
1. I want to find:
Someone who listens as much as they talk.
2. My ideal partner has the following 3 qualities:
Humor
Intellect
Money
3. Analyze what others say they want for you and your relationships:
Parents: Stable long term relationship
Best Friend: Hot guy, nice car, own place, NO DRAMA
Siblings: My baby daddy (Insert laugh here)
Colleagues: A Family man
Online Friends: Someone who will keep me off social media (Laughs)
4. Do their expectations align with what you want?
Yes, they do to a certain extent. All of it seems ideal and would automatically be something that I or you would want clearly. I would enjoy all of their wants but in a different person, environment, and lifetime probably. (Laughs again)
How To Make Money Just By Using Your Phone
28 Feb, 2022
As we all know, the prices of just about EVERYTHING are increasing. Here are a few ways you can make some quick money. NOW when I say quick, I don’t mean FAST. It will take a few moments of your time but it will be worth it! These are some good ideas for your children, yourself, and your friends and family. I have been testing these methods over time to avoid scams. They have been proven to be effective.
When I say spending money, of course, it won’t be thousands of dollars, but if you need lunch money or gas, this is the way to go. This list is not in order meaning that the top choice is my favorite (This is done intentionally), but I use them all at different times.
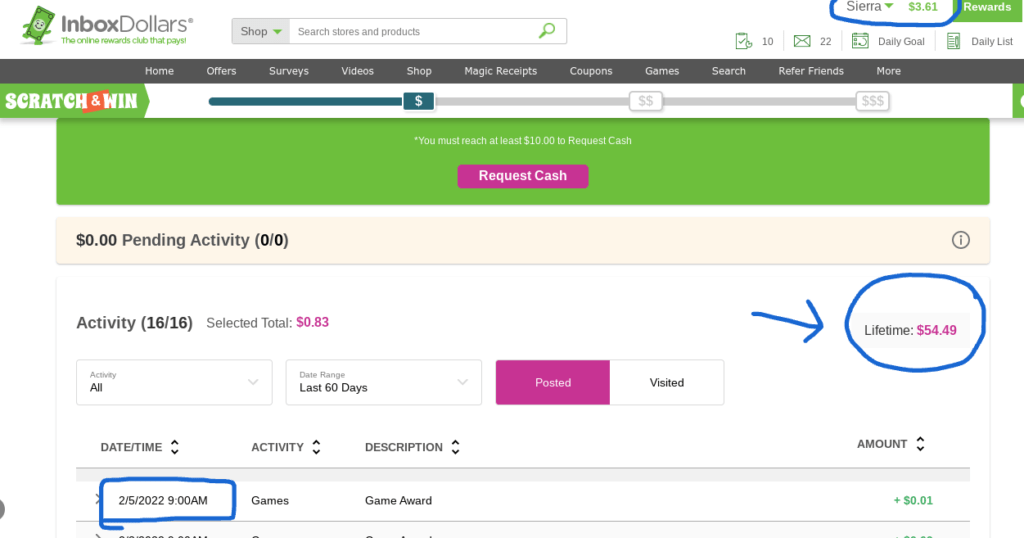
1. Inbox Dollars
A few years ago, I was a stay-at-home mom. I loved it but I needed something to do so I decided to start doing research on various topics. That’s how I stumbled across Inbox Dollars. You can earn money using this website in many ways some of these include:
Downloading the app from the Play Store
Completing offers
Taking Surveys
Watching videos
Shopping
Uploading receipts
Playing games
Searching the web
Referring friends and more
Once you reach the $10.00 threshold you can request a PayPal deposit. You can also redeem your rewards for gift cards or request a check in the mail. Here is my actual account balance. I don’t use this site as often but I do try to visit every once in a while to earn a few cents just because.
2. Swagbucks:
Swagbucks is another site I use to earn a few bucks. I came across this site while doing my research, and I found out that it actually works and does pay out. You can earn money on this site by doing any of the following:
Answering questions and taking polls
Taking Surveys
Completing offers
Playing games
Shopping
Watching videos
Referring to friends and more
You can redeem your rewards for gift cards and PayPal deposits if you have a PayPal account. If you don’t already have a PayPal account head on over and create one!
Swagbucks Redemption
Swagbucks account
3. Current Streaming App:
Normally I listen to the Pandora streaming app for my music. I had tons of radios saved and subscribed to the premium services but I listened to them for so long that I needed a change. Then I came across Current Radio. Let’s be clear I wasn’t looking to be compensated for listening to the radio but I was like “Hey let’s do this!” It takes a while to accumulate points depending on the reward you want but you can earn points by one of these options:
Listening to the radio
Completing the featured offers
Taking Surveys
Playing games
Location check-ins
You can redeem your reward points to get gift cards the featured items, or through PayPal direct deposits. Below are the actual rewards I received using this app.
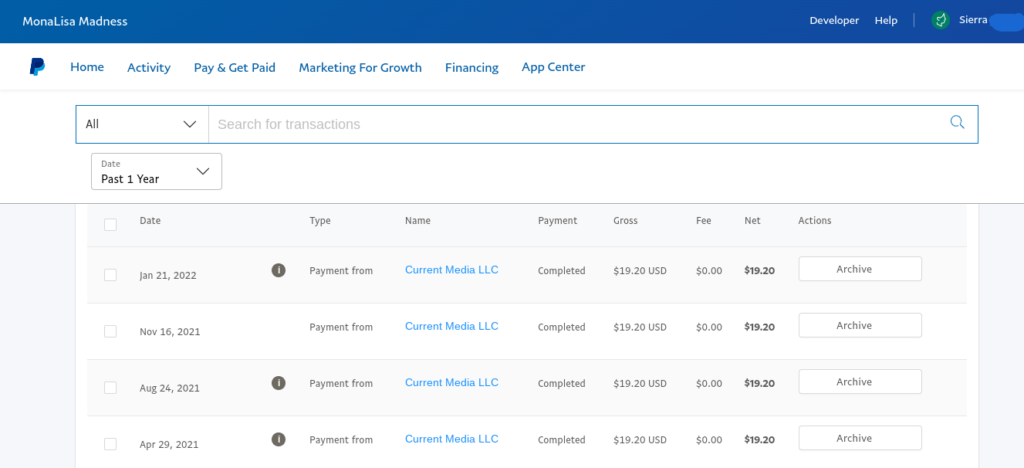
Current Media Paypal Deposits
4. Survey Junkie:
Survey Junkie is a website where you earn points for taking surveys. That’s it! Most of the surveys are not too long but I will say that it is hard to be accepted for surveys on the site. It tends to have some surveys fill up quickly so you have to stay on top of this account. I try to take a few every now and then when I have time but I have to do better! Here are the rewards that I earned using this site.
You can redeem your points With electronic gift cards, PayPal deposits, or electronic bank transfers.
Survey Junkie Paypal deposits
Account Screenshot
5. Lucky Money:
Lucky Money is an app that I was skeptical about at first. It’s an app where you scratch tickets to earn coins or real money. NOW I will say that this app does pay but it has changed over the last few months. Initially, it stated that you can earn CASH, but it takes a while before you reach the $100.00 payout threshold for actual money. (I still need a nickel to get the $100.00) I’m currently still using this app just because it is a good way to pass the time and those dollars add up!
You earn money using this app by completing offers or scratching the tickets every day. Below are the rewards I earned using this app.
Lucky Money Wallet
These are just a few companies that I myself have tested and actually received rewards for. I have a few others that I don’t necessarily use much to know if they are legit but plan on doing so and keeping you all posted so stay tuned. Feel free to browse the sites and start earning some coins! Take the money and run. Just kidding. You are very welcome.
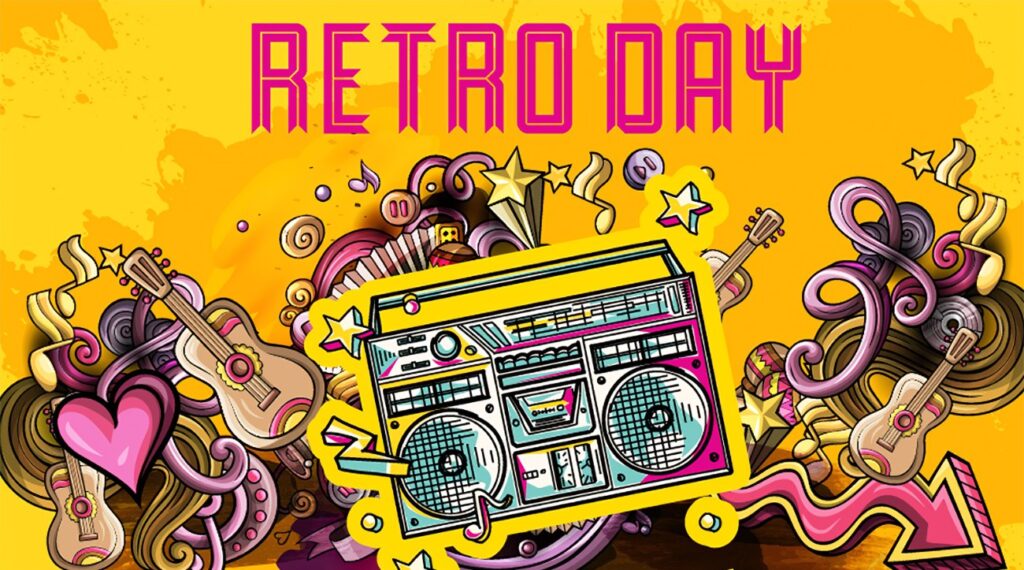
National Retro Day: February 27th
27 Feb, 2022
Okay, so here I was just minding my own business when BOOM. I stumbled across an interesting post. Listed in my calendar of all the important days and holidays I see NATIONAL RETRO DAY. I had no clue that this was a thing. Like a REAL holiday that people will celebrate.
So, I did a little research and IT IS! Thankful for some inspiration here I am just learning and working. This post is my toast. Happy National Retro Day!
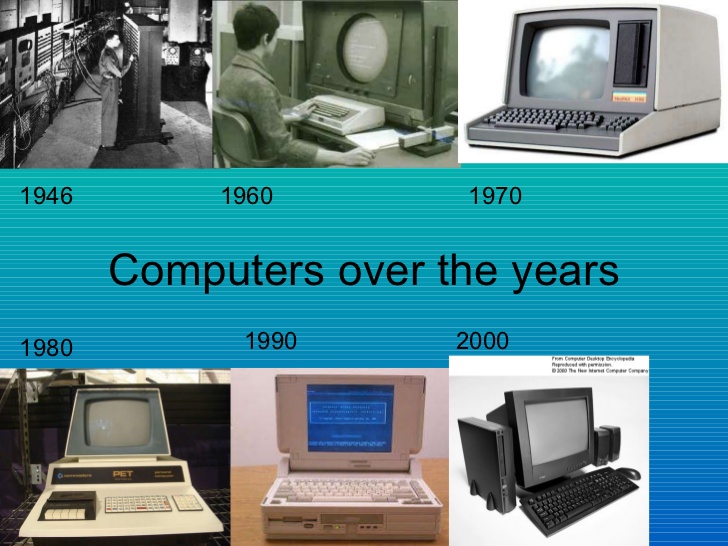
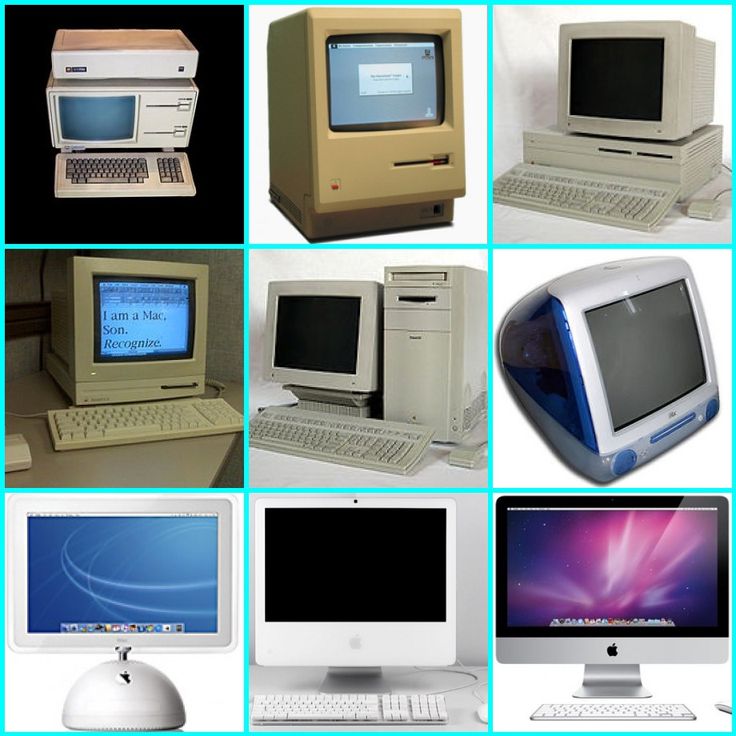
Now with the introduction out of the way where do we begin? Well, let’s start with computers.
Charles Babbage, an English mechanical engineer, and polymath originated the concept of a programmable computer. Considered the “father of the computer”, he conceptualized and invented the first mechanical computer in the early 19th century.
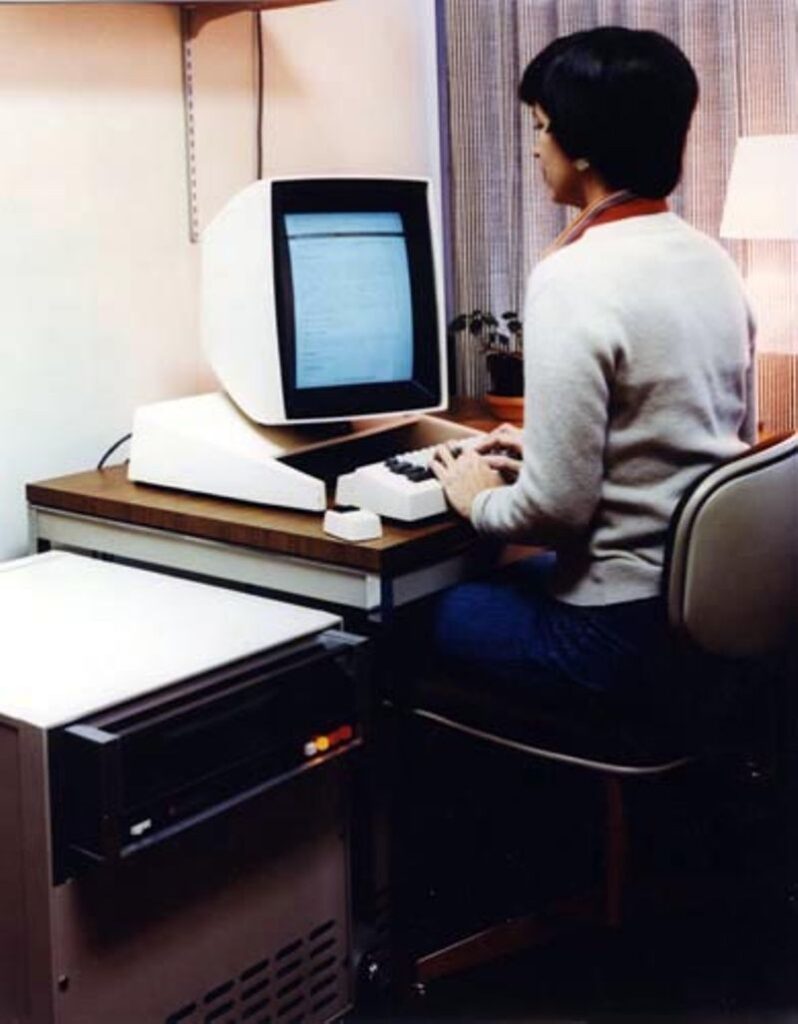
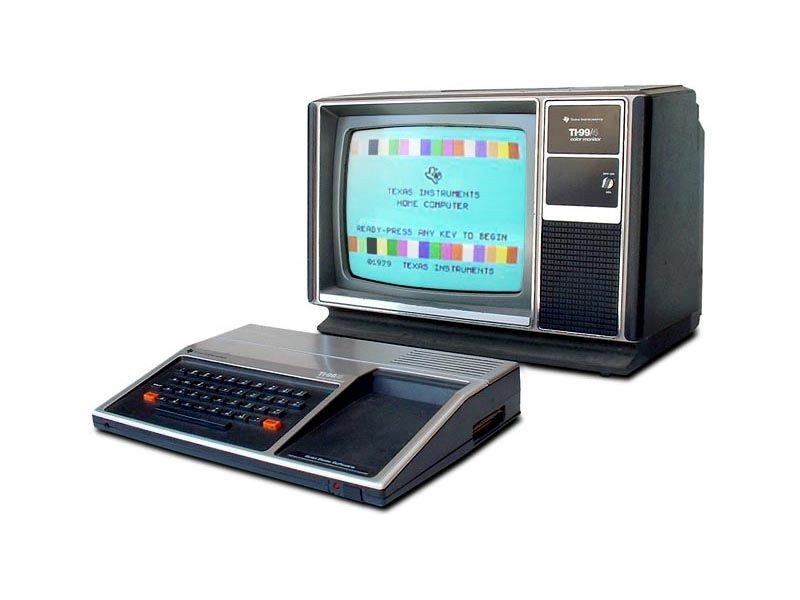
Let’s quickly dive into the evolution of the computer age as we once knew it.
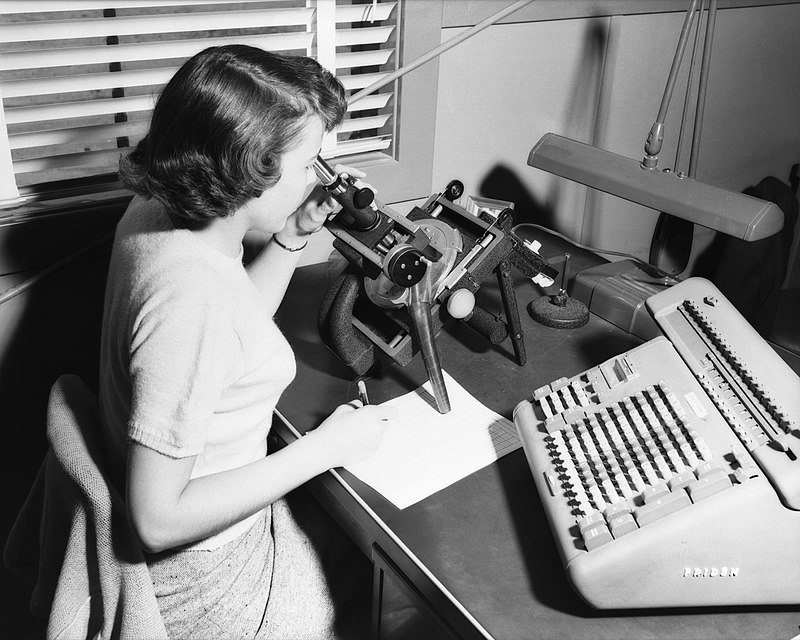
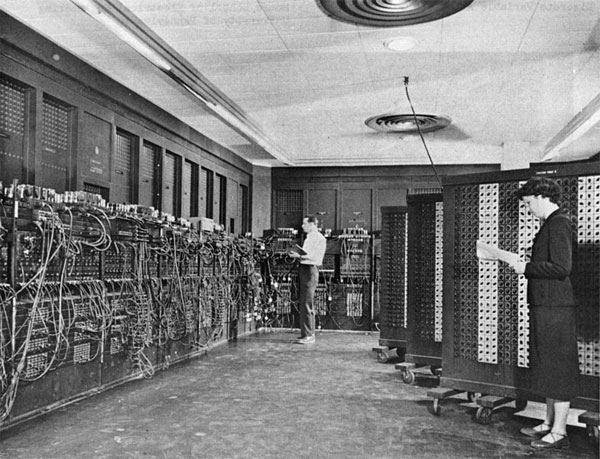
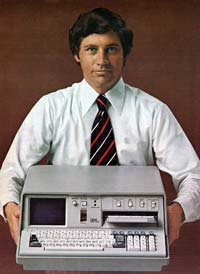
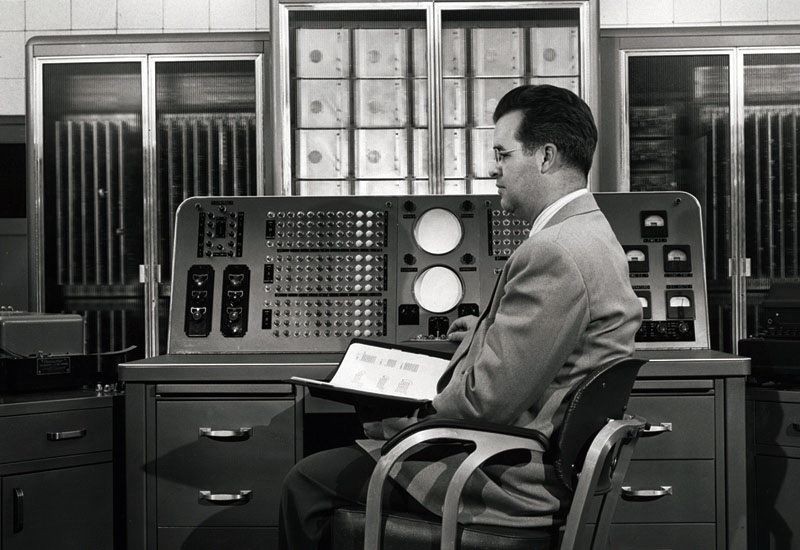
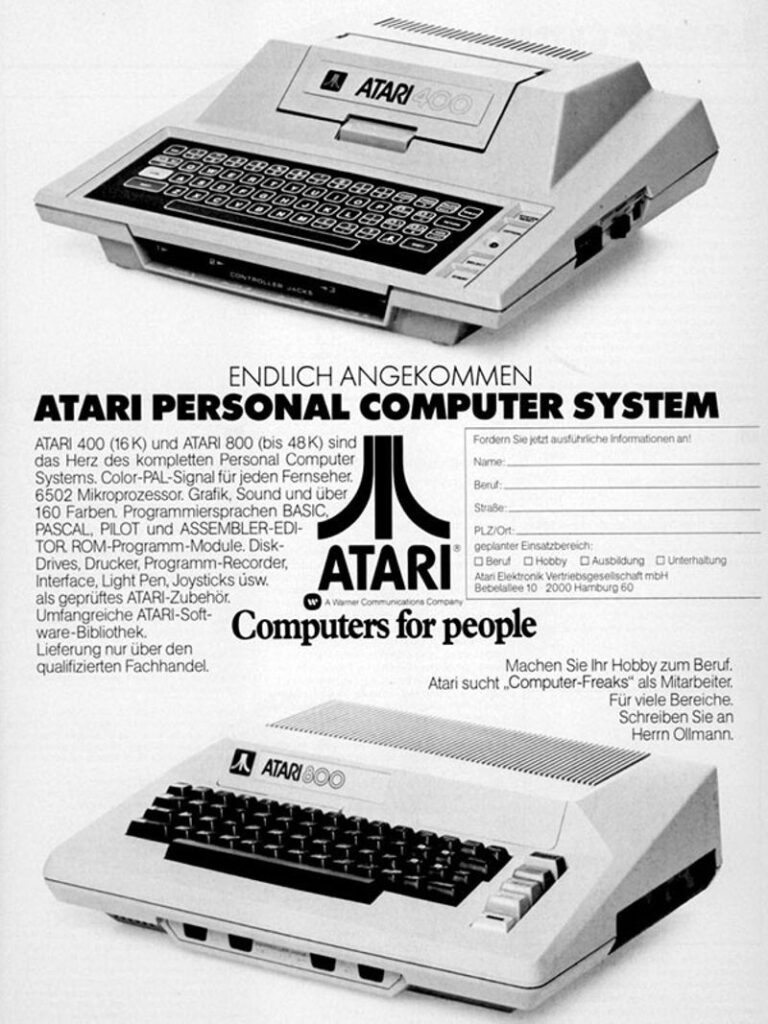
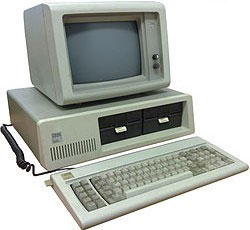
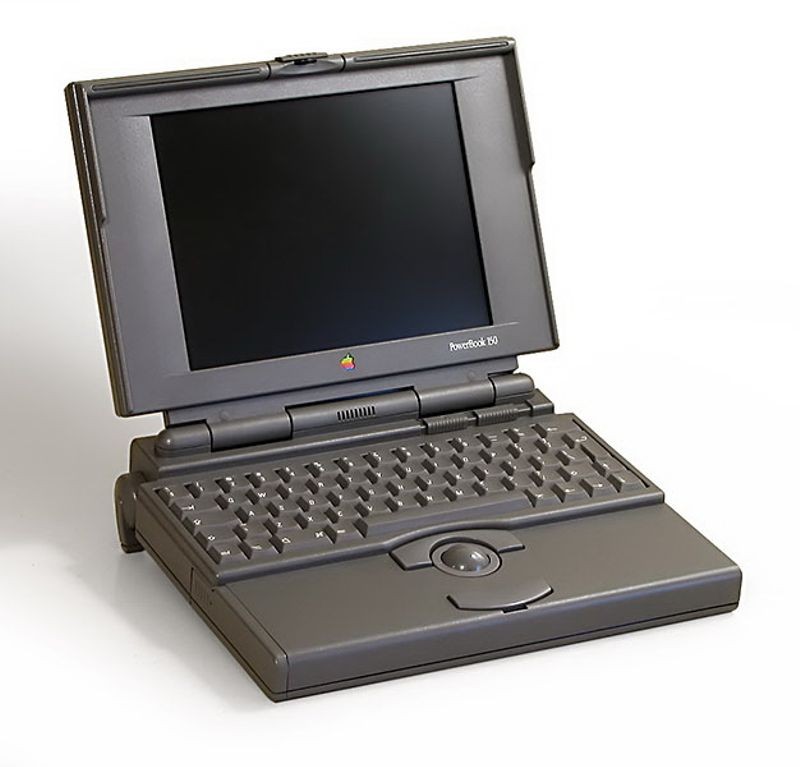
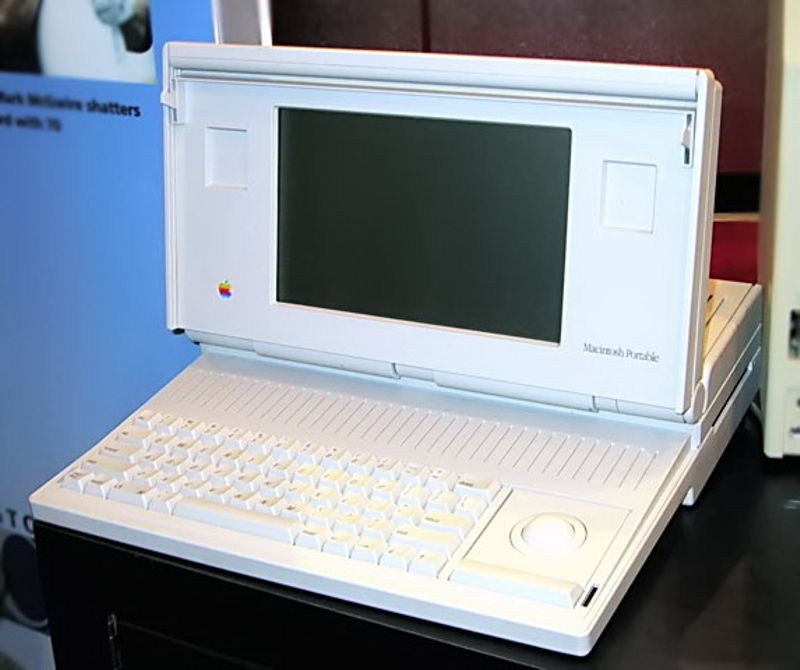
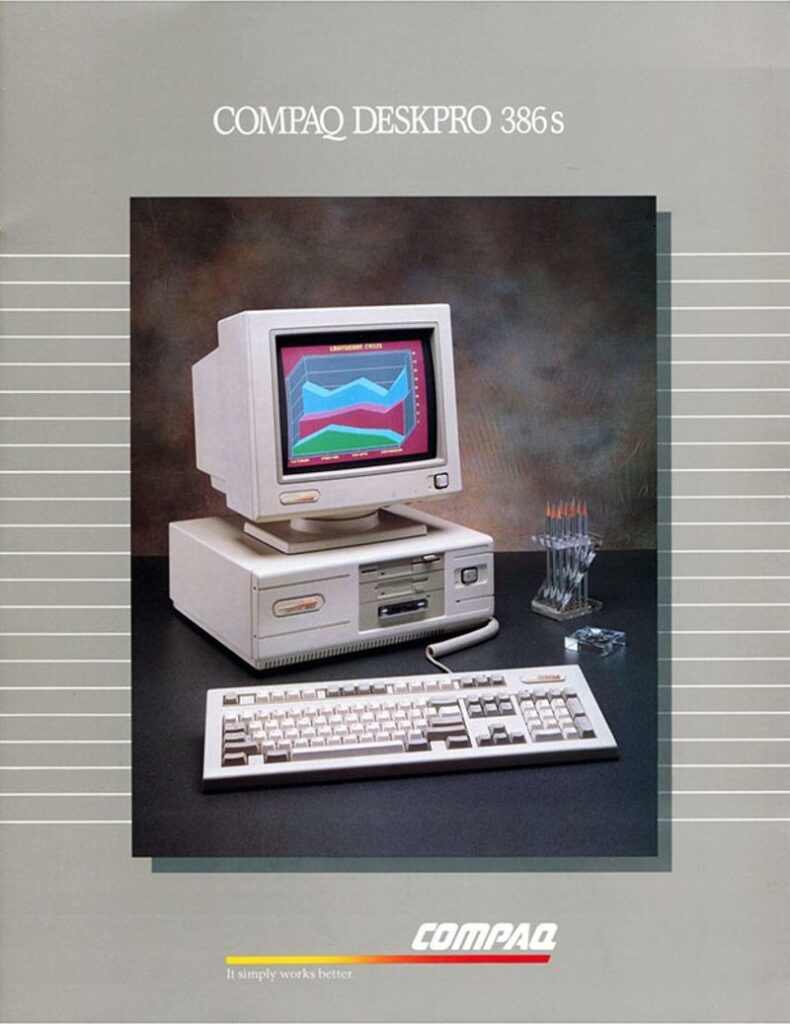
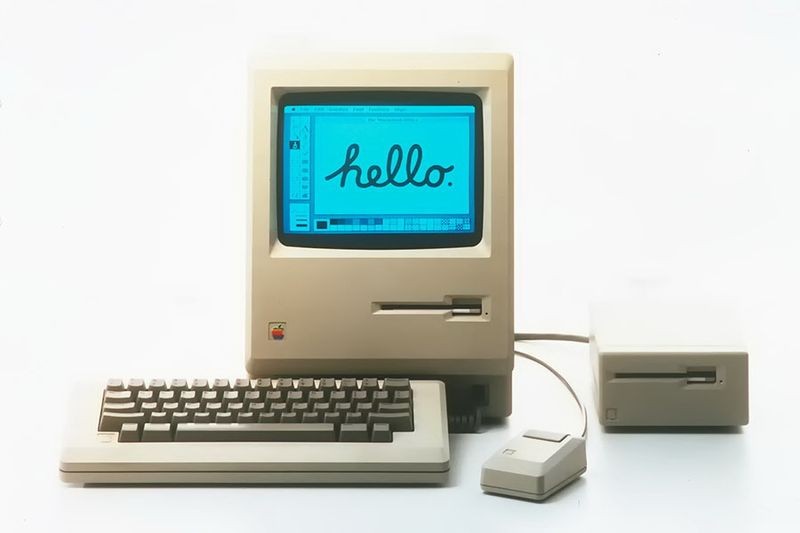
Computers:
A human computer, with microscope and calculator, 1952
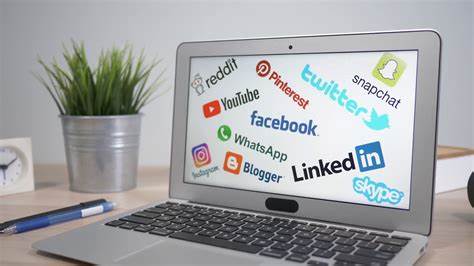
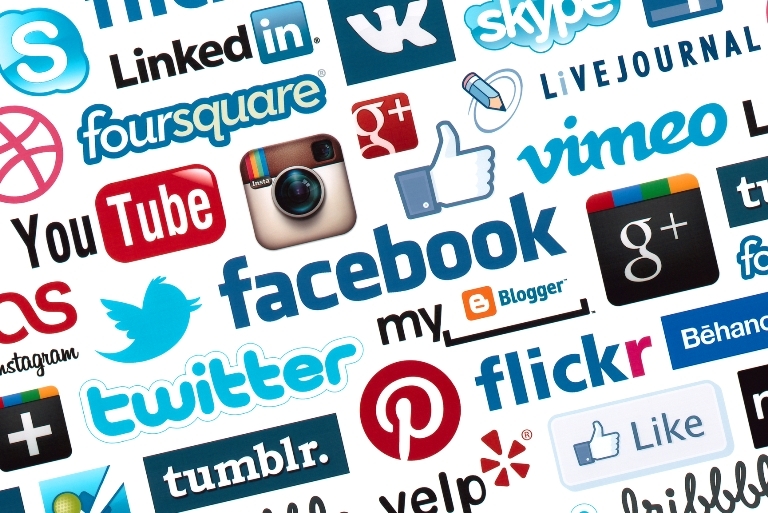
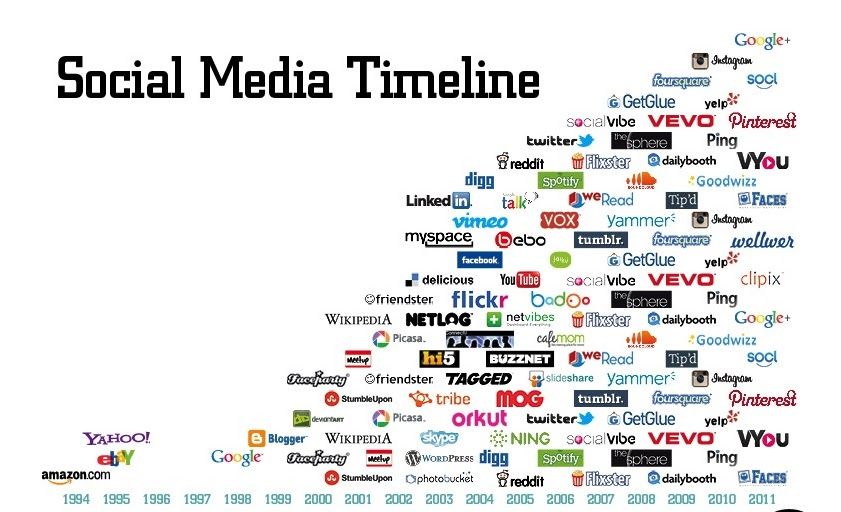
Social Media Platforms:
Now that we have computers what should we do with them? Get SOCIAL DUH. Okay Okay, I’m pretty sure when computers were invented they were meant for some in-depth reason. Probably to calculate all those pennies that were worth billions of dollars back then.
Hey, while we’re here on this topic do you all remember when that social media post went viral claiming Samsung paid Apple a $1 billion dollar fine but in small change? (Insert Laugh Here).
Allegedly it stated “Samsung pays Apple $1 Billion Fine by sending 42 trucks full of Pennies,” reads a graphic shared on an Instagram post. If you missed it read more HERE. Off to the social media world my friends.
Social Media Logotype Background
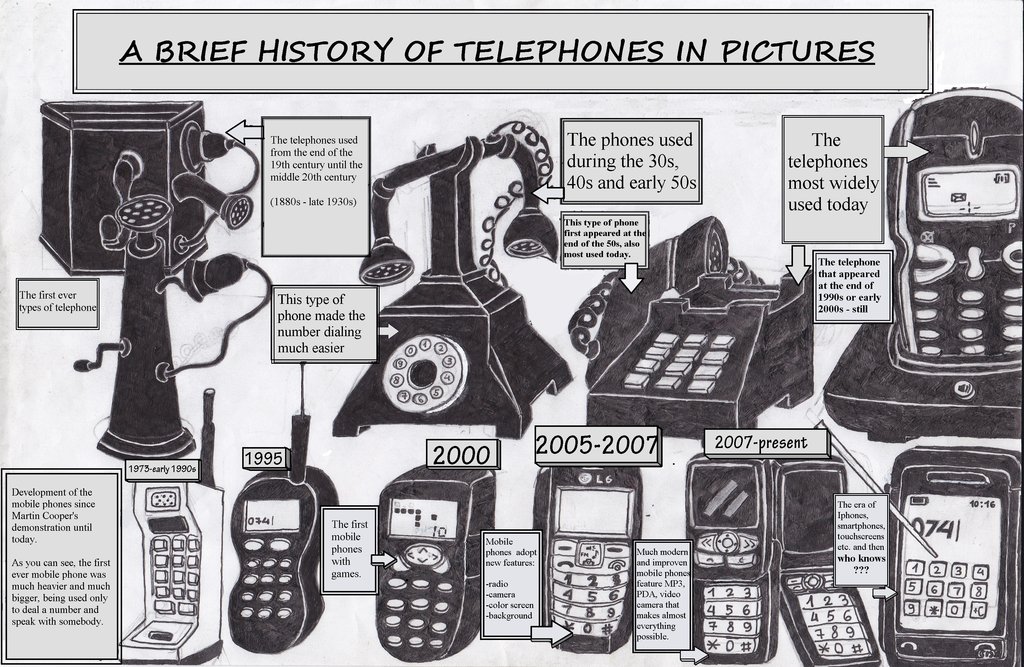
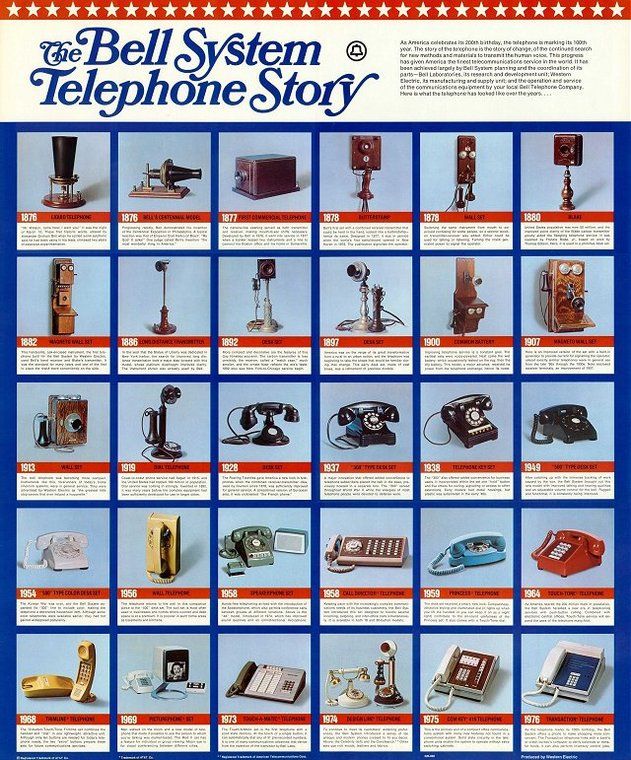
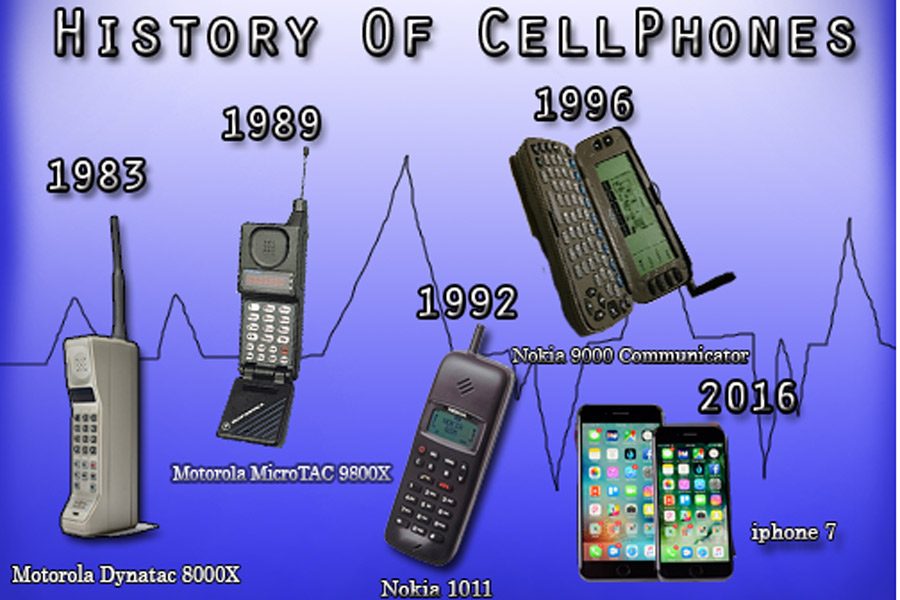
The Invention of the Telephone:
With so much to talk about and so little time, how do we accomplish this task? We jump right on the phone and send a text! We probably should get on the telephone and talk to each other more often but in this day and age, we don’t.
We utilize computers, social media platforms, and cell phones. So here were are on to our next retro selection. But, before we move on to the slide show let’s take a brief moment to appreciate the history of the inventor we all love so much Alexander Graham Bell.
Decades Of Fashion: Hair, Clothes, and Shoes:
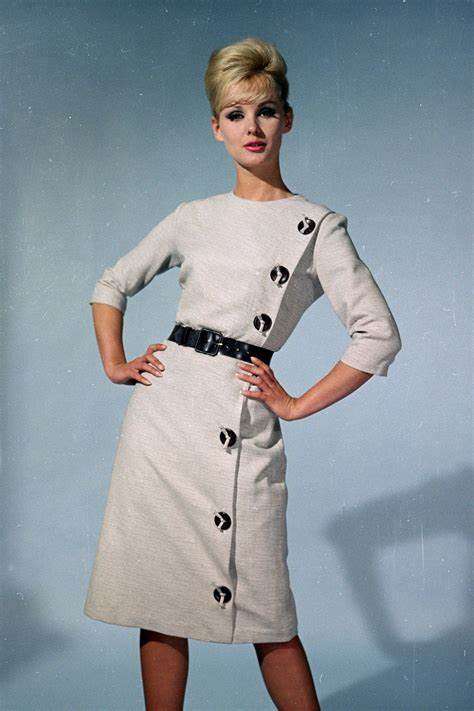
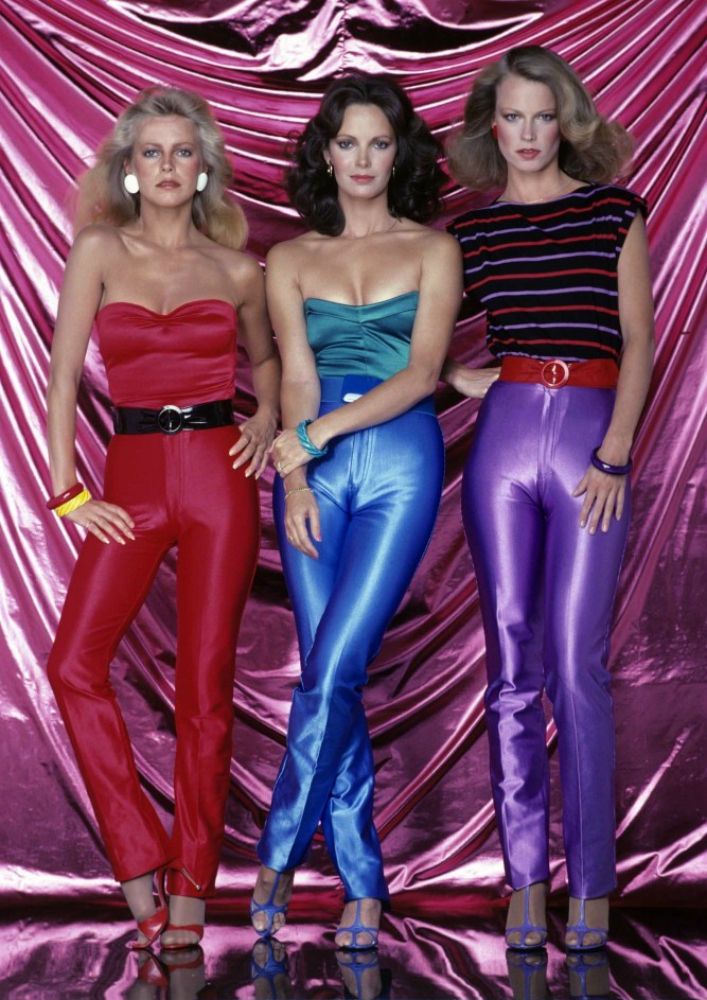
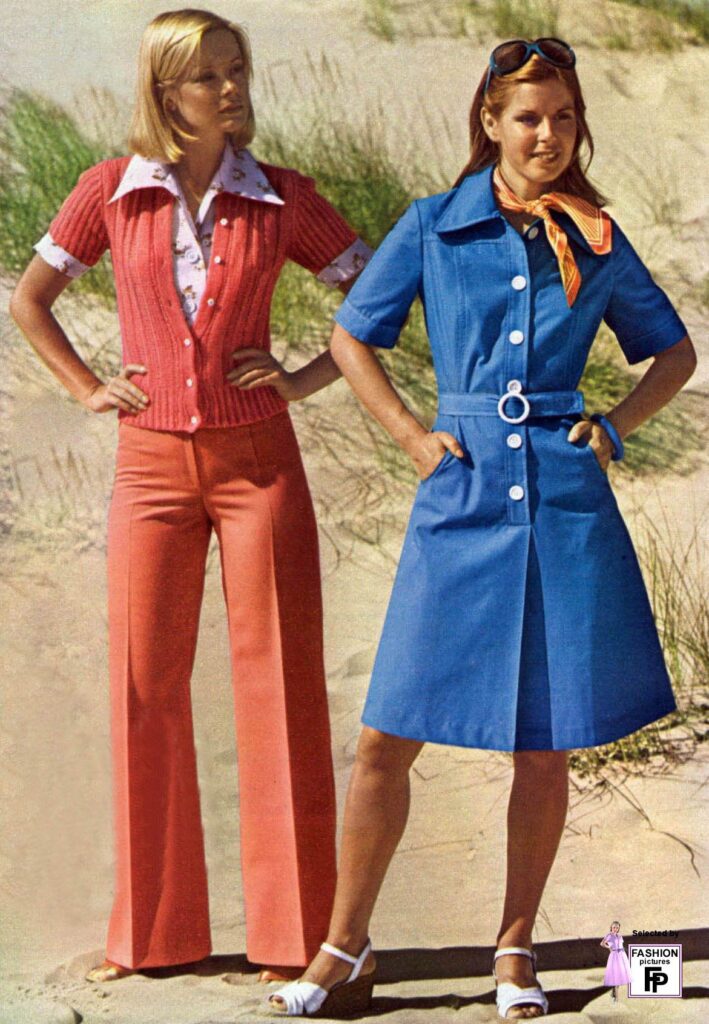
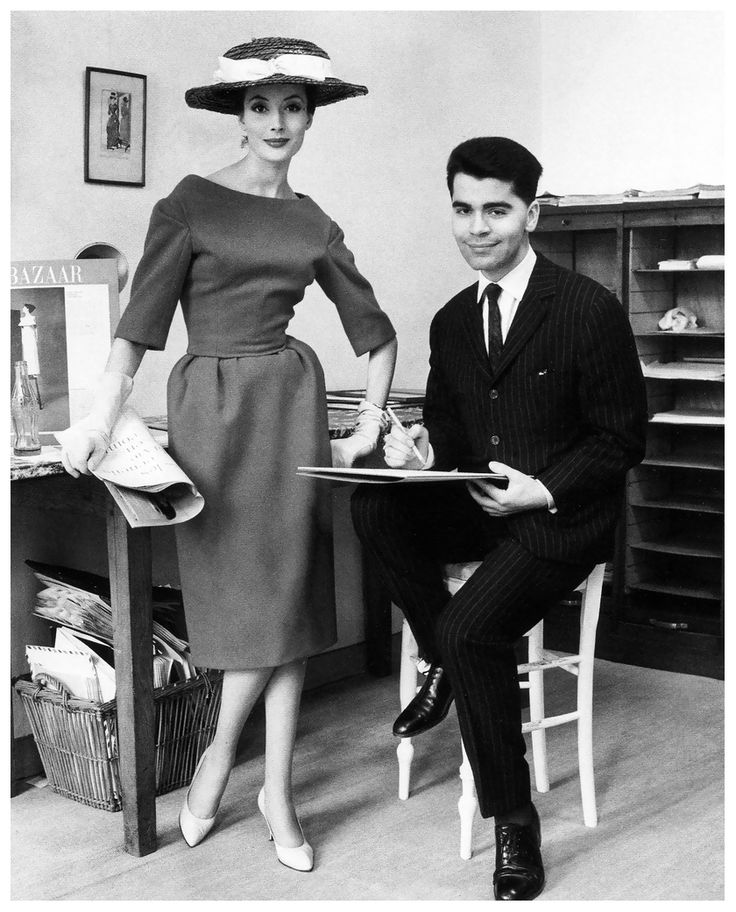
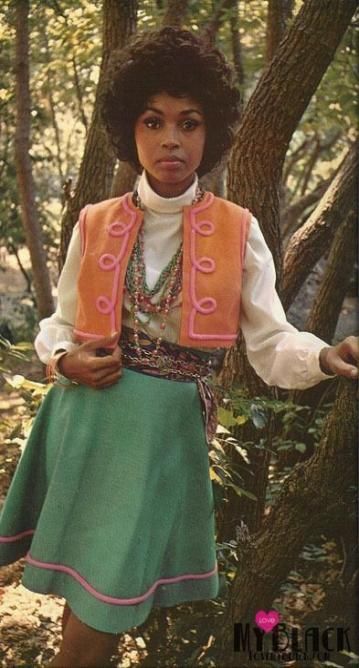
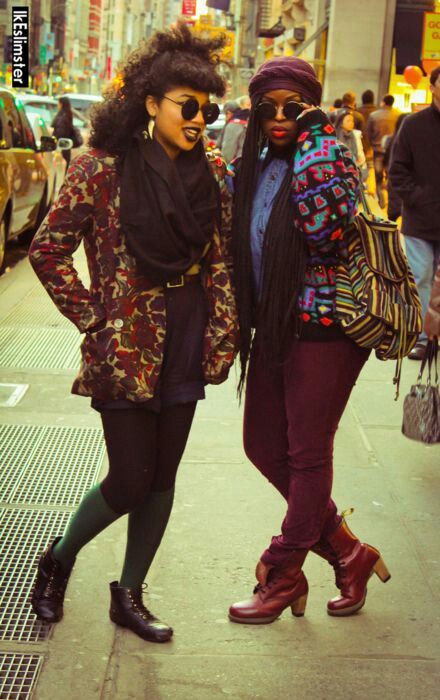
The term retro has been in use since 1972. The term is used to describe styles that have been created in the past. Retro style refers to new things that display characteristics of the past. Pastel and neon colors are stereotypically associated with the 1980s and early 1990s fashion. Also at this time, late 1980s-style high-waisted mom jeans. Pencil skirts, bell bottoms, and platform shoes were also widely popular back in the day. Recently many of those trends have made a comeback in this decade and I appreciate all of it. Here is a look at some of the fashion over the last few decades.
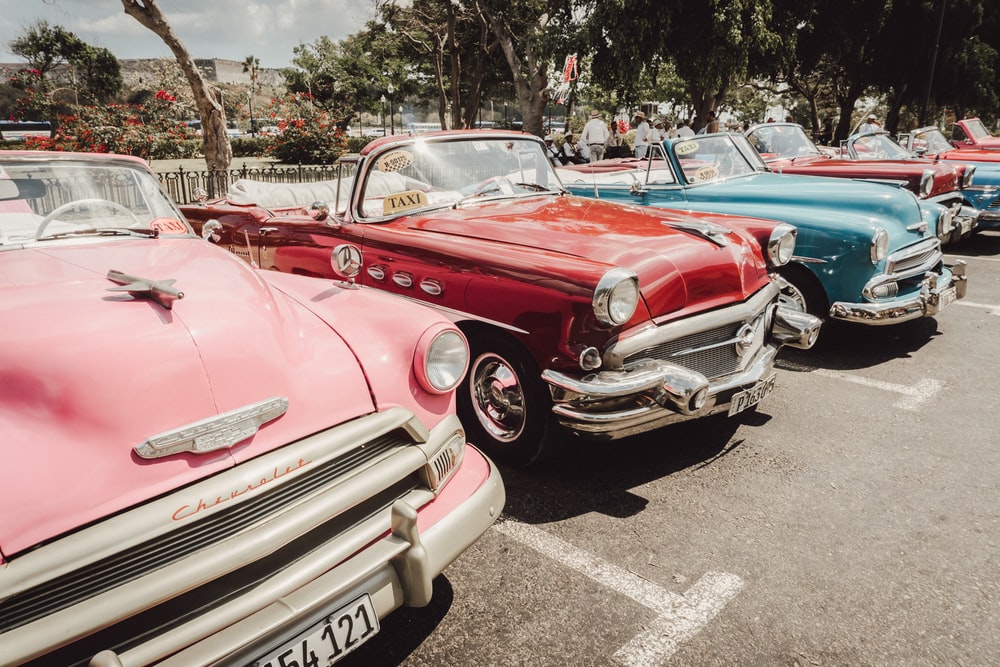
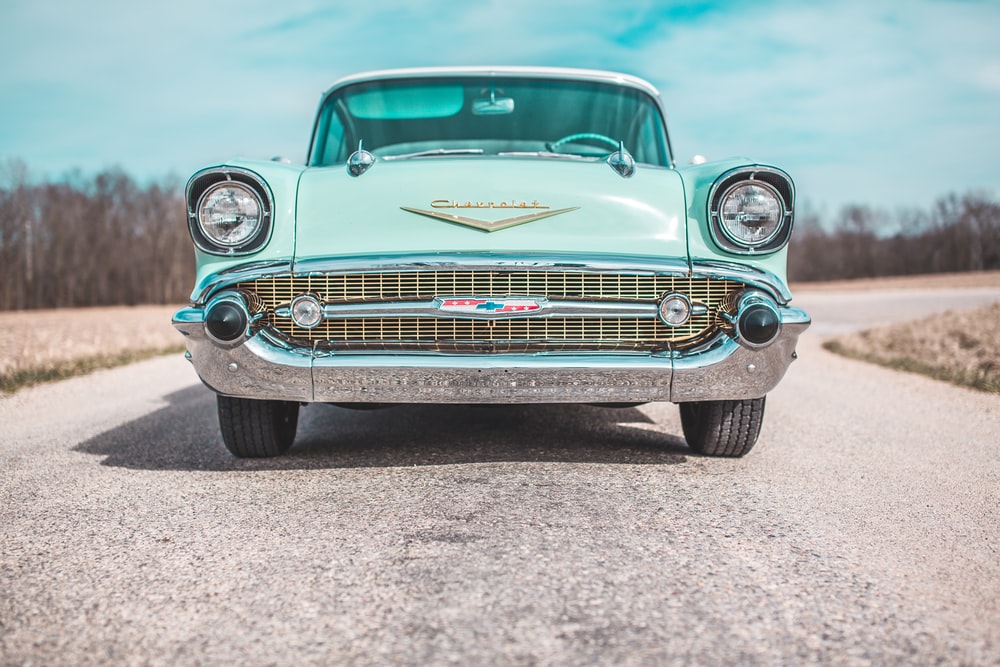
Retro Cars:
Okay as a kid I had never been into the whole retro car thing. In fact, I didn’t even know what a retro car was but I loved the movie, Herbie. If you haven’t seen it here is a clip of the movie starring Lindsay Lohan.
Film:
A silent film is a film with no synchronized recorded sound. In other words, it has no audible dialogue. “Silent film” is typically used as a historical term to describe an era of cinema. This is prior to the invention of synchronized sound. It also naturally applies to sound-era films such as City Lights,Silent Movie, and The Artist which are accompanied by a music-only soundtrack in place of dialogue.
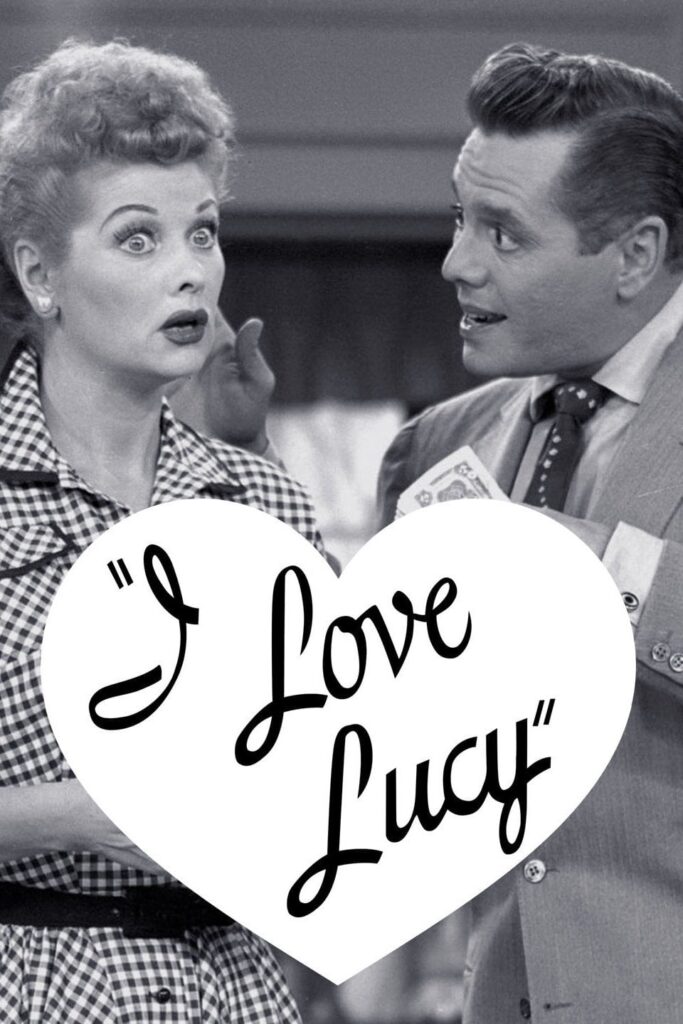
Some of my favorite Classic movies are Grease, Annie, and the original Cinderella.
Last but not least, let’s review music throughout the decades. Motown Records is an American record label owned by the Universal Music Group. It was founded by Berry Gordy Jr. as Tamla Records on January 12, 1959.
It was incorporated as Motown Record Corporation on April 14, 1960. The name which was a combination of motor and town has become a nickname for Detroit where the label was originally headquartered. Many great artists emerged from the record label and much of the music is still listened to in this era.
The label includes artists such as The Supremes, The Four Tops, The Jackson 5, Stevie Wonder, Marvin Gaye, and The Temptations.
Well as much fun as this post was, it has to come to an end as did many of the things included in this post. I hope you all had a great time reminiscing about the past and I look forward to creating more memories for next year!
How To Celebrate St. Patrick's Day In Style
26 Feb, 2022
St. Patrick’s Day is a cultural and religious holiday celebrated on the 17th of March. It is the anniversary of the death of Saint Patrick and named in honor of him. Saint Patrick was born in Britain. He was kidnapped by Irish raiders as a teenager and taken to Ireland, where he was enslaved for six years. During his time in Ireland, Patrick converted to Christianity and eventually escaped to Britain. He later returned to Ireland as a missionary and is credited with converting the Irish people to Christianity.
The festival commemorates the arrival of Christianity in Ireland, as well as the celebration of Irish heritage and culture. The first celebrations were held in Ireland in the 5th century, shortly after his passing. In the 17th century, the day was adopted by the Catholic Church and became a feast day in the Catholic calendar. In the 18th century, Irish immigrants began to celebrate the holiday in the United States. The first St. Patrick’s Day parade in the United States was held in Boston in 1737.
These early celebrations were religious in nature, with people attending church services and feasting on traditional Irish foods. Traditional Irish foods such as corned beef and cabbage, and Irish stew are often eaten on this Day. St. Patrick’s Day parades are a popular tradition in many countries. The largest St. Patrick’s Day parade in the world is held in New York City.
St. Patrick’s Day is now celebrated by many people throughout the world, Irish and non-Irish alike, with food, drink, and all things green. The first thing you need to do to prepare for St. Patrick’s Day is to locate all the GREEN items you can find. This can be clothing, jewelry, socks, shoes, hats, cups, plates, and other decorative items. This make take some time so it’s best to prepare early!
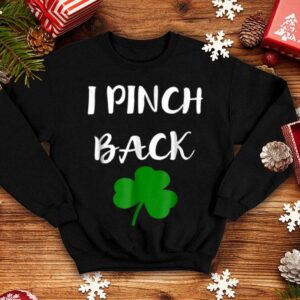
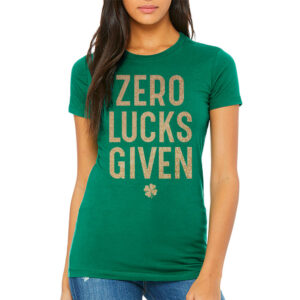
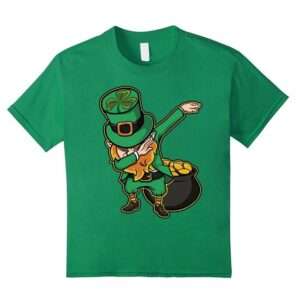
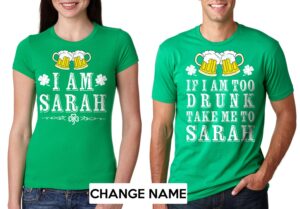
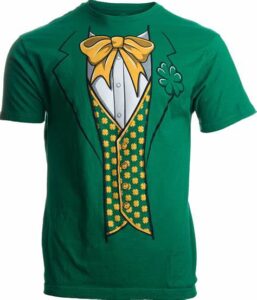
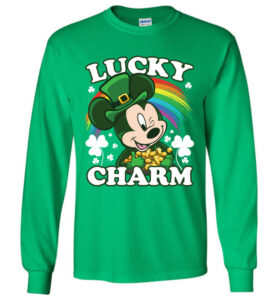
St. Patty Day Tops And T-Shirts:
There are many places available that will be selling St. Patrick’s Day merchandise. Be sure to keep an eye out for “Kiss Me I’m Irish” or four-leaf clover tees. They are very popular during the holiday. A few T-Shirt ideas are pictured in the slideshow below.
Pinch Me, Imma Sock:
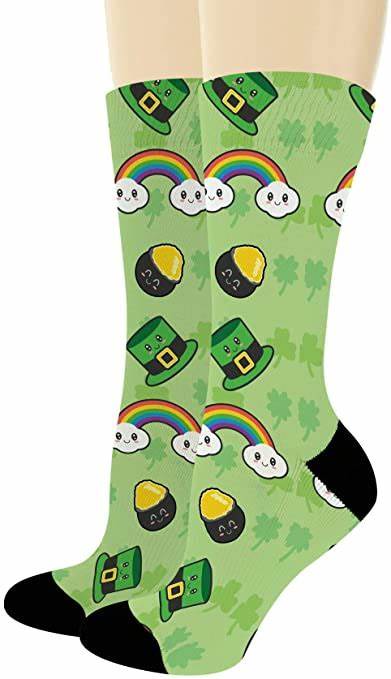
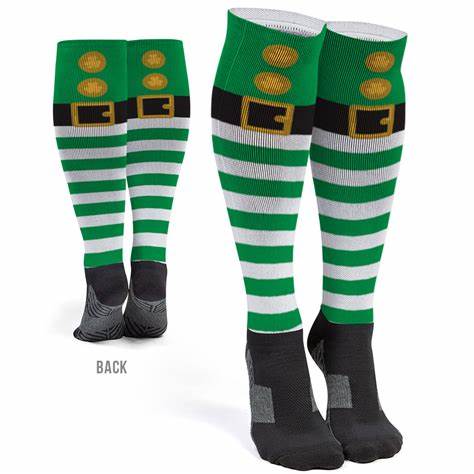
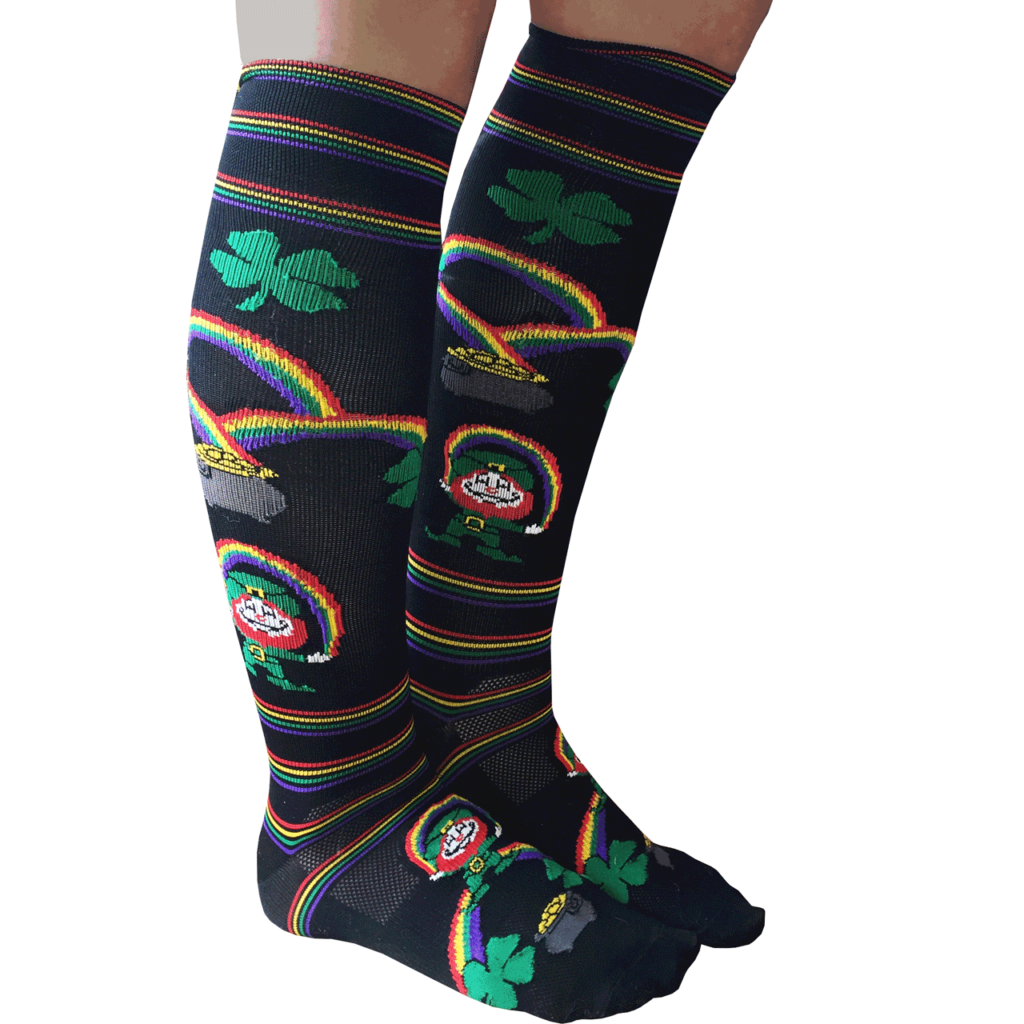
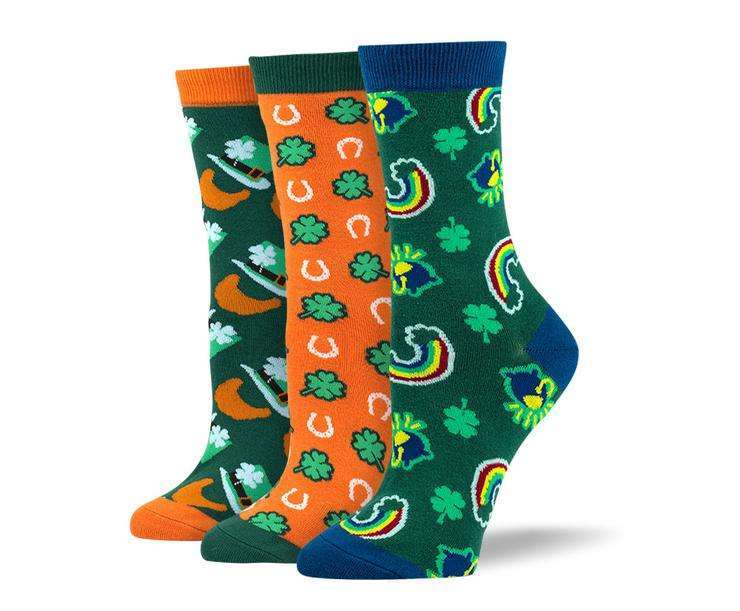
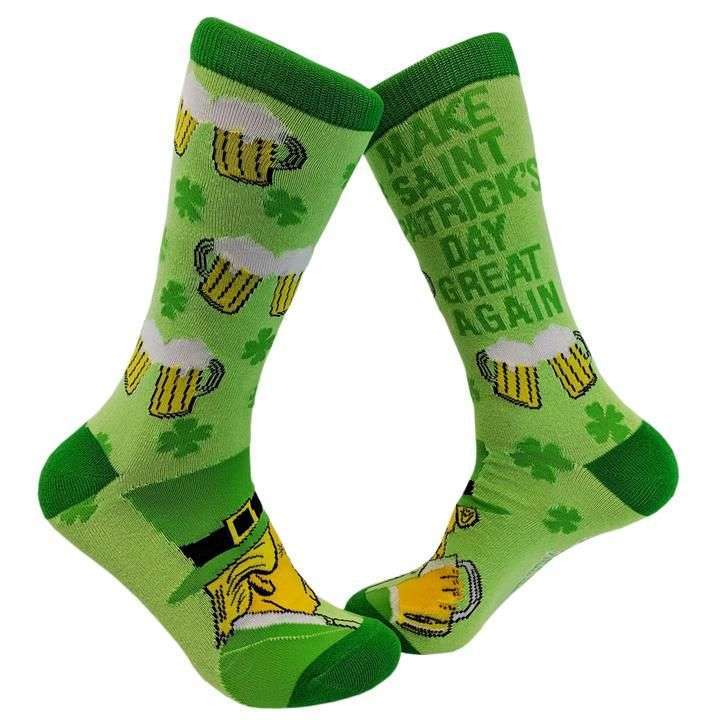
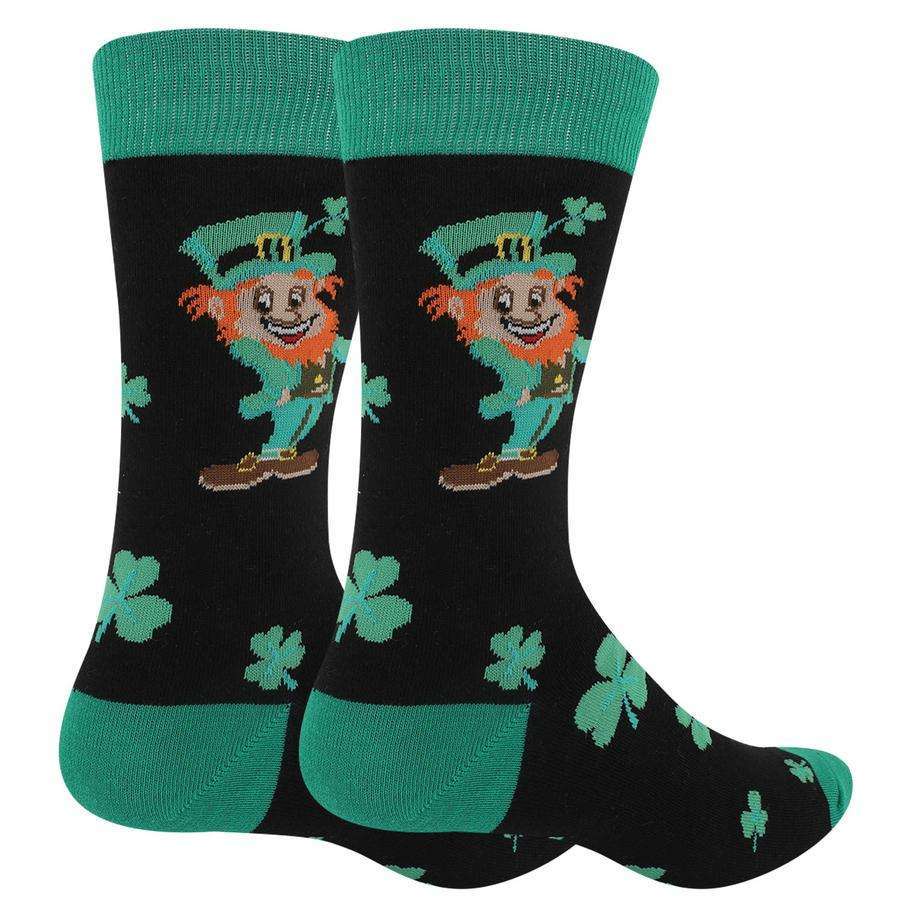
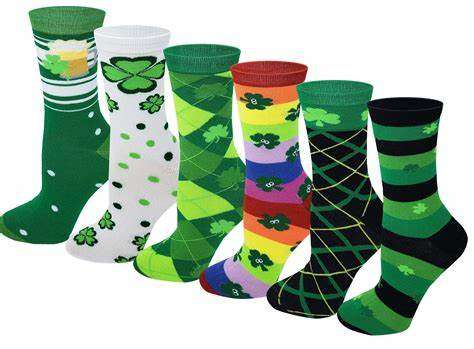
You can never go wrong with buying socks. Seriously who can have too many when you always lose one? I guess if you’re lucky you will be able to keep up with these cool Saint Patrick’s Day socks! I thought these were super dope so I added them down below. Festive socks
HorseShoes:
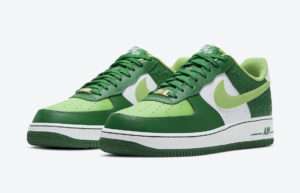
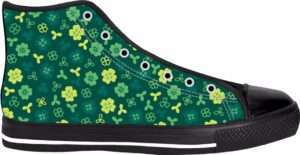
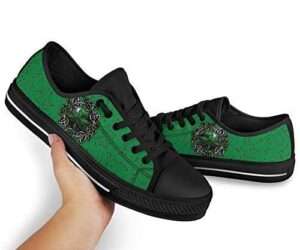
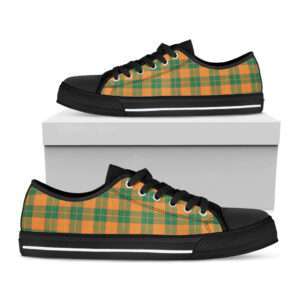
Normally buying green shoes would be out of the question. Let alone a pair of St. Patrick’s kicks. We just wouldn’t even think like that. But now is the time to buy! You just might get lucky and find a really cute pair of shoes at a great price. How’s that for the pot of gold at the end of the rainbow? Check out these St.Patrick’s day shoes.
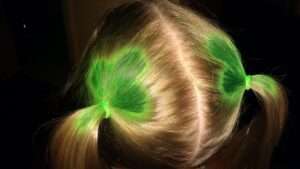
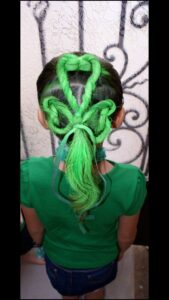
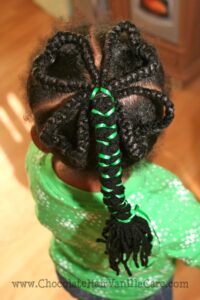
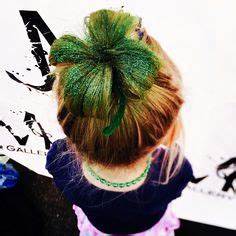
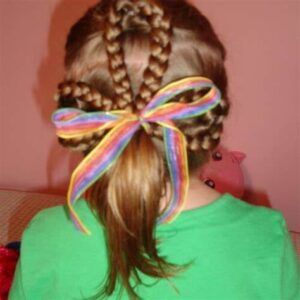
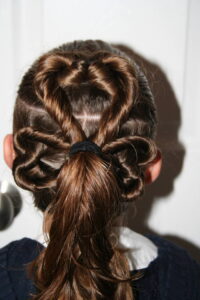
Hello Lucky Hair:
Looking for a quick way to celebrate but don’t want to be too EXTRA? These are a couple of hairstyles that will be great for the kids. Send them off to school or to the park and show off that holiday spirit!
Colored Spray Paint or Hair Chalk
Green Hair Extentions
Shamrock braids
Four Leaf Clover Bun
Green Hair Color
Rainbow Shamrock
Clover Twist
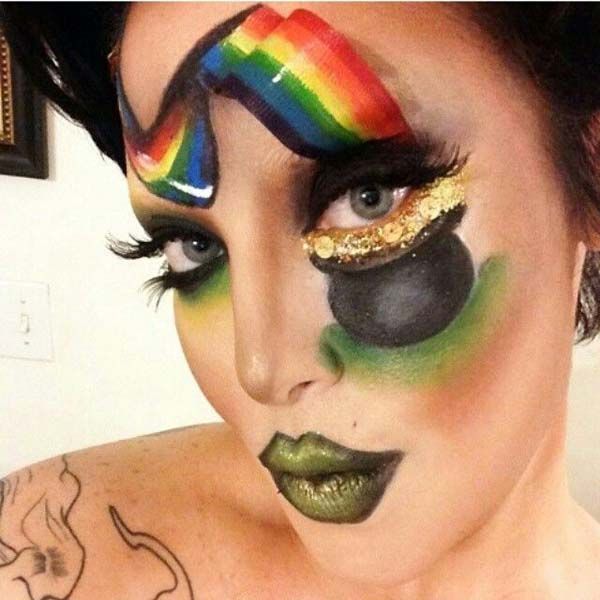
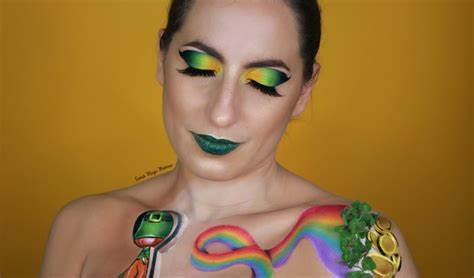
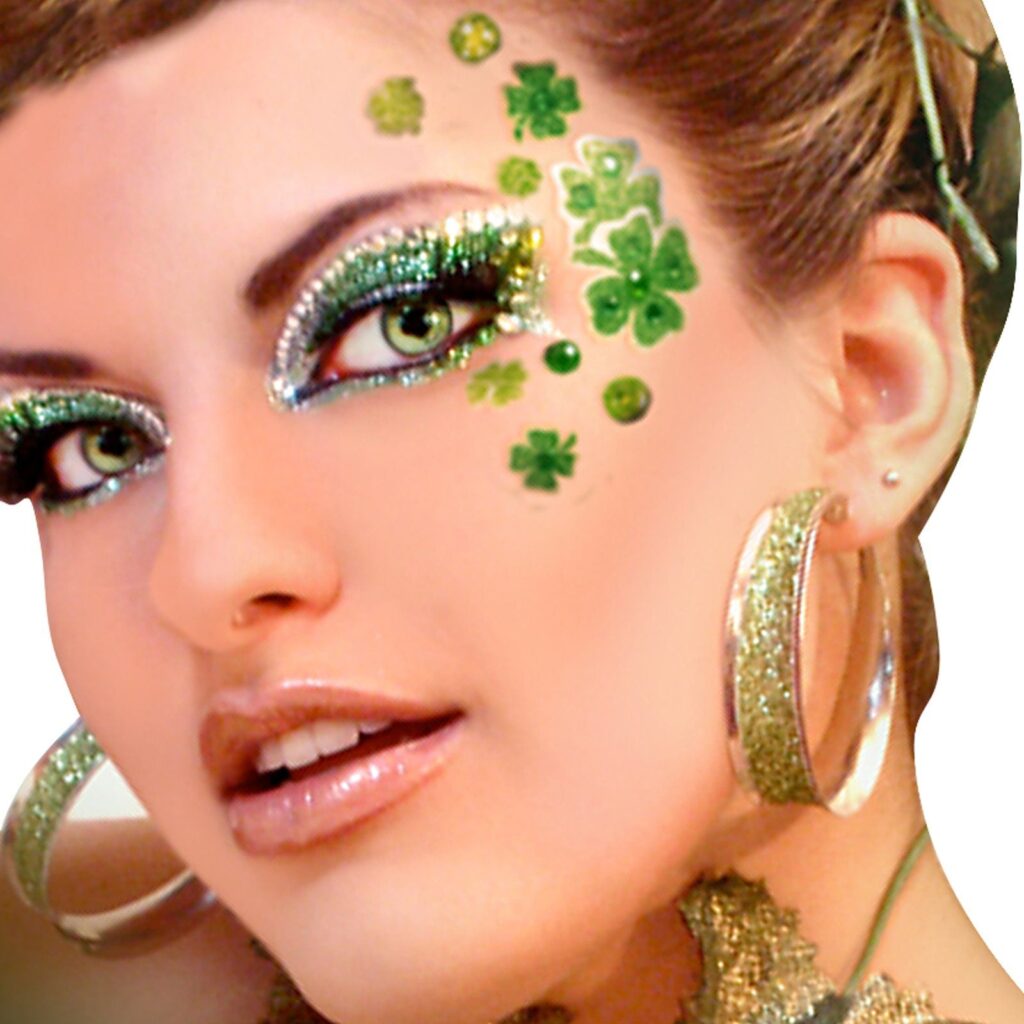
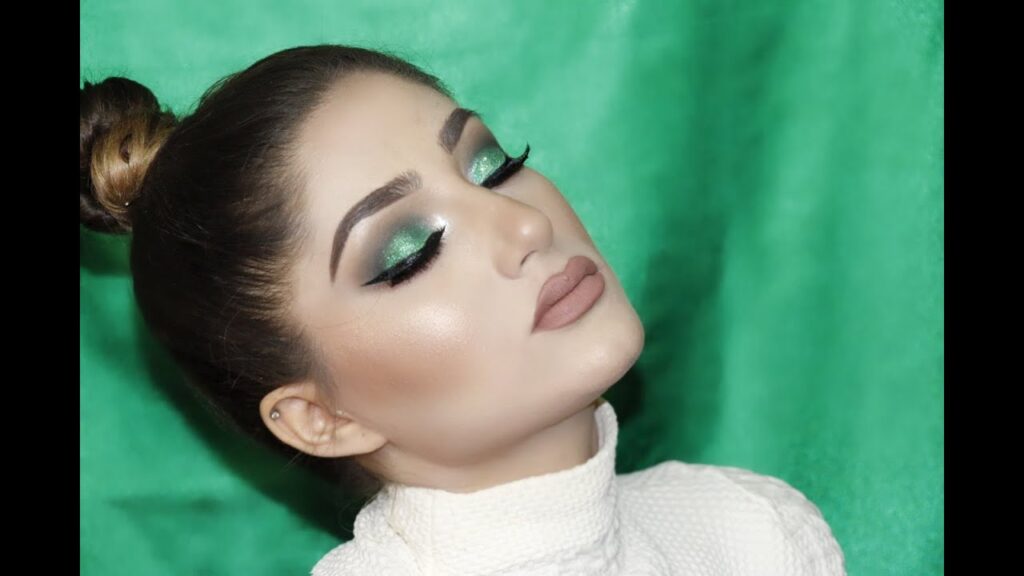
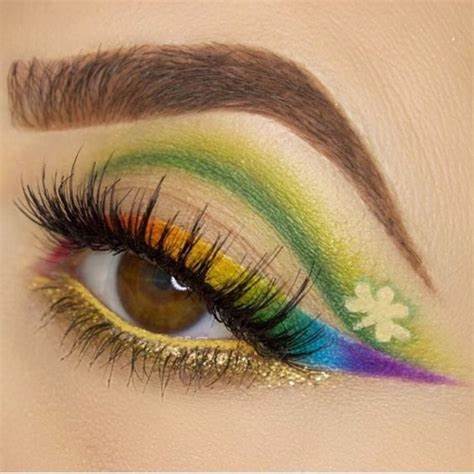
St. Patrick’s Day Makeup Tutorial:
If you are feeling festive this holiday here is a quick makeup tutorial of some Patty paint! If you are looking for something a lot simpler I have a few pics posted below.
St. Patrick’s Day Makeup Tutorial
Makeup Gallery:
Rainbow St. Patrick’s Day Makeup Gallery
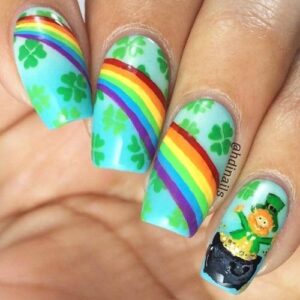
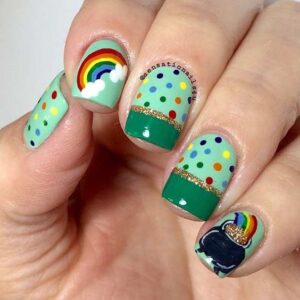
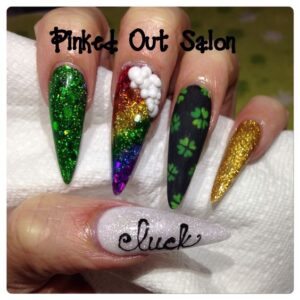
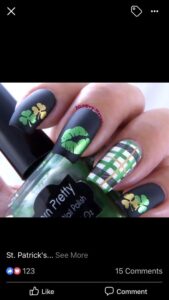
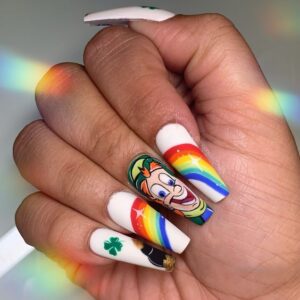
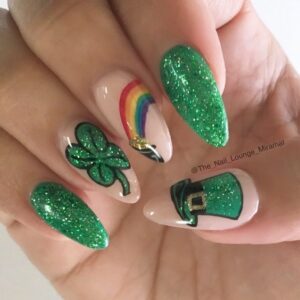
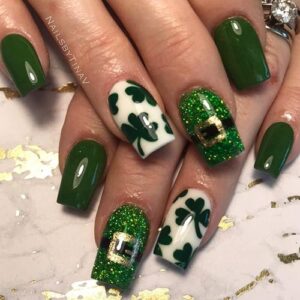
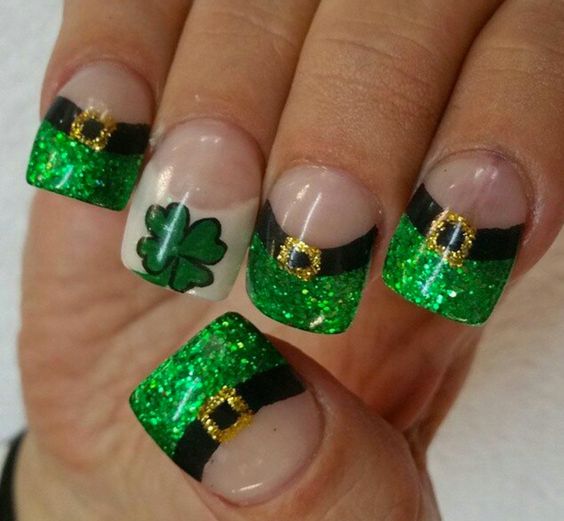
Holiday Nails:
If you are anything like me you probably enjoy a good nail polish. What’s better than a good polish? A great nail design. Depending on your work environment this may not be appropriate but it’s a great idea! These designs can be used for a press-on set or a play date with the kids. I thought these were cute and worth a try.
Rainbow Patty
Polka dot Pot O Gold
Leprechaun Photos
Stiletto Clovers
Kiss Me Plaid
Lucky Charms
Hatty Patty
Lucky Clover Belt
Shamrock Belly
How To Celebrate St. Patrick’s Day In Style:
With March 17th drawing near I decided this post was very necessary. Personally, I’m not quite sure what I plan on doing on this date but I had fun creating this post. While it gave me lots of insight and got my creative juices flowing I also learned something.
While searching the web for photos of festive make up I did not find many that were extremely creative. Now with that being said, I’m not crazy about over-the-top makeup but it is something I enjoy viewing. Hopefully, this post will be inspiring to some makeup artists and give them some inspiration.
When You Have No Money, Try These 10 Easy Steps
24 Feb, 2022
1. Start A Money Saving Challenge:
There are many different ways to start saving money. You can start by making fewer purchases of things you don’t really need. I know this may be hard but it’s easy to do. You can begin saving money by creating a budget. When attempting to budget your funds, only buy things as a treat and avoid impulse buys. Impulse buying is making purchases on the fly. This is typically when you see something online or in the store and have to have it. You buy it and set it aside to basically collect dust. These are things we call wants and NOT needs.
Take time out to browse your own social media platform. While doing this get rid of photos you don’t care for any longer. This can include duplicates, blurred photos, and those that make you cringe. If you still want to keep these pictures try downloading them and saving them to an SD card or flash drive. There are also several programs and sites that will allow you to store these photos online. Delete the posts you shared but may not find necessary. This can include photos that have broken links or are only visible in certain groups and pages. Many social media gurus typically do the same thing.
3. Sell Your Stuff:
Most people hate getting rid of their things. Selling them may be even harder to cope with. Placing your items for sale can be a great way for you to make some money while decreasing your clutter. There are plenty of websites and apps available that will assist you in getting rid of things you no longer need. This can be a great way to save money. It gives you the time to access the things you already have. Doing this can also allow you to possibly trade something old for something new. Some websites that are best known for “thrifting” are eBay, Mecari, Poshmark, and Etsy.
4. Rent Out Your Home:
With the cost of living rising, it is harder to find adequate housing. Many people are looking to rent your home or even a spare bedroom. Working people typically spend more time at work than they do at home. They may not have families or are looking to downsize the home they already have. Renting out your home or living quarters can help you save money, as well as find your forever space. The following sites will help you do just that.
What to do with your leftovers? REUSE THEM! Grocery shopping is a very time-consuming process. This is especially true if you don’t know what you want to eat. After a meal is cooked, the leftovers are either sitting in the fridge idle or tossed in the trash. Find different ways to use the extra plates you couldn’t eat. Place them in smaller containers and either store them in the fridge or freezer for later in the month. This will save you time when cooking, and give you a quick meal for the days when you don’t want to.
Grab a pen and paper and list all your favorite things to eat. If you have a secret sauce or special french fry dip write it down! Keep your notes in the kitchen so you always have a happy meal when you don’t know what’s for dinner.
So you completed a few things on this list and you have money to spend. What do you do with it? Well maybe use it to take a trip. Plan something fun to do alone or with your loved ones. Take a vacation down the road or head out of town! I’ve listed some cool links below.
So You’ve tracked your finances. You’ve saved some money, created a budget, built your own garden, prepped your meals, planned your next vacation, and rented out your home. Time to learn that new foreign language! (Hey Big Spender!) Learning a new language could be a great way to boost your resume views, help with schoolwork, or travel abroad. Here are a few helpful links to assist you with all that.