“I receive a commission for purchases or clicks made through links in this post.”
What is Tea Tree Oil?
Tea tree oil is also known as melaleuca oil. This is an essential oil that comes from the process of steaming the leaves of the Australian tea tree. This type of oil is effective in promoting healthy skin by soothing and healing a wide range of skin issues. However, there is not enough evidence to support any of these claims due to the limited amount of research conducted on the topic. Tea tree oil is neither a patented product nor an approved drug in the United States. Although it is approved as complementary medicine for aromatherapy in Australia, it can be poisonous if consumed by mouth, and unsafe to use on children.
What Are the Uses?
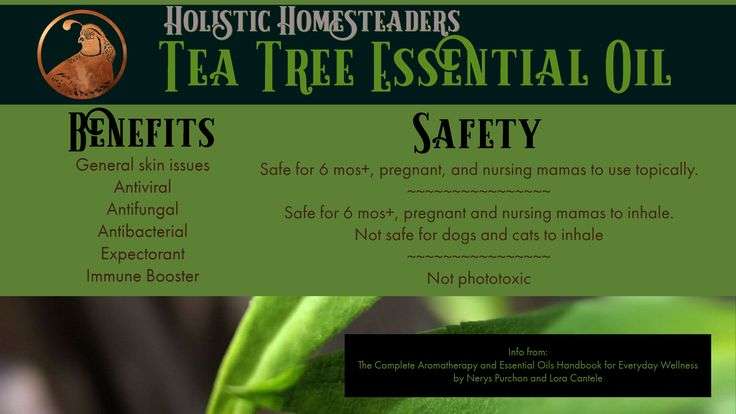
Tea tree oil is commonly used to treat many types of acne, combat athlete’s foot, hair lice, nail fungus, and some insect bites. It can help soothe dry skin by reducing itching and irritation. Also, it has been shown to be more effective than most creams in treating eczema.
Tea tree oil is a prevalent choice for treating acne due to its anti-inflammatory and antimicrobial properties. It’s main use is form effectively reduce redness, swelling, and inflammation. It may even help to prevent and minimize acne scars, leaving you with smoother, clearer, and healthier skin.
Hand Sanitizer
Studies confirm that hand sanitizers with tea tree oil are effective for hand disinfection. It is best used to kill bacteria without antibiotics. Using tree oil as a natural hand sanitizer may help kill a number of germs responsible for colds, the flu, and other illness. In fact, a study conducted to test several types of hand washes show that adding tea tree oil to the cleansers helped boost their effectiveness against E. coli.
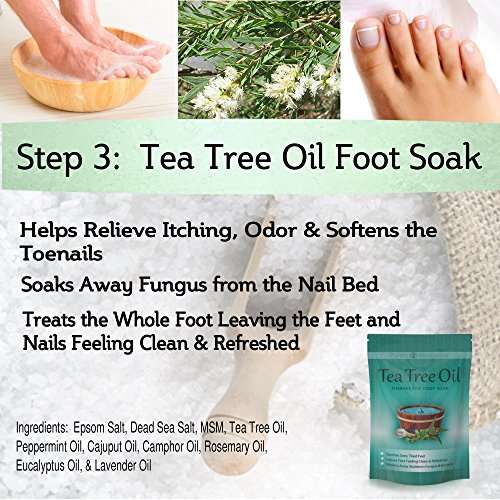
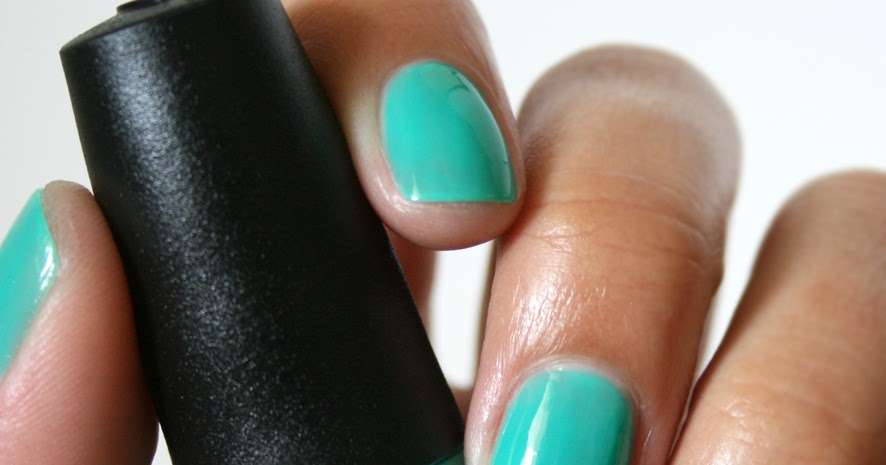
Combat Nail Fungus
Although they aren’t dangerous, Fungal nail infections are quite common. Tea tree oil has been shown to help get rid of nail fungus when used alone or in combination with other natural remedies. They typically have fewer side effects than traditional medications. Some of the types of products to aid in nail fungus include foot soaks, foot creams, ointments, and sprays.
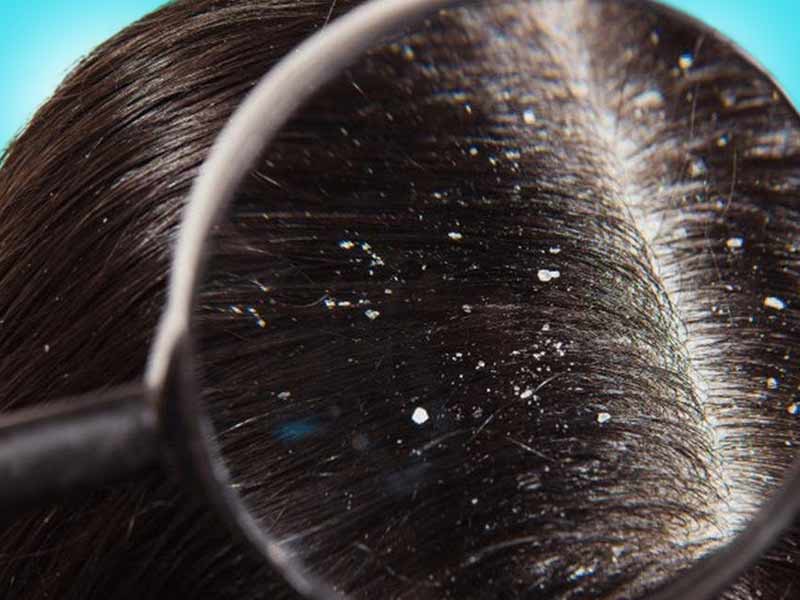
Reduce Dandruff Flakes
Adding tea tree oil to shampoo has been found to significantly reduce dandruff. This is thought to be related to its anti-fungal properties. Since this oil is slightly more acidic than your skin, it helps to clear the dandruff flakes and eliminate the crusty build-up on your scalp.
In one study, shampoos that contained tea tree oil were found to be effective in reducing the growth of Candida albicans (yeast) which often contributes to the formation of dandruff. To help reduce dandruff, simply add a few drops of tea tree oil to a dollop of shampoo when washing your hair.
Safety
Most people can use tea tree oil topically with no problems. However, tea tree oil can cause a few side effects. If any irritation occurs this would indicate that you should stop using the products. These side effects can include one or more of the following:
Skin irritation on or around the area where the product was applied
Allergic reaction or skin rashes (dermatitis)
Itching
Stinging
Burning
Scaling
Redness
Dryness
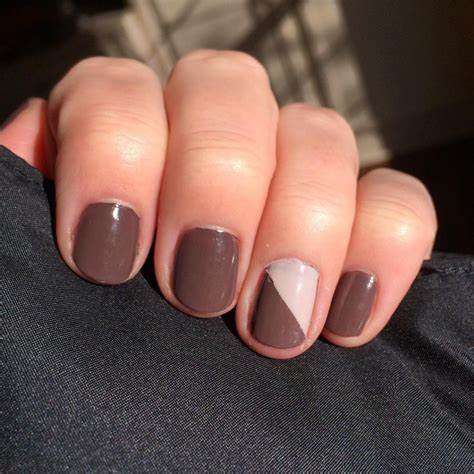
How To Create Round Nails With Ease
29 Apr, 2022
“I receive a commission for purchases or clicks made through links in this post.”
What Are Rounded Nails?
Round nails are a type of nail shape. The nail tip is rounded at the edge and follows the shape of your natural nail bed. This post is intended to teach you how to shape nails rounded with ease.
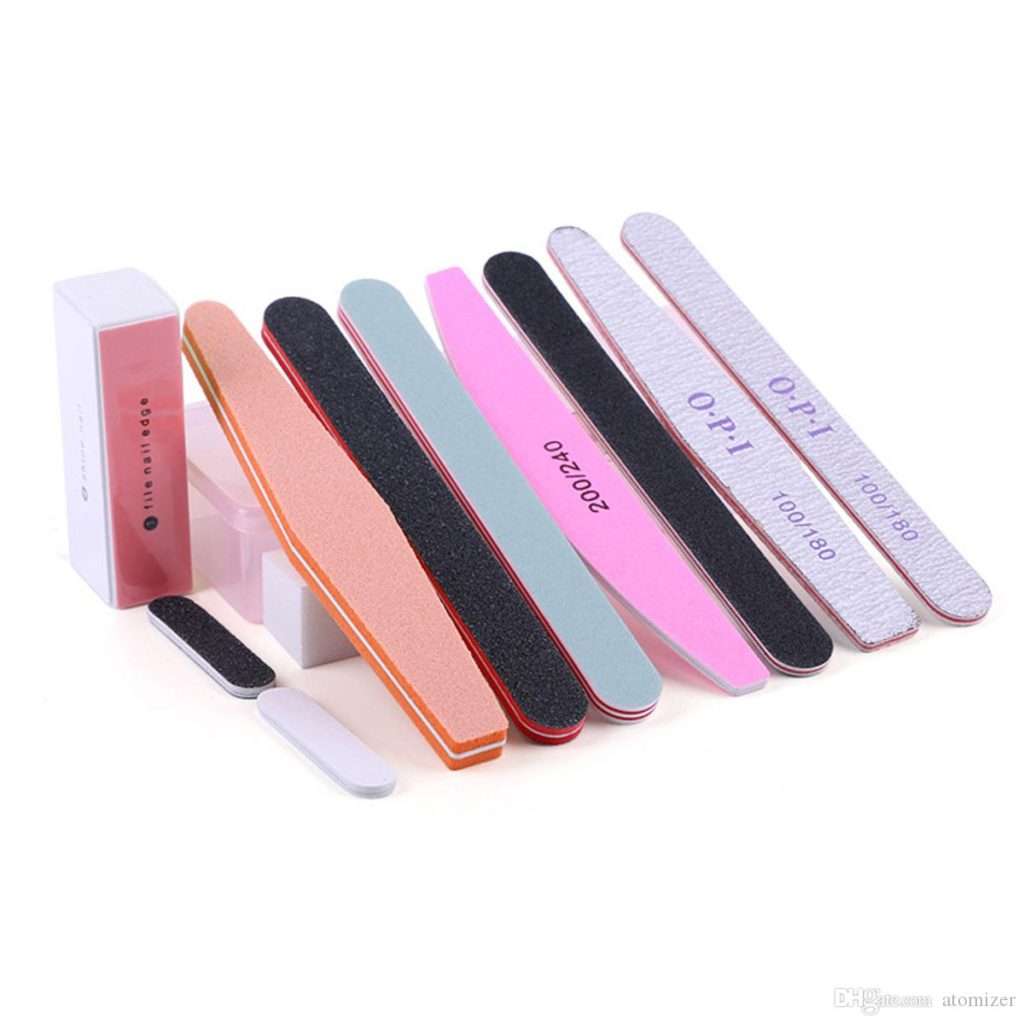
Use a fine-grit cushion nail file to shape your natural nails. If shaping artificial nails use a coarse-grit file.
Begin by filing the sides of the nails first.
Start at the cuticle and file in an upward direction filing the sides straight.
File the tips of the nails
File in a curved manner to achieve a rounded look.
File until the entire nail is rounded and to the desired length.
Rub a fine-grit nail buffer over your nails after rounding them if used on your natural fingernails.
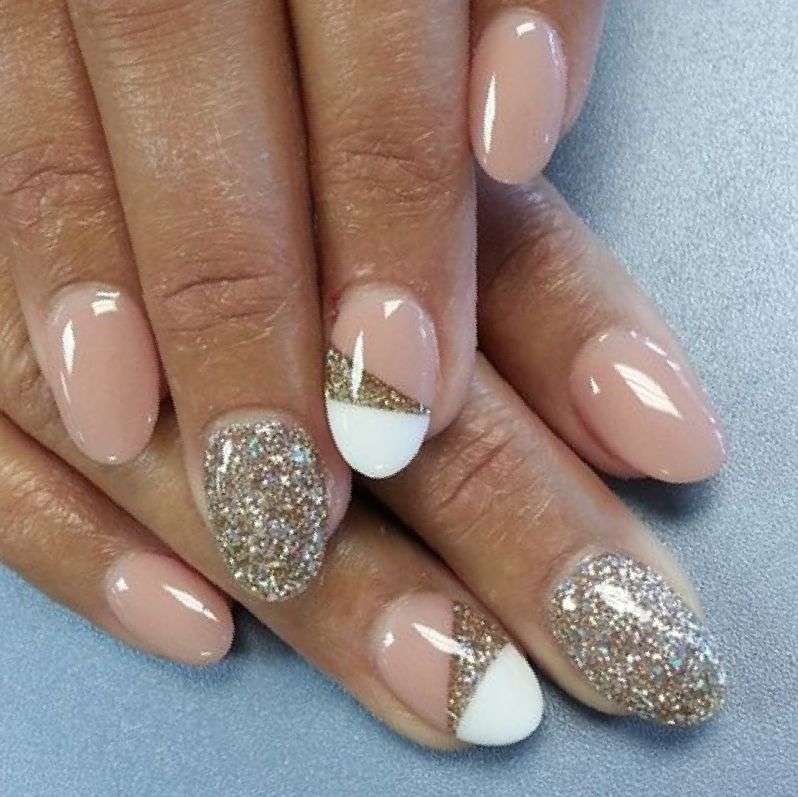
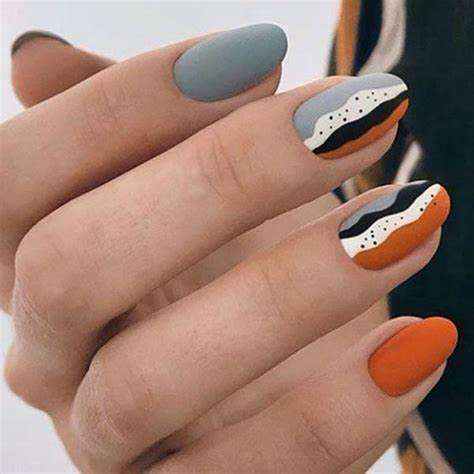
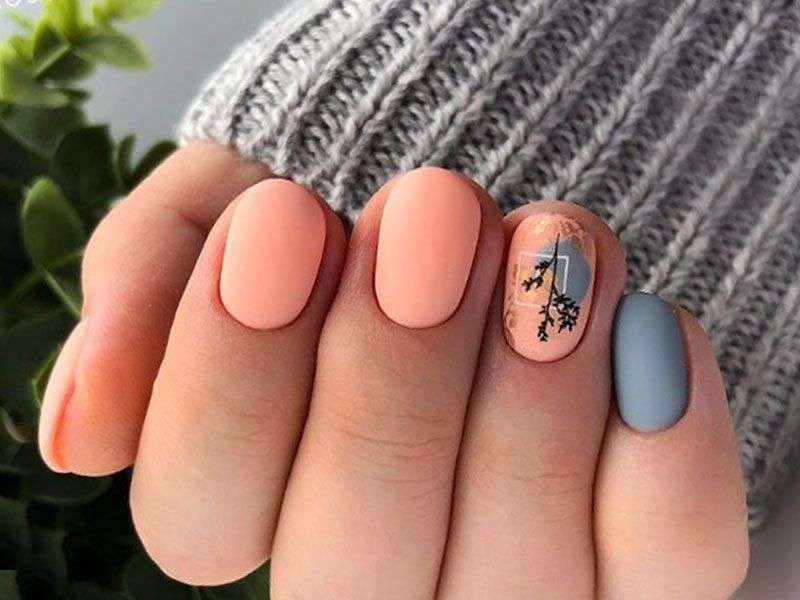
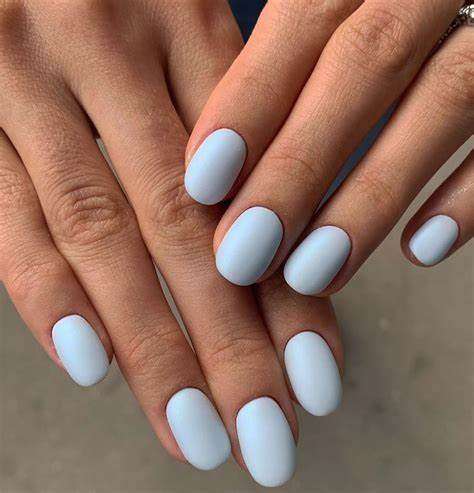
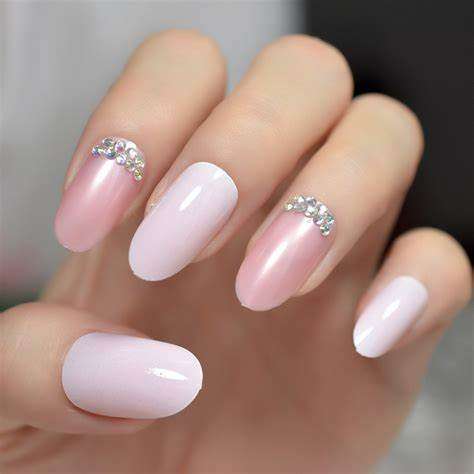
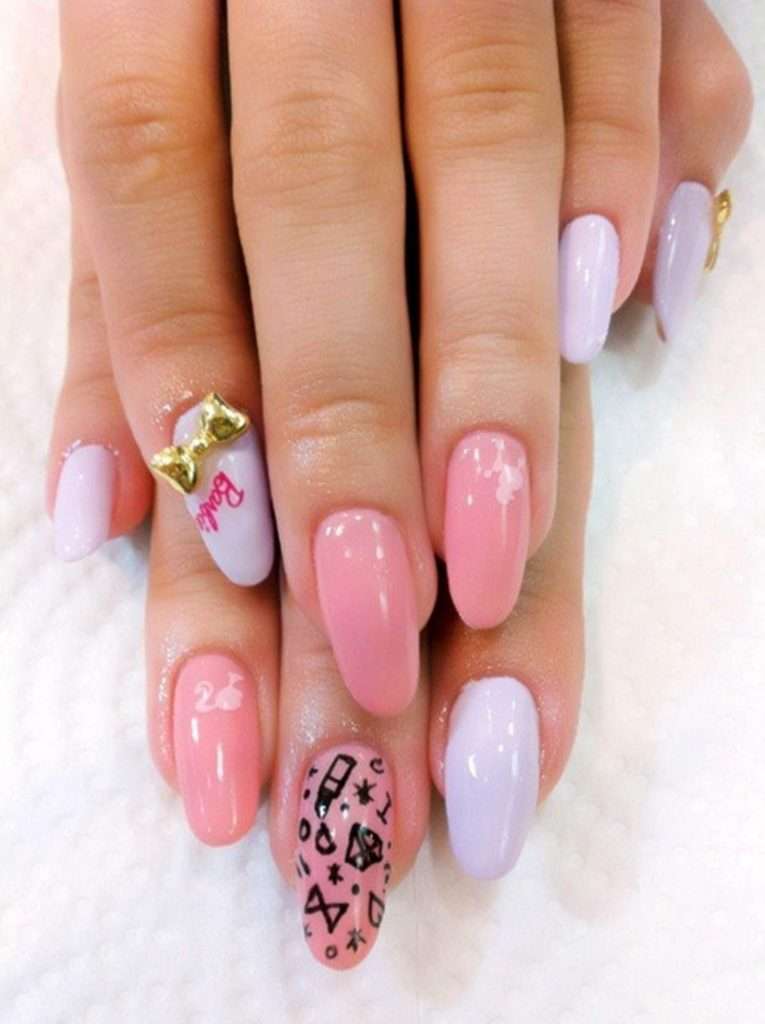
Round Nail Designs:
The Best Way To Pick A Makeup Brush
27 Mar, 2022
“I receive a commission for purchases or clicks made through links in this post.”
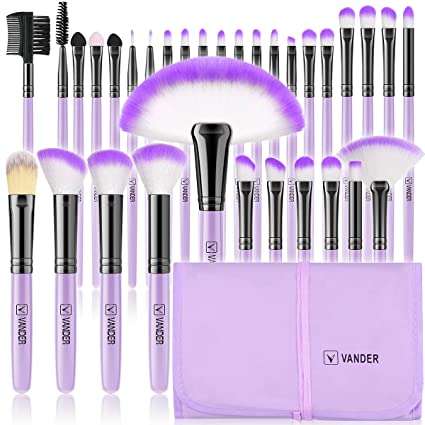
Makeup is a staple for many people during their daily rituals. It’s the first thing they do before leaving the house and going out into the world. For those avid users of these products, you seldom see them without at least foundation done. Having a set of makeup brushes is very important to complete the look. A good set of makeup brushes is even more critical. The following list is compiled of the basic tools you need for a facial application.
Types Of Makeup Brushes
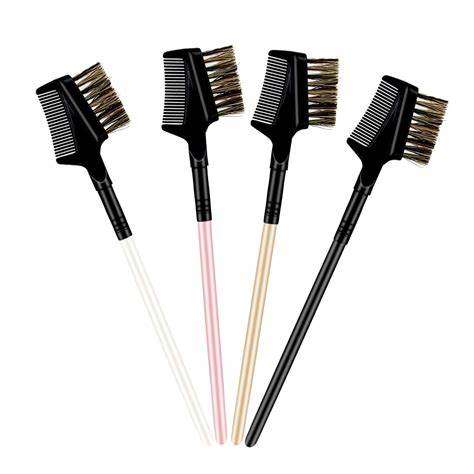
1. Brow Brush
The majority of brow brushes are double-sided. One side of the brush has teeth used for combing and the other had bristles used for brushing. For the best possible outcome, you want to use a stiff, angled brush to fill in sparse brows with eye shadow, eyeliner, or brow cream.
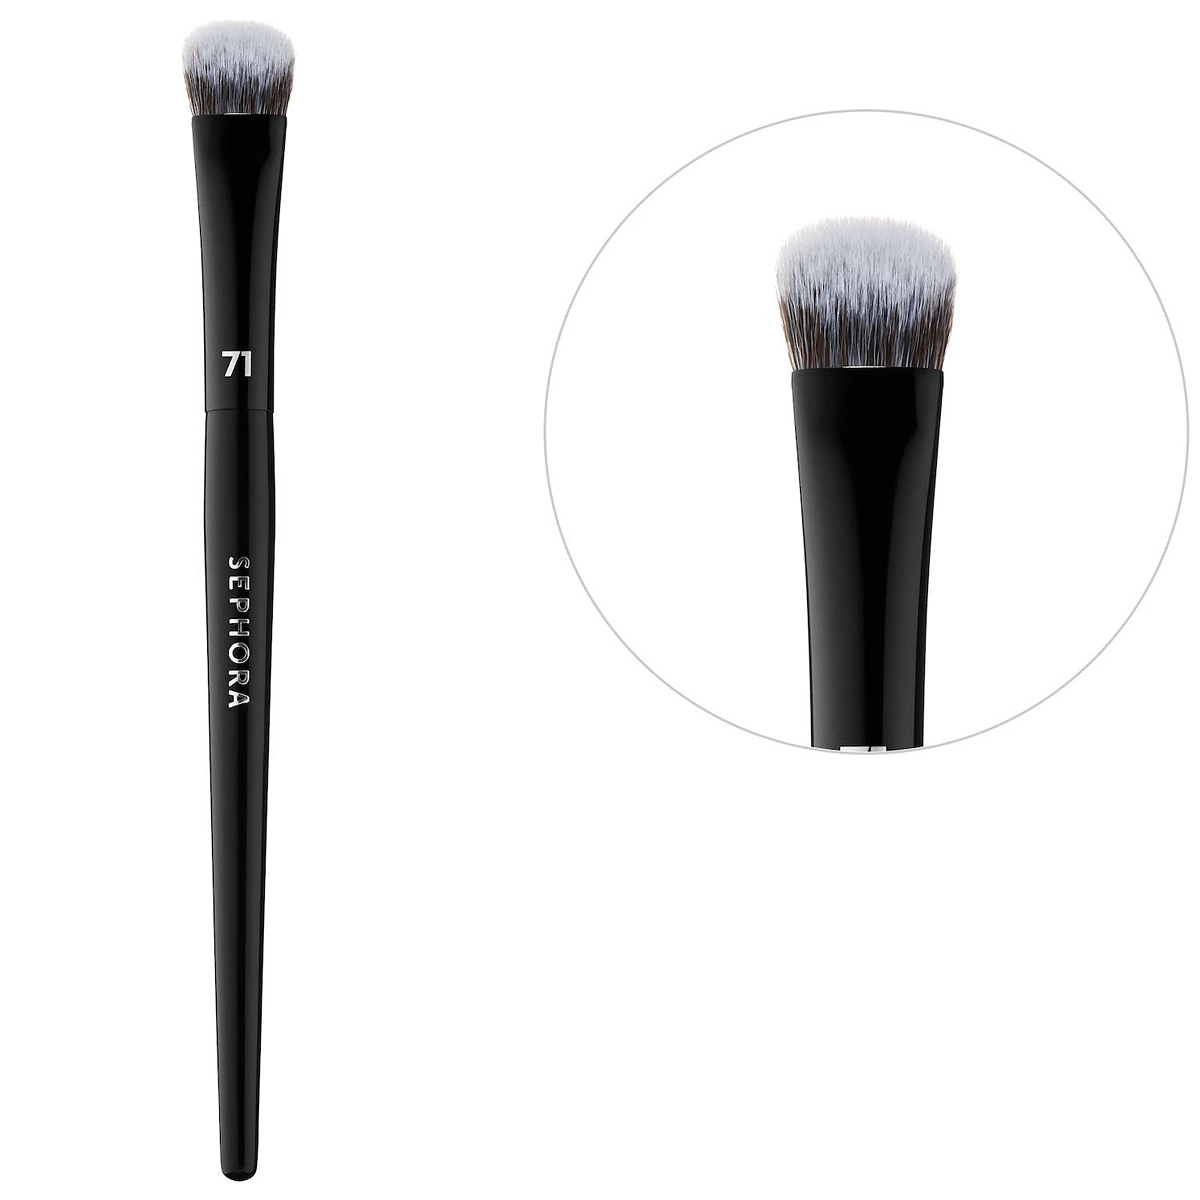
2. Concealer Brush
A standard concealer brush is characterized as a small brush with densely packed bristles and a flat, tapered shape at the end. Complete with a long handle, this beauty tool gives you maximum control making it super easy to provide desired areas of your face with even coverage.
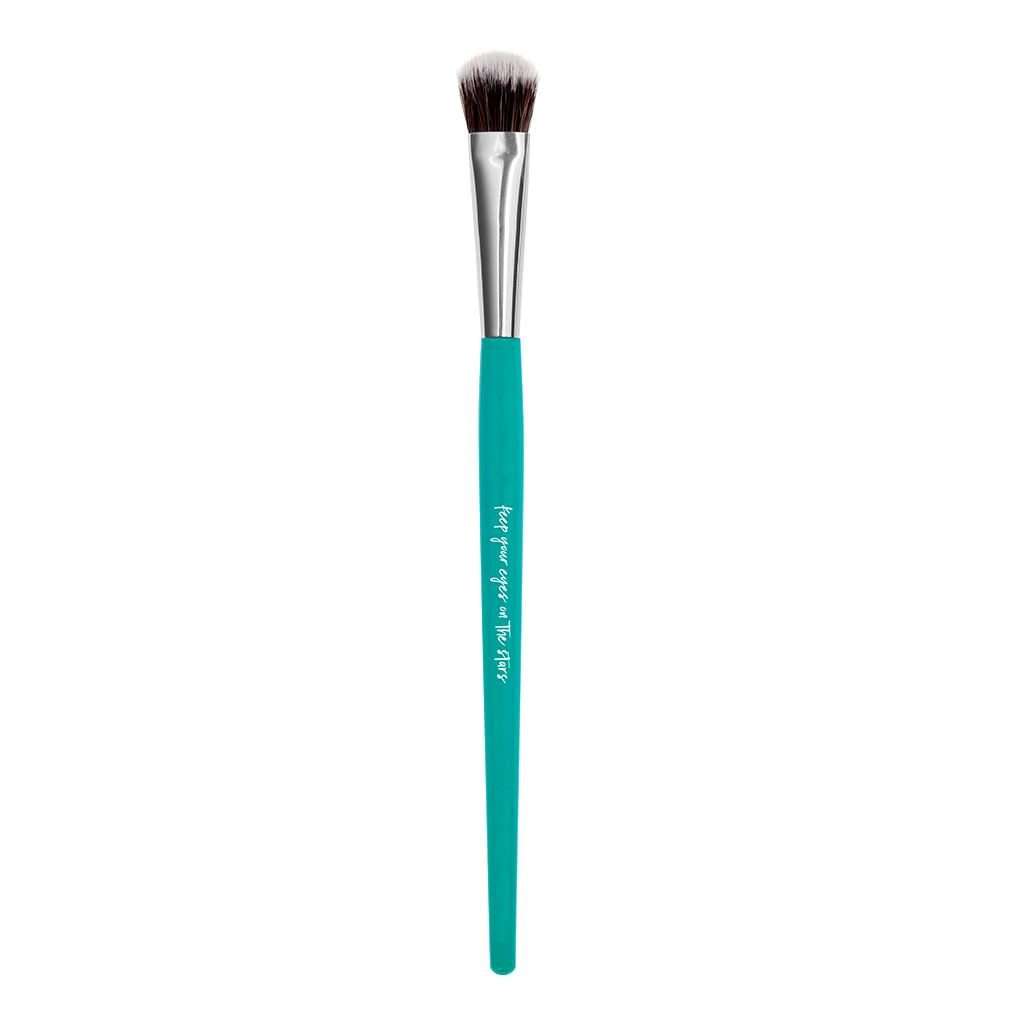
3. Eye shadow brush
An eye shadow brush is a small and tapered brush that is designed for precise application of eye shadow across the lid and upper eye area. Its small and stubby bristles help to create a well-blended, smooth and seamless look. This brush is perfect for creating a variety of eye makeup looks, from natural to dramatic, and is a must-have in any makeup kit.
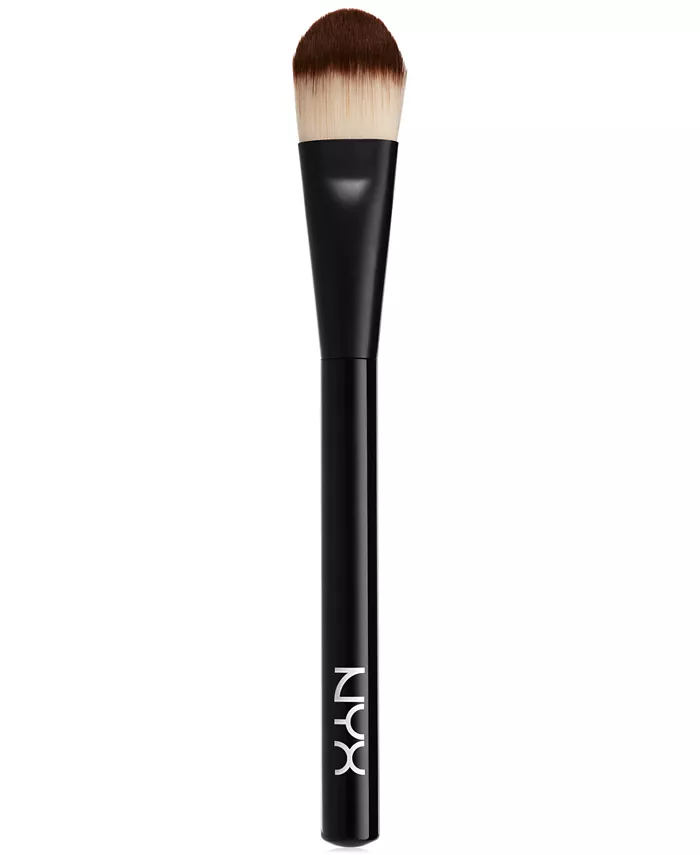
4. Foundation
A foundation brush is typically a medium-sized makeup brush. It is mainly used to apply liquid, cream, or powder foundation to the skin. The brush is equipped with a plastic handle and synthetic bristles on the end. There are many types of foundation brushes available for purchase.
Some have short bristles and others have long bristles. The short-bristled brushes are generally used for cream or liquid foundations. Long-bristled brushes are used for powder foundations.
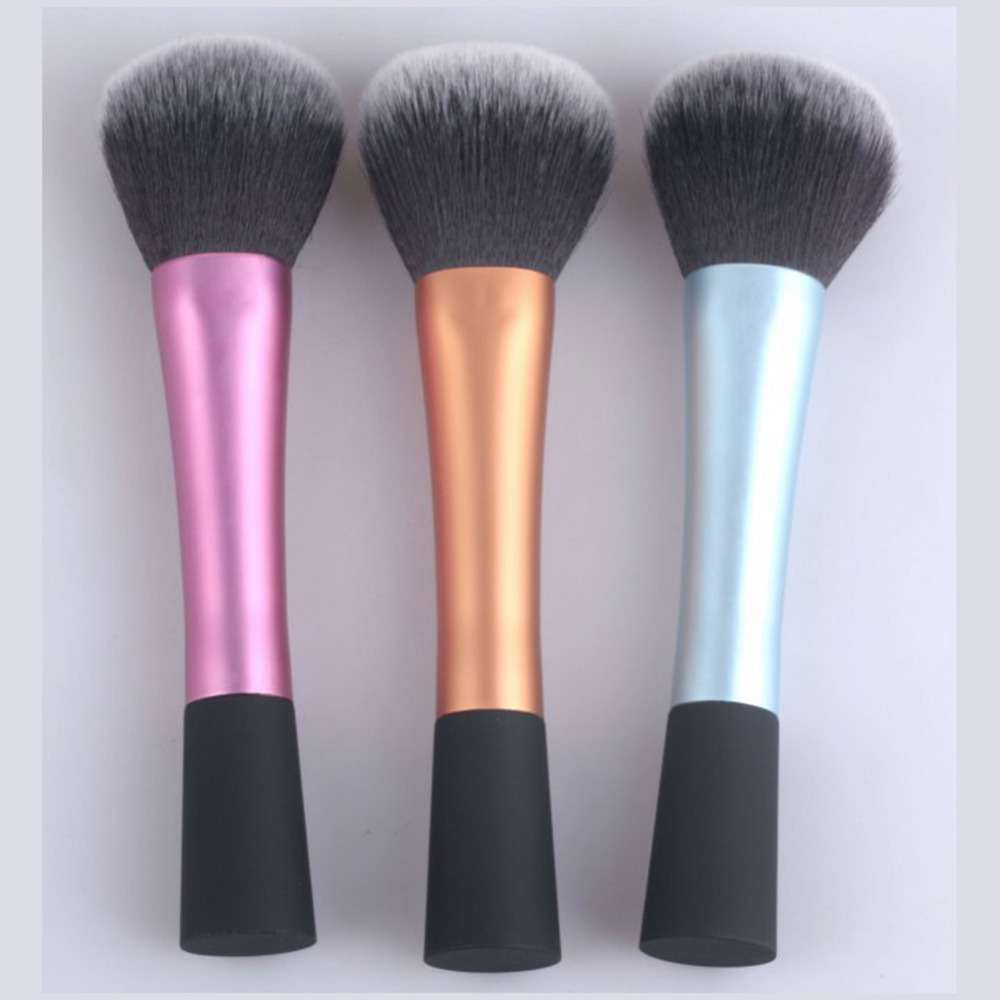
5. Powder
A Powder brush is a large brush with soft, natural bristles. It is generally thick, and either made out of either natural or synthetic fibers. Powder brushes are well-suited for adding color such as blush when you are aiming for a more natural, less pigmented look.
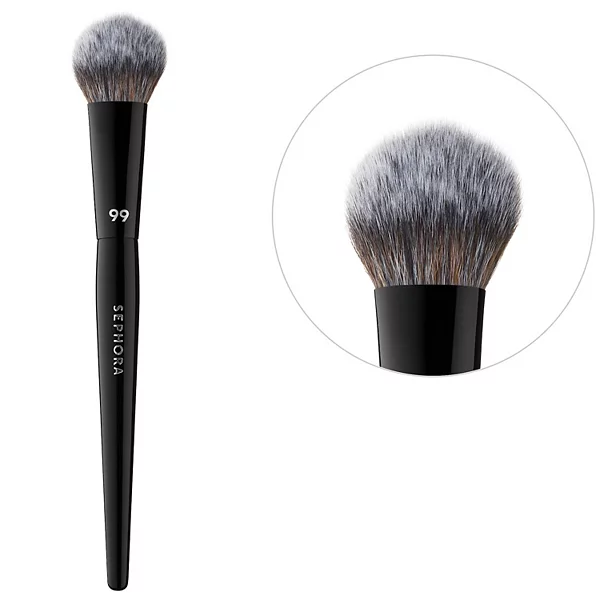
6. Blush
Blush brushes and powder brushes may look alike, but there are subtle differences between them. A blush brush, for instance, is typically shorter and has denser bristles than a powder brush. This design allows for more precision and control when applying blush to the cheeks. Additionally, the smaller size of a blush brush makes it easier to blend the product seamlessly with the skin. So, if you want to achieve a natural-looking flush, a blush brush is your go-to tool.
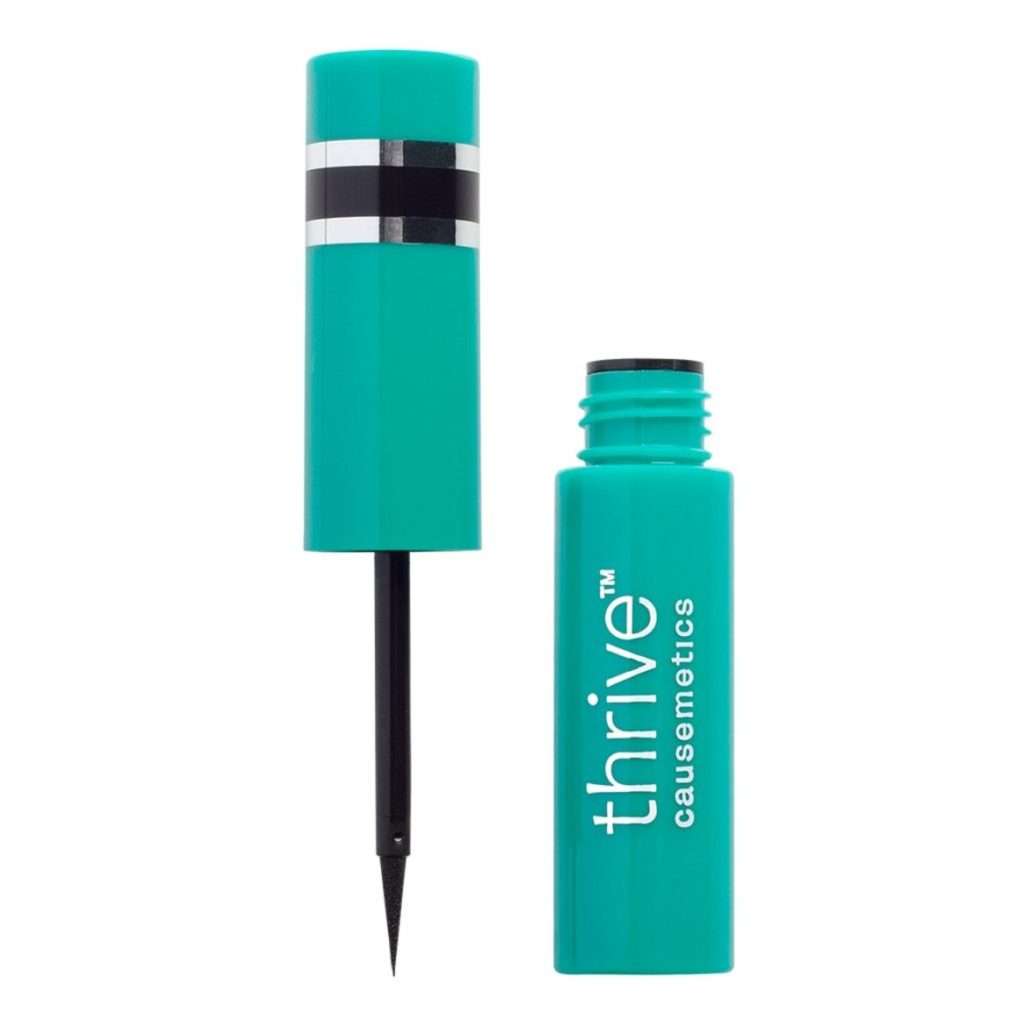
7. Liquid eyeliner
Liquid eyeliner is a popular cosmetic product that comes in a small, sleek bottle with a precision applicator brush that is similar to a mascara wand. It is used to create a wide range of eye makeup looks, from subtle lash enhancements to bold, dramatic lines that extend past the outer corners of the eyes to form wings or cat eyes. Liquid eyeliner is highly pigmented, so it provides a rich, intense color that can be layered for a more dramatic effect. Whether you’re looking to create a classic cat-eye or experiment with new eye makeup trends, liquid eyeliner is an essential tool in any beauty kit.
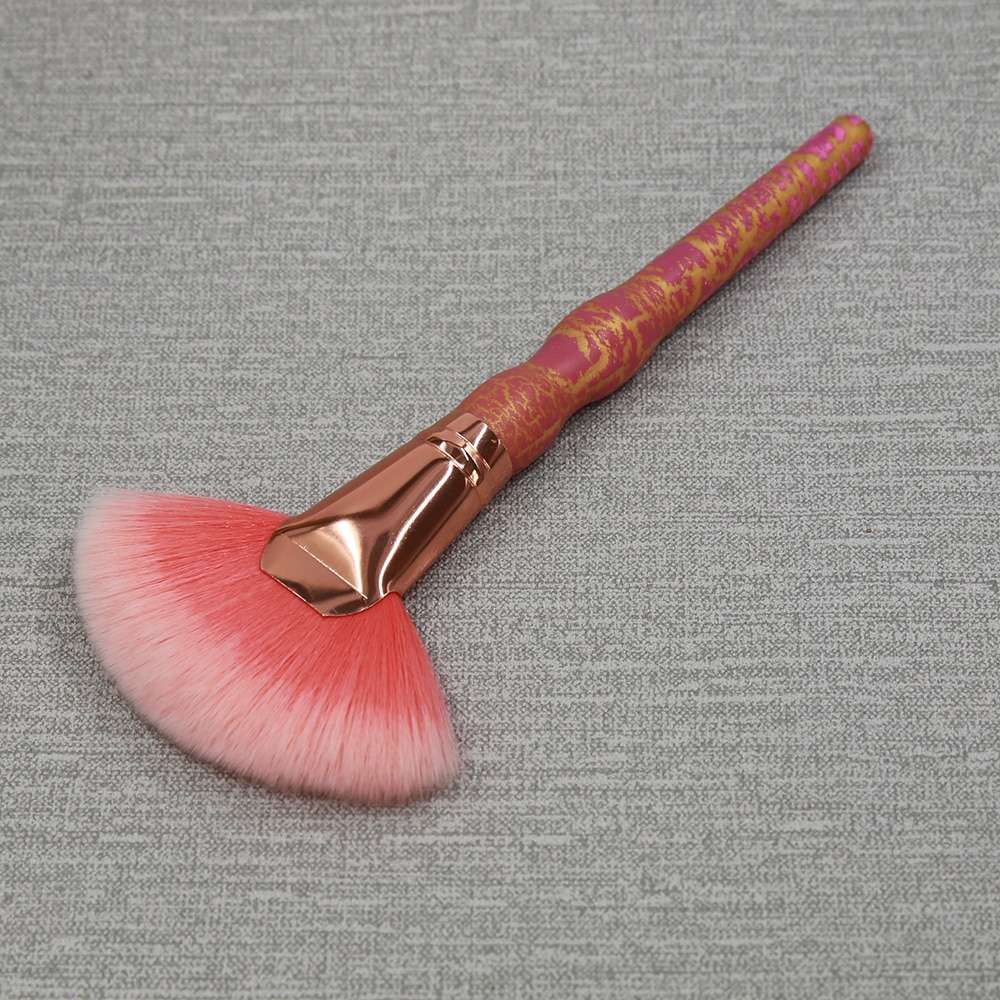
8. Highlighter
Usually, highlighter brushes are thin lightweight brushes shaped like a fan. The main use for these brushes is for applying bronzer or highlighter to the cheekbones.
How To Use A Glass File For Your Nail Care
23 Mar, 2022
“I receive a commission for purchases or clicks made through links in this post.”
In the growing age of DIY projects and the internet, there are lots of things we don’t know. The use of a glass file for your nails happens to be one of them. After completing cosmetology school, and changing hobbies and interests I ended up HERE. Creating this post and conducting research for a possible career change. This post came about while doing research on Nail Shapes. While we are here let’s talk about it!
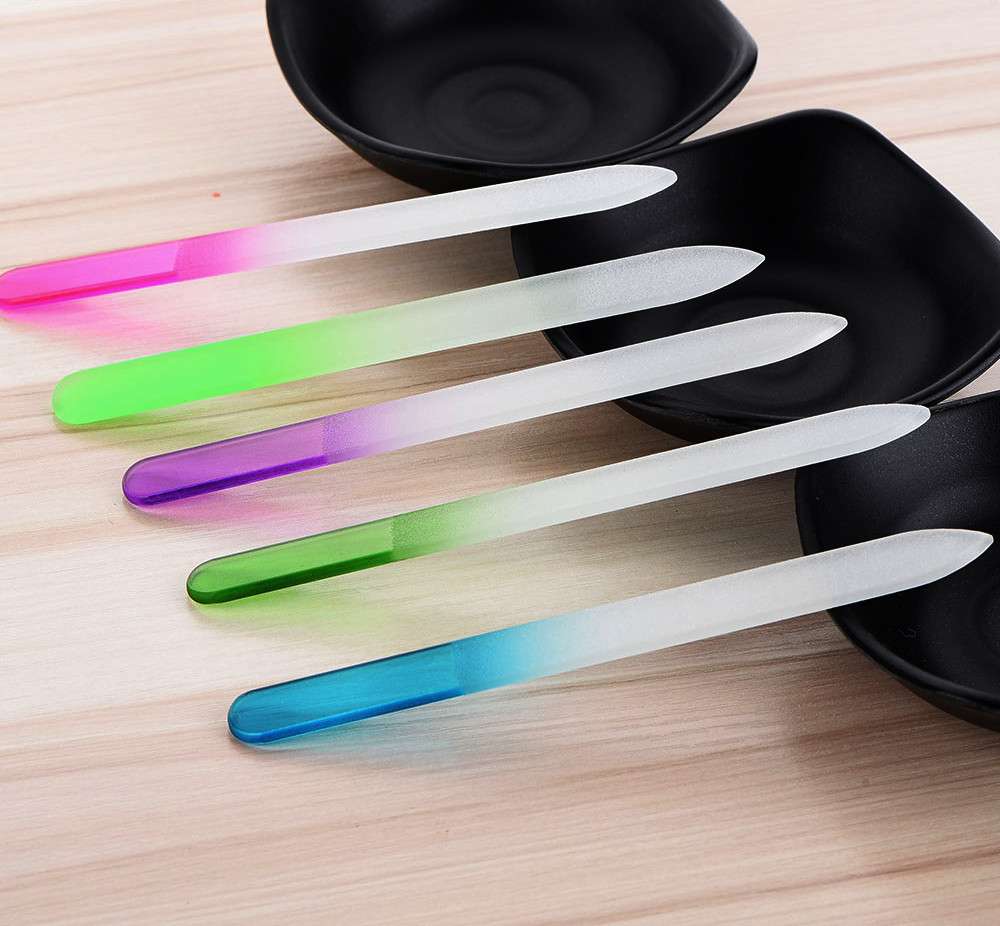
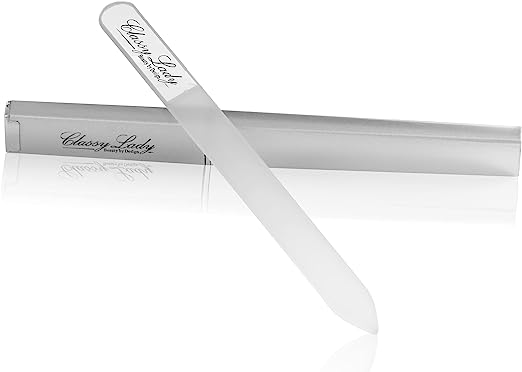
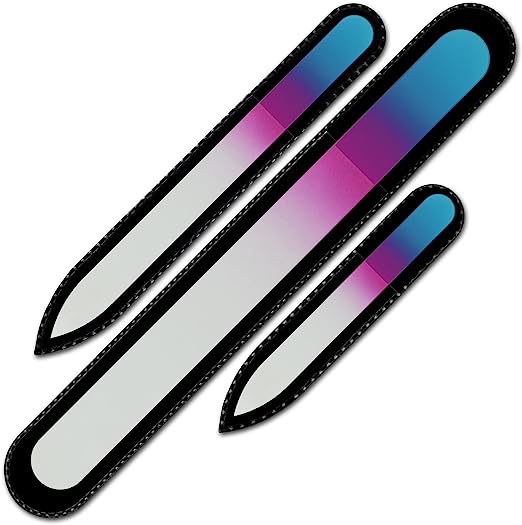
What Is A Glass File?
A glass nail file can be best described as being exactly what it sounds like. A file made of glass! Using salon terminology it’s described as being a thermal-tempered, chemically-etched glass used to file, shape, and buff your nails. Glass nail files are a great alternative to traditional emery boards. They are made of tempered glass that is smooth and even, which makes them gentle on the nails. Glass nail files also last longer than emery boards, and they are more sanitary because they are not porous.
What Are The Uses?
Traditionally, when you are in a rush and need to straighten, buff, shape, or trim down a nail an Emory Board would be your best friend. This has been claimed to be an incorrect solution to our problems. While you may be able to accomplish the goal set in mind it can lead to damages later on. Some of these damages include: If you are looking for a gentle, long-lasting, and sanitary way to file your nails, then a glass nail file is a great option.
Nail splits and tears at the tip
Weakened nail beds
Torn skin above and around the cuticle area
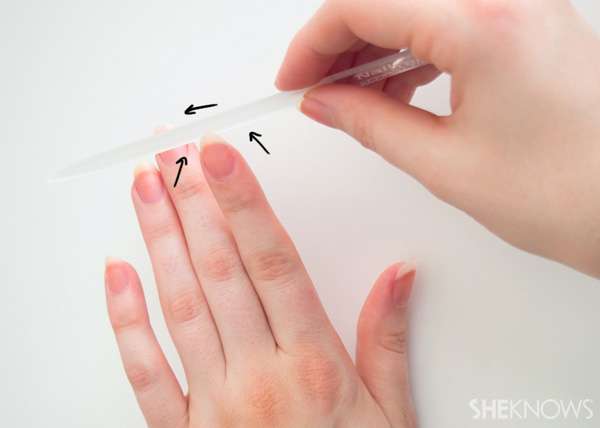
When using your nail file there are a few things that you need to keep in mind. Some of these things include the following:
File in one direction: Always file your nails in one direction, from the cuticle to the tip. Filing back and forth can cause the nails to become weak and brittle.
Use a fine grit: Glass nail files come in a variety of grits, from coarse to fine. For everyday filing, use a fine grit. This will help to keep your nails smooth and prevent them from becoming ragged.
Be gentle: Glass nail files are very sharp, so be gentle when using them. Apply light pressure and file slowly.
Store properly: When you are not using your nail file, store it in a clean, dry place. This will help to prevent it from getting damaged.
The Benefits Of Using A Glass Nail File:
Gentle on the nails: Glass nail files are much gentler on the nails than emery boards. They do not tear or split the nails, and they help to keep the nails smooth and healthy.
Long-lasting: These types of nail files last much longer than emery boards. They can be used for months or even years, and they will not wear down or become dull.
Sanitary: Glass nail files are more sanitary than emery boards. They are not porous, so they do not harbor bacteria. This makes them a good choice for people with sensitive nails or those who are prone to infections.
Easy to clean: Glass nail files are easy to clean. You can simply wash them with soap and water, or you can use a disinfectant wipe.
Versatile: Glass nail files can be used to file nails of all shapes and sizes. They can also be used to buff nails, remove calluses, and shape cuticles.
Where Can I Find One?
Glass nail files can be found at your local Sallys or Ulta stores. If you can’t find one at your local store they can also be found online at Amazon, Walmart, or Etsy.
Bona Fide Beauty Glass Nail File: This file is made of borosilicate glass and has two sides, one for rough filing and one for smooth finishing. It is available on Amazon for $9.99.
Mont Bleu Glass Nail File: This file is also made of borosilicate glass and has two sides, one for rough filing and one for smooth finishing. It is available on Amazon for $10.99.
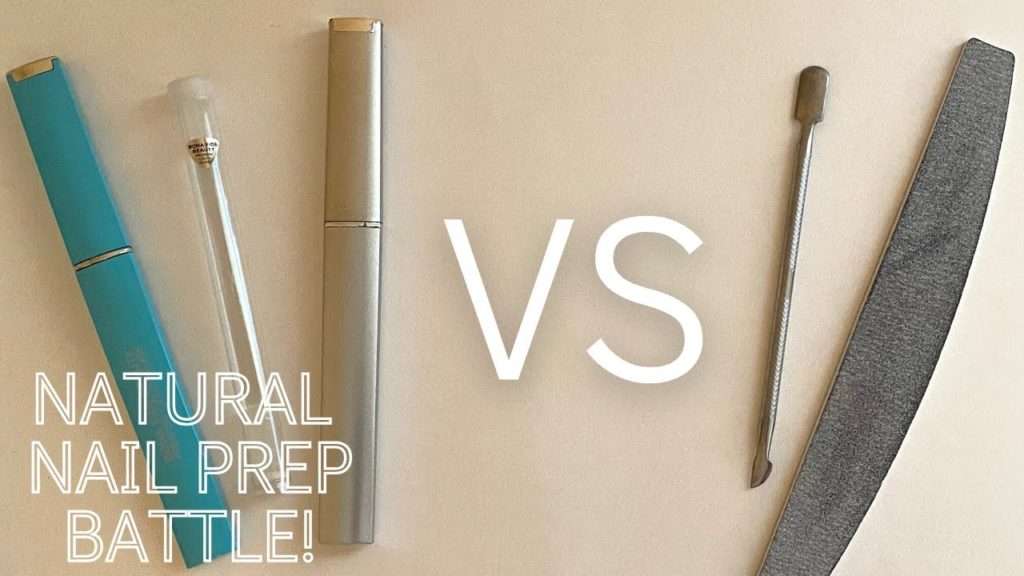
Glass files are made from glass. Emery boards are composed of sandpaper fused to a cardboard or plastic tool. With glass files, the material is toughened so the board retains integrity. Some have embedded mini crystals affixed to the surface to provide more grit.
They are said to be more gentle on the nail, as they don’t have as many grit options.
They are also less elastic than emery boards which will allow for longer use.
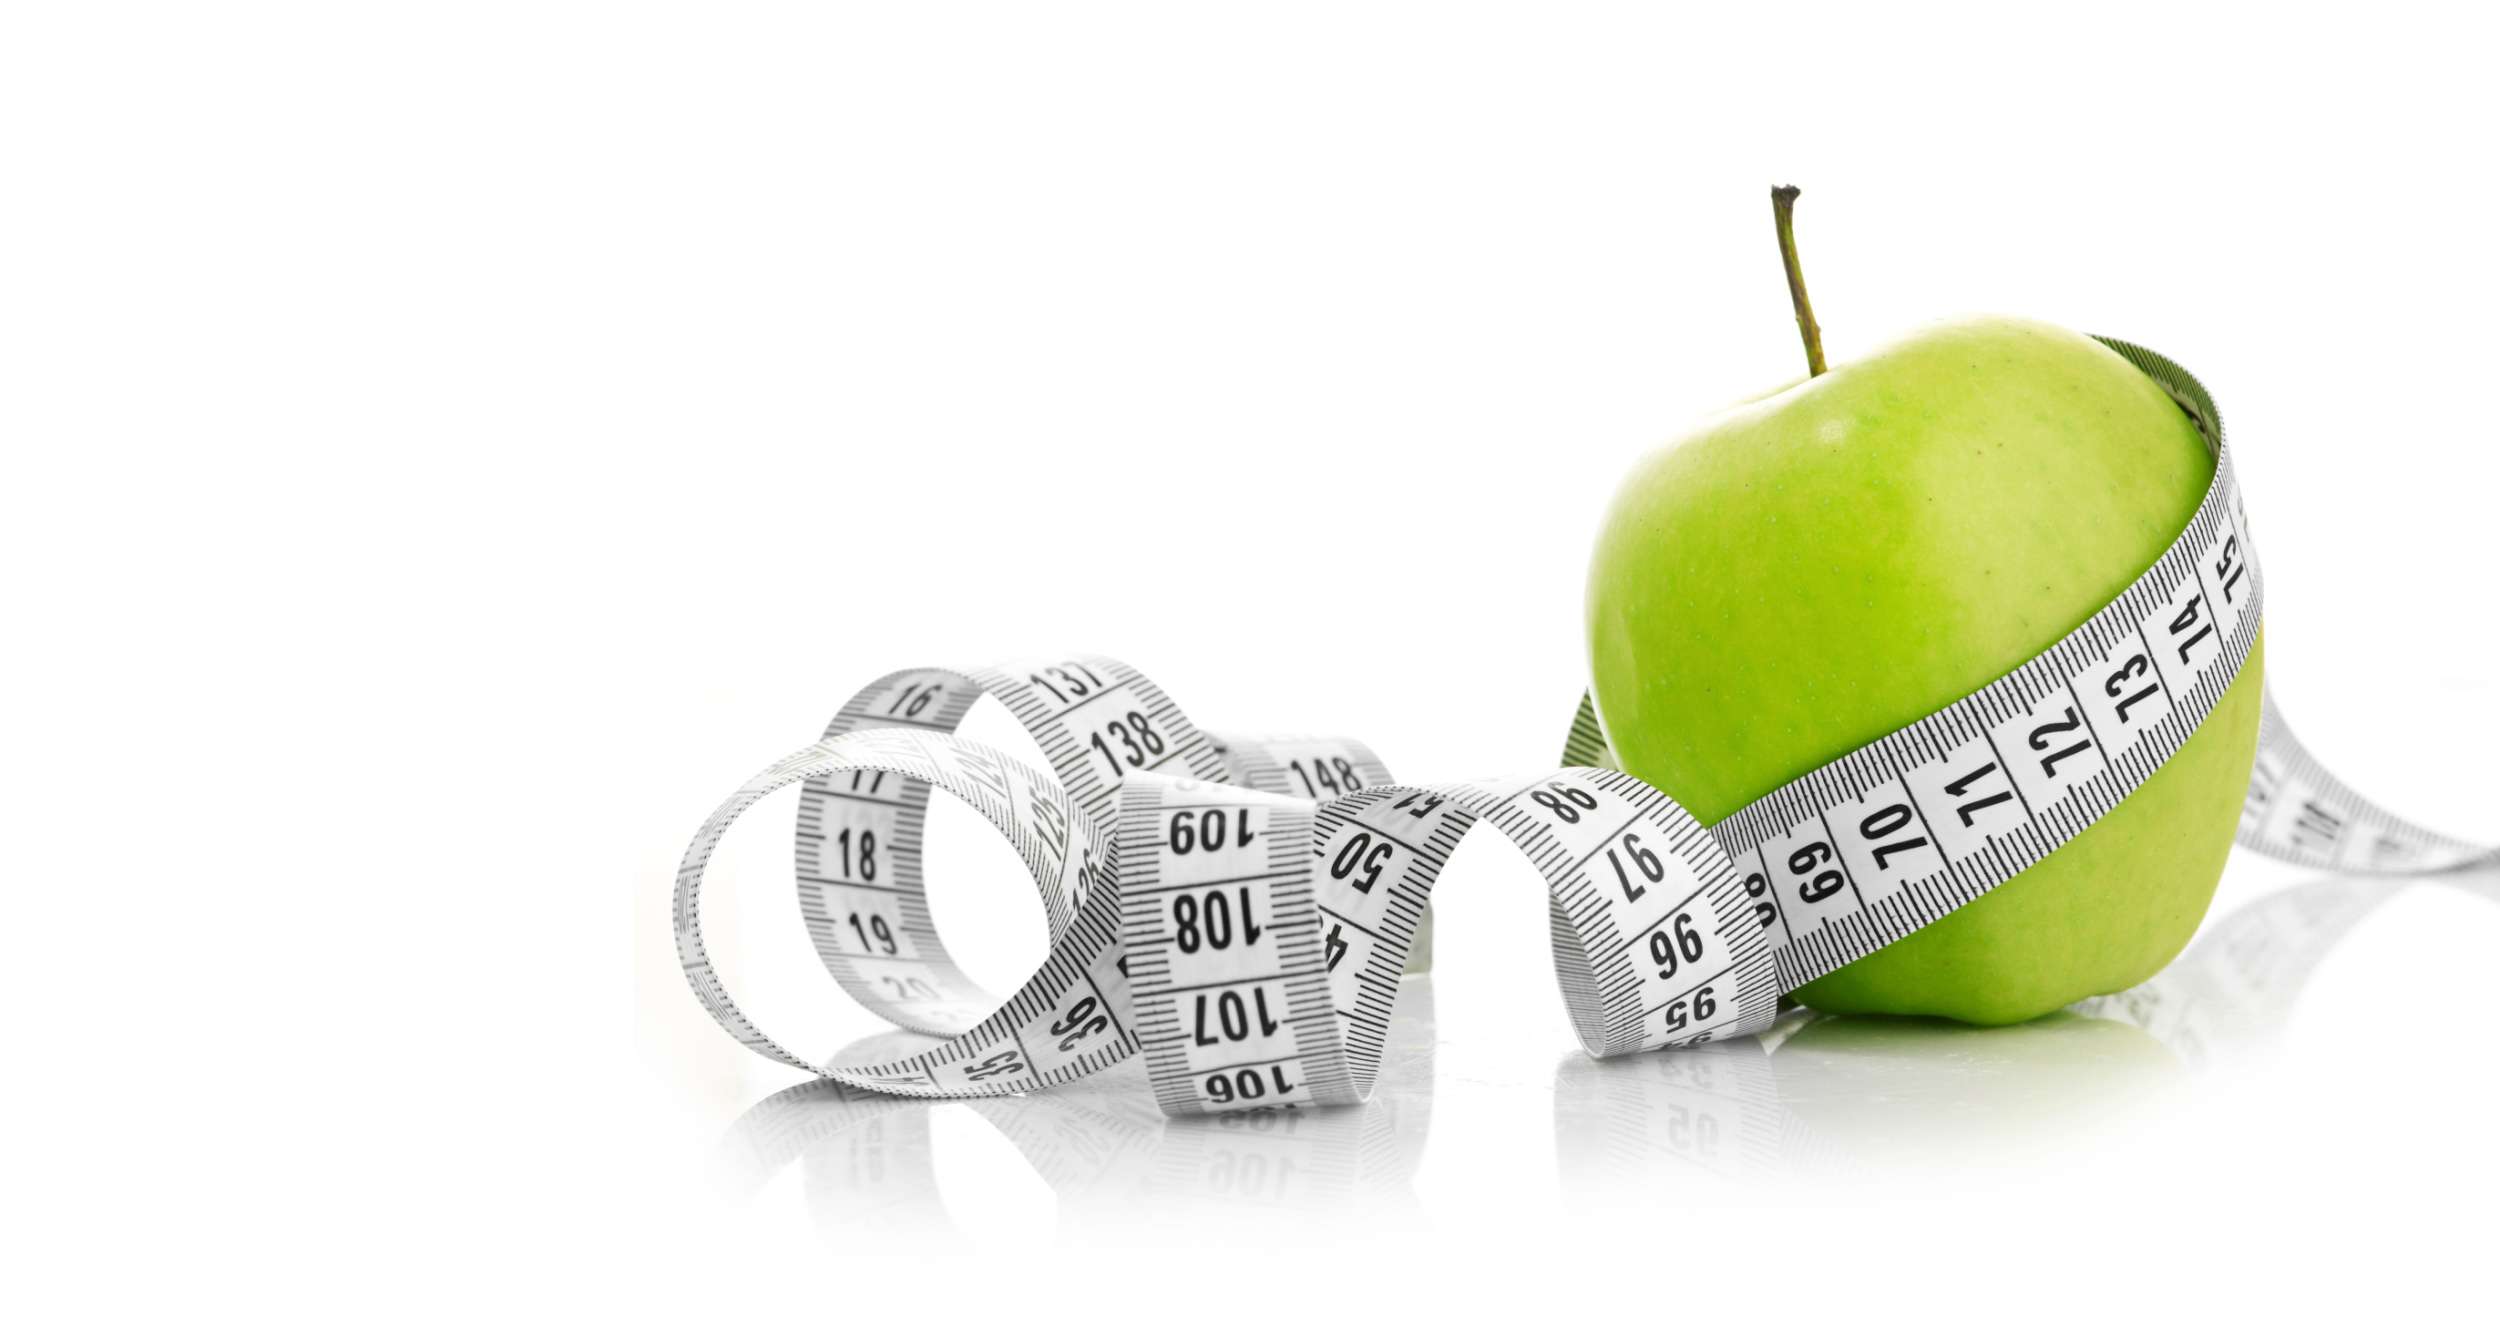
What Are The Best Foods To Enhance Weight Loss?
23 Mar, 2022
Many people assume that in order to lose weight you have to eat less. Now, that may be true of course if you have NOTHING to eat you have NOTHING to gain. Instead of strategically attempting to eat less you need to be mindful of what you are actually eating. To help manage your weight you should eat foods that are rich in protein and fiber. The best sources of protein are meat, poultry, fish, dairy foods, eggs, and tofu. Here is a list of all the foods and ingredients that should help you shed a few pounds in no time.
“I receive a commission for purchases or clicks made through links in this post.”
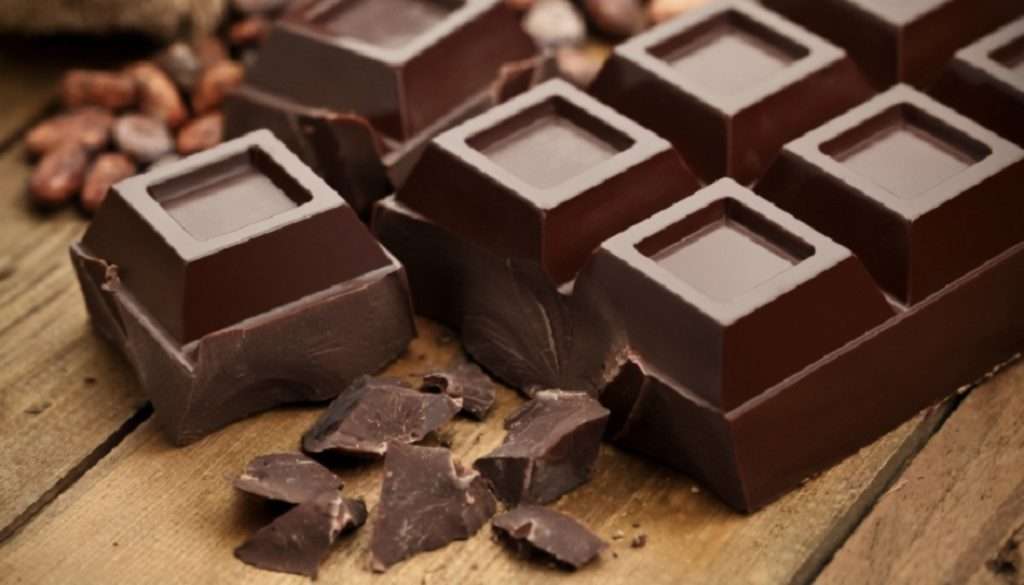
1. Chocolate
Let’s go ahead and start the list off with CHOCOLATE! I know they say chocolate has a bunch of health benefits that we should pay attention to. While it has all these benefits, they tell us to “Eat in moderation”. What exactly does that mean? It means we should eat CHOCOLATE! When they say this they mean no snickers, or kit kats, or twix. (No offense) Studies suggest you “stick to dark chocolate with a high cacao content, rather than milk chocolate.” Cacao is nutrient-dense and packed with antioxidants. It can help lower blood pressure, combat clogged arteries, and reduce the risk of stroke.
2. Nuts and Seeds
Second on the list will be nuts and seeds. Nuts are a great go to when you need a quick snack for body fuel or nutritional intake. Chestnuts contain the lowest fat and calories, and almonds make a great healthy snack—one study found eating a handful of almonds daily, instead of a high-carbohydrate snack with equal calories, helped reduce belly fat, and significantly improved cholesterol levels. Eating nuts can help to control body weight as they boost satiety.
Satiety is defined as a state of non-eating. It is characterized by the absence of hunger that follows at the end of a meal and is due to consequences of food ingestion. In simpler terms it is better know as the feeling of fullness after eating.
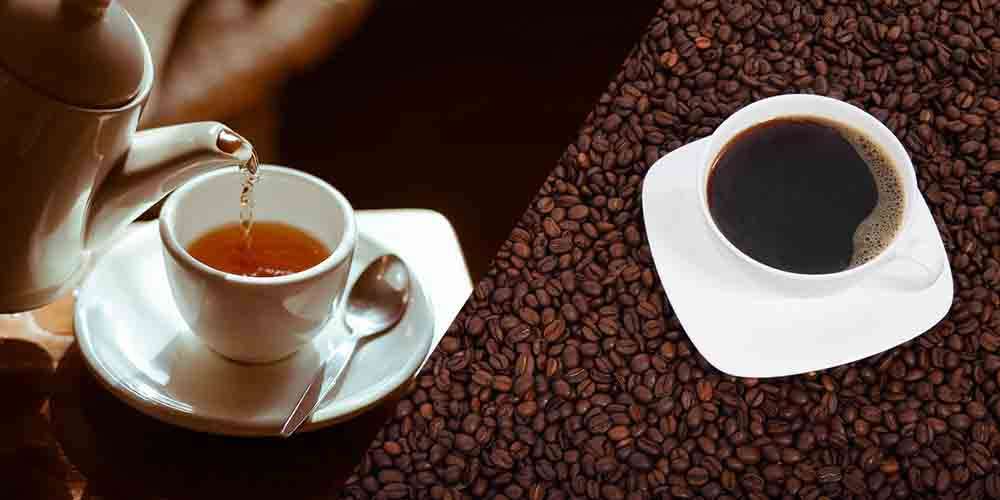
3. Coffee and Tea
Drinking a cup of coffee helps you burn more calories. Caffeine is one common ingredient that is known to help speed up your metabolism. It allows you to increase the rate at which your body burns fat. One study states that both black and green tea could help combat obesity. Caffeine breaks down body fat cells and uses it as fuel.
Black coffee helps decrease the extra water content in the body through frequent urination. A study that was done by King’s College University in London suggests you may be able to burn up to 150 calories a day after drinking an entire cup.
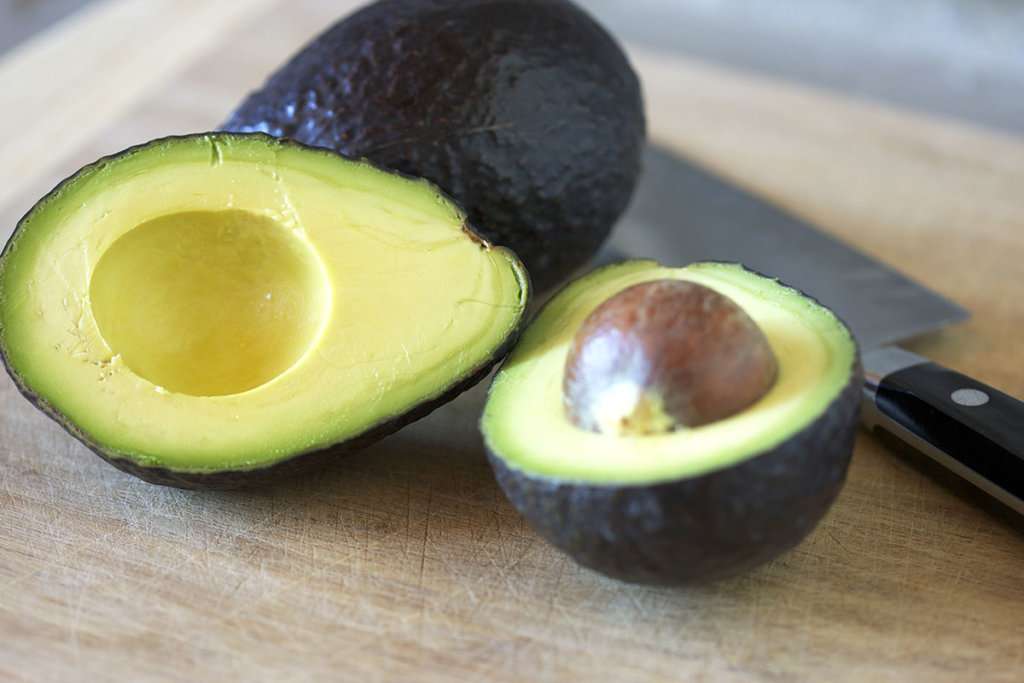
4. Avocados
Avocados are a great source of “good fat”. They have been shown to decrease belly fat, are good appetite suppressants, and helps you absorb more nutrients. Avocados also contain both soluble and insoluble fiber that feeds gut microbes, and helps to move food through the digestive system.
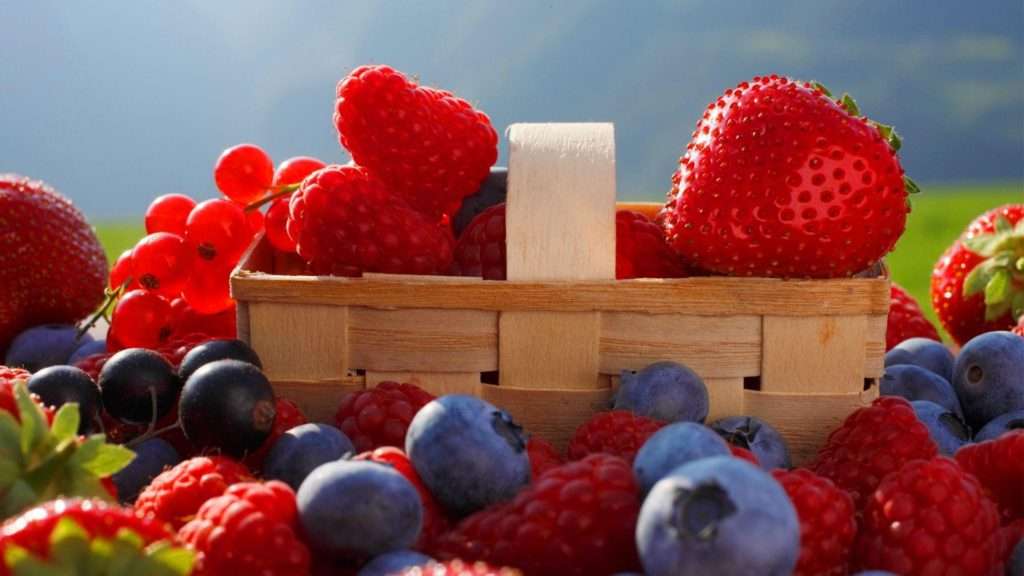
5. Berries
Eating berries are one of the key factors in a successful control of your weight. Blueberries, strawberries, blackberries, cranberries, and raspberries, are nature’s super foods. They are also excellent foods for weight loss. They are low in calories and high in fiber. Goji berries are rich in fiber and helps to reduces your appetite giving a feeling of fullness for a longer time.
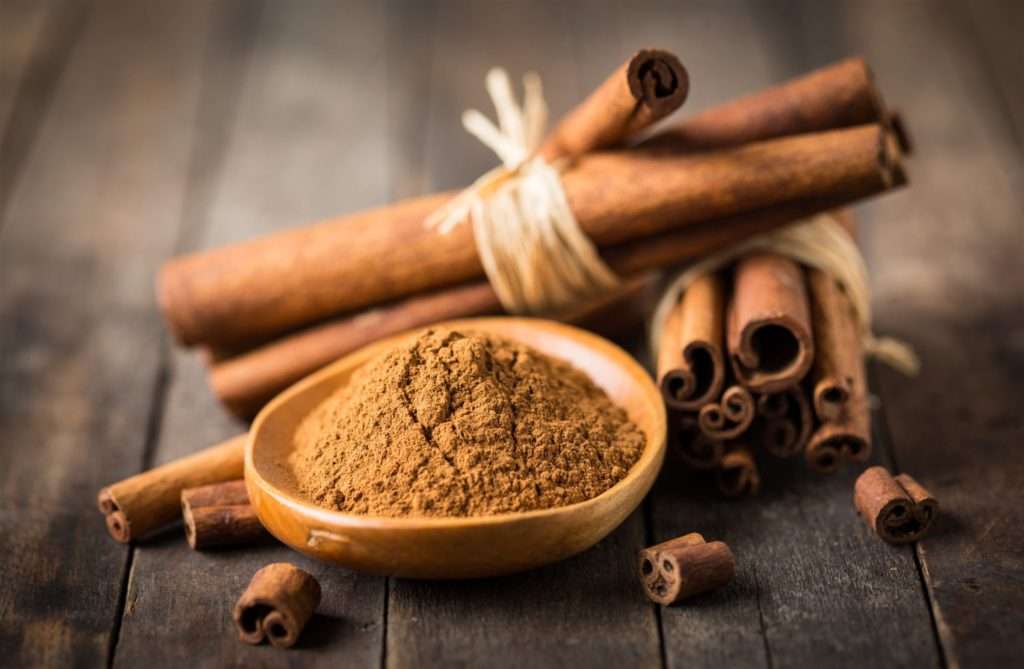
6. Cinnamon
Cinnamon is a rich source of antioxidants, anti-inflammatory, and analgesic properties. It’s been tested and proven to be very useful when trying to lower cholesterol and blood sugar levels in the human body. Not only does cinnamon help prevent an increased storage of fat, it’s also believed to help speed your metabolism while lowering your blood sugar levels.
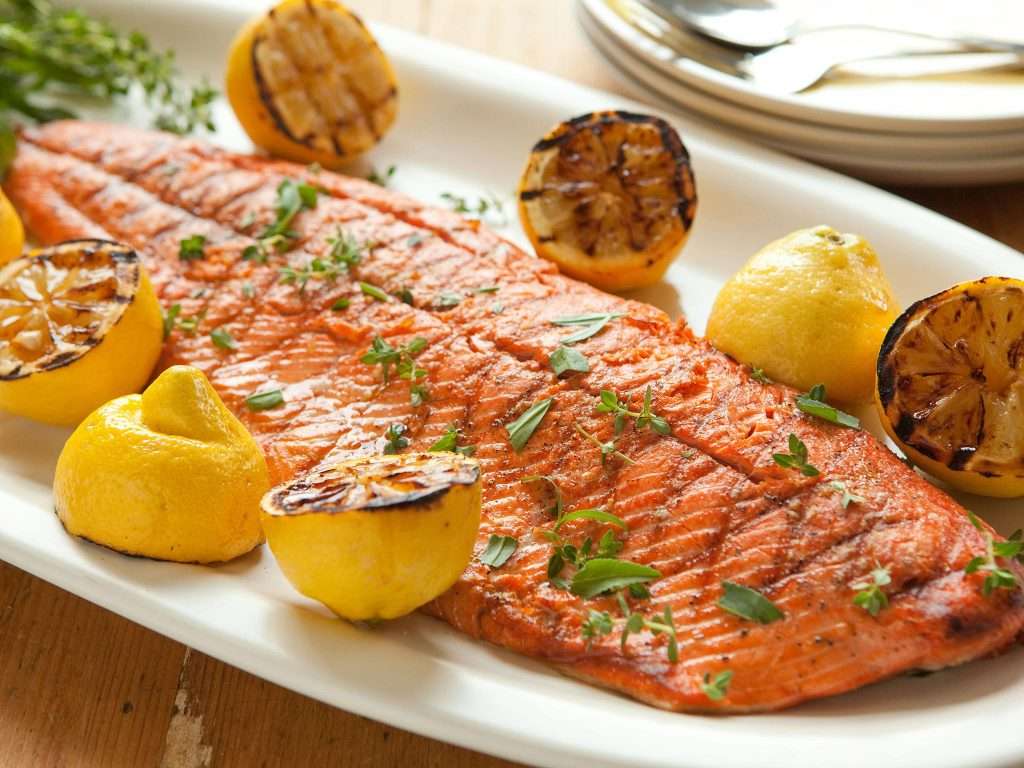
7. Salmon
Salmon is notable for its exceptionally high level of omega-3 fatty acids. Theomega 3 found in salmon is known to aid in weight loss because they reduce inflammation levels in your body. This process can lead to decreased belly fat storage. Less inflammation, increased cardiovascular health, and improved metabolism, all help with weight loss.
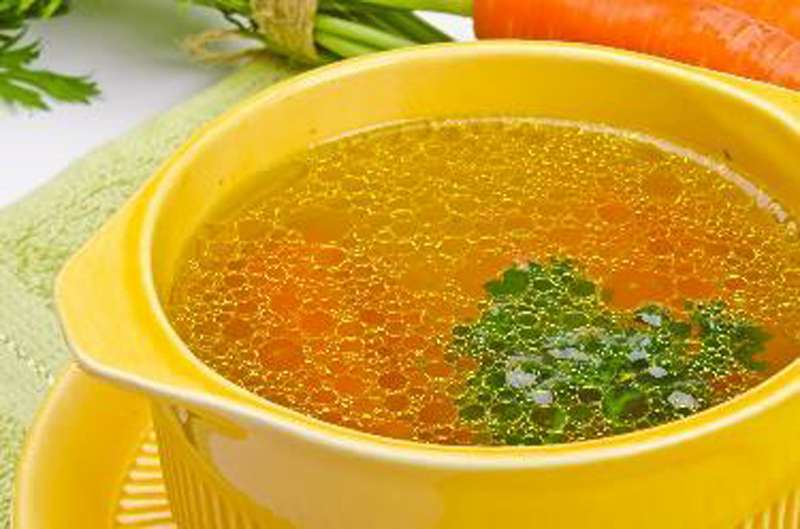
8. Chicken Broth
A bowl chicken broth sounds like a very appealing meal to recover from an illness. While that may be true, a bowl of broth may also help you to lose weight. Chicken broth is a great choice for a healthful, low-calorie meal. Research revealed that a cup of chicken-bone broth contains more protein than regular chicken soup. This will allow you to eat a light meal and stay full for a longer period of time.
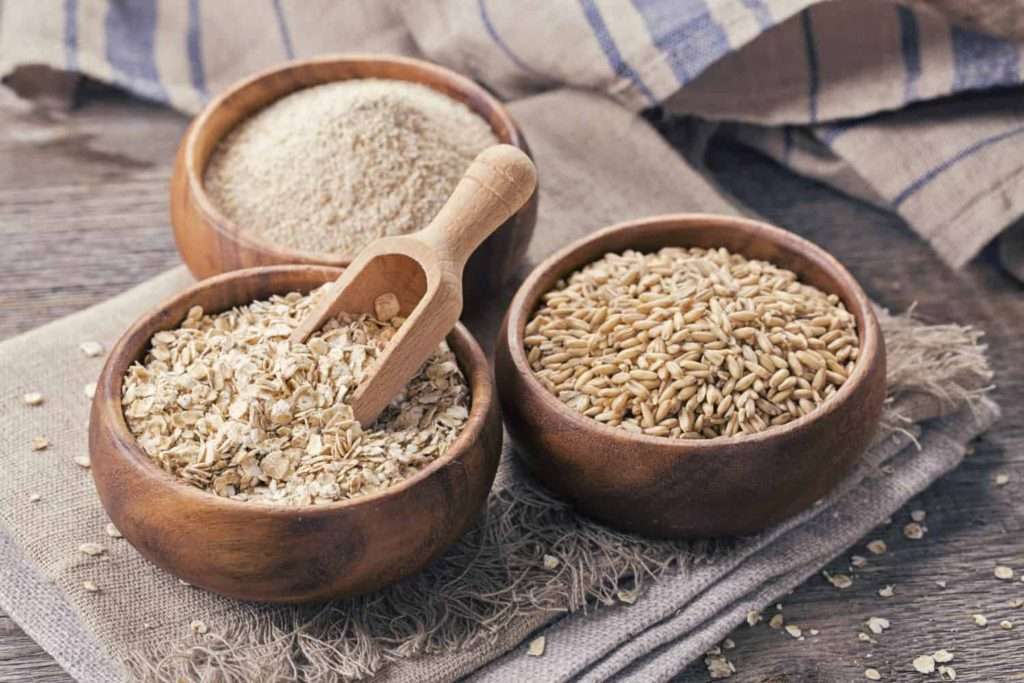
9. Oats
Whole grains are a good source of fiber. Evidence shows that a higher intake is more likely to lead to lower body weight, lower body mass index (BMI) and less weight gain. It is known to be one of the best fiber-based foods for weight loss.
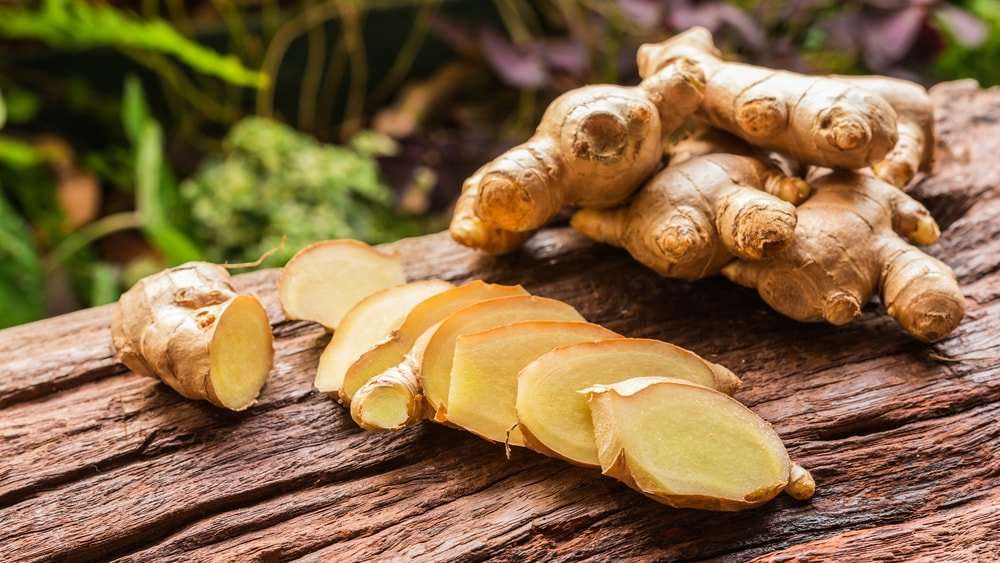
10. Ginger Root
It is said that ginger root is a good food for weight loss because it contains powerful anti-inflammatory properties.This ingredient is helpful during the digestion and circulation processes within the body.
What Is Gel Nail Polish And How To Use It?
19 Mar, 2022
“I receive a commission for purchases or clicks made through links in this post.”
Gel nail polish is applied to your natural nails, similar to normal nail polish. It’s much healthier and more natural than artificial nails, yet more durable than regular nail polish. Gel polish is typically applied in very thin layers compared to standard polish.
After the brush application, each coat of polish will need to be cured for about 30 to 60 seconds at a time. This process is done using a UV/LED lamp. If you are using a UV lamp, you will be able to cure both UV and LED gel polish. With an LED lamp, you can only cure LED gel polishes. During the curing process, the polish will produce a sticky residue, which should be wiped off with a cleanser at the end of the manicure.
A gel manicure follows most of the same steps as your traditional manicure—your nails are cut, filed, and shaped. When applying gel polish, make sure that your nail beds are as dry as possible. There should be no water, lotions, or oils on your nail plates. The presence of such residue could prevent your gel polish from latching on.
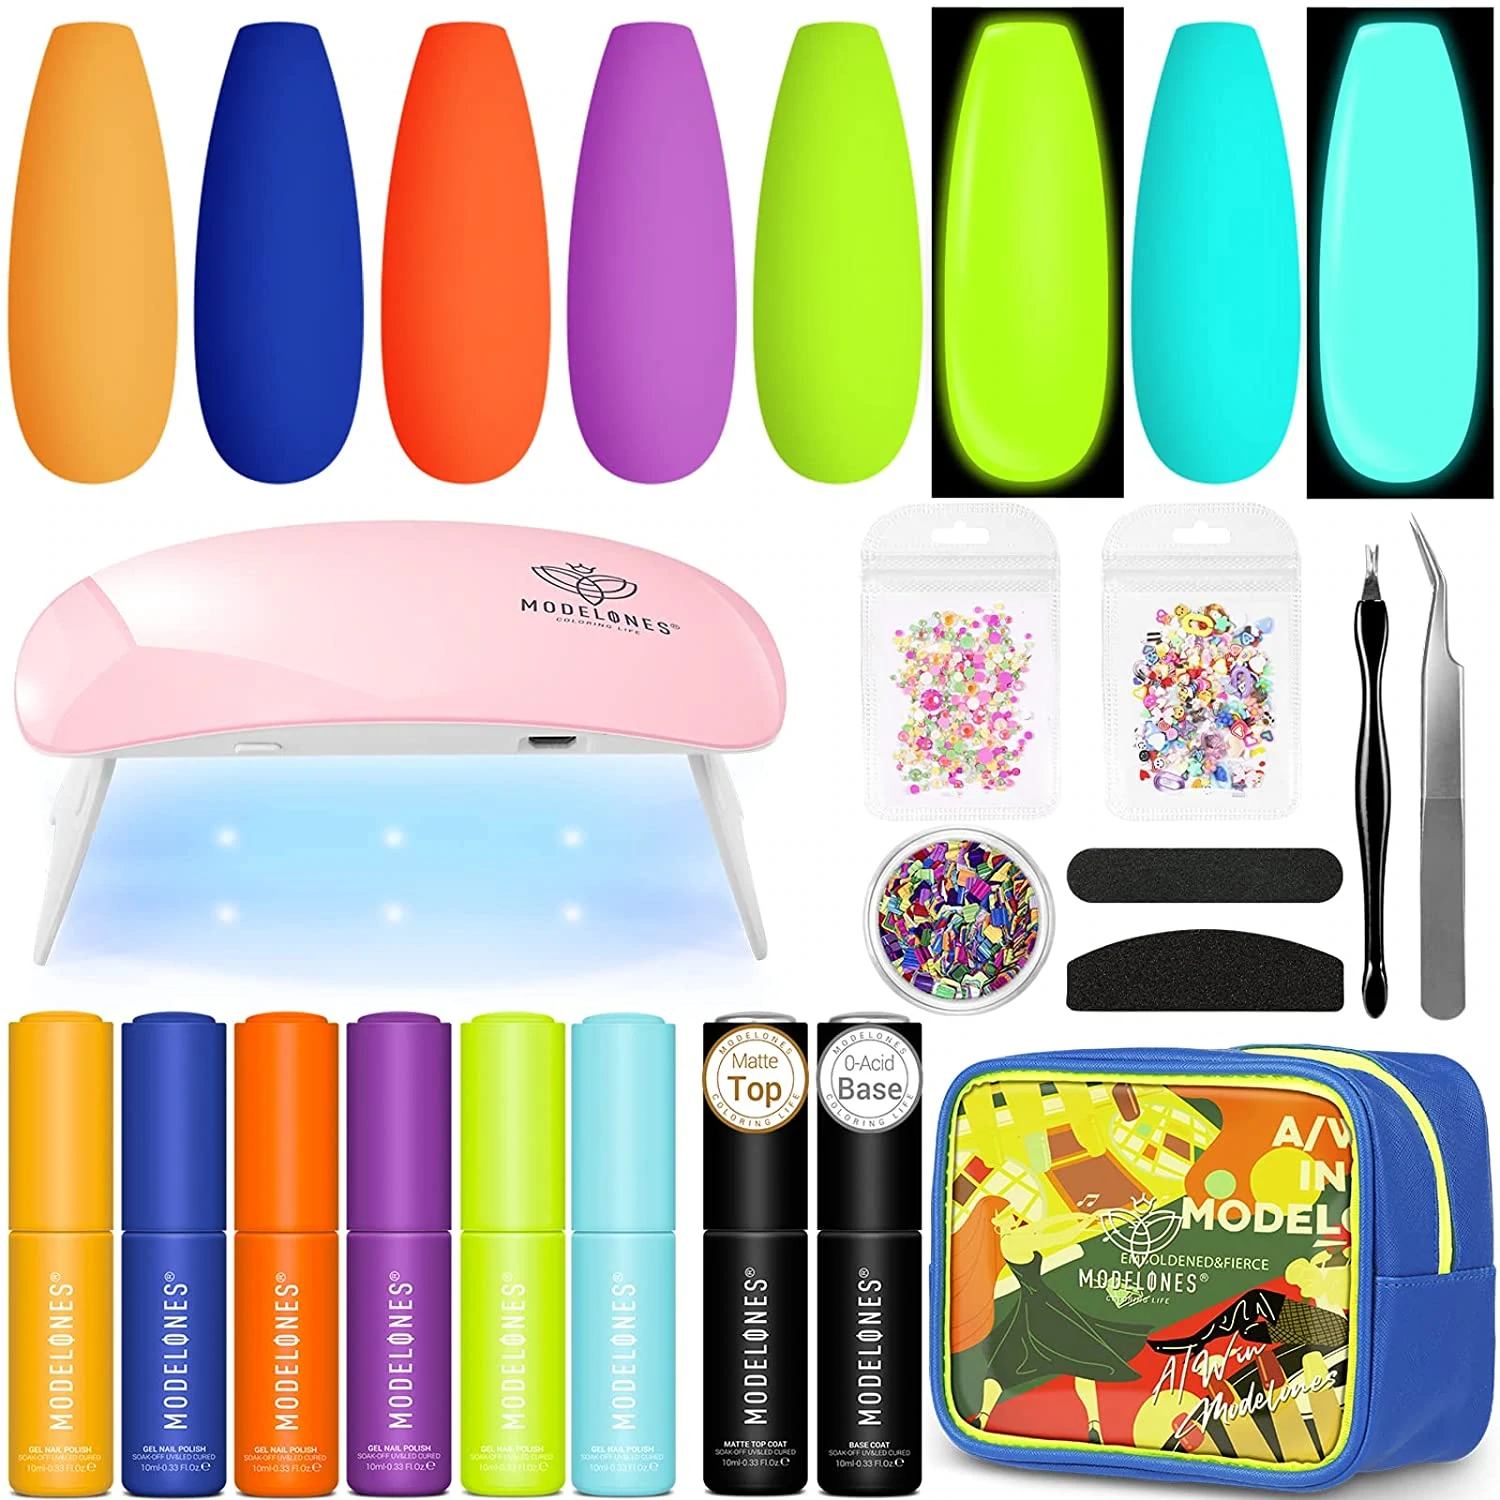
What Products Do I need?
To get started on your gel polish manicure, of course, there will be items that you will need to use. Many of them will be standard manicure tools, but some will need to be specifically made for your gel polish preparation. Some of these items will include:
Tools Needed
Application Process
Nail File
1. Prepare the nails and apply the base coat.
Cuticle Stick
2. Apply one thin, even layer to your nail bed.
Nail Cleansing Solution
3. Cure for 60–90 seconds using a UV/LED lamp.
Wipes Or Cotton Pads
4. Apply colored gel nail polish.
Base Coat
5. Apply 2 thin coats, leaving a tiny margin around the cuticle area
Gel Nail Polish
6. Paint the free edge and cure for 30 more seconds.
Gel Polish Top Coat
7. Remove gel residue with a nail wipe saturated with cleansing solution.
UV/LED Lamp
8. Apply the gel top coat and cure for 60–90 seconds.
Cuticle Oil
9. Finish with cuticle oil around the cuticles.
Benefits of Using Gel Polish Instead Of Standard Polish:
Longer wear time: Gel nail polish can last for up to 2-3 weeks, while standard polish typically only lasts for 1-2 weeks. This is because gel polish cures under a UV or LED light, which hardens it and makes it more durable.
Chip-resistant: Gel nail polish is more chip-resistant than standard polish. This is because the gel polish forms a strong bond to the nail, making it less likely to chip or peel.
Shinier finish: Gel nail polish typically has a shinier finish than standard polish. This is because the gel polish is more opaque and has a higher concentration of pigment.
Dries quickly: Gel nail polish dries quickly under a UV or LED light. This means that you can get your manicure done in less time than with standard polish.
Easy to remove: Gel nail polish can be removed with a special gel remover. This makes it easier to remove than standard polish, which can sometimes be difficult to remove without damaging the nails.
Cons Of Using Gel Polish:
Requires special equipment: Gel nail polish requires a UV or LED light to cure. This means that you will need to purchase a light if you do not already have one.
Can be damaged by heat: Gel nail polish can be damaged by heat. This means that you should avoid using hot tools on your nails if you have gel polish on them.
Can be drying to the nails: Gel nail polish can be drying to the nails. This is because the gel polish forms a tight bond to the nail, which can prevent the nails from breathing.
Top Gel Nail Polish Brands:
OPI GelColor: OPI is a well-known brand of nail polish, and their gel polish line is no exception. OPI GelColor is known for its wide range of colors, its long-lasting formula, and its chip-resistant finish.
Essie Gel Couture: Essie is another popular brand of nail polish, and their gel polish line is also highly rated. Essie Gel Couture is known for its easy application, its vibrant colors, and its long-lasting wear.
Gelish: Gelish is one of the most popular gel nail polish brands on the market. Gelish is known for its high quality, its long-lasting formula, and its wide range of colors.
CND Shellac: CND Shellac is one of the first gel nail polishes on the market, and it is still one of the most popular. CND Shellac is known for its long-lasting wear, its chip-resistant finish, and its wide range of colors.
Sally Hansen Miracle Gel: Sally Hansen Miracle Gel is a more affordable option for gel nail polish. Sally Hansen Miracle Gel is known for its easy application, its vibrant colors, and its long-lasting wear.
Beetles:Beetles is a Chinese brand that offers high-quality gel nail polish at an affordable price. Beetles gel polish is known for its wide range of colors, its long-lasting formula, and its chip-resistant finish.
NAILS INC: Nails Inc is a British brand that offers a wide range of gel nail polishes, including vegan and cruelty-free options. Nails Inc gel polish is known for its high quality, its long-lasting formula, and its vibrant colors.
Deborah Lippmann Gel Lab Pro: Deborah Lippmann is a high-end brand that offers a wide range of gel nail polishes, including vegan and cruelty-free options. Deborah Lippmann gel polish is known for its high quality, its long-lasting formula, and its luxurious finishes.
DND Gel Nail Polish is a professional-quality gel polish that is known for its long-lasting wear, high shine, and wide range of colors. DND gel polishes are made in the USA and are cruelty-free and vegan.
These are just a few of the many gel nail polish brands on the market. When choosing a gel nail polish brand, it is important to consider your budget, your desired color range, and your personal preferences. Overall, gel nail polish has many benefits standard polish. However, it is important to weigh the pros and cons before deciding if gel nail polish is right for you.
Can you use gel polish without a UV light?
Gel nail polish is known for its long-lasting shine and durability, but it can be a hassle to go to the salon every time you want a fresh manicure. If you’re looking for a way to get salon-quality gel nails at home, without having to invest in a UV lamp, there is a solution.
There are now a number of gel nail polishes on the market that don’t require a UV lamp to cure. These polishes are typically formulated with a special type of acrylic resin that hardens when exposed to air.
Gel nail polish has become increasingly popular in recent years, but it can be expensive and time-consuming to get a gel manicure at a salon. Fortunately, there are now gel nail polishes that do not require a UV lamp to cure. These polishes are called gel effect nail polishes, and they are a great way to get a long-lasting, chip-resistant manicure at home.
What is gel effect nail polish?
Gel effect nail polish is a hybrid of regular nail polish and gel polish. It is formulated with polymers that cross-link and harden when exposed to air or sunlight. This makes gel-effect nail polish more durable and long-lasting than regular nail polish, but it also means that it takes longer to dry.
How To dry gel effect nail polish without a UV light
There are a few different ways to dry gel-effect nail polish without a UV light. One way is to simply let your nails air dry. This can take up to an hour, so it is important to be patient. Another way to dry gel polish is to use a hair dryer in a cool setting. Be careful not to hold the hair dryer too close to your nails, as this can cause the polish to bubble.
If you want your gel manicure to dry as quickly as possible, you can use a special quick-dry top coat. These top coats are formulated to help gel polish dry in minutes. A nail polish dryer spray will also be a great addition to the completion of your nail set. The nail dryer spray will help dry your polish faster than normal air drying.
How do you remove gel nail polish safely?
Gel nail polish has become a popular choice for many people who want long-lasting, chip-resistant manicures. However, gel polish can be difficult to remove, and it’s important to do so safely to avoid damaging your nails.
There are two main ways to remove gel nail polish: with acetone or with a gel polish remover.
Acetone is a solvent that breaks down the gel polish. To remove gel polish with acetone, you will need:
A bowl of acetone
Cotton balls or pads
Aluminum foil
Orangewood sticks
Instructions:
File the top layer of your gel polish to dull it. This will help the acetone penetrate the polish more easily.
Soak a cotton ball or pad in acetone and place it on each nail.
Wrap each nail in aluminum foil.
Let the acetone sit on your nails for 10-15 minutes.
Gently remove the aluminum foil and cotton balls.
Use an orangewood stick to push back any remaining gel polish.
Removing gel nail polish with a gel polish remover
Gel polish removers are specifically designed to remove gel polish. They are typically less harsh than acetone and less likely to damage your nails.
To remove gel polish with a gel polish remover, you will need:
A bottle of gel polish remover
Cotton balls or pads
Orangewood sticks
Instructions:
File the top layer of your gel polish to dull it. This will help the gel polish remover penetrate the polish more easily.
Apply a generous amount of gel polish remover to each nail.
Wrap each nail in a cotton ball or pad.
Let the gel polish remover sit on your nails for 10-15 minutes.
Gently remove the cotton balls.
Use an orangewood stick to push back any remaining gel polish.
Tips for removing gel nail polish safely and easily
Always file the top layer of your gel polish before removing it. This will help the acetone or gel polish remover penetrate the polish more easily and make it easier to remove.
Be careful not to over file your nails, as this can weaken them and make them more likely to break.
If you are using acetone, be sure to work in a well-ventilated area. Acetone fumes can be irritating to your eyes and respiratory system.
Wear gloves to protect your hands from the acetone or gel polish remover.
Be patient when removing gel polish. It may take several minutes for the acetone or gel polish remover to break down the polish.
Do not force off any remaining gel polish. If there is any gel polish remaining, simply reapply the acetone or gel polish remover and let it sit for a few more minutes.
After removing your gel polish
Once you have removed your gel polish, it is important to moisturize your nails. Gel polish can dry out your nails, so it is important to replenish the moisture. You can use a hand cream or cuticle oil to moisturize your nails.
You may also want to give your nails a break from gel polish before getting another professional manicure. This will give your nails time to recover from the acetone or gel polish remover.
How To Define Your Skin Type Classification
19 Mar, 2022
“I receive a commission for purchases or clicks made through links in this post.”
Your skin type is determined by several factors including genetics, age, and environment. Knowing your skin type is important for choosing the best skin care treatments and products. Your skin type influences things such as water retention, sensitivity, and your propensity towards certain skin conditions, such as acne. Skin is often classified into 5 main types:
1. Normal Skin:
Normal skin is well-balanced. It is less likely to suffer from skin conditions and appears clear, radiant, and healthy. Normal skin is more likely used to describe the youthful look of younger people. This type can be portrayed as being one or more of the following:
Free from skin blemishes
Fine or invisible pores
Skin tone is even, clear, and smooth
Radiant complexion
Neither too oily or too dry
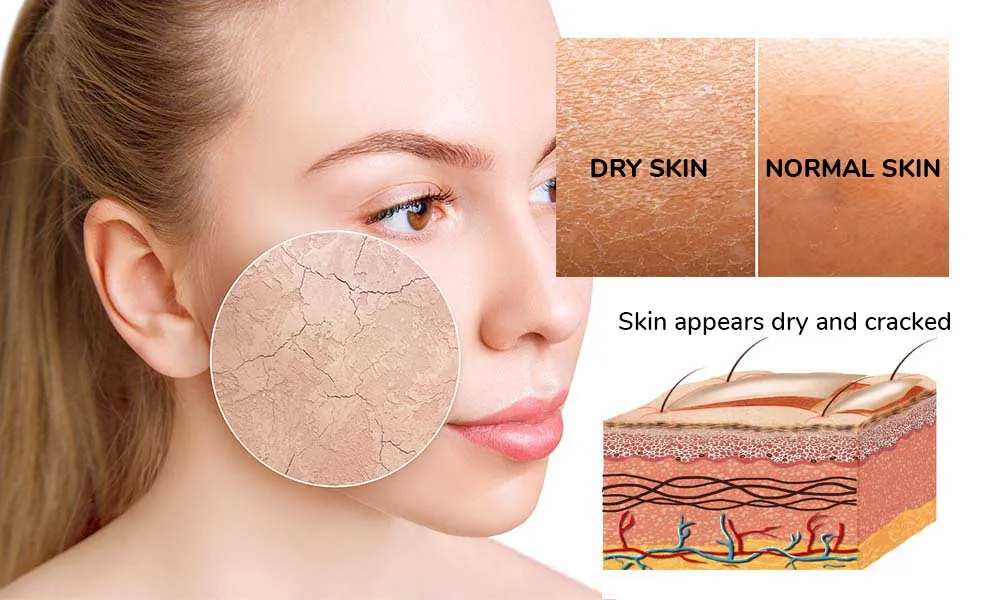
2. Dry Skin
Certain areas of the body are more prone to dry skin including the hands, arms, legs, palms, and soles of the feet. Dry skin can be a result of genetics or environmental factors. Studies show that women are more prone to dry skin than men. The skin will have a dry, scaly appearance which is due to the lack of moisture content. People who have dry skin should try their best to avoid skin care products that have drying ingredients. Also, they need to be careful of products that strip the skin of sebum. Characteristics of dry skin include the following:
Skin feels tight and brittle, and lacks elasticity
Rough skin texture
Scaling, flaking, and itchiness
Prone to redness, irritation, and infection
Chapping and prone to cracking
Enhances fine lines and wrinkles
To diagnose dry skin, your doctor is likely to examine you and ask about your medical history. During your doctor’s visit be sure to inform your doctor about when you noticed the drying of your skin. Discuss when it started, what hurts or heals it, cleansing routines, and skin care. This will be important information because oftentimes dry skin is a symptom of serious conditions such as dermatitis or psoriasis.
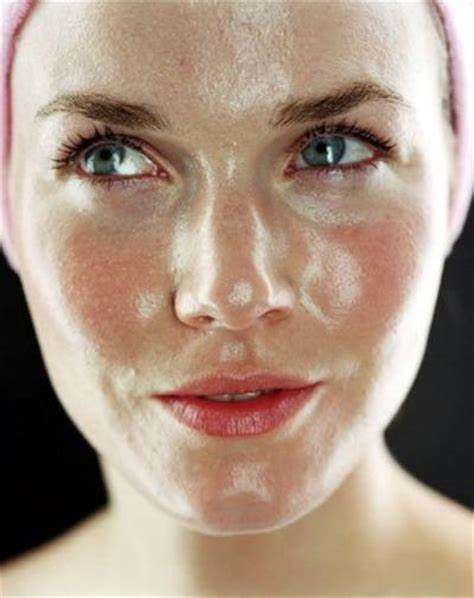
3. Oily Skin
When the production of sebum becomes excessive the result is oily skin. Individuals with an oily skin type are more acne prone and more likely to have skin blemishes. In addition to a shiny complexion, oily skin is usually accompanied by larger more noticeable pores.
Oily skin is heavily influenced by genetics. Other factors such as hormonal changes (pregnancy or puberty), stress, medications, diet, and skin care products may contribute to oily skin. These are some of the signs and symptoms of oily skin:
Pores look enlarged and are visible
Skin looks thicker and paler
Acne-prone in the T- Zone which includes the forehead, nose, and chin
Oily skin looks plumper and less aged
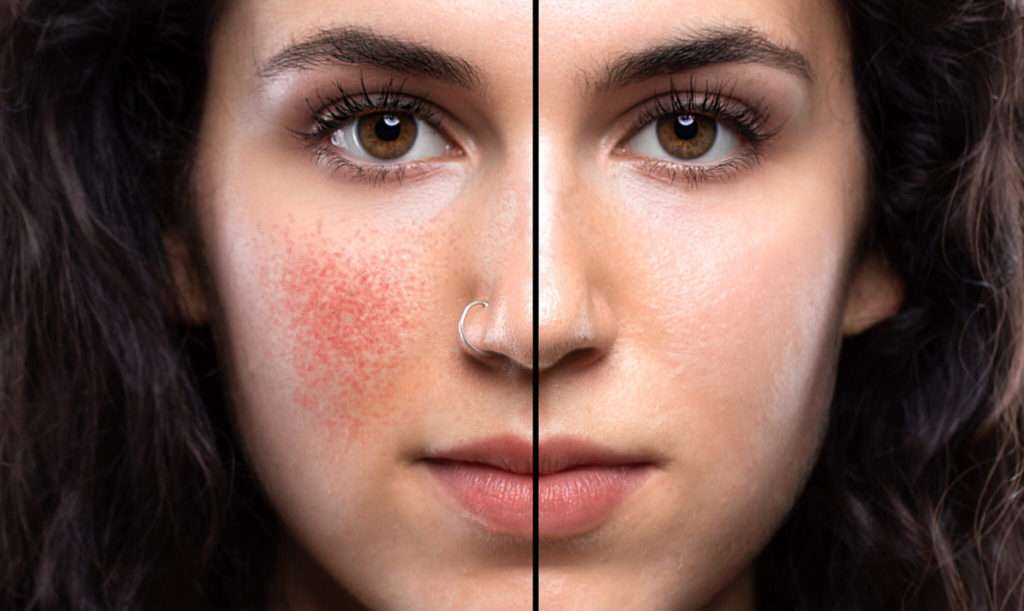
4. Sensitive skin
Most people who have sensitive skin notice occasional or frequent itching, burning, and stinging of patches of skin. Many individuals with sensitive skin cite worsening symptoms due to environmental factors. Signs of sensitive skin come from the breakdown of your skin’s protective barrier. This can be caused by the environment, dehydration, or an underlying condition. Many of these signs are included in one or more of the following:
Redness
Peeling skin
Rough, flaky patches
Open sores or yellow crust over the skin
Wrinkled, rough texture
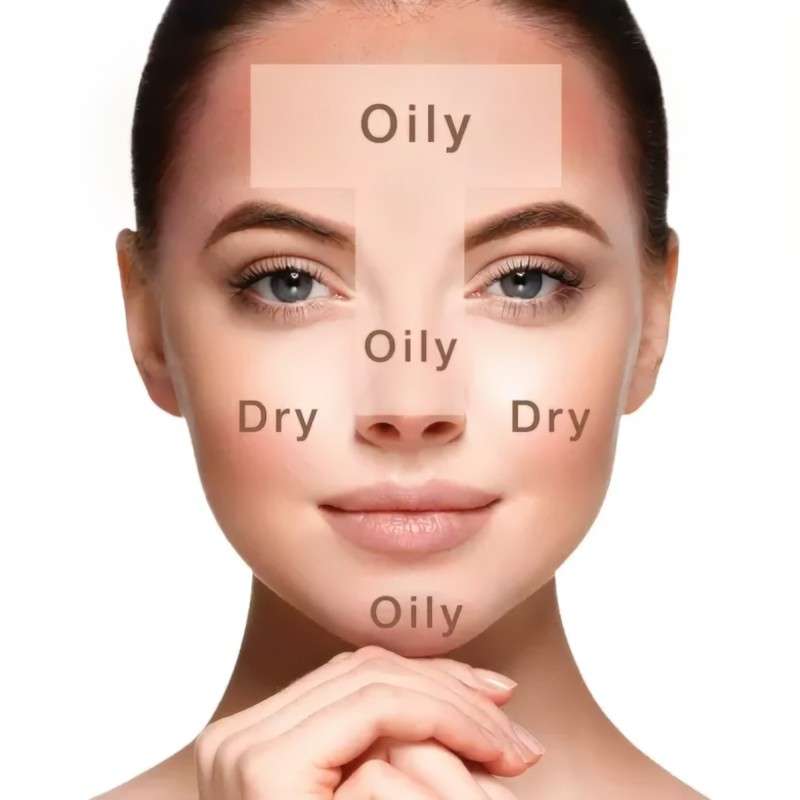
5. Combination Skin
Combination skin is the most common skin type. Many people have it and many people suffer from having it. This skin type is characterized by having a mix of oily and dry skin. This is usually in different areas of the face. They have an over-production of sebum around the forehead, nose, and chin areas. Dry skin typically affects the cheeks, mouth, and eyes due to a lack of sebum production.
The Top 25 Pinterest Pins I Love This Year
18 Mar, 2022
“I receive a commission for purchases or clicks made through links in this post.”
I don’t know about you, but I love me a good Pinterest pin. Pinterest trends are a great way to keep you inspired and focused. Another thing about me is that I love good nail polish! It has become a growing obsession and impulse-buying habit. Every time I’m near the nail polish section, I have to stop myself from getting new ones. Yes, I am one of those three bottles of the same nail polish type of girl. I apologize in advance.
My Pinterest Pin Collection
Why not just collect Pinterest pins instead of unnecessary accumulation? Of course, you can have your cake and eat it too when it comes down to Pinterest trends. It’s a great space to showcase all the styles and designs you’ve always wanted. The site is also packed with nail ideas and opportunities to share your work. Are you passionate about your nail color? Here are my top 3 lists in the nail department. I hope you don’t mind bright colors and EXTRA bling. These are 3 of my favorite Pinterest pins in each category.
Pinterest Nail Colors:
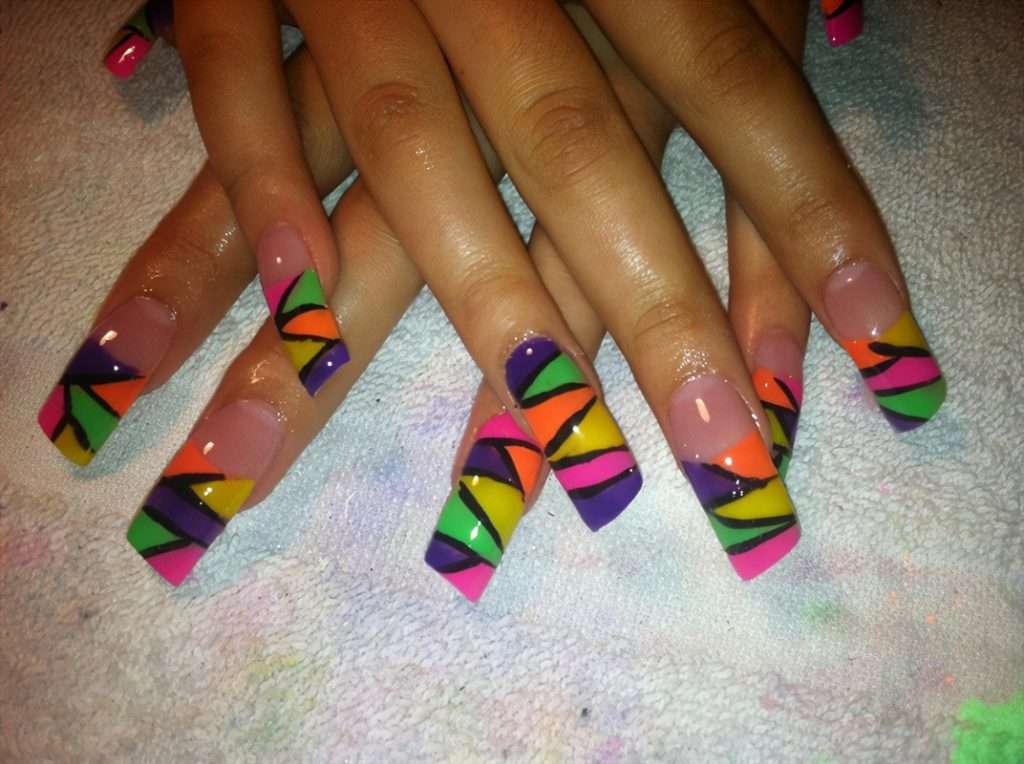
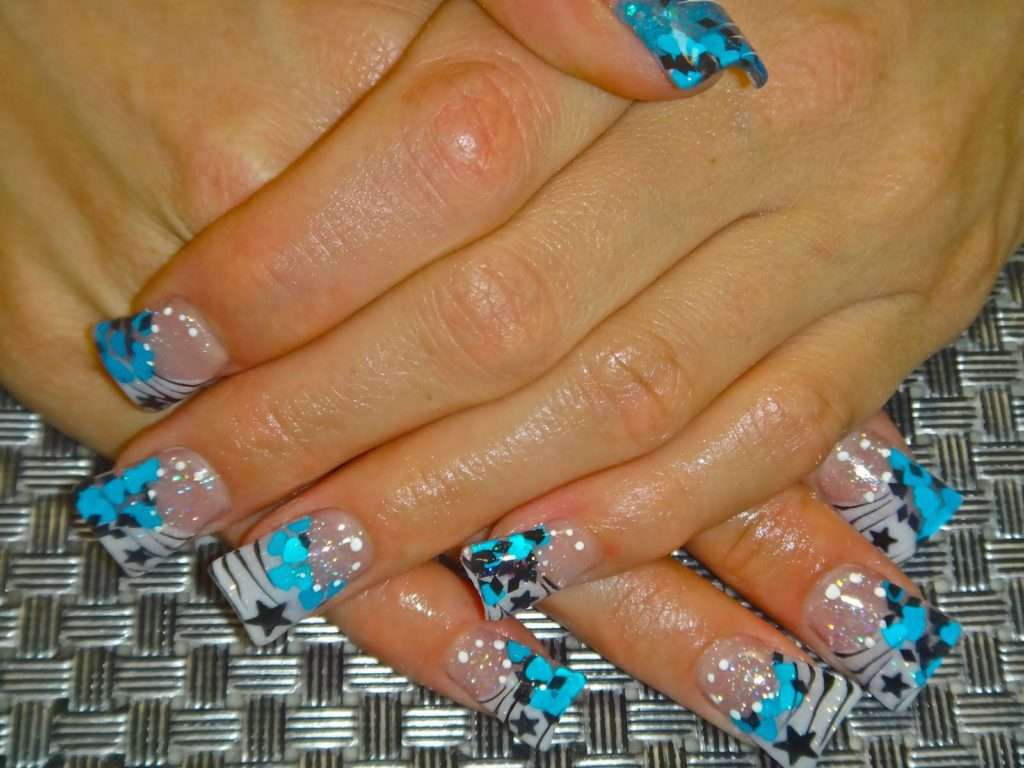
Pinterest Nail ideas:
If you are anything like me you also love good nail design. This is HARDER than it looks. Trust me I have attempted some for myself. One hand is always perfect and the other not so great. (Sighs) For all my ladies rocking these designs or doing them for clients, I appreciate you.
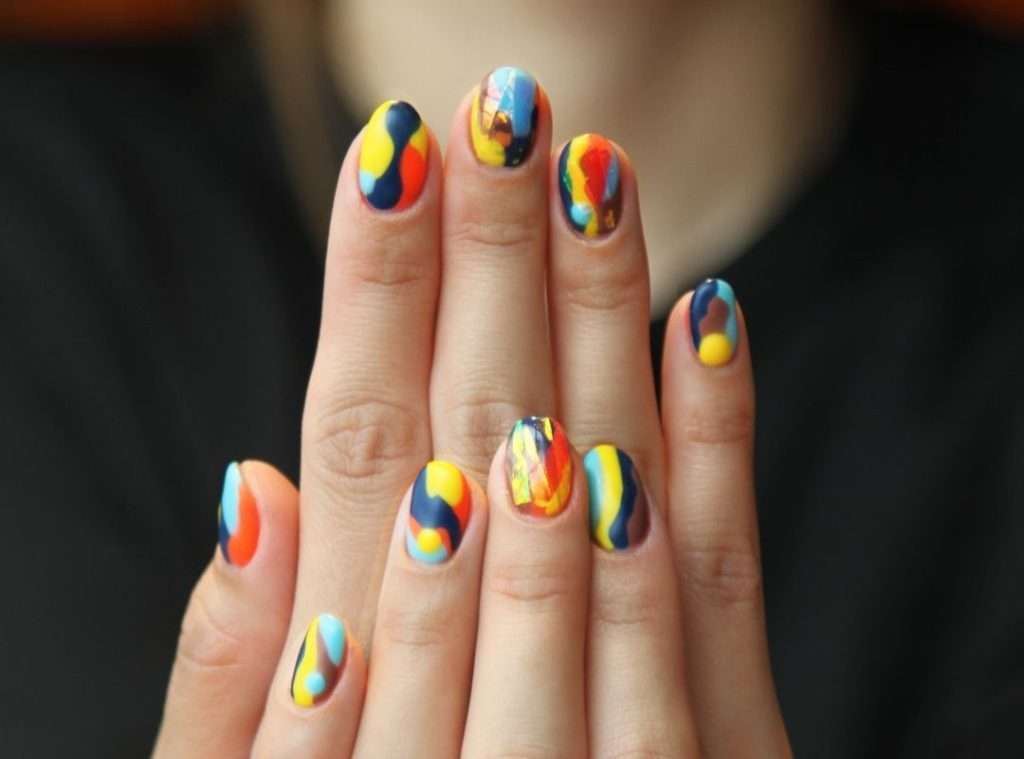
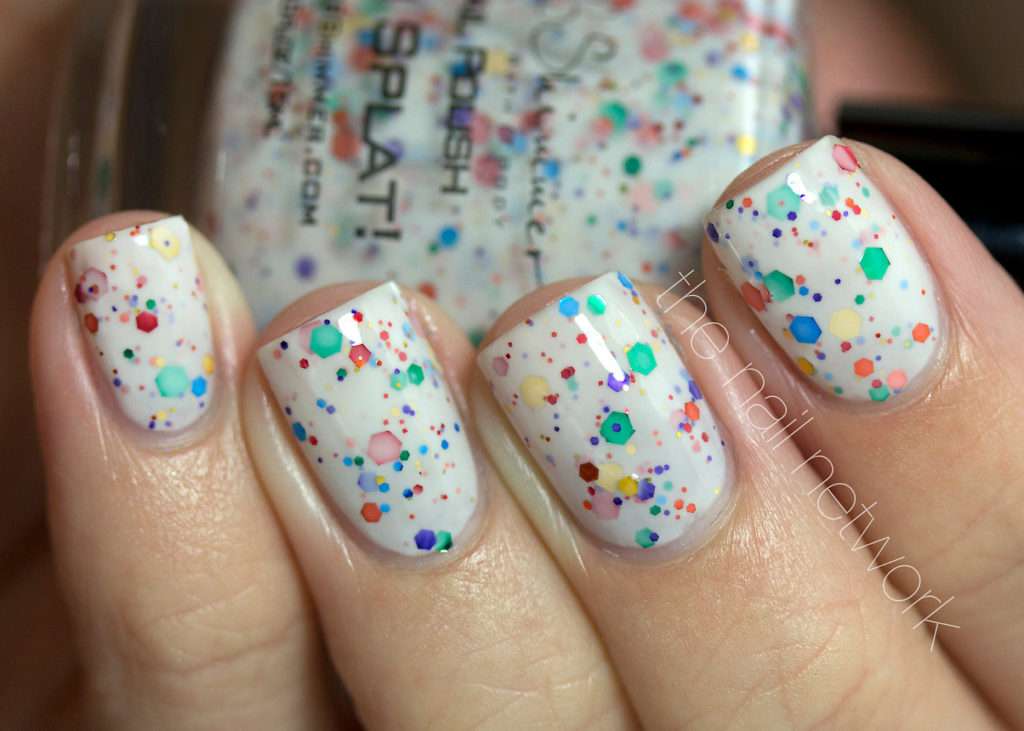
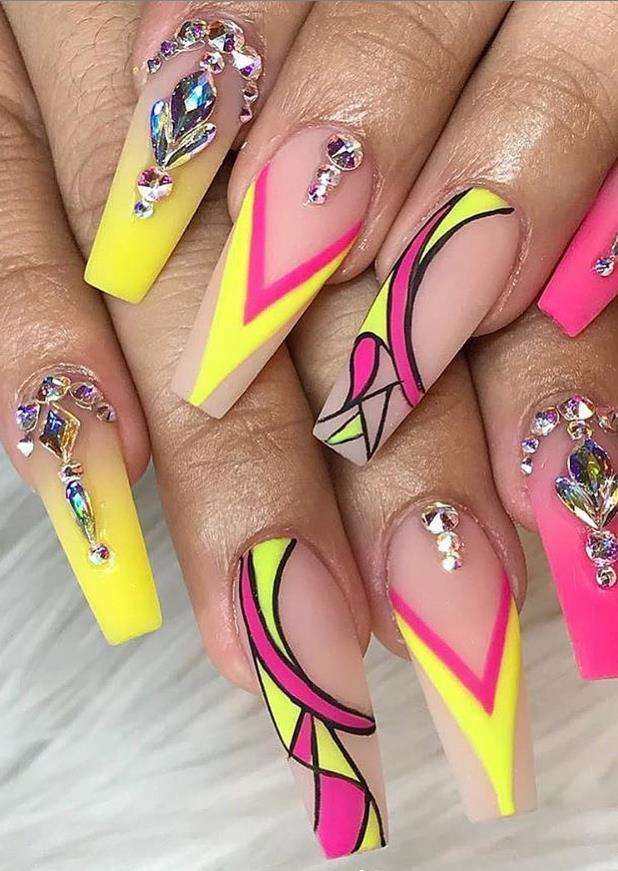
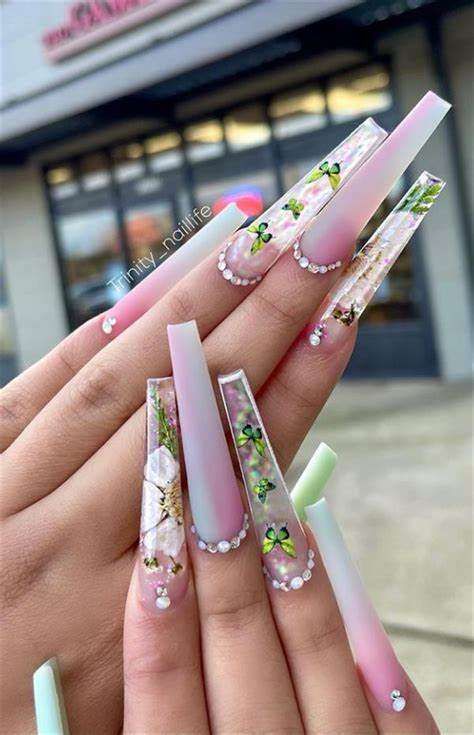
Nail Art:
And let’s not forget about nail art. Nail art is a creative way to paint, decorate, enhance, and embellish nails. Similar to a nail design this may include bling, glitter, stamping, piercing, flowers, or nail decals.
Braids:
Having natural hair is a very challenging task. It requires many hours of tedious service and maintenance. Often, you will spend the entire day attempting to achieve perfection. In an instant, it can be poofed up and frizzy. Are you trying to sport your “natural hair” but not willing to fight with it every day? My guess is that you may need a protective style to hold you over. Looking for a new trendy set of braids? We’ve got you covered with these braided looks and lace wigs. These are my top 3 favorite Pinterest pins right now.
Pinterest Wig Pins:
If you struggle with your natural hair or are afraid of hair loss, this section is for you. Some people wear wigs on a daily or occasional basis in everyday life. Wigs offer a safe way to change up your style, color, and length without the risk of permanent damage. Every woman deserves to look her very best, and their hair should be one of their top priorities. Having a bad hair day is never a good thing. Many people notice the condition of your hair before they actually see you.
Unlike hair extensions, a lace wig will not cause damage to your hair or scalp. These are worn over a hair cap and secured with a special lace glue or adhesive for security. A normal or inexpensive wig may have a net cap with an elastic band that could potentially cause minor irritation around the edges. You can curl or straighten your hair wigs for more styling options.
When using heating tools on your wigs be sure to follow proper temperature settings to avoid heat damage or the hair melting or sticking to your iron. You can wash your wigs in the same manner as you would wash your natural hair. Be sure to use a conditioner to soften the hair texture after using the shampoo. Here are a few wig-inspiration Pinterest pins that will be sure to give you some hair ideas.
Heels:
In the market for a good heel? High heels make the wearer appear taller, accentuate the leg muscles, and make the wearer’s legs appear longer. While there are a variety of heel heights and styles available, the perfect heel is one that is not too high to be comfortable but still adds a bit of height and flare to the outfit. They can also be a great opportunity to show your personal style and specific taste. They can be used as an accessory to spice up a dull look or be the focal point of the entire outfit.
We all need a good set of heels to put on when the occasion calls for it. High heels have been an essential part of women’s fashion for centuries and have gone through a variety of transformations over the years. These are 3 of the Pinterest pins that I love in the high-heel category. These may give you some inspiration for that winter stock or summer revamp.
Which Nail Shapes Are The Most Popular?
16 Mar, 2022
“I receive a commission for purchases or clicks made through links in this post.”
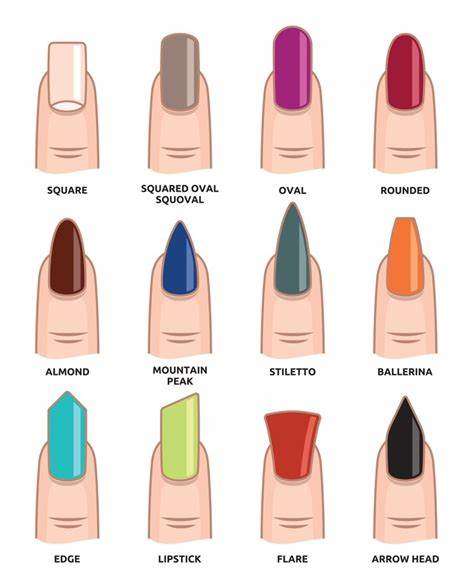
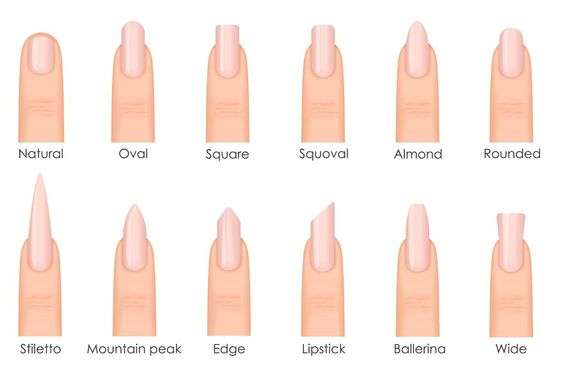
Different Types of Nail Shapes:
With so many new trends on the market, it is becoming more complicated to choose your nail designs. First, it was either natural nails with polish or acrylic nails with polish. Then we had to choose whether we wanted acrylic nails with polish or a French manicure.
After that, it became acrylic French manicures or airbrush designs. Now we have nail art, hand designs, nail decals, gel polishes, and nail shapes. How will we ever “Narrow it down?”
When choosing a nail shape, it is important to consider the following factors:
The length of your nails: If you have short nails, you will want to choose a shape that is shorter and more practical. If you have long nails, you can choose a more dramatic shape.
Your lifestyle: If you have a busy lifestyle, you will want to choose a shape that is easy to maintain. If you have more time, you can choose a more intricate shape.
Your overall aesthetic: Consider the clothes you typically wear and the overall style you are going for. Choose a nail shape that complements your overall look. Here are a few nail shapes for you to get started on your next set.
1. Round Nails:
Rounded fingernails are one of the nail shapes that create a soft look that closely resembles the natural shape of nail growth. Round nails start with straight sides but curve at the edges, following the natural shape of your fingertip. A round nail shape is best suited for those with shorter nails, giving them more natural finger nail shapes and a professional appearance.
2. Oval Nails:
Oval-shaped nails are classic and versatile nail shapes that flatter most people. Oval nails are filed down on the sides in addition to the tips. The curvature is more narrow, which is created to make your fingers look more slender. This is great for growing and maintaining your nails. It’s the most functional and is intended to create a more natural-looking nail.
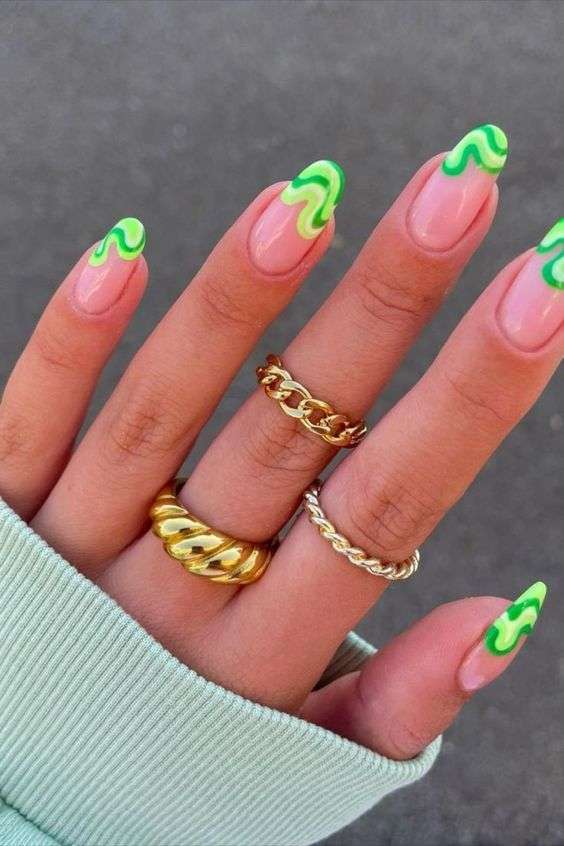
3. Almond Nails:
Almond nail shapes are similar to round and oval nails. The difference between the three is that almonds are filed along the sides. In addition, the nail wall is tapered to end in a rounded peak. This architecture is similar to the shape of an actual almond.
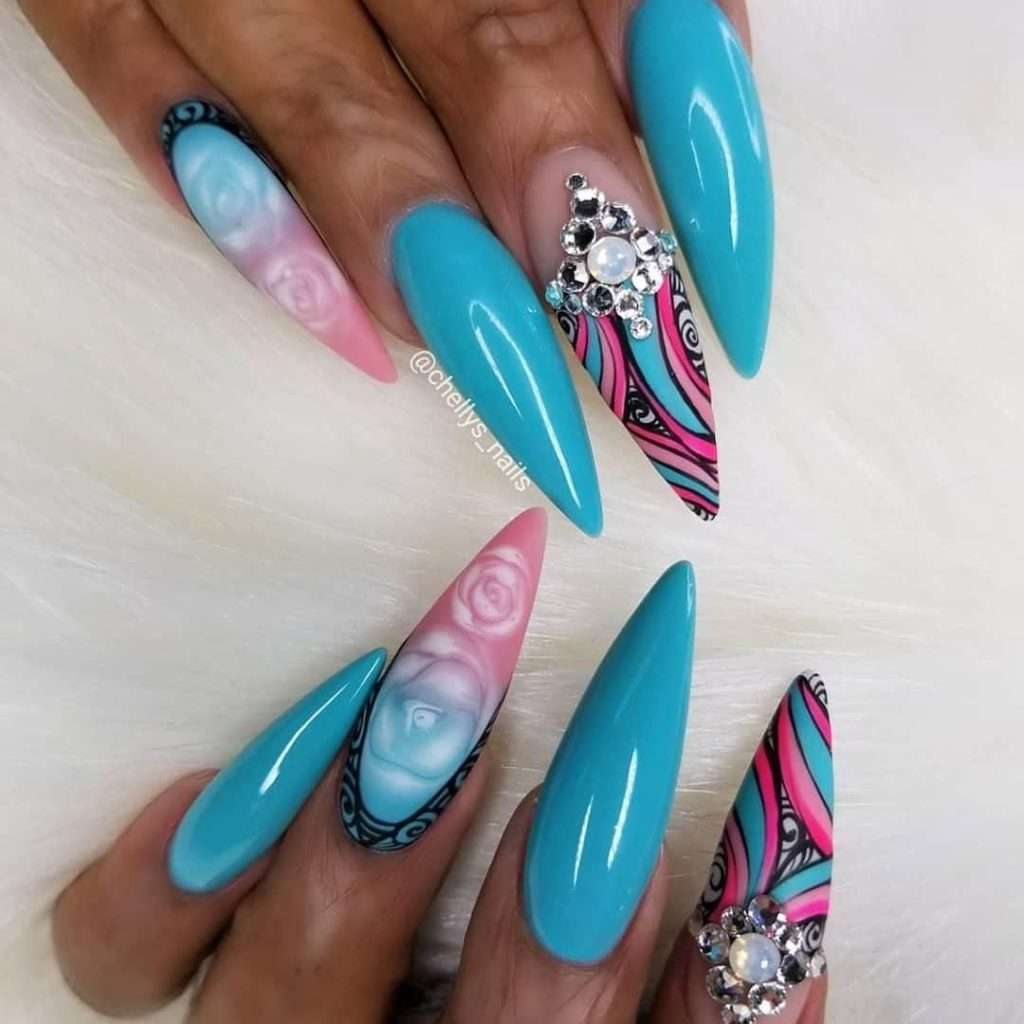
4. Stiletto Nails:
This is one of the most popular nail shapes. It is very similar to the round, oval, and almond nail shapes. They closely resemble the shape of a stiletto and tend to end at a much sharper point with a wider base. Wearing these nails can be very challenging as well as rewarding. These nails are typically worn long rather than short.
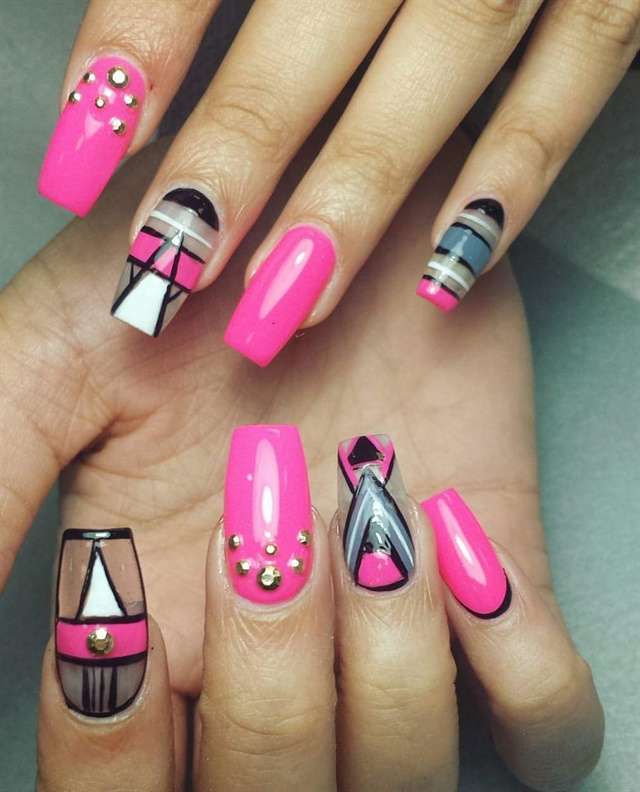
5. Square Nails:
Square nails include popular types of acrylic nail shapes that are both stylish and practical. Square nails are created to be squared. They are typically flat on top with straight, sharp corners. This is a popular shape for those with short nails or long, narrow nail beds. They are a good choice for people with short nails or who are looking for a low-maintenance shape.
6. Coffin Nails:
Coffin nails are typically square nails. They are filed straight along the edges and curve in towards the center, closer to the tip where they’re squared off. Coffin nails are a great way to make a statement. They are perfect for those who want a bold and eye-catching look.
7. Ballerina Nails:
The ballerina nail shape is typically mistaken for the stiletto nail; this nail is mostly long and squared. Instead of a pointed tip, it’s filed into a square to resemble a ballerina’s shoe.
8. Lipstick Nails:
The angled cut of a fresh tube of lipstick inspires the lipstick nail shape. This nail type is essentially square. It’s filed straight at the edges and slants diagonally at the tip, creating a sharp point at the tip.
9. Flare Nails:
These new nail shapes are a trend seems weird but is rapidly growing. The nail is basically a square nail with an upward flare at the tip. This shape is also known as the duck bill nail because it resembles the bill of a duck.
No matter what nail shape you choose, make sure to take care of your nails. This includes keeping them clean and trimmed and using good cuticle oil. With proper care, your nails will look their best, no matter what shape you choose.
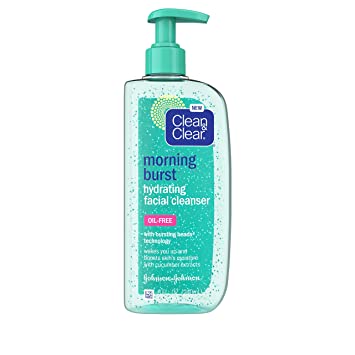
The Best Of Skin Cleansing And Toning Routines
13 Mar, 2022
Regular skin cleansing is essential to keeping your skin looking radiant and healthy. Using too many products on your skin is never a good idea. Using too many products with too many ingredients can make acne and blemishes worse. Be careful about what goes on your face and skin. The key to healthy skin is keeping a skin cleansing and toning routine. You can do that by following these two main steps.
“I receive a commission for purchases or clicks made through links in this post.”
1. Start your day with a skin cleanse.
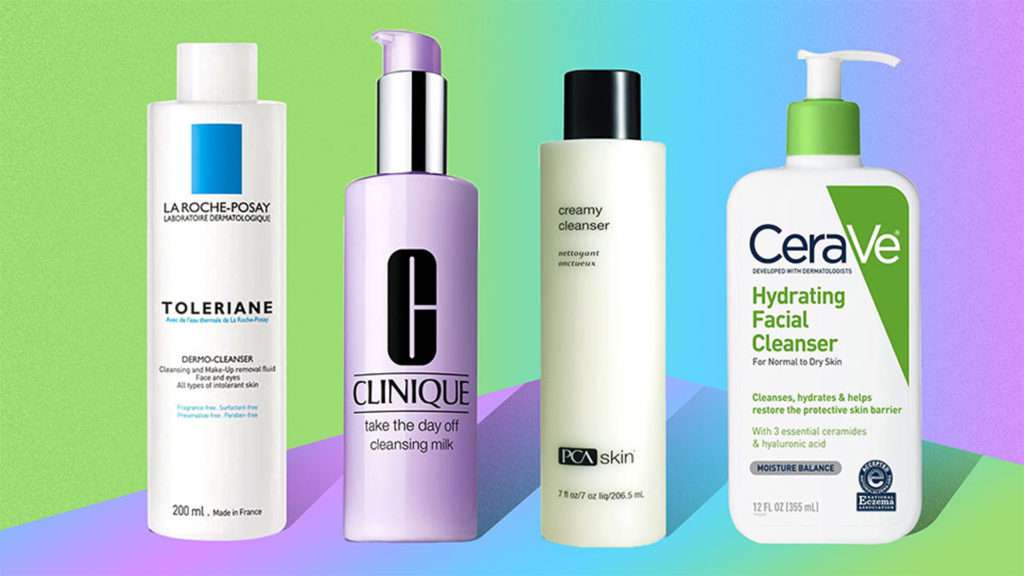
Cleaning your face regularly has the common benefit of removing dirt, oil, and other impurities. Your face’s skin is constantly being invaded by bacteria, pollutants, viruses, dirt, and dead skin cells throughout the course of the day. These impurities are removed by daily facial washing, giving the skin a clean smooth, and glowing appearance. Without a facial skin cleanser, a thick layer of dirt and grime would cover your skin, making it difficult for your skin to showcase your natural beauty.
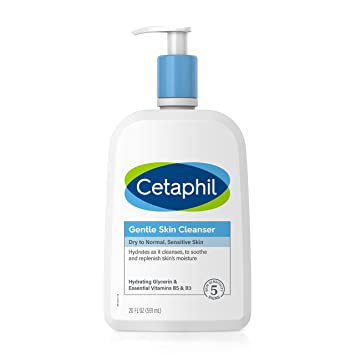
When choosing the best cleansers knowledge of your skin type is essential. If you have fairly dry skin you may want to get the best dead skin cleanser you can find. This would help eliminate all the dead skin cells from your skin while hydrating it at the same time. A facial cleanser for sensitive skin would be ideal for people who are sensitive to many cleansing agents. It would give them a gentle skin cleansing without causing major irritations.
Proper skin cleansing helps maintain proper pore size. The skin’s surface has depressions called pores that have one or more openings to ducts that transfer perspiration and oil from the sebaceous and endocrine glands. All ethnic groups and ages can exhibit enlarged pores. Certain ethnic groups may have larger pores, particularly those of African and Indian ancestry. Age frequently causes pores to look bigger. The likelihood of having wide pores is the same for both sexes, despite varying results. The largest pore size in women occurs during ovulation, while pore size may vary throughout the menstrual cycle. Always use warm water when cleansing and try your best to avoid using hot water.
The first cleanse removes makeup, pollutants, and dirt from the day. The second cleanse removes dead skin cells, meaning the products you apply afterward can work all the more effectively.
Deep cleanse weekly
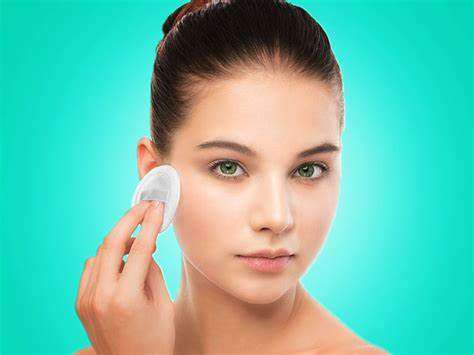
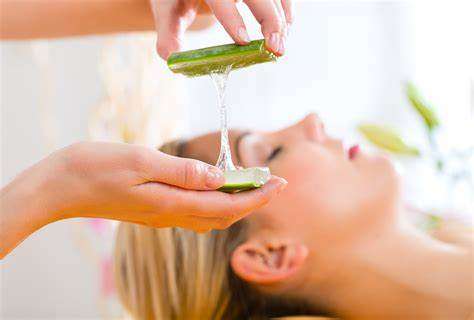
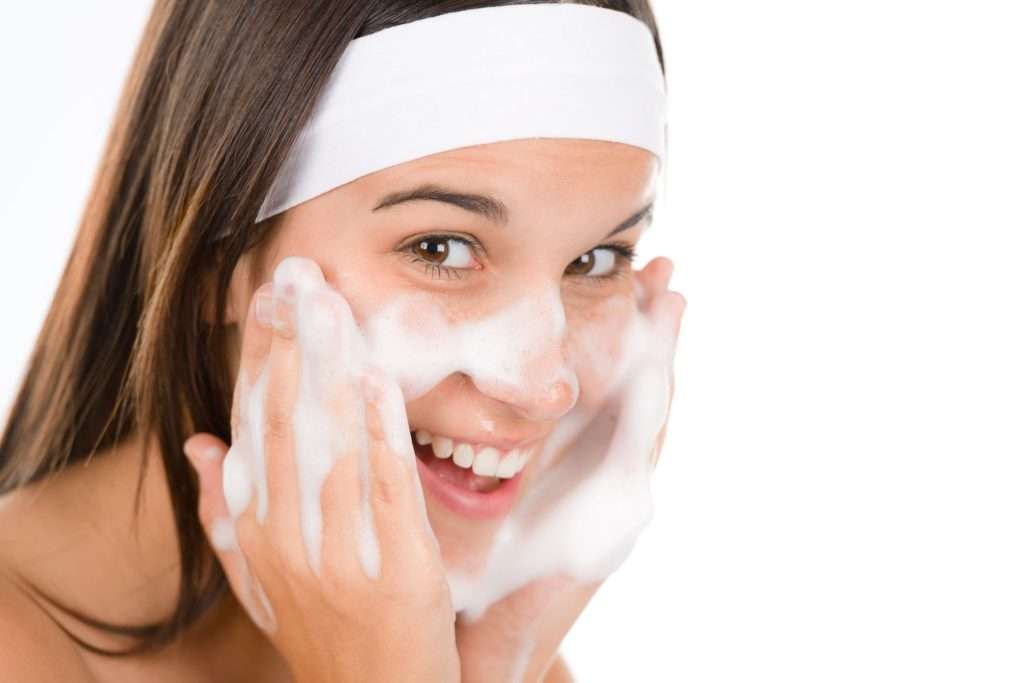
Teenager problem skin care – woman wash face with cleansing foam
The Cleansing Procedure:
Wash your face with cold water and remove all residue. Doing this first will allow you to apply your cleanser more thoroughly. The water helps create a better lather which increases the smoothness of your product application. This is also an additional hydrating method.
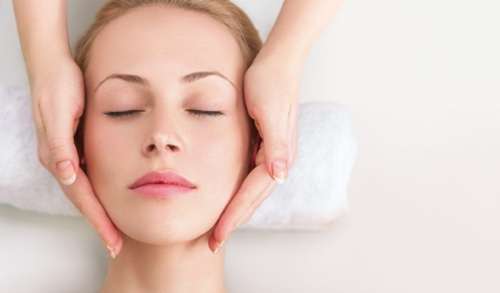
Gently massage the skin on your forehead, chin, and neck to relax all the muscles. It ensures that you cover your whole entire face with the product. It also prevents future breakouts in the coverage area.
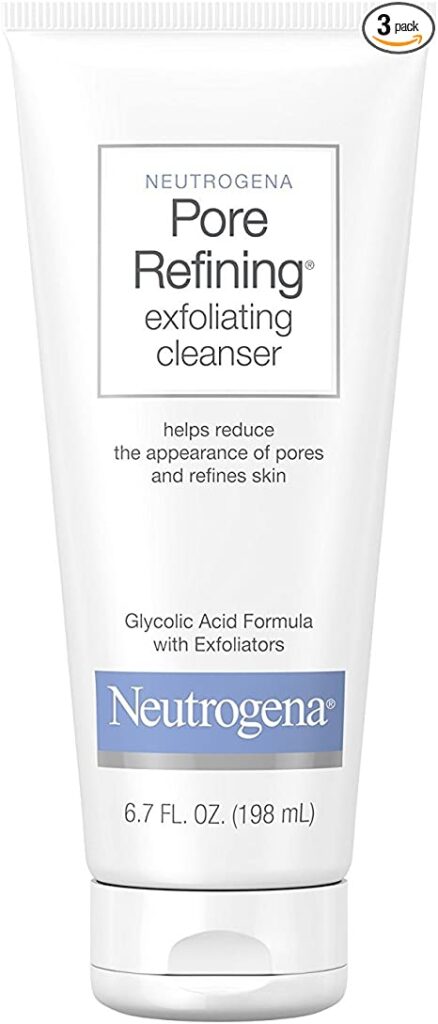
Apply an exfoliating lotion to remove dead cells. Some facial cleansers have exfoliating beads that assist with the process. If your regular facial cleanser does not have this feature you can buy one and mix the two together. Mixing them instead of using them separately helps avoid skin irritations.
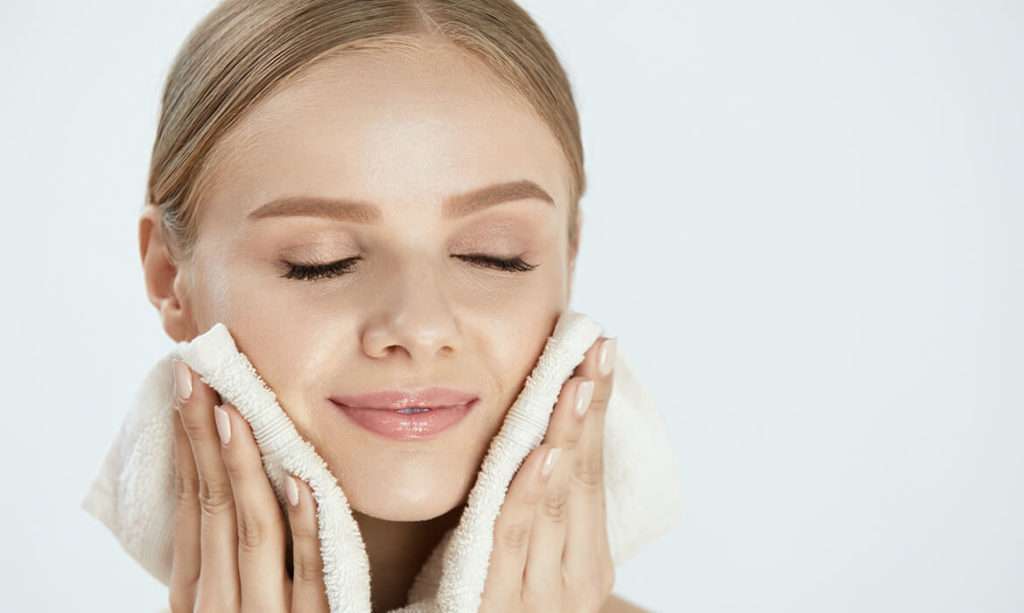
Rinse the skin and pat dry. You can rinse your skin by splashing water on your face with your hands You can also you a facial wipe or washcloth. Using a washcloth is ideal but if it causes irritation due to the roughness of most rags, I would suggest using your hands or a cotton pad.
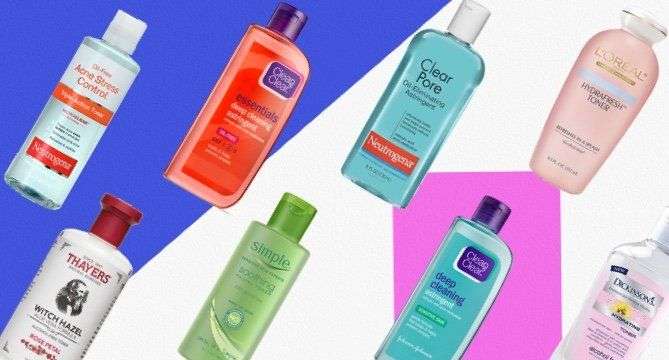
2. Tone your skin after cleansing.
This process is typically simple and easy. It is intended to restore the PH balance of your skin and removes impurities.
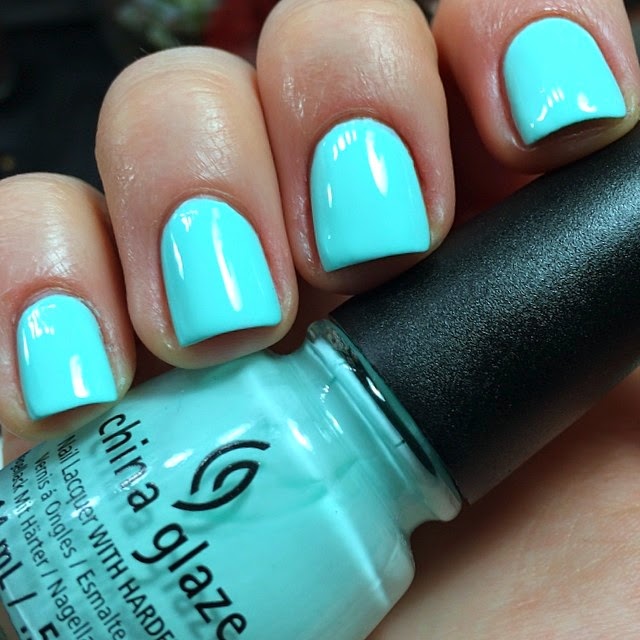
Toning your skin after a skin cleanse will help soothe, nourish and hydrate the skin. Look for toners that have soothing ingredients such as aloe vera or tea tree.
Helps to close and refine the pores.
The Toning Process:
Choose a gentle toning lotion.
Apply a small amount on a cotton ball, cotton pad, or fingertips.
Massage into the skin.
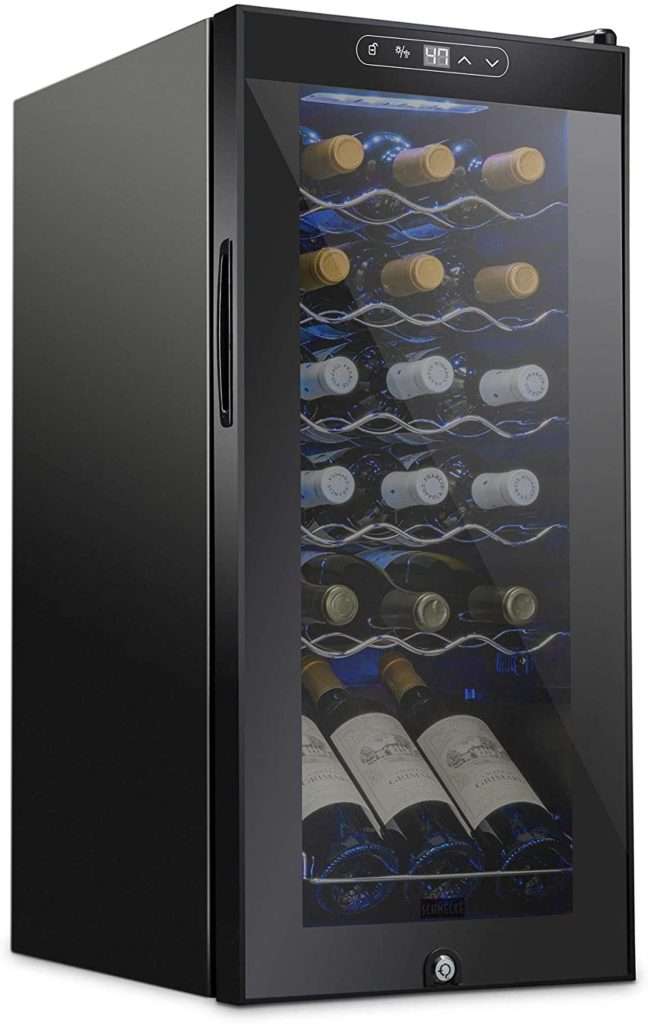
How To Start A Basic Bar With The Best Essentials
10 Mar, 2022
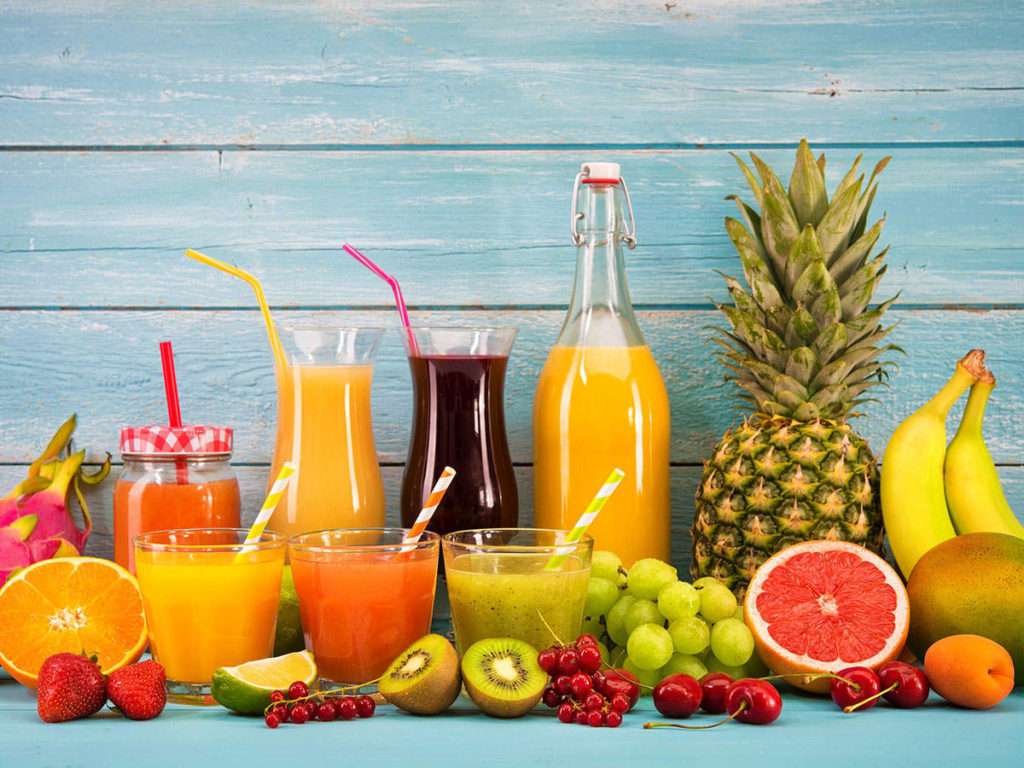
If you’re entertaining guests or just enjoying a drink at home, a well-stocked basic bar is a must-have. But you don’t need to spend a lot of money or have a lot of space to create a great bar. With a few basic essentials, you can mix up all sorts of delicious drinks, both alcoholic and non-alcoholic.
Items Needed For A Super Basic Bar
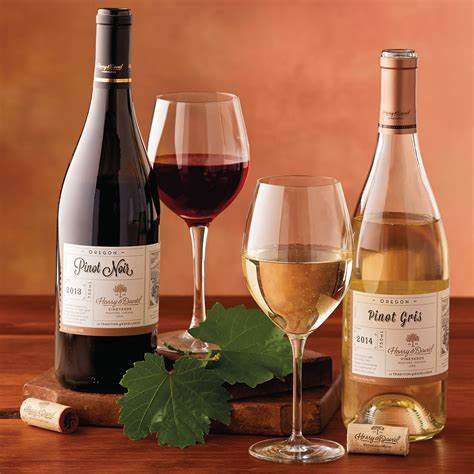
Liquor or non-alcoholic spirits: Choose a few of your favorite spirits, such as vodka, gin, whiskey, or tequila. If you’re creating a non-alcoholic bar, there are now many great options available, such as Seedlip, Ritual Zero Proof, and Lyre’s.
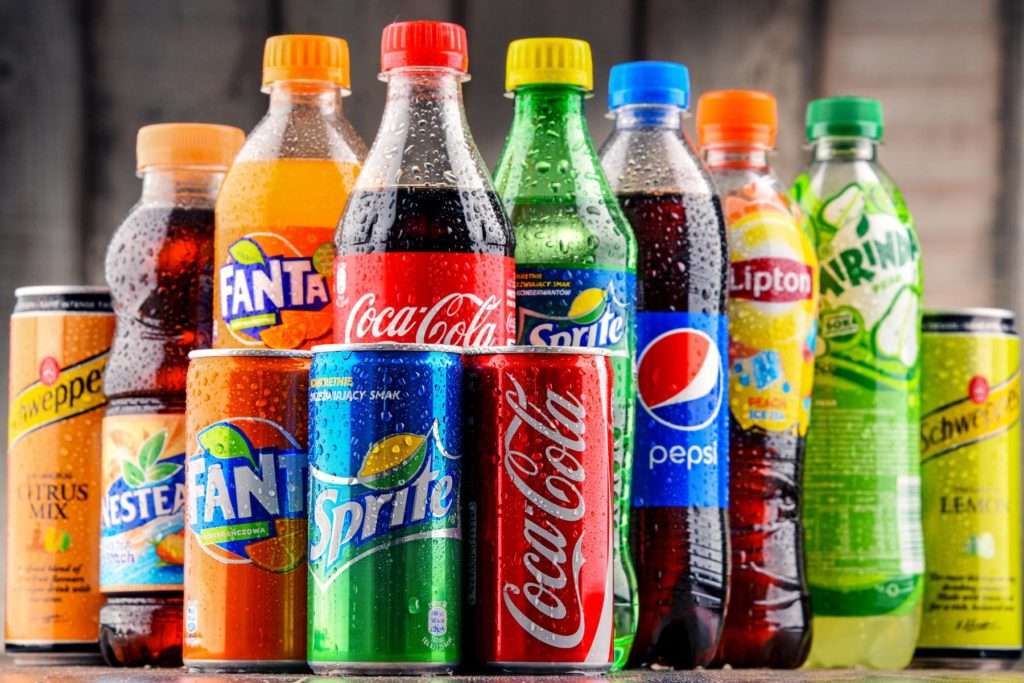
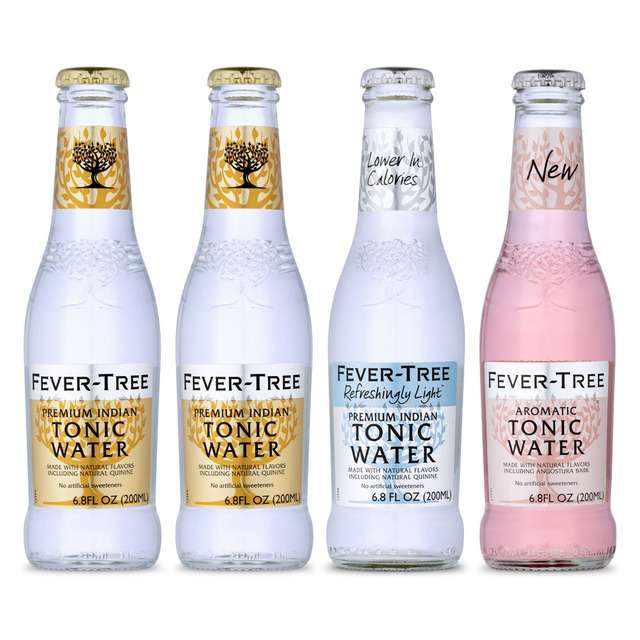
Mixers: This is where you can get creative! Stock up on a variety of mixers, such as club soda, tonic water, juice, and soda. You may also want to have some bitters and syrups on hand to add extra flavor to your drinks.
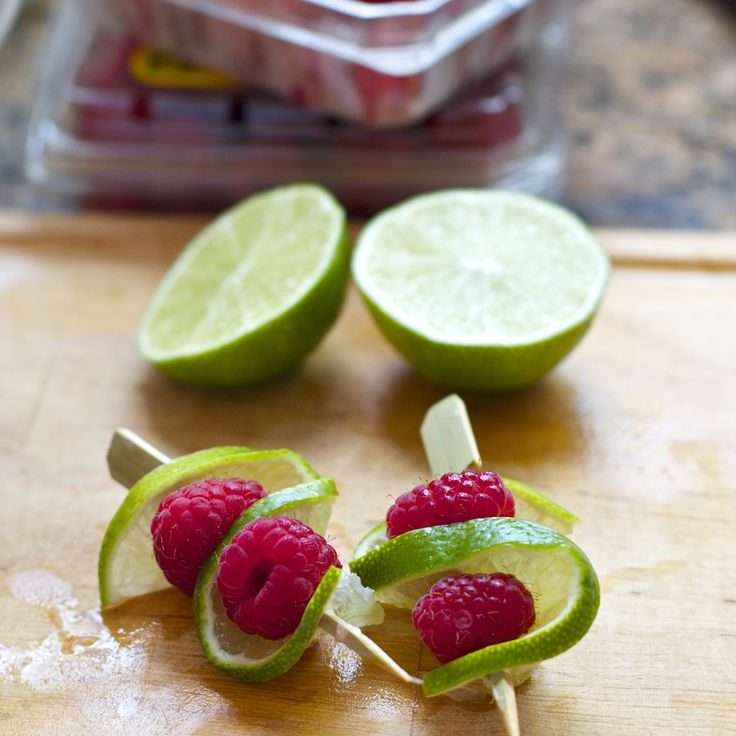
Garnishes: Garnishes are a simple way to elevate your drinks and make them more special. Try keeping some fresh fruit, herbs, and spices on hand.
Bar tools: You don’t need a lot of fancy bar tools, but a few basic items will be helpful, such as a jigger, shaker, strainer, and ice bucket.
“I receive a commission for purchases or clicks made through links in this post.”
Once you have your essentials, you’re ready to start creating drinks!
Start with a simple recipe. Once you’ve mastered the basics, you can start to experiment with more complex recipes. But don’t be afraid to start with something simple, like a gin and tonic or a vodka soda.
Use fresh ingredients whenever possible. Fresh ingredients will always taste better than processed ones. So if you have the time, try to use fresh fruit, herbs, and juices in your drinks.
Don’t be afraid to experiment. The best way to learn how to make great drinks is by experimenting. Try different combinations of ingredients and see what you like best.
Whether you’re a homebody who loves to entertain, or you simply enjoy a good drink at home, having a basic bar is a great way to make your life easier and more enjoyable. Here’s a guide on how to create a basic bar for your alcoholic or non-alcoholic beverages:
Choose a location
The first step is to choose a location for your bar. If you have a dedicated space, such as a home bar or rec room, that’s ideal. But if not, you can easily set up one up in your kitchen, living room, or even on a patio or deck. Just make sure that the location is convenient and that you have enough space to store your supplies and mix drinks.
Get the basics
Once you’ve chosen a location, it’s time to start gathering the basics for your bar. Here’s a list of essential items:
Glasses: You’ll need a variety of glasses for different types of drinks, such as wine glasses, cocktail glasses, and beer glasses.
Bar tools: A basic bar set should include a jigger, shaker, strainer, and stirring spoon.
Mixers: You’ll need a variety of mixers for cocktails, such as tonic water, club soda, and juices.
Spirits: If you’re planning on serving alcoholic beverages, you’ll need to stock up on your favorite spirits.
Garnishes: Garnishes add a touch of elegance to drinks and can also enhance the flavor. Some common garnishes include fruit slices, citrus wedges, and herbs.
Add your own personal touch
Once you have the basics, you can start to add your own personal touch. Maybe you want to focus on a particular type of drink, such as cocktails or craft beer. Or maybe you want to collect vintage glassware. Whatever your style, make sure your bar reflects your personality. Creating a basic bar is a great way to make your life easier and more enjoyable. With a little planning and effort, you can create a bar that is both stylish and functional.
Additional tips for creating a great bar:
Have a variety of drinks to choose from, including alcoholic and non-alcoholic options.
Keep your bar clean and organized.
Label all of your bottles and mixers.
Invest in some good quality bar tools.
Learn how to make a few basic cocktails.
Have fun and be creative!
Learn How To Shop Smart In 10 Easy Steps
9 Mar, 2022
1. Know what you need
Always shop with a list. Having any form of list consiting of things to buy is very important. You can use a physical list or phone app or memorize the items you need. (I prefer a physical list to avoid impulse buys) This will help you avoid being overwhelmed once in the store and keep you from forgetting items.
2. Be sure about it
Only buy items you know you will need.It is fairly typical that people buy numerous items thy think they will use but never do. Before making the purchase, ask yourself “Do I love this?” “Do I need this?” “Will I use this?” If you are unsure about the answer to these questions, place the item right back where you found it. Impulse buys are a great way to lose money eventhough you are adding goods to your stockpile.
3. Dress for action
When choosing your daily attire, only wear clothes that are easy to get into and out of. Shoes that slip on and off are great too. Dress for the occasion and be mindful of the activities you will be performing in these clothes. You always look and feel better when your clothes fit properly and your feet don’t hurt!
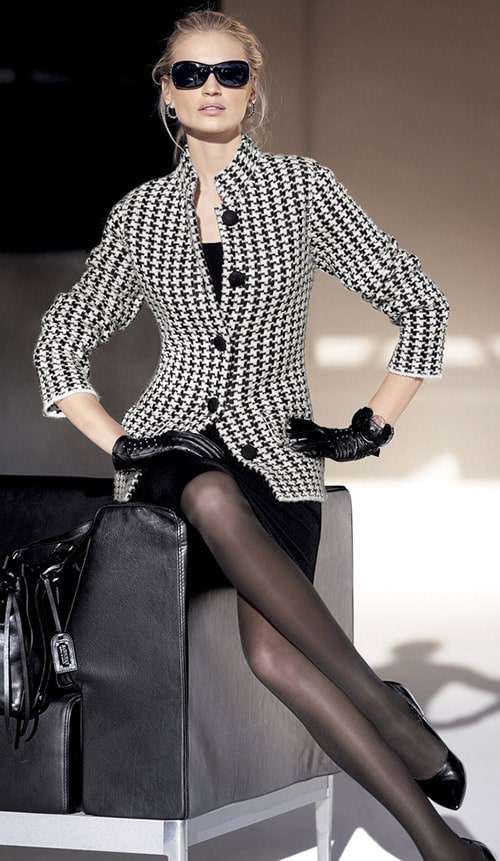
4. Buy classics
Don’t feel guilty about spending a little extra money on classic pieces. These items include wool, leather, pumps, or a designer handbag. In these cases, quality would be better than quantity. Spend less money on items that are trendy or will be here one day and out of style the next.
5. Prioritize the costs
Smart shopping consists of thinking abut the item prices before making purchaces. Ask yourself “Is the amount of money for that item way too expensive? Or is it within reason?” Calculate the cost per wear first and then factor in how many times you would wear or use the item in question. You can do the sam thing with any type of goods and services. If you are buying a type of service think about the service price first. After you do that think about how often you will use the service.
6. Avoid the crowds
If you need to get in and out and are pressed for time, be sure to avoid peak hours. This will give you time to shop without having to rush around a packed store or wait in long lines during checkout. This will also be a great option if you are trying on clothes or buying new makeup items. The salespeople may be friendlier and more willing to assist you.
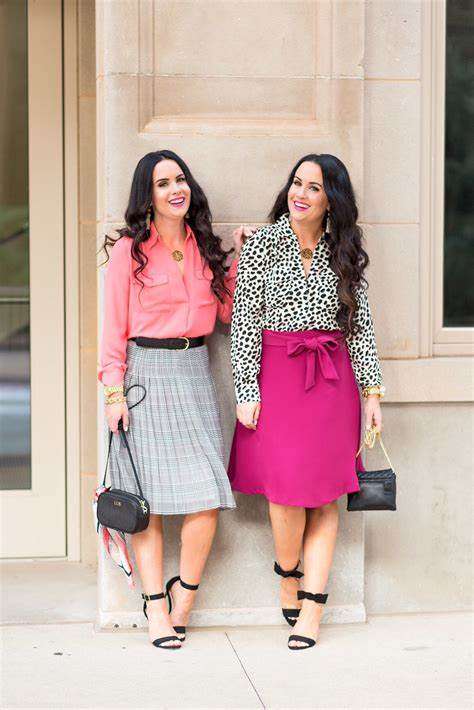
7. Mix and match
The style today is more about mixing and matching than the outfit you wear. Instead of buying one complete outfit buy that top or that bottom. When shopping ask yourself “What can I wear this with?” “Do I already have something to go with this?” Try buying pieces that will work together with your current wardrobe.
8. Know yourself
Be honest about what styles flatter your body type and are appropriate for your age. ALWAYS shop for the size you are now. (Pre-pregnancy and post-pregnancy weight changes)
9. Feel Chippier
Don’t shop when you are hungry or really tired. Don’t shop when you are in a rush either! This is more likely the time when you make plenty of impulse buys, forget to pick up an item or miss a great sale.
10. Go with the neutrals
When you are buying expensive or pricey items be sure to stick with the neutrals. That gives you plenty of room to recycle those pieces and incorporate them in with other items as you rewind or add to your current wardrobe.