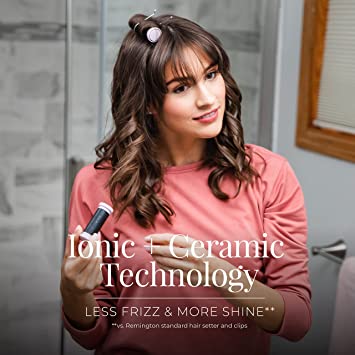
Heated hair rollers are a must-have for people who want to create curly hairstyles. Depending on which type of roller you used and the method applied will determine the finished look. Using hair rollers is an easy process. All you have to do is grab a set of rollers, a styling product two, and roll and unroll. That’s pretty much it, to be honest. Now while it seems like an easy task many times the styling part is where many of us face the greatest struggles.
Why Use Heated Hair Rollers?
You just knew you had the bomb roller set and perfect curls once you got started. Shortly after you begin to take the rollers out you notice that some or even all the curls didn’t properly set. This can be an easy fix by using heated or hot rollers. A hot hair roller is a hair roller that is heated by a base before being placed on your hair.
These rollers take the place of leaving the rollers in your hair overnight or having to sit under a hair dryer. Most time this entails a great deal of hoping and praying that your curls are set properly and dry in time. Even then you still don’t know if the style will come out properly once the rollers are removed. Using heated rollers can possibly help you out in that department. They also save you time if you are in a rush or doing a last-minute curly hairstyle.
You can easily plug the base in and allow it to heat up while you do other things. The heating time of the rollers will vary depending on the brand, style, make, and number of rollers in the set. This can be anywhere from 5 to 10 minutes for them to heat completely. Choose the method in which you want to roll your hair and let them set until you are ready to remove them. Like standard hair rollers the longer you leave them in the better the curls will be.
Unlike typical rollers that need to sit longer or under a hair dryer if one or more curls don’t curl just take the roller out. Place it back on the base and allow it time to heat up. Once it gets heated simply reroll the part of your hair that needs to be fixed.
Let it sit for a few minutes and remove them to check the curl. The setting time will be a whole lot faster than using a heated roller. This is because it allows you more attempts at the perfect curl without having to sleep in it overnight. You also don’t have to sit under the dryer for long periods of time to curl one or two curls.
I have used two different types of rollers on my hair to produce curls. Some people just can’t seem to get the hang of using a heated roller and that’s understandable. When using the spoolie type of heated hair roller I got the best curl. Using the actual rollers gave me a decent curl but I did not use them for a style I was basically using them as an experiment.
I didn’t use a product on them because they were felt/velvet coated and I wasn’t sure if the product would stick to the roller. That is one thing that you would have to be mindful of when choosing the set of rollers you buy. With the spoolies, they are pretty much made out of rubber so product build-up wasn’t an issue that I had. When using the heated roller type you have to make sure you allow the rollers to fully heat up. Most of the bases will have an indicator light letting you know that the rollers are hot. I would suggest letting them heat for a few extra minutes to make sure they are thoroughly heated.
The Best Basic Nail Art Supplies For Beginners
30 Nov, 2022
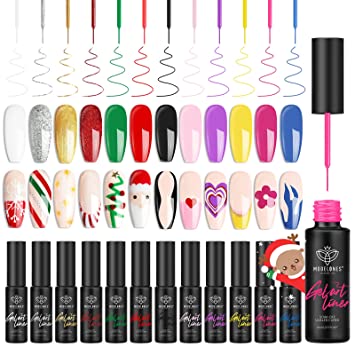
Creating your own nail art can be fun yet challenging as a beginner nail artist. While a fresh set of polished nails is nice it can also be a bit simple, plain, and boring. DIY nail art could be an easy fix to your nail care woes with a few basic nail art tools. You can find many of these items online, in-store, or at a friend’s house. If you aren’t able to purchase these items a separate post will be made for items you can use instead of buying them from the store. These are 5 essential DIY nail art tools for all your designer needs.
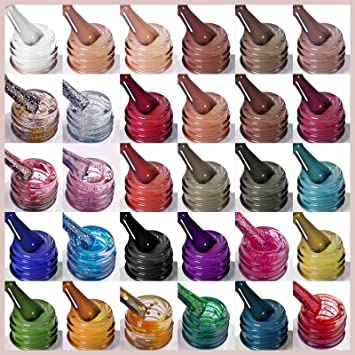
1. Nail Polish
Nail polish is the most important component of nail art and design. It is the beginning and end of any nail care service. A base coat is usually the first step to applying polish to your nails. This is used in order to prevent nail discoloration and staining. It allows your nail polish to glide on more smoothly. While it is important many people do not use this as the first step.
Colored nail polish is also a must-have nail tool. It can provide you with a variety of different nail design options. You can paint them all one color mix and match the colors or settle for clear polish. A top coat is the final step in your nail care routine. This is used to ensure that you are able to have a longer-lasting manicure.
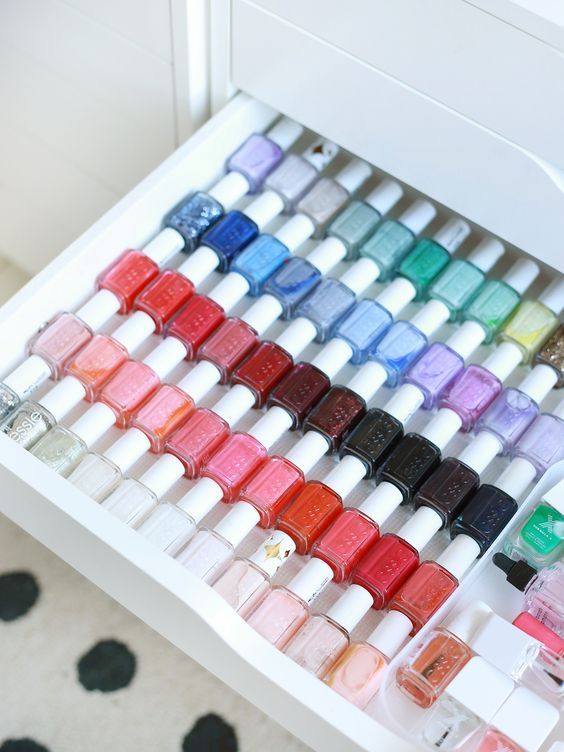
I will be the first to admit when it comes to nails, hair, or skin I am a bit of a product junkie. What do I mean by “Product junkie”? Basically, this is a nicer way of being called a hoarder. I have tried loads of different products and brands. Investing in a good set of nail polish is the best thing you can do. It’s also a good idea to test out a polish from a brand you haven’t used before you begin buying a large quantity of them.
Expensive brands of nail polish should be better for your nails but that isn’t always the case. They are worth the price if they are longer lasting, faster drying, and don’t get bubbly or lumpy. This can happen more often if you are using gel nail polish and have to cure them under a UV/LED lamp. When you find a few reputable brands that you like stick to those brands. Some of these brands can include Orly, OPI, China Glaze, Sally Hansen, and Essie.
2. Liner Nail Polishes
Having a set of liner nail polish is essential but not necessary. For many people, this may be challenging to use even though it is a simple tool. A nail liner is similar to a standard bottle of nail polish. The only difference is that they are smaller in size and have a thinner, longer brush. These are used for painting lines and adding random flicks of color. They can be used to create dots as well, but the dotting tool will create more uniform shapes.
When you first start out, I recommend purchasing at least a white and black liner polish. These are the standard colors, and they can be used to create lines on most of the colored nail polishes in your collection. Using a gel liner nail polish works best for beginner techs. The gel liner nail polish needs to be cured to dry. This gives you more time when creating your nail designs. You shouldn’t have to buy a new liner polish every time you want a new color. You could simply get a nail liner brush instead.
A nail liner brush is an art tool that had a long thin brush head used for nail designs. Not all brushes are good for nail polish. Some nail polishes will completely ruin the hairs on the brush. Some nail polish brushes will get clumpy if they are sitting in the paint for too long without use.
Other nail brushes will have thin or stringy brush hairs. You can clip them but they will make nail art a bit less precise and more challenging to use. Use water-based nail paint if you must. This makes it much easier to clean the brushes. If you’ve used nail polish, use acetone, some soap water, and a paper towel to clean your brushes. Brands like LA Colors have a wide range of colors and come pretty cheap, so have fun with them!
3. Nail Art Brushes
If you’re really serious about doing nail art, you might want to consider investing in a good set of nail art brushes. These will be very helpful when you begin designing nails. They come in a range of sizes and styles. The main types of brushes for nail art are fan-shaped brushes, flat brushes, flat angled brushes, thin brushes for detail, and long-liner brushes. These brushes can be purchased conveniently and rather affordably in a set.
3. Liner Tape
Ever wondered how DIY nail artists create super neat and straight lines and stripes? Using tape you can create many different geometric and striped designs.
Stationery tape is one of the best tools EVER for nail art. Any sort of normal scotch tape is fine, but you can experiment and see which gives you the best results. They’re great for creating neat lines and geometric shapes. Just cut the tape into the desired strip/shape, paste it onto your nail and paint over it. Easy as that!
4. Nail Dotting Tools
Dotting tools can be a great help when it comes to creating dots and circle patterns. They come in a few different sizes which can help you find the exact dot size for your design. These are extremely helpful when making simple polka-dot designs. They are also helpful when you are placing your rhinestones or nail sequins. Starting out, it would be in your best interest to get a dotting tool that has a medium-sized round on one end and a small one on the other.
This will allow you to choose the size of the dots you want to create. I use the smaller end of the dotting tool when I add my rhinestones. I place a bit of nail glue on a piece of plastic or plate first. Then I take the end of the tool and dip it into the glue. Then I dig into the decal box to pull the decals out and place them on the nail. Be sure to apply your glue to the nail before doing this though. I just use the tool to make getting them out easier and for better placement of the decals.
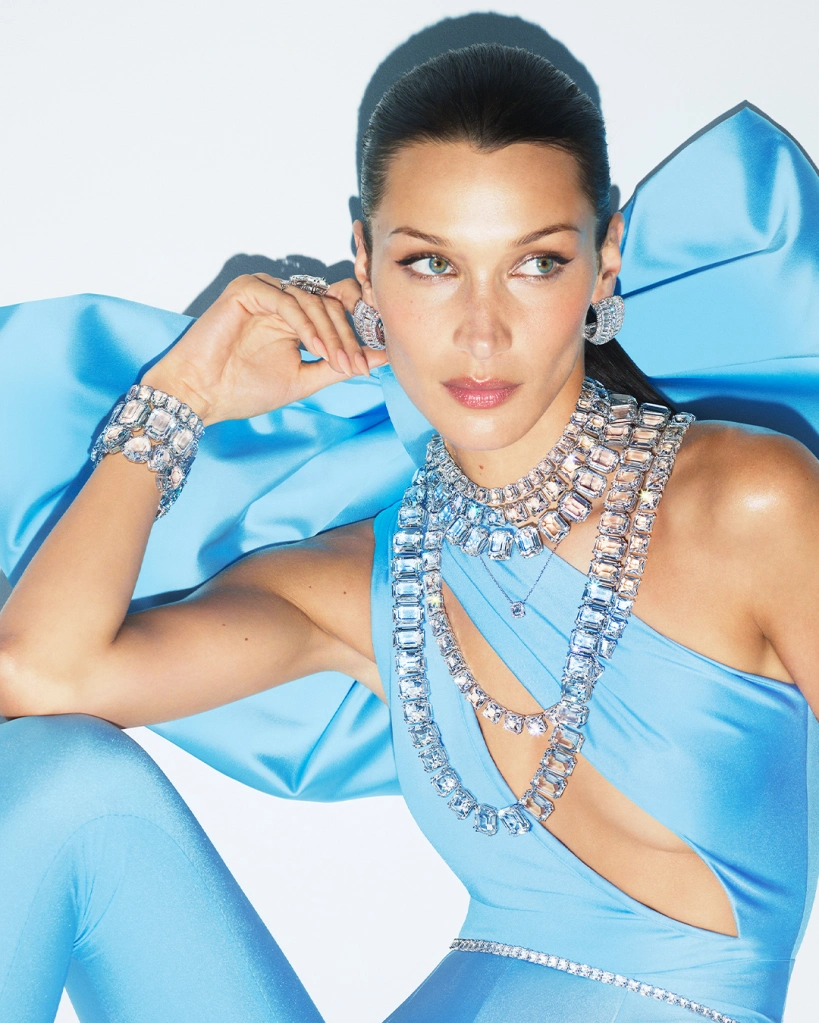
So I was in the process of being productive you know working on my content, and a flash of captivating colors caught my attention. I paused for a moment and had to take a second look. On my television screen was a commercial for Swarovski. Below is a clip from the actual commercial that I saw. I have seen plenty of commercials over the last few years. I will be the first to admit that I hate being interrupted during my television shows. Yes, commercials are important for better business. This is one thing that I do know.
“Crystals are fun,” according to Alexis Nasard, chief executive officer of Swarovski, a brand he believes represents “joy and self-expression. Luxury doesn’t have to be serious.” In his first interview since taking the reins of the Austrian crystal maker in July.
How To Spell Swarovski
Now the name sounds like I may have heard it before but I couldn’t be too sure. The likelihood that I have is very high. I was captivated by the video I had to wait for all the way until the end to figure out who was responsible for this. And low and behold they mention the company name, Swarovski. Y’all I had to talk about this. I rushed to get a pen and paper so I could write this down.
I could barely say the name let alone spell it properly but it is very fancy! How do you spell Swer-Ohvs-Ski? I think that’s how you spell it. Swerv-Ohs-Ki perhaps? I believe that is also how you pronounce it. And after this post hopefully, we all will remember it. Now that we have addressed that topic, BUY.
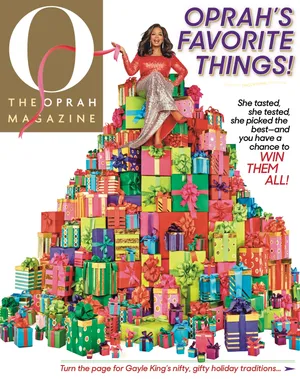
With that being said I had to laugh because the video reminded me of another video. I cannot say which one because I have to be “professional”, but I would like to thank the creators for this bit of inspiration. Yes, Lawd and Amen. I love everything about this commercial. Let me start from the beginning with my list of things I love. Hey Oprah!
The name itself is very unique. It is something that you see and hear but can’t remember unless you write it down. Or make a purchase for that matter. During the holidays when you think of big-name jewelry companies Kay’s and Zales are the easiest to remember. I have officially added this to the list of festive holiday gifting channels.
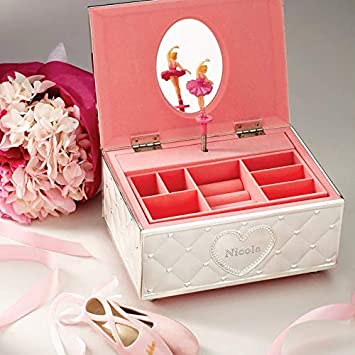
2. The music is very soothing and festive.
The jewelry box tunes are very soft and merry. It reminds you of your younger days and hints to the ones you love that you deserve a gift this Christmas season. And should they have any trouble figuring out what you want, a diamond is a girl’s best friend. Time for us to get ready for the holidays. Cheers!
That’s all you need to say about this statement. It matches the description that I have already addressed in an earlier item. If you don’t get it, nevermine. (Pun is definitely intended.)
4. The color scheme is magnetizing.
I love the color choices in this video. Everything is bright and joyful. It reminds me of a kid in a candy store. Kinda like that catchphrase, all the grown-ups used to say. “It’s like taking candy from a baby.” Can I say “Periodt pooh?”
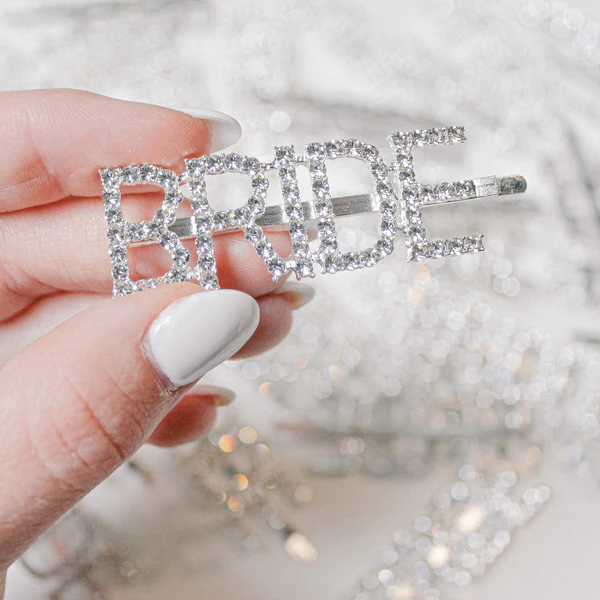
The Blingy Bride Barrette
5. The jewelry is ULTRA blingy.
6. The model’s attire is extremely unique.
Did you miss something?
7. Her hair is sleek and polished.
The model has the perfect hairstyle for the outfit she is wearing. It’s giving me Tower Heist vibes and I like it. Along with the heist, just her hair alone gives me military style good cop bad cop. So does the bun pulled to the back mean that she will be getting arrested soon? Hopefully. Once again, if you didn’t get it nevermine. This jewelry is expensive.
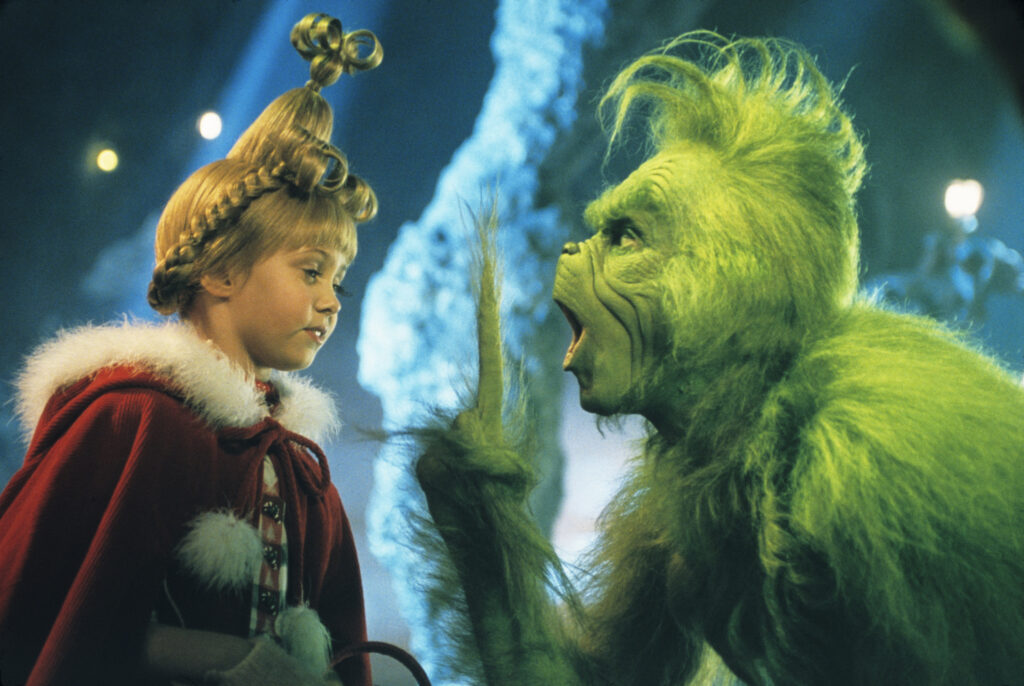
DR. SEUSS’ HOW THE GRINCH STOLE CHRISTMAS – The curmudgeonly recluse Grinch, who hates Christmas, becomes annoyed with the out-of-control Christmas festivities in Whoville, the town lying below his cave dwelling on Mt. Crumpit. But after the Grinch conspires to deprive the Who’s of their favorite holiday by sneaking into town on Christmas eve to steal everything associated with the holiday, he learns that the spirit of Christmas goes much deeper than tinsel and toys. “Dr. Seuss’ How the Grinch Stole Christmas” airs DECEMBER 25 (8:30-11:00 p.m., ET), on the ABC Television Network. (RON BATZDORFF/UNIVERSAL STUDIOS) TAYLOR MOMSEN, JIM CARREY
8. The concept of the video is LOUD.
Did you pick up on the Grinch who Stole Christmas concept while watching the video? You have to PAY very close attention. Also, you must be very quiet when you see it and be sure to leave treats for Santa. That’s just in case he slides down the chimney while you are asleep.
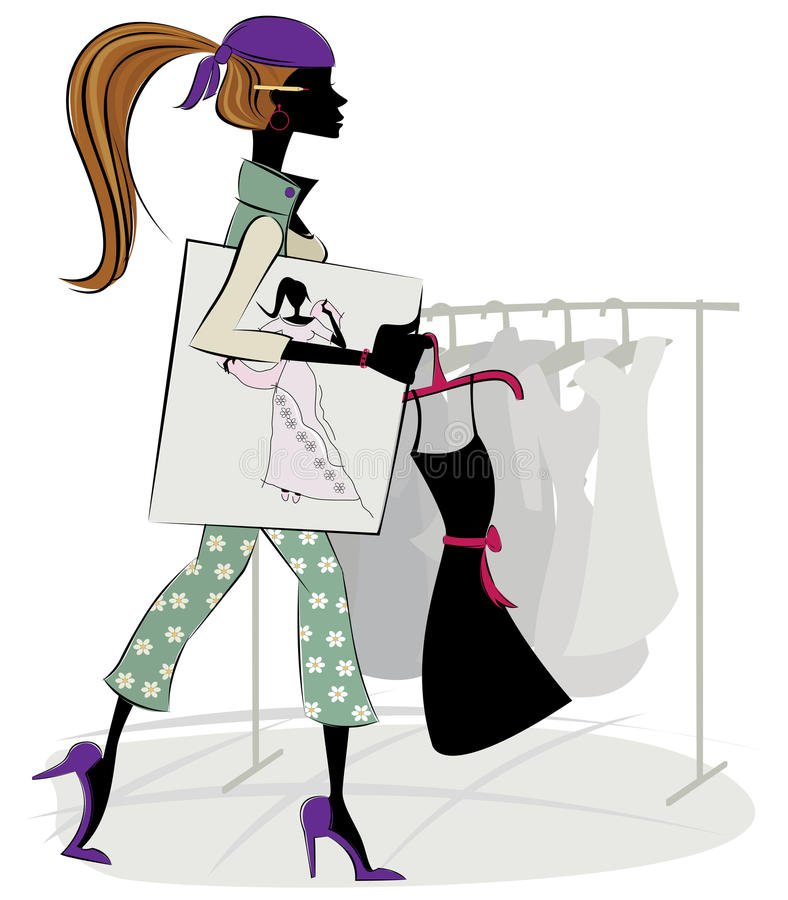
The 3 Basic Rules To Becoming A Fashion Designer
27 Nov, 2022
The art of being a fashion designer is much more than just being stylish. Being stylish is more than just buying the most expensive items we can afford. It’s also way more than just putting pieces of clothing together, hoping that it all comes together properly. And it’s even way more than attempting to throw on a few bracelets, necklaces, and a watch. All the while, you’re hoping and praying that nobody tells you your accessories are cute but your clothes don’t match.
“I get a commission for purchases or clicks made through links in this post.”
Yikes, that would definitely be the absolute worst. Especially if you knew you were wearing the perfect outfit! Some people are extremely fashion-inclined and fashionable. “Get dressed,” many others say. Creativity and attitude are insufficient when it comes to the fashion industry. Proper training from top fashion universities is a necessity for becoming a designer in the field of fashion.
What Is A Fashion Designer?
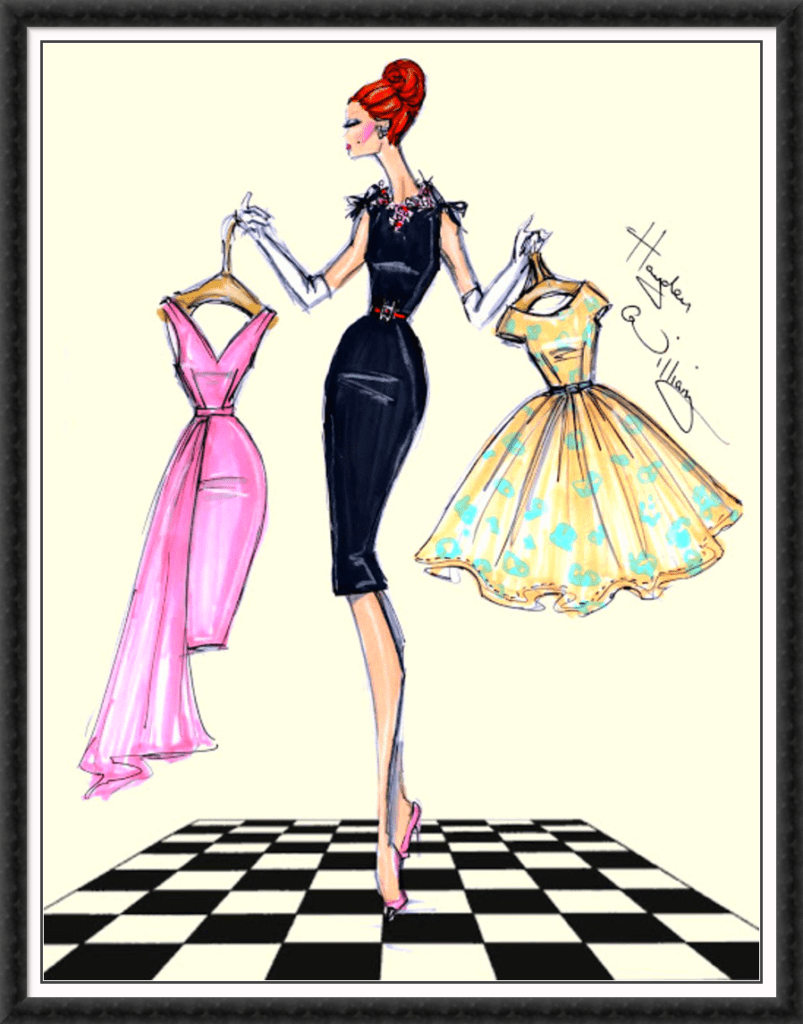
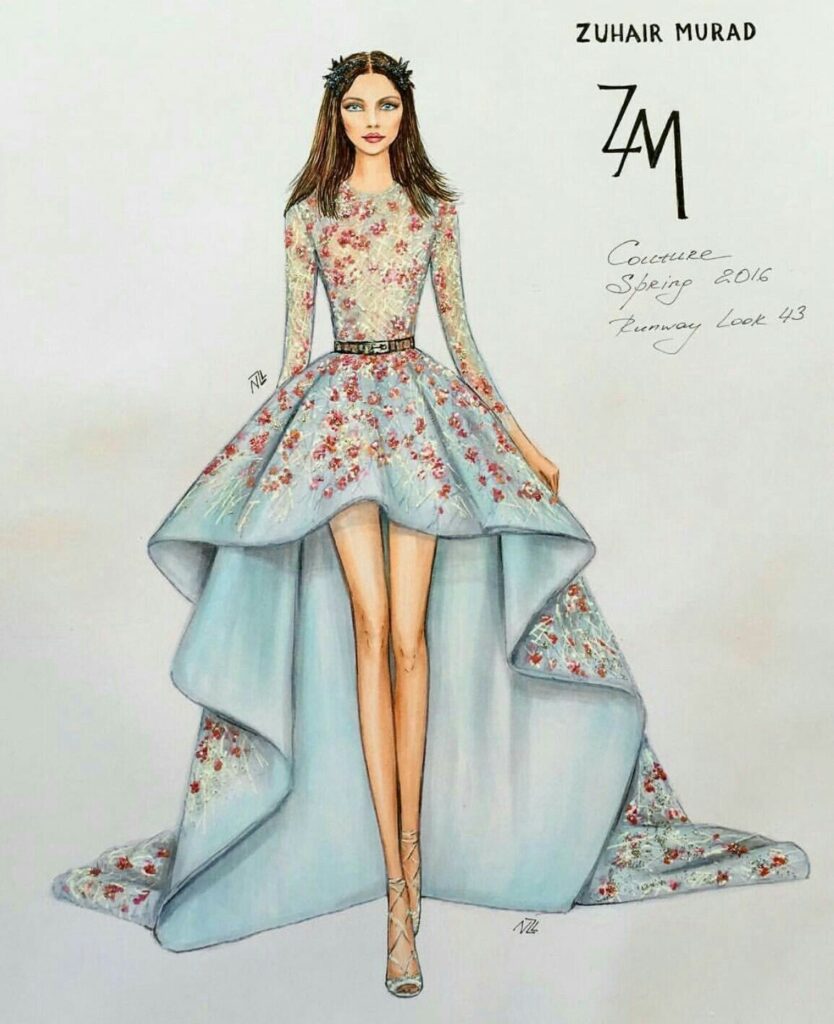
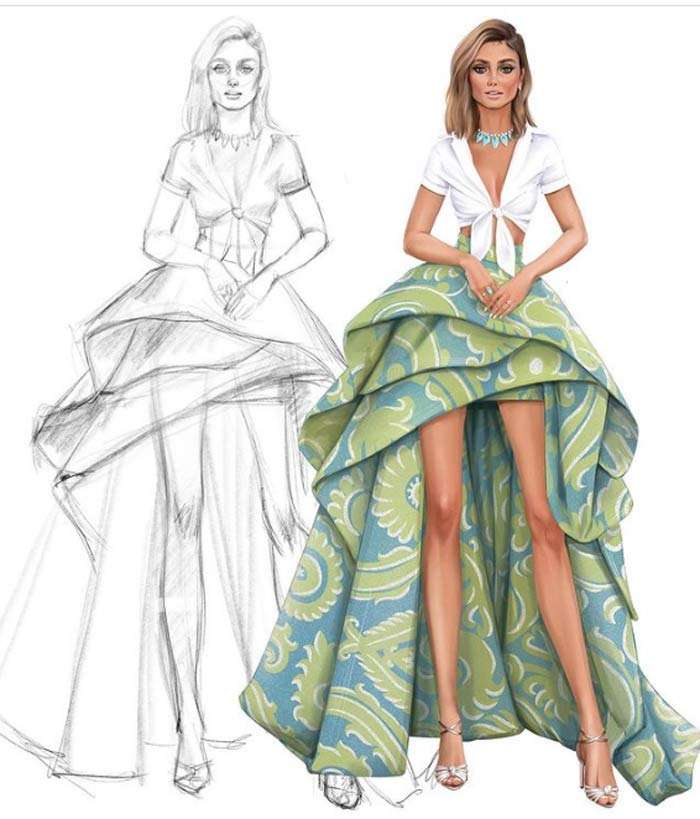
Fashion design is a multifaceted art form that requires creativity, skill, and knowledge of current trends, as well as cultural and social influences. It encompasses the process of designing clothing, shoes, and accessories, from concept to finished product. Designers use a variety of techniques and tools to bring their visions to life, such as sketching, draping, and pattern making. They also consider factors such as fabric selection, color palettes, and construction techniques, to ensure that the final product is both aesthetically pleasing and functional.
Fashion design is a constantly evolving field that is influenced by a variety of factors, including historical context, technological advancements, and changes in social norms and cultural values. “A fashion designer designs clothing and accessories. Designers are responsible for creating looks for individual garments, preparing the shape, color, fabric, trimming, and more.
How To Become A Fashion Designer?
As you all probably know, the fashion industry is a very fast-paced, competitive field of growth. Due to the high demand how much you pay for fashion designers is a top priority. Most fashion universities know that. They have to tailor their studies and courses to leave room for changes in the future. Of course, when you attend these designer schools and houses of textiles, you will pretty much only learn the basics. This is true of any school simply because there isn’t enough time to teach you everything that your professor may not have learned yet.
The job of fashion designers entail many tasks. It’s the duty of the designers to read screenplays and consult with directors and other members of the production team. Using this technique, productions are planned and design concepts are developed. In order to coordinate distinctive products and designs, they often work with other designers. Agents and sales professionals are given sample clothing from them.
They make arrangements for sample clothing to be displayed during sales meetings or fashion displays. They also choose the products’ production processes and materials. They oversee and coordinate the activities of those who cut and draw patterns. Their responsibility also includes building samples or completing clothing.
Designers often have to go back to school for refresher courses. This is to avoid getting left behind and being out of the loop when discussing the latest trends in fashion. Online fashion design courses can be extremely helpful. The tips listed below are simple guides that can help fashion designers stay in fashion while working in the industry and after. If you are interested in becoming a designer, sign up for the free online fashion design courses below.
Free Fashion Design Courses
Diploma In Fashion Design
This certificate program examines the evolution of fashion and discusses how historical trends affect the marketplace today. Learn practical design techniques and examine the many textile fibers, yarns, and textiles used in the manufacture of clothes, as well as their sources. Learn how to make clothes so you can start, fund, and sell your own clothing line.
Fashion Store Assistant & Personal Shopper Training
With the help of this free online course, you can learn how to become a personal shopper and assist customers in making wise purchasing selections. Did you realize that personal shoppers get paid by using other people’s money to make purchases? Although it seems enjoyable, a personal shopper’s job is challenging. You must be aware of certain areas, such as body shapes, current trends, and how to conceal imperfections.
This free online course will teach you how to sell t-shirts on several print-on-demand platforms without paying anything upfront. Put aside costly business plans that cost thousands of dollars to launch. There are no start-up expenditures, no inventory to keep, and no goods to send with this business! Let the market handle the printing, shipping, marketing, and even customer support while you concentrate your efforts on designing t-shirt designs.
The fashion industry is a fast-paced environment that requires constant innovative designs. A Fashion institute can keep you up to date with most of the trends at a time, but by tomorrow, a brand new concept will be introduced. As the industry moves from season to season, designers must always remain a season ahead of everyone else. It would mean that they literally have to plan their fashion designs a year in advance. This is one reason why a fashion designer salary is very important. This is because they need to take time to come up with their concept, map it out, choose their materials, and get to work.
Doing all this by hand or independently can be a challenge for most designers. Designers and fashionistas must always be aware of the constantly shifting demands and opportunities of the fashion industry. They should know how to think quickly, master their skills, and have swift production methods. Something new will always need to be produced, year after year. This can be a daunting task because you never know which items will actually sell. How many orders will be needed after they sell, and what will be done with the leftover items?
2. Be Innovative
Most fashion universities and institutes teach their students how to stay current. Most of the top designers are typically industry trendsetters. Practically speaking, they are the ones who dictate what savvy people should or will be wearing within the next season. All types of people follow the top designers in the industry for inspiration and style. The main goal for Fashion Universities today is to instill a trend-setting mindset into their student’s craniums.
Immersing yourself in fashion blogs, reading magazines, and retail shopping can all be effective in getting your creative juices flowing. This, in turn, will most likely amp up your creativity levels. Clothing is a way of expression for most people, both designers, and customers. This puts a heavy responsibility on the designers. People will be wearing your designs and buying your clothes.
Designers should always challenge themselves to come up with new ideas and ways to express themselves. Always remember that fashion is life for some people. And life is fashion. People use their clothes to send messages to others. Whether it’s good or bad, hot or cold, fashionable or drab.
3. Broaden Your Horizons
There are hundreds of fashion designers who dream of getting their designs on the runway. Graduates of fashion universities are usually either self-employed or work in retail. This can either be at a clothing store or an apparel company. Inadequate capital and social connections are factors that hinder good designers from showcasing their exquisite, creative, and original designs. It is harder for them to attend fashion shows and mass-produce items. The salary for a fashion designer has to cover all these things.
The fashion industry is highly competitive, and only a few designers ever become famous. If you’re interested in pursuing a career in fashion design, it’s important to be aware of this fact and consider your options carefully. Keep in mind that there are other careers closely related to fashion design that you might want to explore.
For example, you could become a makeup artist, a stylist, or a fashion merchandiser. To learn more about these fields, you can enroll in courses offered by many fashion universities. By doing so, you’ll gain valuable knowledge and skills that will help you succeed in the fashion industry.
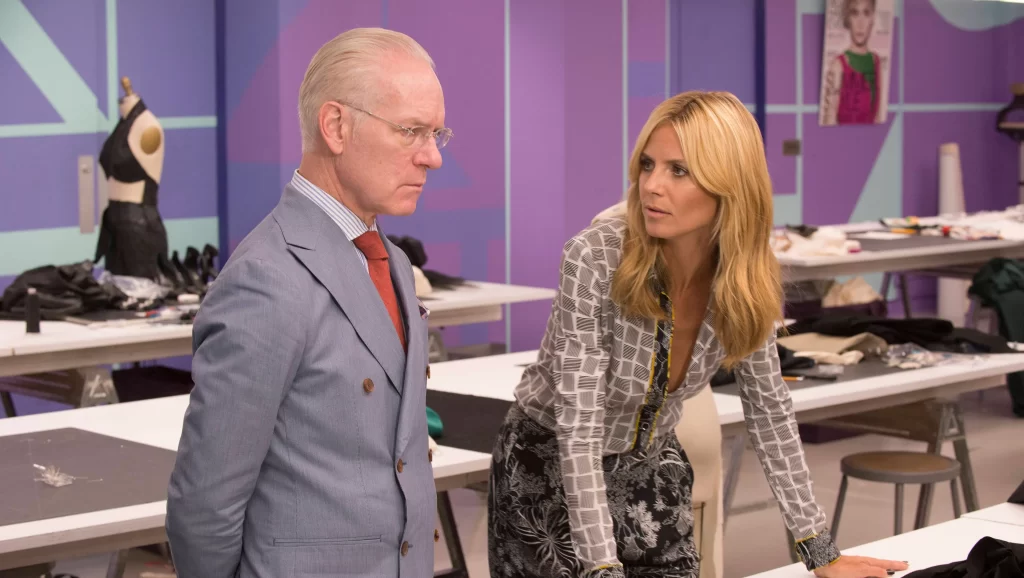
Fashion universities are best suited for those who truly have a love for clothing and fashion. Staying in fashion can be both a tiring and rewarding career. Like Heidi Klum says in her popular TV show called Project Runway, “One day you’re in, and the next day you’re out”.
What Income Range Should You Expect?
In the field of fashion, you are responsible for creating the clothes and accessories that we wear every day. They work with a variety of materials, colors, and styles to create designs that are both fashionable and functional.
Top designer salaries can vary depending on a number of factors, including experience, education, location, and the type of company they work for. However, the median annual salary in the United States is $77,450. Entry-level designers typically earn between $50,000 and $60,000 per year. Experienced designers can earn upwards of $100,000 per year, and some top designers earn millions of dollars per year.
Designers who work for large companies, such as Ralph Lauren or Chanel, typically earn more than those who work for smaller companies or who are self-employed. Fashion designers who work in major fashion cities, such as New York, London, and Paris, also tend to earn more than those who work in smaller cities.
Here are some tips for increasing your earning potential:
Get a degree in fashion design or a related field.
Gain experience by working as an assistant designer or intern.
Build a portfolio of your work.
Network with other fashion professionals.
Start your own fashion business.
If you’re passionate about fashion and have a creative eye, then a career in fashion design may be right for you. With hard work and dedication, you can achieve your goals and become successful in the world of fashion design. Becoming successful in the fashion industry takes hard work and dedication, but it is a rewarding career that can lead to a high salary and a lot of satisfaction.
Here are some additional tips for fashion designers who want to earn a high salary:
Focus on a particular niche, such as women’s wear, men’s wear, or children’s wear.
Develop a signature style that will make your designs stand out.
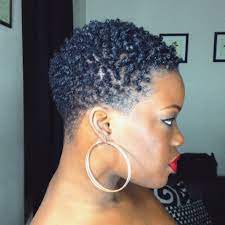
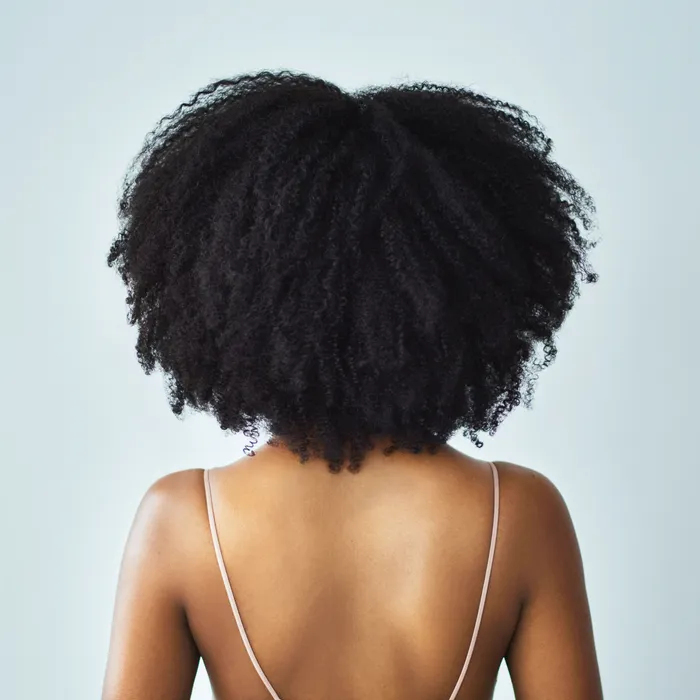
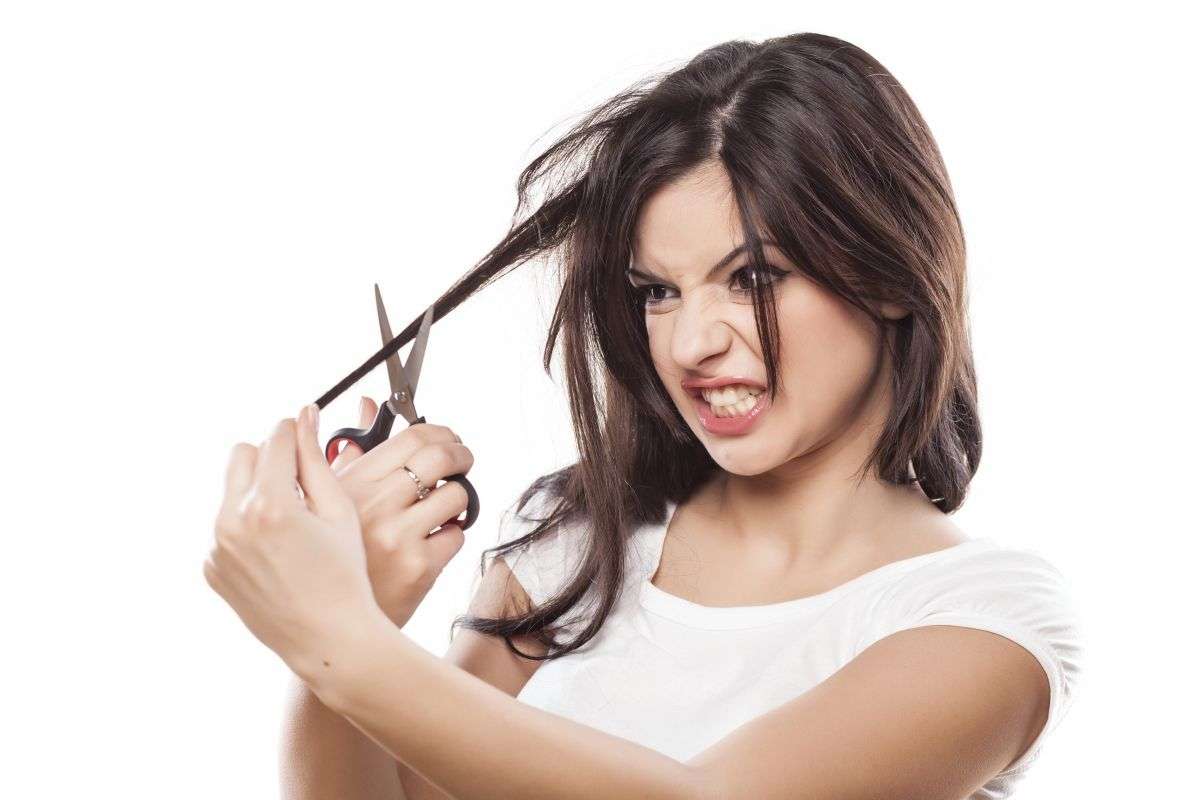
When you’re making the decision to regrow your natural hair by returning to its natural state, you have two primary options. You can begin the transitioning process of your hair or cutting it. Transitioning means going from relaxed hair to natural hair. You can do this by either gradually cutting the relaxer off or cutting the relaxed ends off all at once. That is why it is called a big chop. EVERYTHING must go all at once. This can even be done by waiting to grow out the relaxed hair until all the hair is natural.
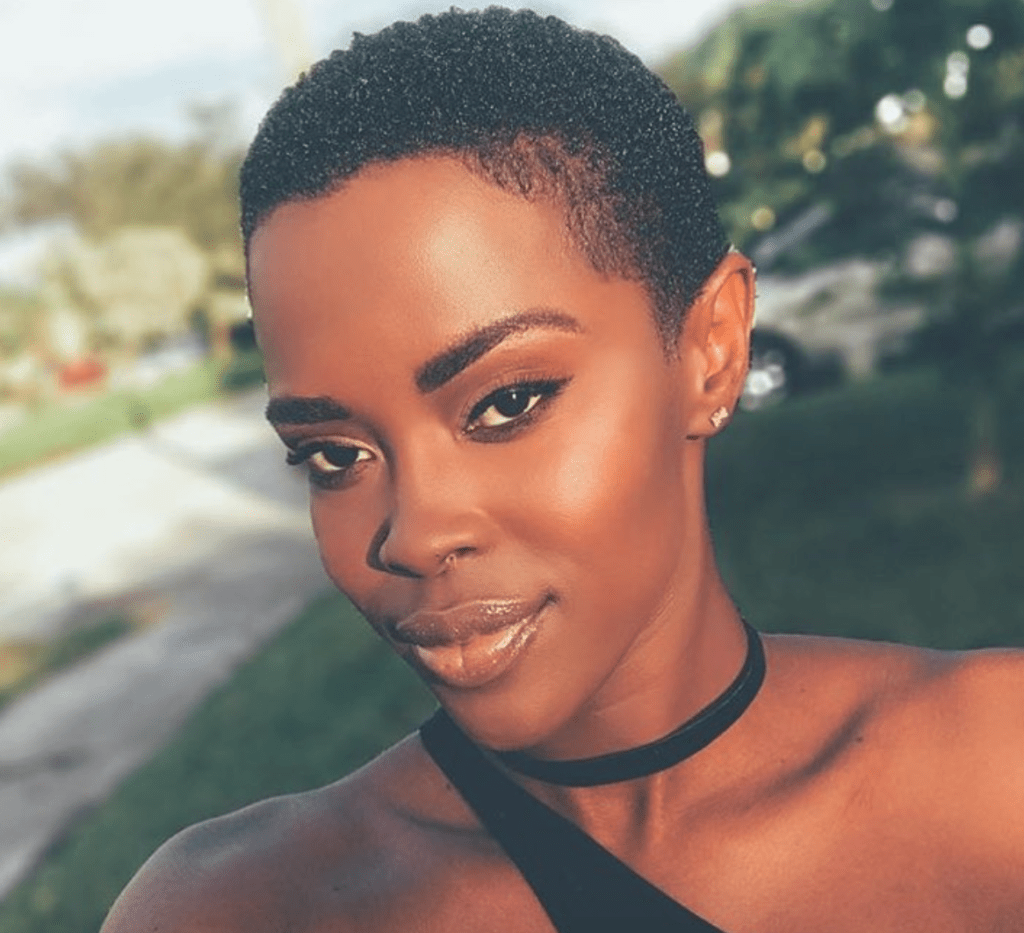
Cutting it all off is known in the natural hair community as the “Big Chop”. It is the fastest way to achieve 100 percent natural hair. Many times it may not always suit everyone. Going through with the big chop can be one of the most incomparable moments on your natural hair journey. It gives some people a new outlook on life while others struggle to try to find the right hairstyles.
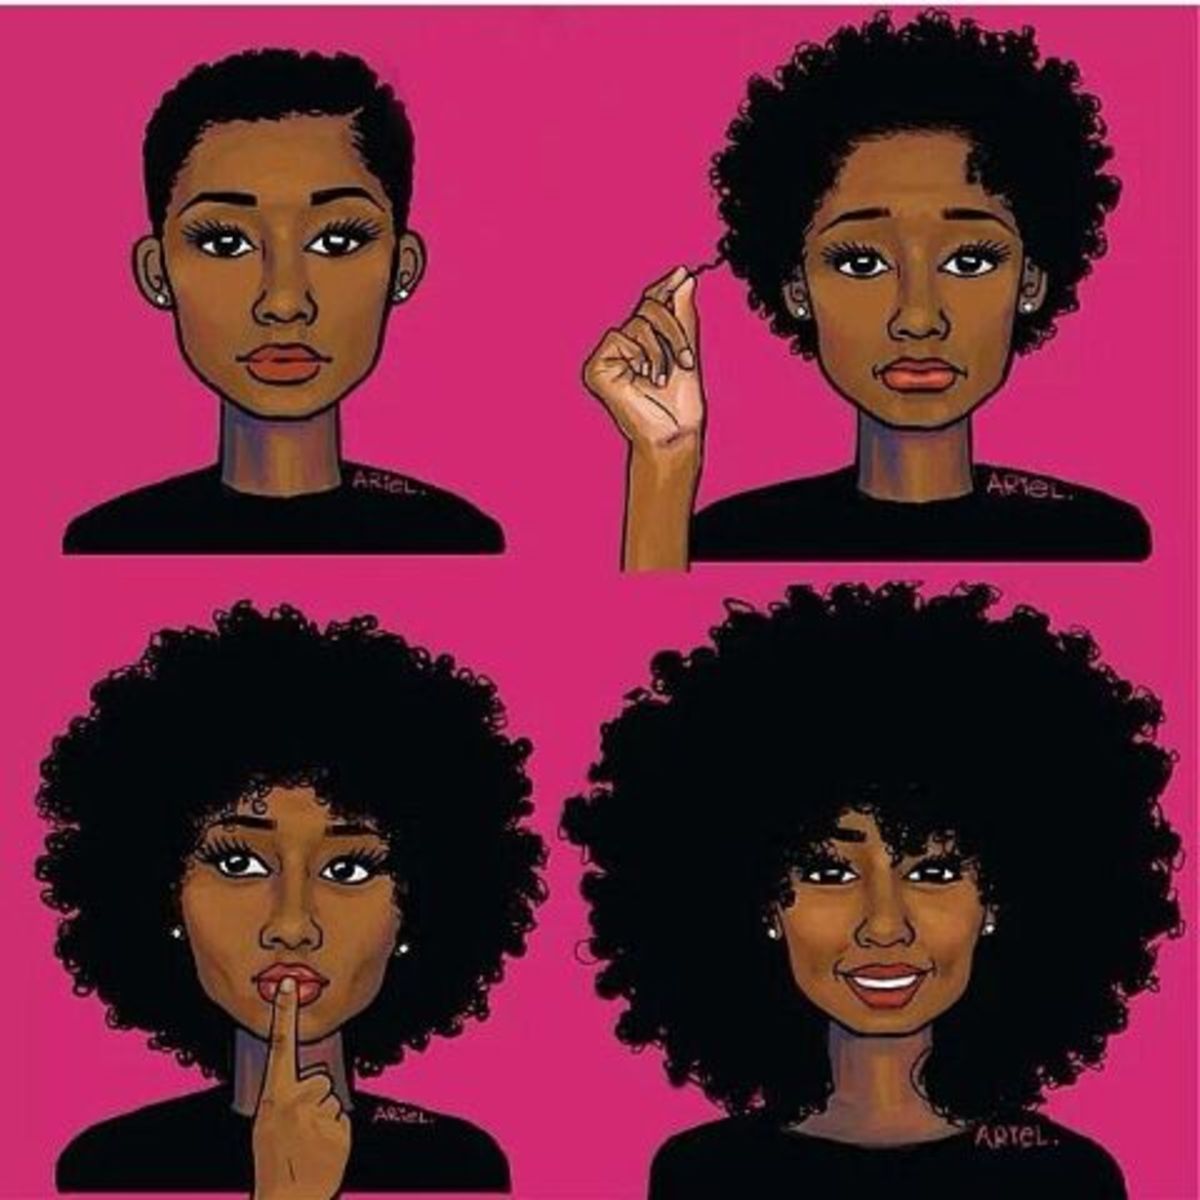
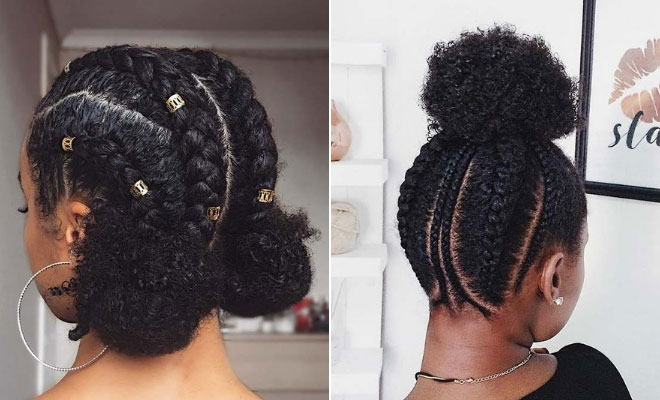
Natural Styles
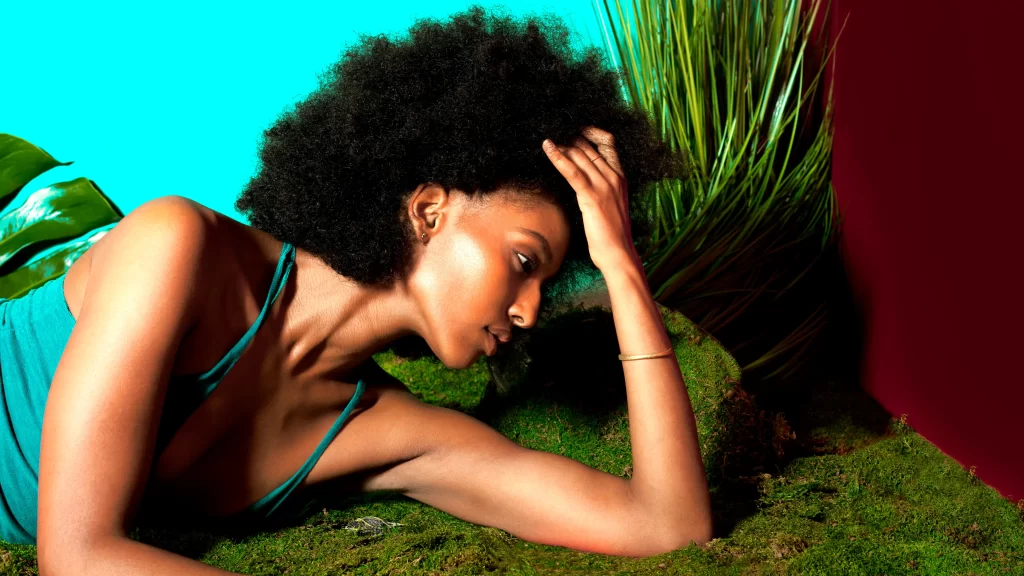
If you are considering a natural hairstyle I suggest you do your research first! Consult a professional about transitioning options. Try a few textured hairstyles like rod and twist sets to see if you like the way you look with big hair. It is not recommended that women cut off all their hair for a fresh start. You can also opt-out in a bun or wear your natural fro and accessorize.
Short hair isn’t for everyone, keeping your confidence with a new look is the main goal. Although the big chop might be the best solution for some, there’s nothing wrong with cutting the relaxer out as it grows. Many people actually start off cutting the relaxer as it grows out to keep its length. Others are daring and go for the big chop.
Hair extensions are also a great alternative when choosing to go natural. It is also the most popular way to start your natural hair journey. Regular trims between braiding will ensure the hair is healthy and that you are getting closer to your natural hair goals. Most people trim their ends anywhere between 4-6 weeks. Also, deep conditioning and hot oil treatments are key when wearing extensions regularly. Although you are wearing weaves or extensions you MUST also add moisture to your natural roots as well.
Once you make the decision to stop chemically altering your hair, you need to decide how you’re going to go about it. Will you transition to natural hair? This process can take anywhere from weeks to months, to even years depending on the length of your hair and how quickly it grows. Or will you choose the quicker route, also known as the Big Chop? Before making your final decision, check out the pros and cons of the big chop. Whichever route you decide to take embrace your natural roots you are BEAUTIFUL!
For all my men and women out there who are growing out their natural hair, I commend you. Having natural hair Is NOT an easy task, nor is it something you can do without having knowledge of your hair. Listed below I have included a few natural hair tips and tricks of the trade that you should know. Being mindful of your hair type is ideal. That is the easiest way to take care of your hair and promote hair growth.
When transitioning from relaxed hair to natural hair, there are a few things you need to keep in mind along the way. For example, I have thick coarse hair. So I thought until I began paying attention to my actual hair texture. Thick coarse hair basically means the same thing. Thickness describes the width of your hair strands. I actually have a 4B/4C hair texture with fine hair strands and high density.
Natural Hair Tips
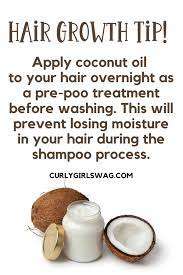
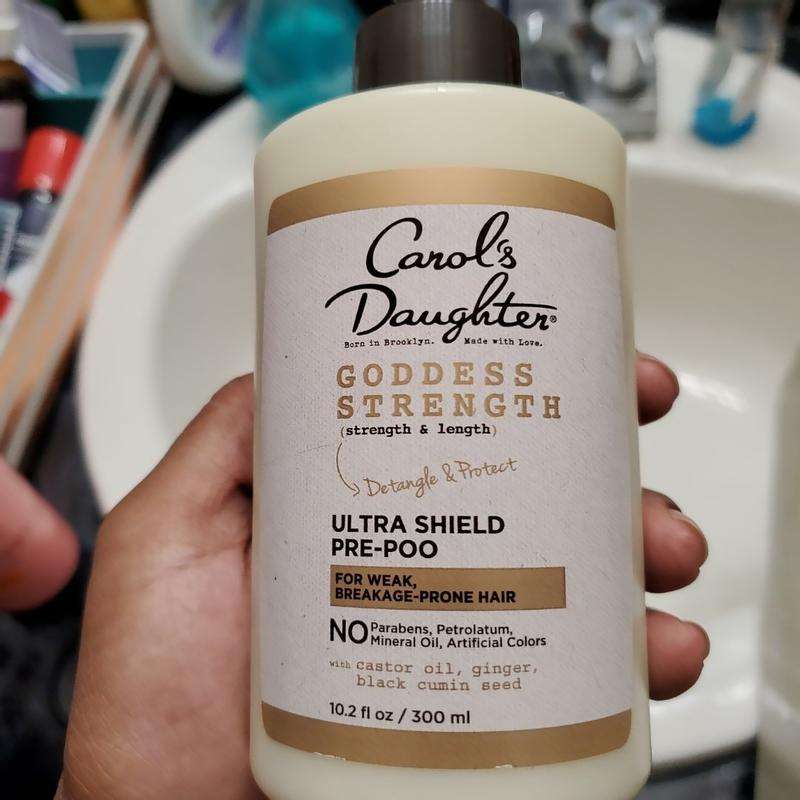
Pre Poo Method
A pre-poo means moisturizing your hair before you begin your shampoo. When you use this method it doesn’t strip your hair from its natural oils or take away moisture. You don’t have to use any expensive products cheaper ones usually work just as fine. You can use Olive oil to pre-poo or a rinse-out conditioner. Any other type of oil that promotes hair growth is optimal. Sometimes I will use hair grease to pre-poo because I feel like grease is a bit more “greasy”.
Using oil would be better to avoid having greasy hair after your shampoo though. I just feel as if I will wash away the oil so the process is redundant. Nevertheless, be sure to apply the oil to your hair strands and saturate them. When you approach your wash day, remember shampoo is for the scalp, and conditioners are for the strands. There is no need to measure out the exact amount you will use because everyone is different. Leave on for about 30 minutes then rinse out.
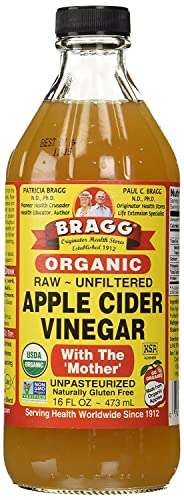
Apple Cider Vinegar Rinse
Apple Cider Vinegar is a likely common item in most households. It has many uses and benefits outside of the kitchen. Apple Cider Vinegar clarifies and restores shine, removes buildup and environmental residue, locks in moisture, and helps with detangling natural locks. It can also be used to kill the bacteria that cause dandruff. You can use this as a hair rinse before and after you shampoo.
Create and massage one part water and one part Organic Apple Cider into your scalp area. (Make sure that it is Organic) Leave this mixture on your scalp for 30 minutes then rinse with cold water. Do not use this method more than once a week. Also, make sure to use small amounts and DILUTE! Too much of this will damage your hair and contribute to dryness.
Deep Condition
Deep conditioning makes your hair shine and allows you to wear natural styles for longer periods of time. Deep conditioning is a very important step in your hair care routine. It adds hydration to dry hair and protects your hair against damage and breakage. This should be done after you shampoo but before you condition your hair.
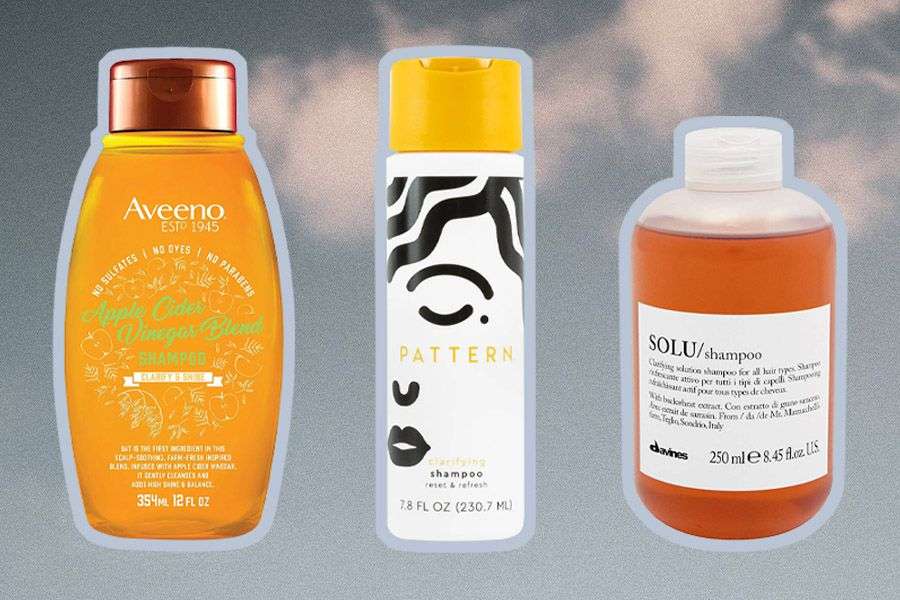
Many natural hair products are thick and creamy which can cause build-up if used on a daily basis. Build-up on the hair can make the hair look dull and cause breakage. This breakage occurs because the build-up causes your hair to become heavy and weighs it down. Clarifying your hair is a necessary process. This is especially true if you are someone who uses many products on your hair. A bit of oil or grease will not cause loads of product to build up on your hair.
You should use a clarifying shampoo on your hair every 4-6 weeks or when necessary. A hydrating shampoo is recommended afterward because it adds moisture to your hair. If you don’t typically use many hair products on a daily basis you should be fine. A clarifying shampoo will be necessary if you use any of the following at least 3- 4 times during the week. These can include any of the following:
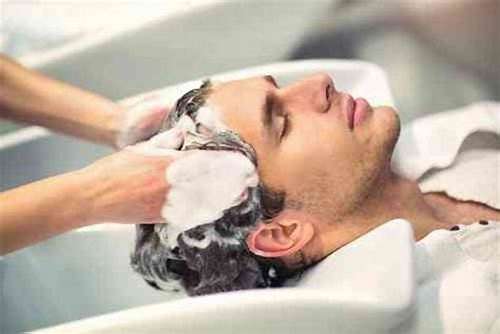
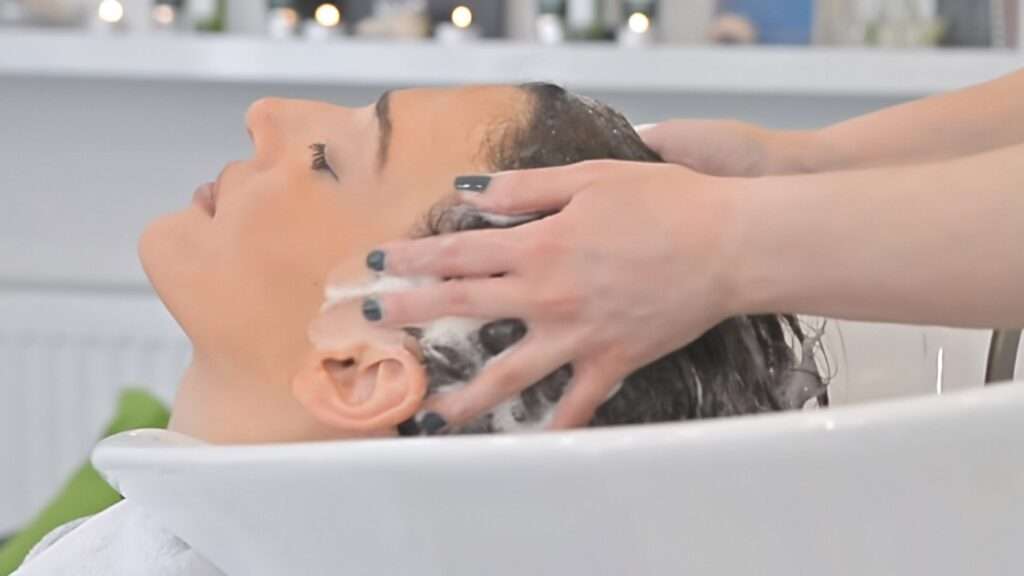
Many people wash their hair in hot or warm water. This is because most people either wash their hair in the shower or over the sink. Let’s be honest who really wants to wash their hair with cold water? That’s something nobody would ever say “Yeah I’ll do that”. Going to the hair salon and receiving a cold water shampoo would probably leave the client highly offended. This is why we have to be mindful of our hair and hair techniques.
Washing your hair with hot or warm water opens the cuticle of the hair. When doing your final rinse using cold water is preferred, because it closes the cuticle and leaves a smooth and shiny finish. When I say cold I don’t mean freezing! Lukewarm water would work just as fine as long as it is cooler than warm.
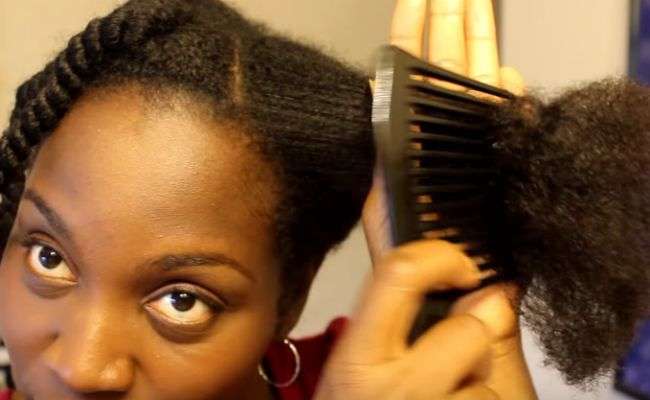
Comb through your hair thoroughly with conditioners, and not just the outside perimeter of your hair. If you do not comb conditioners thoroughly through your hair, you can cause matting, tangling, and knots which many times results in breakage. When you do comb your hair rake your fingers through your hair prior to using a comb. This will help you untangle most of the hair that may become tangled or matted together. Use a wide tooth comb to allow you space to detangle and always start from the ends. Beginning at the ends of your hair work your way up to the roots as gently as possible.
NO Sulfates
Sulfates are harsh chemicals that can harm your hair. They can cause damage, breakage, and dry hair. STAY AWAY from shampoos that contain sulfates.
If you are wearing braids or extensions, avoid tension around the hairline. Unnecessary tugging and pulling around the edges cause breakage and bald spots. Be sure to wear styles that work with your hair. For example, if you have thin hair around the edges be mindful of your wig placement if wearing a wig. Be sure that you do not place the wig directly on your edges if you notice thinning around that area. If you are wearing extensions avoid adding too much hair to your braids. This will cause your hair to be heavy and pull your hair out causing breakage.
The Best Uses Of Shea Butter| Skin And Hair Care
27 Nov, 2022
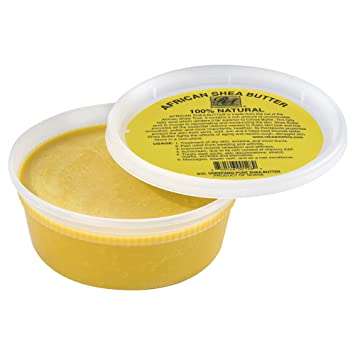
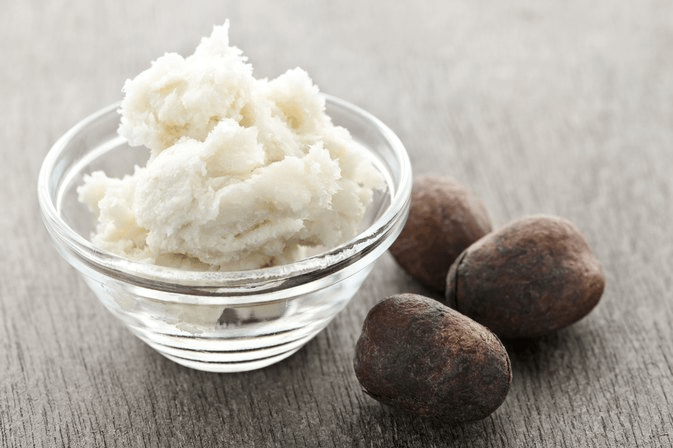
Raw Shea Butter is a yellowish or ivory-colored fat. Recent studies say that this butter is taken from the nut of the African Shea tree. The tree grows up to 60 feet and can live up to 200 years. This tree only produces its fruits once a year. It contains very high levels of vitamins and fatty acids that are essential for your skin.
Shea Butter is a natural fat that is extracted from the nut of the African Shea tree. It is traditionally made by crushing and boiling the nut, which separates the oil from the solids. The oil is then heated and the water is evaporated, leaving behind a thick, creamy substance that is Shea Butter.
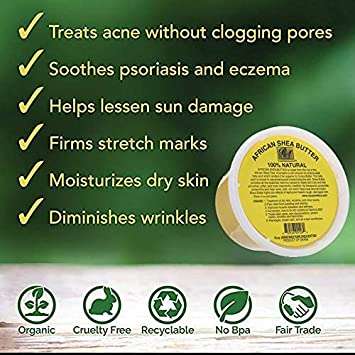
In addition to its moisturizing benefits, raw shea butter also has anti-inflammatory properties that can help soothe irritated skin and reduce redness. It also contains antioxidants that help protect the skin from free radical damage, which can lead to premature aging.
Shea Butter is widely used in cosmetics and skincare products due to its high concentration of fatty acids and vitamins. It is especially popular as a moisturizer or lotion, as it deeply hydrates the skin and locks in moisture. Its emollient properties also make it an effective treatment for dry, cracked, or damaged skin.
Overall, Raw Shea Butter has been found to be an excellent ingredient for promoting healthy, beautiful skin. Its ability to hydrate, soften, protect, and beautify the skin has made it a staple in many skincare routines.
Uses For Raw Shea Butter
If you use Shea butter as a daily cleanser for your face and body, it can provide a range of benefits for your skin. One of the key advantages of using Shea butter is that it can help reduce the damage caused by sun exposure. This is because Shea butter contains a variety of natural compounds like cinnamic acid and triterpenes that provide some level of UV protection to the skin.In addition to its sun-protective properties, Shea butter is also known to be an excellent anti-aging agent. This is due to its high concentration of fatty acids like oleic, stearic, linoleic, and palmitic acid.
These fatty acids help to nourish and moisturize the skin, which can reduce the appearance of fine lines and wrinkles over time.Furthermore, Shea butter is also rich in vitamins such as A, E, and K, which can provide additional benefits for the skin. Vitamin A, for instance, is known to help improve skin texture and tone, while Vitamin E is a powerful antioxidant that can help protect the skin against free radical damage. Vitamin K, meanwhile, can help reduce the appearance of dark circles and other skin imperfections.
It’s worth noting that the benefits of raw shea butter are most pronounced when used in its natural form. This means that you should opt for unrefined Shea butter, which has not undergone any chemical processing. By using a natural and high-quality Shea butter product, you can help ensure that your skin receives the full range of benefits that this amazing natural ingredient has to offer.
Some of the creams on the market are probably made of thirty percent or less Shea butter. It may also be mixed with lots of chemicals, leaving it without much of its natural power. If your skin happens to be very acne-prone, many people suggest that you use black soap to wash your face and follow up with raw shea butter to moisturize.
Massaging your hands and feet with this butter on a daily basis can help to reduce stress & tension in your body. Applying Shea Butter in between your toes daily will also help to achieve softer skin and avoid smelly feet. Soak your feet in warm water for about 15 minutes. Scrub your heels with a bathstone or a sponge.
Once completed pour out the old water and replace it with clean warm water. Then add 1 teaspoon of the butter to the warm water. Soak your feet in the water a second time for 15-20 minutes. Towel dry your feet. Make sure that you also dry in between all your toes. Following the towel, and drying process moisturize with the butter cream. Do this once or twice a week for smoother feet.
Some of the many Benefits include:
Deep moisturizing
Healing and soothing
Anti-aging
There are also many different uses for the face, hair, and body. These include:
Soothes and promotes healing for burns and insect bites
Prevents diaper rash
Stimulates skin renewal
Good for the prevention and treatment of frostbite
Is Cold Water Better For Your Hair Care?
26 Nov, 2022
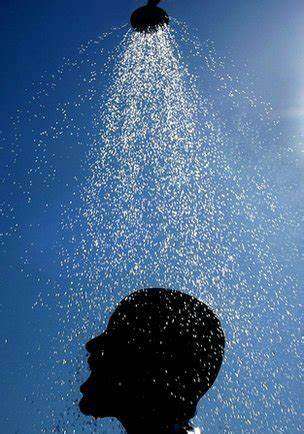
With the harsh weather and dropping temperatures outside, using hot water can sometimes dry out our skin and hair. It may be very tempting for a person to want to submerge in a hot bath or relax in a steamy shower. Cold water is actually known to be better for you. Unlike hot water, it does not dry skin and hair, making them prone to damage.
While there is no way to instantly repair years of damage done, there are some simple tips that can aid in that repair. There are some shampoos, conditioners, and leave-in products that can really help reduce the damage by introducing vitamins and some oils back into our hair. There are advantages to both hot and cold water.
Washing your hair in lukewarm water, however, is the best. Hot water has a tendency to burn it and causes it to dry out. It has the same effects as a curling iron or a flat iron. If the water is too hot, it will scald the shaft and the scalp. That will not help the damage that is already done and will cause further damage! It can also become brittle and fade, for those with color-treated hair. You can help repair and tame your hair by using the right water temperature.
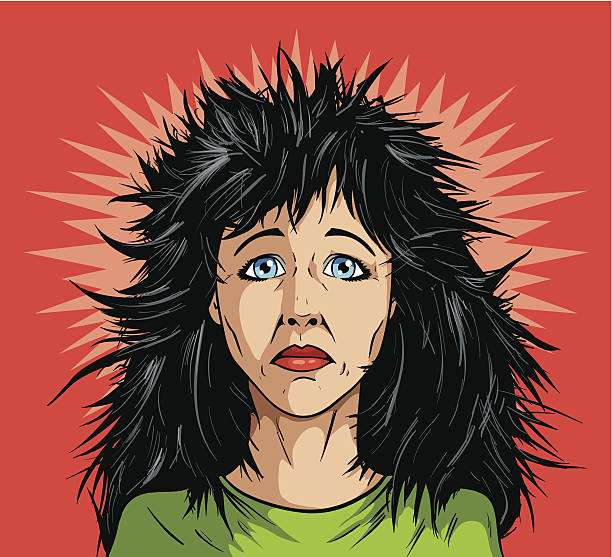
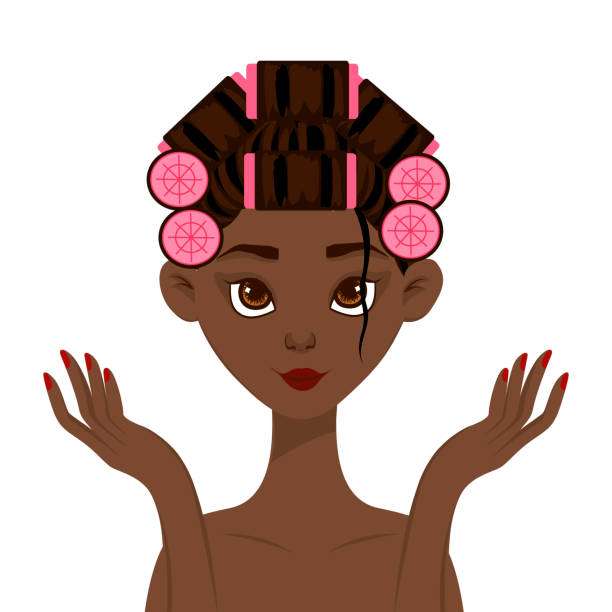
Cartoon of a bad hair day
Your hair shaft and scalp alike need the natural oils that are produced by going a few days without hair washing. When you wash your hair on a daily basis, you end up stripping your hair of those oils. This can actually cause your hair to become greasy or dry; depending on your hair type. People who have naturally oily hair may need to wash their hair more often. They have a higher sebum production but may still suffer from dry hair with constant hair washing. If you have fairly dry hair the lack of constant hair washing will be more beneficial.
SEBUM:
Both our skin and our hair are protected by a layer of natural oil or lubrication called sebum. Hot water can dry up that layer of sebum, making our skin dry and causing fragility. If we go directly out after a hot shower, Hot water can also lead to the pores becoming clogged. Cold showers are one of the great anti-aging secrets for keeping your skin tight, elastic, vibrant, and radiant looking. They can also lead to stronger hair, which can prevent it from easily falling out and slow down overall hair loss.
FEWER FRIZZES:
Hot water dries out your hair stripping it of its natural healthy oils. After you wash your hair in warm water, using both your shampoo and conditioner, bathing in cold water helps close the cuticles. This helps to support hair strength and even comes with the added benefit of shiny, less frizzy appearing hair. If you have natural hair this is a very IMPORTANT factor because natural hair tends to be more on frizzy size!
The cold water will lock in the oils and chemicals from the shampoo. Cold water closes the pores. When the water hits your scalp and hair, the pores will close without the hair fully being cleansed. That will lead to oily hair, an itchy scalp, and frequent showers for your hair to feel clean again. What you want is for the vitamins to be locked into your hair and not the shampoo. Washing your hair with lukewarm water will aid in the vitamins being absorbed, but not the shampoo or conditioner chemicals. Since the lukewarm water washes the scalp clean with no residue, you won’t have to wash your hair as frequently.
What Are The Best Types Of Hair Rollers?
26 Nov, 2022
Since the invention of the hair curling iron, hair rollers may appear to be a thing of the past. Although that may be true, tons of people actually still use hair rollers to roll their hair. Many of these products can be found on company websites. You can also find hair rollers on Amazon, eBay, Etsy, and Walmart, to name a few.
What Are Hair Rollers?
A hair roller is a small, medium, or large tube that is rolled into a person’s hair. This is done to produce a curl in the hair as the end result. This is best for people who have straight hair. According to the hair world, a person who has straight hair is said to have the texture of 1 type of hair. This hair type has an absent or non-existent hair curl pattern. Hair rollers can also be used on other types of hair, but they may need additional manipulations.
Hair rollers can also be used to straighten or elongate those types of hair. You would initially place the rollers on your coily or curly hair to stretch the length.
After the rollers are removed, you can wrap, flat iron, or blow dry your hair. Using the rollers is an easier method of drying your hair and not the final styling method, although it can be worn that way. Hair rollers come in a variety of different shapes, sizes, and colors. There are several different types of rollers, and these include:
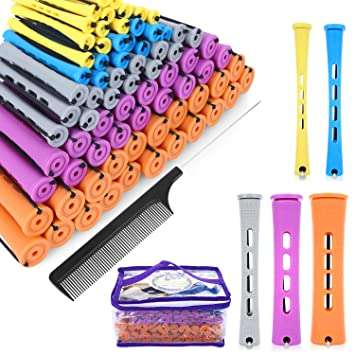
Cold Wave or Perm rods are rods that give you tight ringlets or spiral curls. They are made out of hard plastic some with small ridges others without. They are available in many different sizes and suit even the shortest of strands. They have a rubber band with a small plastic “button” that expands across the plastic rod securing them in place. These are one of my favorite types of hair rollers. They give you definite curls and achieving the perfect style is almost guaranteed. I would suggest that you use end papers on the ends of your hair strand when rolling to perfect your style.
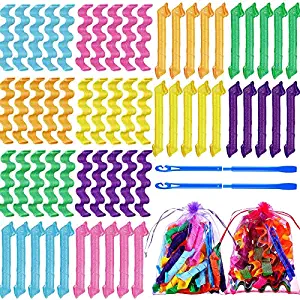
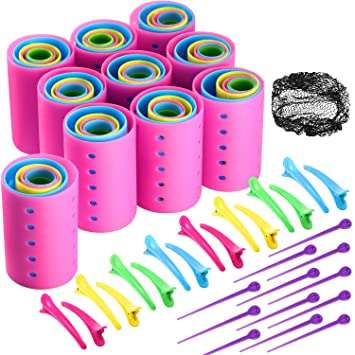
Curl formers are hair rollers that give you a corkscrew type of curl. They are simple and easy to use, making them great for beginners. Curl formers are made from a mesh-like fabric that is stretched flat when placing them in your hair. They use a hook-and-pull method to adhere the roller to your hair. Similar to a crochet wand or tool, the wand is placed inside the opening of the curl former. Slide it through, grab the hair, and pull the wand out.
BOOM, the rollers are set in place with minimum effort. When using this type of roller adding a styling product to your curl set would be ideal. I’m pretty sure you can use these on dry hair but the curl won’t be as great. A leaving conditioner or defining cream would be best for a BOMB set of curls.
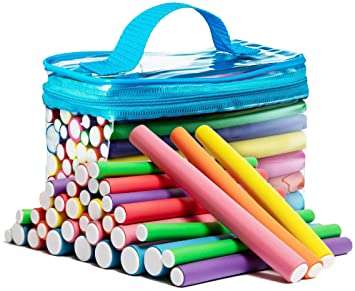
Flexi rods are rod shepherd foam rollers that create ringlets or spiral curls. They can be small medium or large depending on the size of the foam rod being used. This is a very popular styling tool used by those who have natural hair. It is easier for them to wrap their natural hair around. They bend to create shapes that allow the rods to stay neatly in place. They are used to add definition to kinky and curly textured hair.
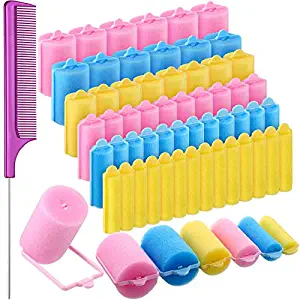
Foam rollers are the hair rollers that you see in all old-school movies. They generate way back before most of our times. These rollers are best for overnight hairstyles because they make sleeping with them in your hair more comfortable. They also give your hair a fluffier texture as the final result. I will say that using these rollers may be challenging to get the perfect end result.
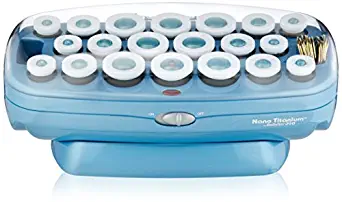
Hot rollers are rollers that heat up using a heated base. They are heated instantly but some make take a few moments to heat up. The heated part of the roller is what is used to curl your hair. This process is similar to using a curling iron but a lot safer for use. These are best for use when you want to set your hair instantly. I would suggest using these on dry hair to avoid any damage to the rollers and avoid long wait times.
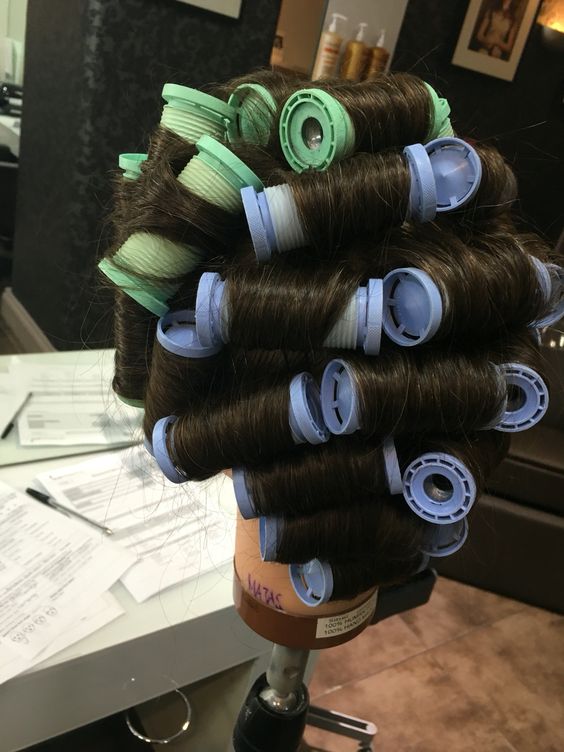
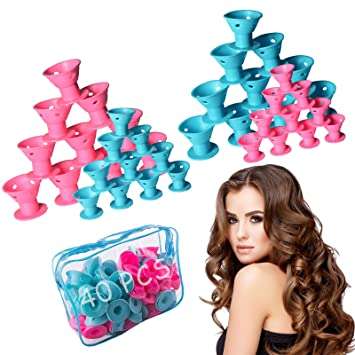
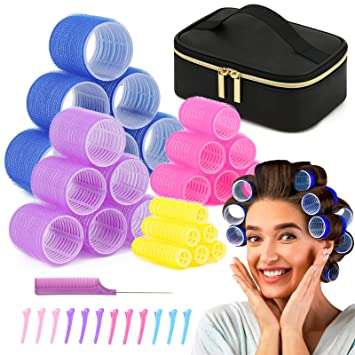
Magnetic rollers are round types of various shapes that are made out of plastic. These rolls are perfect for roller sets at home but are very popular at most hair salons. They are best for perfect hair wraps and quickly drying your hair. They are rolled into the hair at varying degrees to produce a wide range of curls. They need to be secured with clips or hairpins on both sides. This by far may be one of the most challenging rollers for those in the beginner stages because the pins create obstacles while in the rolling process.
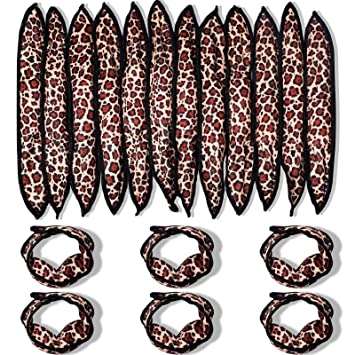
Satin pillow rollers are another simple and easy-to-use hair roller. They provide you with salon-worthy curls all without using a heated styling tool. They are also comfortable enough for you to sleep in and great for those overnight roller sets. These rollers are gentle on your hair and made out of soft satin fabric. The satin surrounding the roller protects your hair from snags and frizziness to prevent hair breakage. Similar to wearing a hair bonnet or sleeping on a silky smooth pillow. These rollers create a crimp-free style with an ultra-soft bouncy finish.
Spoolies are small plastic rollers that are shaped like a pinwheel. You simply wind your hair around the base of the roller and place the covering over the wrapped hair. After unwinding these rollers you will have pin curl-type curls as the end result. They are great for beginners and kids because they are simple and easy to use. These rollers produce the best curl results when paired with a setting lotion or a hair mousse. You can also stay them with hair spray before applying the cover for a longer-lasting and more secure curly style.
Velcro Rollers are used to create voluminous loose curls. They work best for those who have thinning hair. Using this type of roller will give you soft curls as well as added lift and volume. This can give off the illusion of having a thicker head of hair and more body. The velcro on the roller should grab the hair and hold the roller in place. While they may be good for creating beautiful hairstyles they can sometimes snag your hair strands and cause minor damage.
The longevity of the curls depends on how long the set is left in initially. The products used to support the style are of great importance, along with the size of the rollers and the roller placement. The porosity of your hair and the weather are also huge factors. A Velcro set will probably last a full day but will need to be set again overnight.
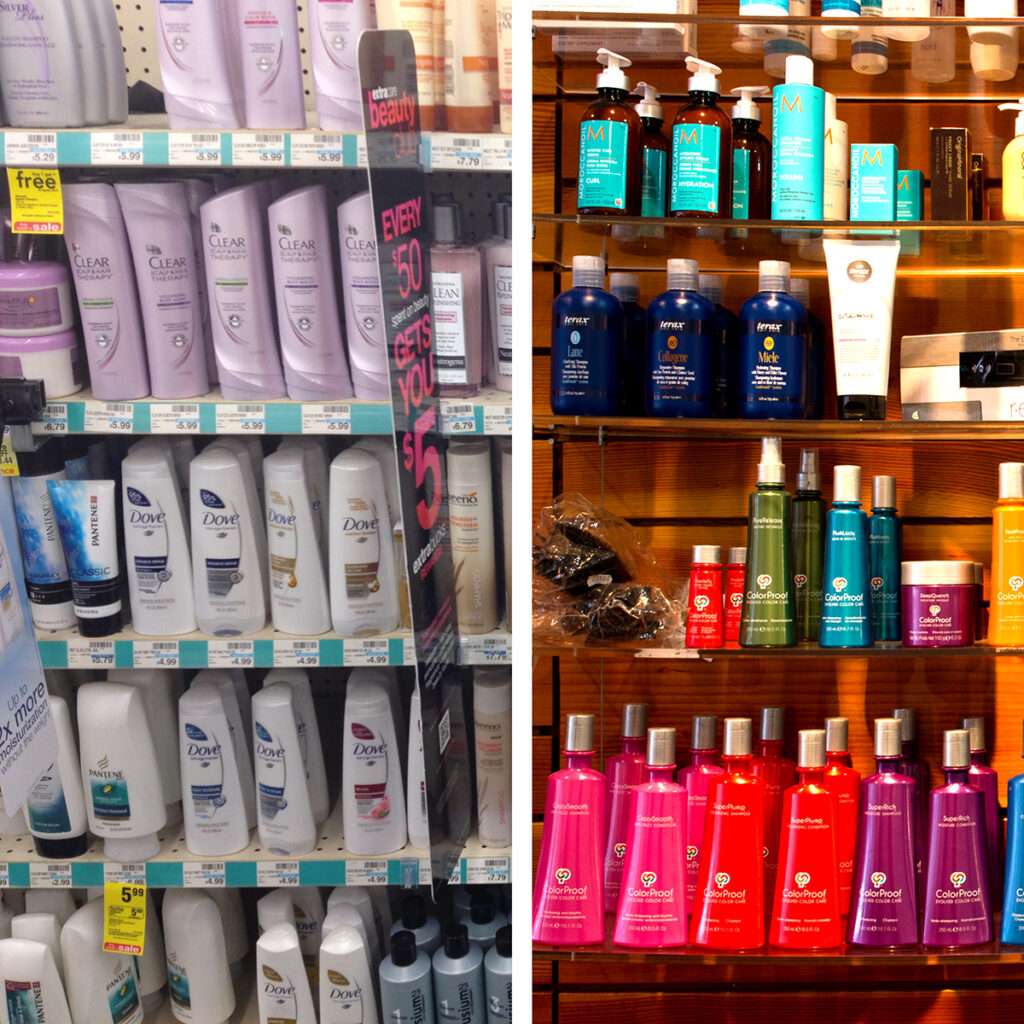
Which is Better Expensive Or Store Brand Hair Care Products?
26 Nov, 2022
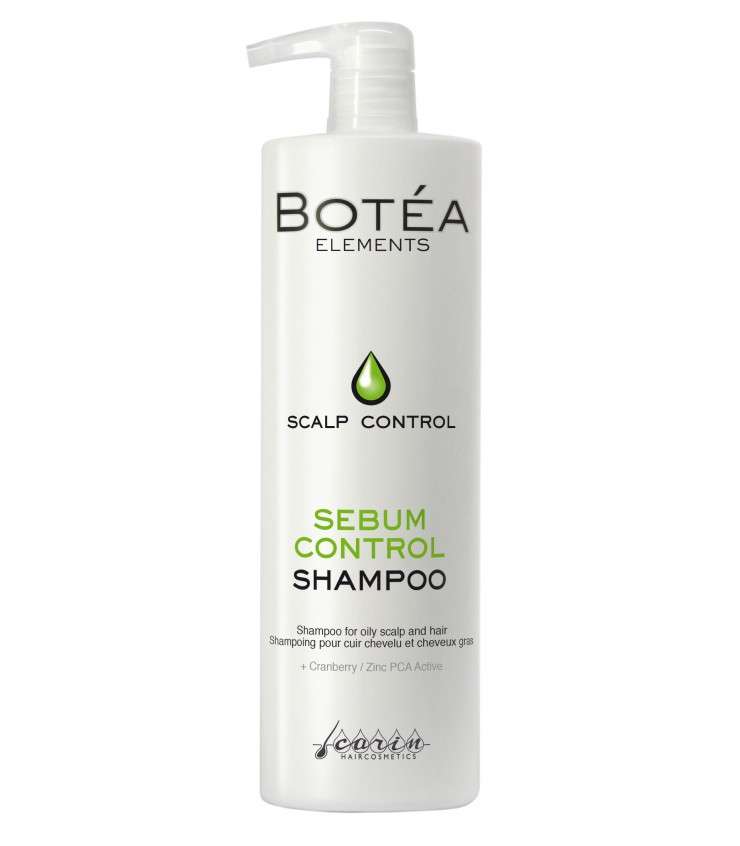
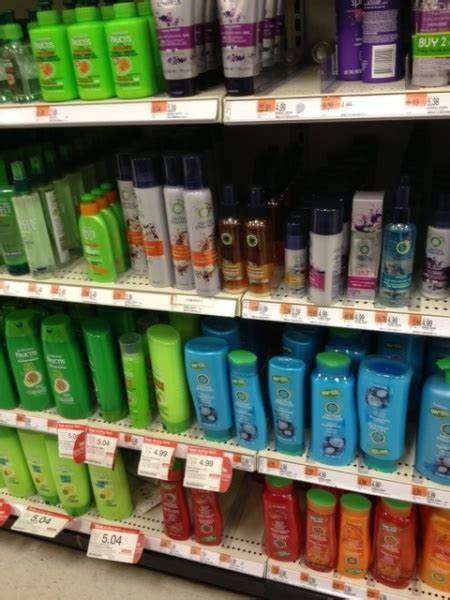
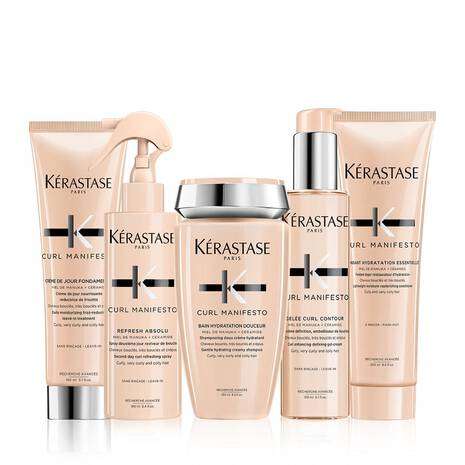
Store brands are on the left, and expensive brands are on the right
This is a very interesting topic that is up for discussion. Can a store brand product be more effective than a more expensive brand? I’m not quite sure if I have a definite opinion or argument here. Of course, I haven’t tried all the expensive or store brands. Many times big companies partner with department stores and the like to sell products. These products are typically sold in the same manner as the name brands. I mean what else is there to do with my leftover product? This is speaking of those big-name companies that sell top-rated products. I’m pretty sure the packaging, marketing, and production for the expensive brands would be very costly.
Selling store-brand products would be more cost-efficient because you don’t typically have to market those products. Those products are simply placed in the store and they sell. Those products may be priced lower but would essentially come out to be the same profit for the company. This is because they end up saving money in the long run. When buying products I buy them depending on how much money I want to spend, where I am buying them from, how many items I will buy, and who or what I will be using them for.
I will buy store brands if I will be using them as a co-wash. Which is the pre-wash before the actual shampoo and conditioner. It doesn’t seem like a big deal to me because I will be adding additional steps to my hair care routine. The co-wash isn’t of importance for my co-washing step. I will stress the fact that you need to be sure that you are buying products that will work for your hair type. This includes damage repair, clarifying, color-treated or hydrating, etc.
This is all-important whether it is a store brand or an expensive brand. I also read reviews on expensive brands because I want to make sure they will work for my hair and make sure that they will be worth the money. Do not be fooled because people will sell you anything. Essentially you are paying for the “Brand” and not the product. Although the brand is who you trust and not the actual product. If that makes any sense. I will say that I make sure that if anything I get a good conditioner. That will be the last and final step in your hair care routine. It will be the protective barrier for your hair after the process.
Now I have used some store brands before I knew their importance and that could possibly explain some of the hair struggles at that time. I cannot be too sure though. Some of the work is fine for what I use them for and others are not so good. Also, we have to be very mindful of what we call a “store brand”.
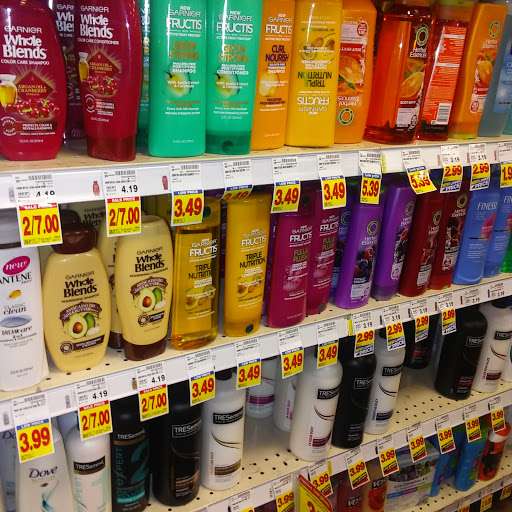
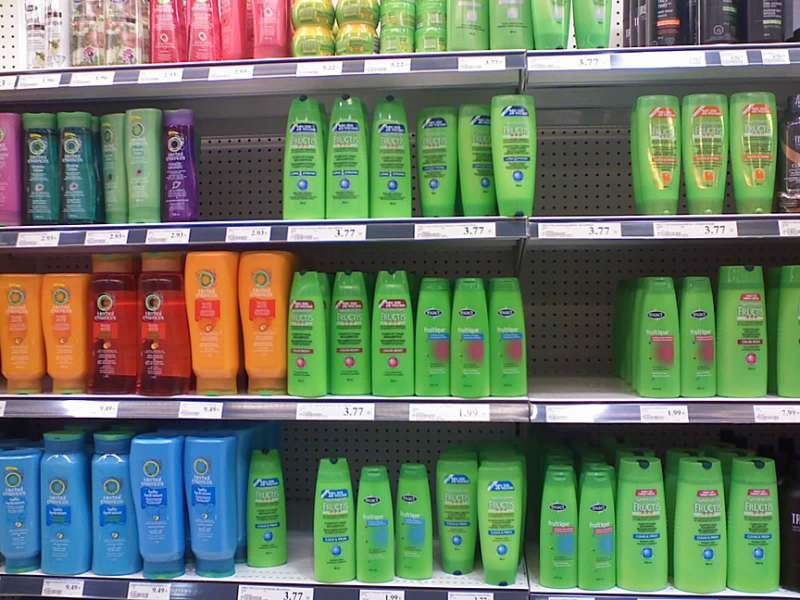
Store Brand Products
A store brand would be more so the products you purchase at your local Walmart, Target, or somewhere similar. Don’t get me wrong these places also carry items that you would see in a salon. Most people don’t go to the hair salon for service so they may be unaware of the quality of the products.
Let’s say I walk into my local beauty supply store and start looking around. My first instinct would be to grab a product that I have seen before, heard about, or currently use. I could be looking at the most expensive brand product in the world but to me, it would seem like an off-brand or “bootleg”. Why do I say this? it’s because it is unfamiliar to me and I have no knowledge about the product or its origin. I don’t know anyone who has used it before and never saw an ad on tv.
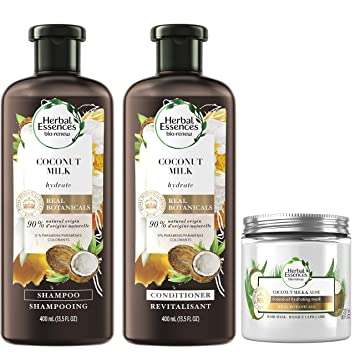
Expensive Brand Products
An expensive brand is what most people define as “Salon quality” products. These are the items that you would see in most hair salons depending on where you go. People who use expensive products may possibly only use them because they frequent their nearest hair salon. While getting serviced these are probably the products that they were sold during their visit. They liked the way their hair turned out after the products had been used. Some products that I have previously used were from actual “companies” and not store brands. I tried them out and did not like the way they made my hair look and feel.
All in all, I think that you should try and test different products and see how they work for your specific hair type. This will help you find the right products. If store brands work for you buy them because it could save you tons of money. If expensive brands work for you and you like them continue to purchase them. That could also save you money by not having to shop around and go through trial and error. It can be a daunting task to search for a good shampoo and conditioner for your hair care routine.
Trimming| How To Know If My Hair Needs A Trim
26 Nov, 2022
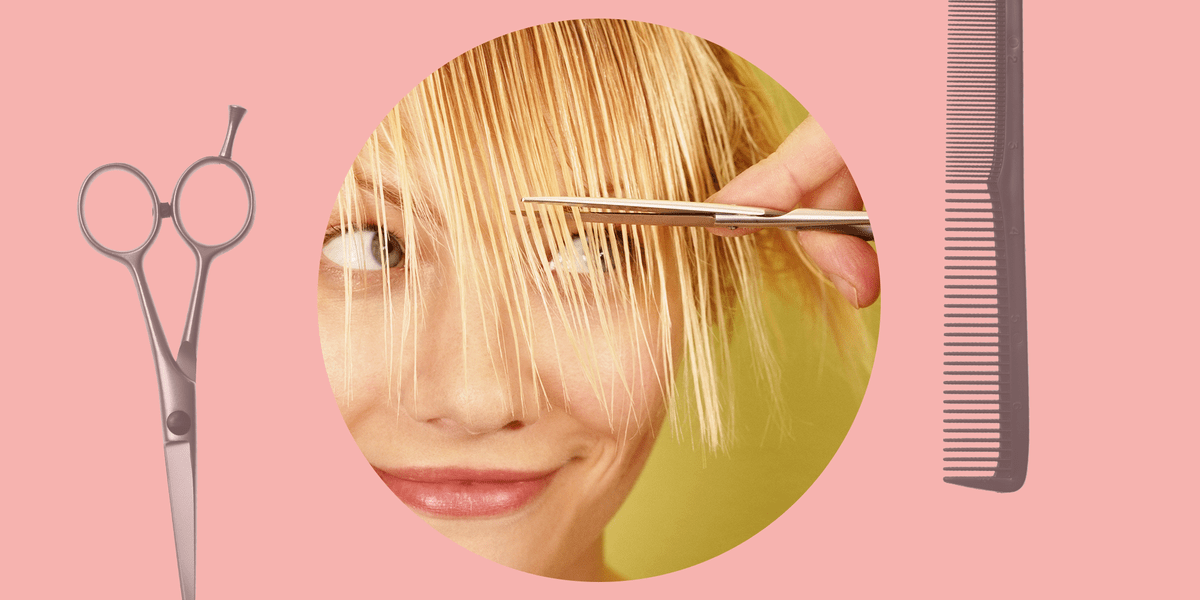
Of course, every once in a while your hair will need a good trim. The key word in that statement is “Trim”. Trimming your hair is the process of clipping and not necessarily cutting off any unwanted, split ends, uneven hair strands, or relaxed ends when going natural. Basically, it’s removing any dead hair on your head. When you have this service done, you do not intend to get a full-blown haircut.
Hair trimming is only intended to cut off about 1-2 inches of your hair. 3 inches or more of your hair being taken off is pushing the limit and a borderline haircut status. Most people don’t want to give up the length of their hair. This causes them to avoid any removal of their split ends and haircuts altogether. So when should you not trim our hair?
Do not trim your hair if you do not know what you are doing. It is best to go to a hairstylist near you or someone you know who can do it for you properly.
You have natural hair. Most people who have natural hair don’t typically wear their hair in its straightened state or in straight hairstyles. They wear their hair in an afro, pineapple, twists, or dreadlocks. This is basically an unnecessary process because you would not be able to tell that the hair was actually cut. This is due to their natural daily hairstyles.
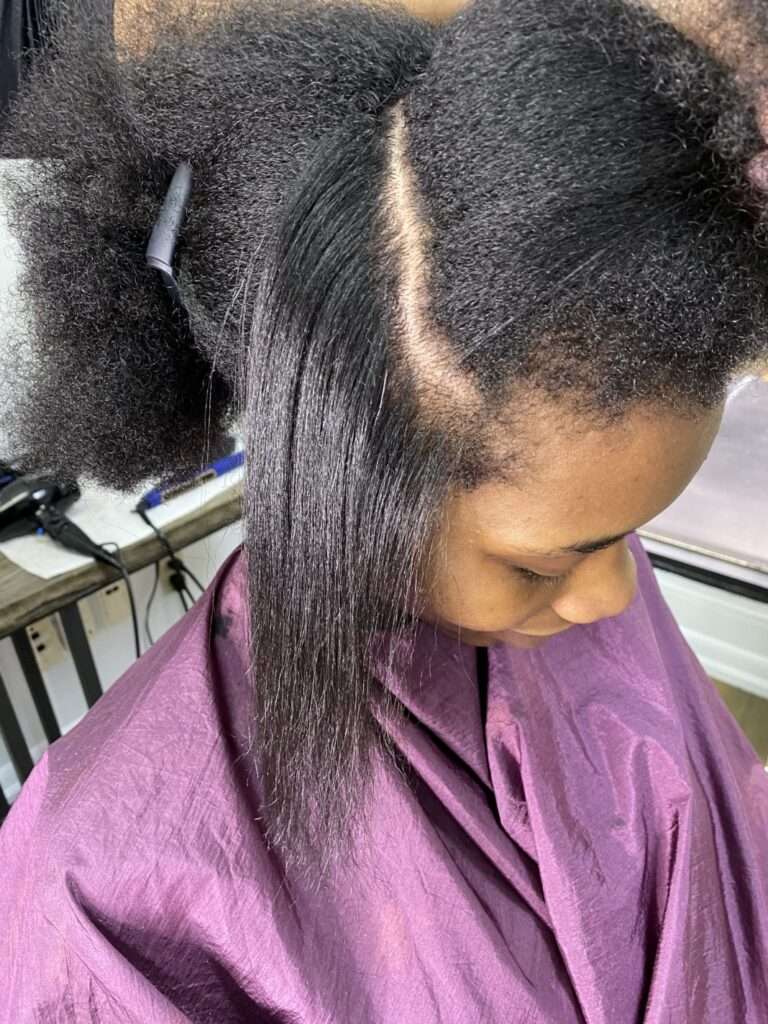
Natural Hair & Pressed Hair Trimming
Do not trim your hair if you had it done during your last wash or style. Unnecessary trimming is done that doesn’t need to be done depending on the length of time in between trims. Your hair doesn’t typically grow that fast. Your hair grows at a rate of about half of an inch per month to about 6 inches a year. You would be getting rid of hair that should remain on your head.
You just did a big chop. This is either cutting all your hair off of your head to start with a fresh set of new growth or clipping your relaxed ends. If you did a big chop it would not be needed because your hair is just beginning to grow. If you were transitioning it would essentially be the same thing because your relaxed ends would have already been removed. You would just be cutting into your new growth.
You will be getting a braided style, a weave, or wearing a wig. You should wait until after you take down the style so that this will allow your hair to grow out a bit longer before cutting. Also, your hair can possibly become damaged during the style which may cause you to have to go back in and cut away more hair.
How To Define A Hair Trim
25 Nov, 2022
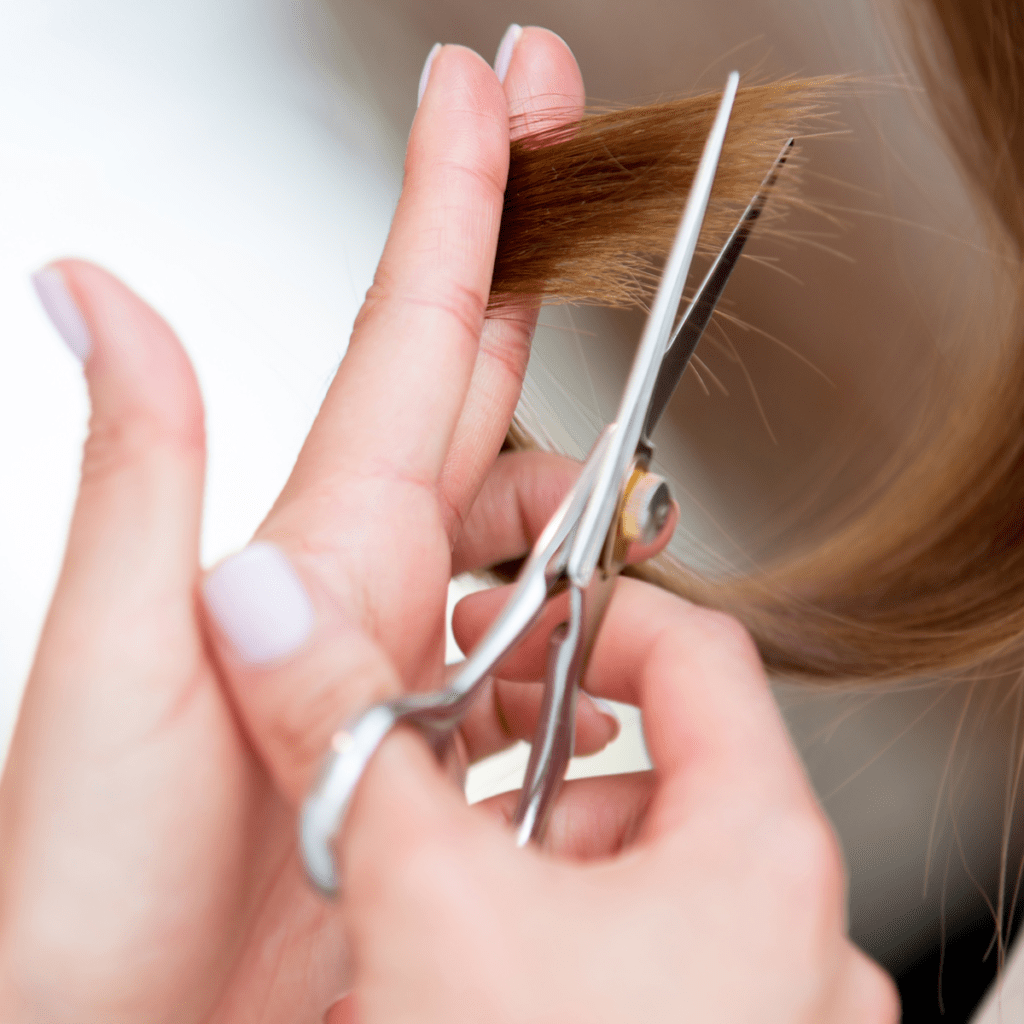
Hair trimming
Hair Trimming Basics
A hair trim is the process of cutting your hair. When you get your hair trimmed you will be cutting off anywhere between ¼ to 2 inches of hair. There will be no change in the style or shape of your hair. This is done to remove any dry or damaged ends of your hair strands. This process is very different from getting a haircut.
This will also be considered an additional or add-on service when you go to the hair salon for service. It comes with its own set price and you will be billed for it once the service is complete. You may possibly be able to get a trim free of charge during your salon service because this will not be something that will be extremely time-consuming for your stylist.
When you visit the salon of choice nearest to your physical location you will have to “ask” for this to be done. When you do be sure to tell the stylist exactly what you want to be done and how much hair you would like for them to take off. Getting a haircut is different from a trim because it is intended to alter the style, shape, or length of your hair. Trim should be done at least eerie 6 to 8 weeks.
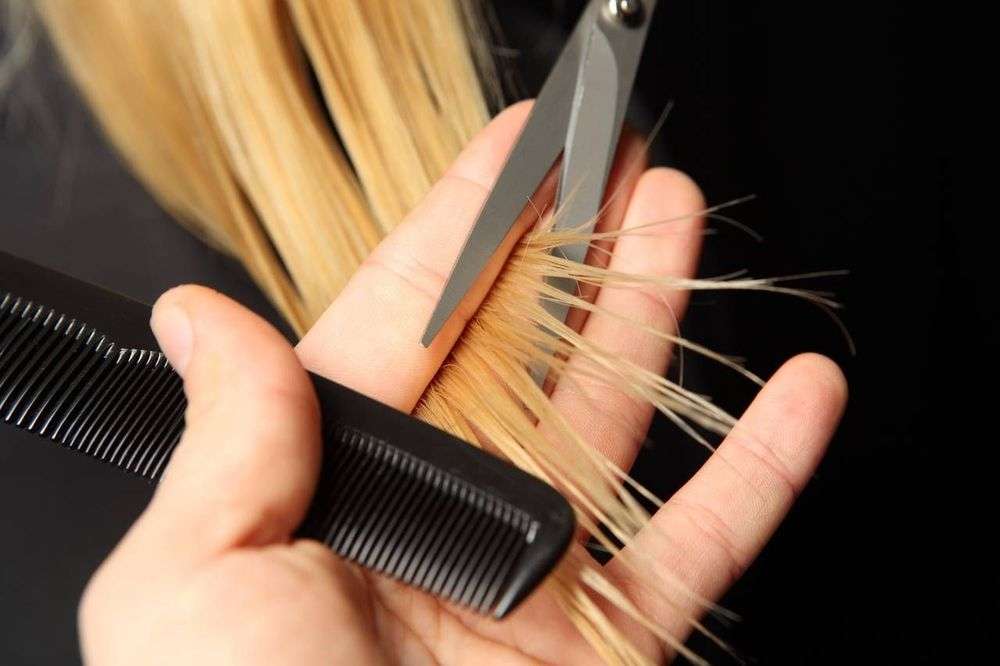
This all depends on how well you take care of your hair. If you want to retain more of your hair’s length you can get a trim every 8 to 12 weeks. Most people get their hair trimmed when they begin to notice damage to their ends or thinning. You will know that you need a trim when you notice any of these signs more often than normal. This can include any of these signs such as:
Your ends feel limp or lifeless
It takes extra time for you to detangle your hair
Your hair is thinning or see-through at the ends
You have lots of breakage or split ends
If you have a lot of breakage on your ends from neglecting your hair strands towards the bottom a haircut may possibly be needed. Trimming your hair is typically recommended but necessary. If you do not trim your ends your split ends will eventually creep up the hair strand and break up on their own. This will shorten pieces of your hair. Depending on where this occurs it can damage your whole head. This can cause insecurities and eventually send you straight to the nearest hair salon. This may be a high-price haircut due to the damage and an extensive treatment plan.