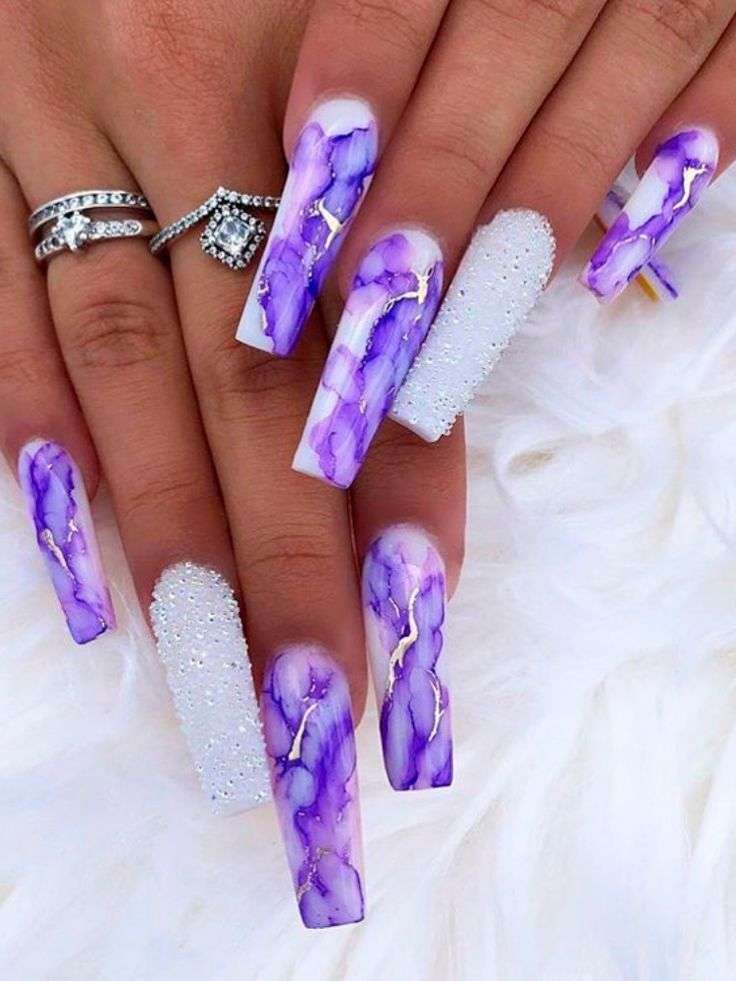
Marble Nail Designs: A Timeless Classic
Marble nail designs have been around for decades, and they continue to be one of the most sought-after nail designs today. These designs are created by swirling together different shades of nail polish, resulting in a stunning and unique marble effect.
One of the best things about marble nail designs is their versatility. You can choose from a variety of colors to create a look that matches your style and personality perfectly. Additionally, the technique used to create marble nails allows for endless customization and experimentation, making it a fun and creative process. Marble nail designs are also incredibly elegant and sophisticated.

They are perfect for any occasion, whether it’s a formal event or a casual day out. The timeless beauty of marble nails is sure to impress anyone who sees them. If you’re looking for a way to elevate your nail game, marble nail designs are definitely worth trying out. With a little practice, you can create your own unique and eye-catching marble nail designs that you’ll love showing off.

What are marble nail designs?
Marble nail designs are inspired by the look of natural marble. They typically use a combination of two or more colors to create a swirling, veined effect. There are many different ways to create marble nail designs, but some of the most popular nail art techniques include:
- Water marbling: This technique involves dipping your nails into a pool of water with two or more colors of nail polish. The colors will swirl together to create a marble effect.
- Dry marbling: This technique is similar to water marbling, but instead of dipping your nails into water, you will apply the polish directly to your nails.
- Stamping: This technique uses a stamping plate and a stamper to create a marble effect.
- Freehand: This technique is the most difficult, but it also allows you to create the most unique and customized marble nails.
How to Do marble nail designs
If you want to try your hand at creating your own marble nails, there are a few things you will need:
- Nail polish in two or more colors
- A small bowl of water (for water marbling)
- A stamping plate and a stamper (for stamping)
- A fine-tipped nail polish brush (for freehand)
Once you have your supplies, you can follow these steps to create marble nails:
- Start by applying a base coat to your nails. This will help protect your nails from the polish and make it easier to remove the design later.
- If you are using the water marbling technique, fill a small bowl with water. Add a few drops of each color of nail polish to the surface of the water.
- Dip your finger into the water, swirling it around to create a marble effect.
- Quickly remove your finger from the water and let the polish dry.
- Repeat steps 2-4 for each nail.
- If you are using the dry marbling technique, apply a thin layer of each color of nail polish to your nails.
- Use a dotting tool or a toothpick to create a marble effect.
- Let the polish dry.
- If you are using the stamping technique, apply a base coat to your nails.
- Apply a stamping polish to your stamping plate.
- Use a stamper to pick up the polish from the stamping plate.
- Stamp the polish onto your nails.
- Let the polish dry.
- If you are using the freehand technique, apply a base coat to your nails.
- Use a fine-tipped nail polish brush to create a marble effect.
- Let the polish dry.
- You can also add glitter or rhinestones to your marble nails for a more glamorous look.

Tips for creating perfect marble nails
Here are a few tips for creating perfect marble nails:
- Use high-quality nail polish.
- Apply the polish in thin coats.
- Be patient and let each layer of polish dry completely before adding the next.
- Use a steady hand.
- Practice makes perfect!
Marble nail designs for any occasion
Marble nail designs are perfect for any occasion, from a casual day out to a formal event. They are also a great way to add a touch of personality to your style.
