Blog Posts

Turtlenecks, An Unexpectedly Stylish History

The history of turtlenecks has been praised as a versatile fashion item, a comforting hug for the neck, and the stylish equivalent of a warm embrace. But did you ever wonder how it came to be, from its origins in medieval times to its modern-day prominence on the runway? Today, we’re delving into the surprisingly rich history of the turtleneck, from its humble beginnings to its iconic status. Fashion enthusiasts, get ready for a fascinating journey!

From Knights to Cool Kids: The Journey Of Turtlenecks

The early 20th century saw the turtleneck make its way into the world of fashion, thanks in part to the “Gibson Girl” ideal. This fictional character, popularized by illustrator Charles Dana Gibson, often sported a high-necked sweater, paving the way for women to embrace the garment.

Midevil turtlenecks

Medieval Origins: Believe it or not, turtleneck’s roots trace back to the 15th century, where knights wore them beneath chainmail to prevent chafing and irritation. Yep, it started as purely practical armor for men! Think of it as the original neck-saver, a practical solution to a medieval problem.

Sporting a Polo Neck: Fast forward to the 19th century, and the turtleneck found a new purpose on the polo field. English polo players adopted the garment for its warmth and comfort, dubbing it the “polo neck.” This moniker stuck in certain parts of the world, even as the garment evolved beyond its sporty origins.

Breaking Gender Barriers: In the early 20th century, the turtleneck made a daring leap across the gender divide. The “Gibson Girl,” a popular illustration of the ideal American woman, often sported turtlenecks, challenging the notion that they were just for men.

Hollywood Glamour: During the 1930s and 40s, the turtleneck became popular in Hollywood thanks to fashion icons such as Audrey Hepburn and Greta Garbo. They brought a touch of sophistication and elegance to the garment. In the 1950s and 60s, they became even more popular among Hollywood stars like Audrey Hepburn and James Dean. They wore the garment to add an air of sophistication and cool rebellion to their personas. The turtleneck became a symbol of intellectualism, artistic expression, and a touch of rebelliousness.

Beatnik Cool: In the 1950s, the turtleneck became a symbol of rebellion and intellectualism, adopted by beatniks like James Dean and Allen Ginsberg.

From Preppy to Punk: The 1960s and 70s saw the turtleneck’s versatility shine. Preppy styles embraced it as a symbol of neatness, while punk rockers adopted it as a statement piece, often ripped and dyed.

High Fashion Icon: By the 1980s, the turtleneck had reached high fashion circles, gracing the runways of designers like Yves Saint Laurent and Giorgio Armani.

Modern Day Mashup: The turtleneck has remained a versatile fashion item throughout the years. It can be worn in various styles, including sleek and minimalist, edgy and rebellious, or cozy and casual. Celebrities such as Steve Jobs and Anna Wintour have made it a signature piece, and designers have continued to reimagine it in new and exciting ways. Today, the turtleneck remains a stylish and adaptable wardrobe staple. It is available in various materials, from chunky knits to sleek cashmere, and worn by people of all walks of life, including celebrities and fashion icons.

So, why does the turtleneck endure? Here are a few reasons:

  • Versatility: The turtleneck can be dressed up or down, making it perfect for work, weekend outings, and even formal occasions.
  • Comfort: It’s cozy and warm, ideal for chilly days and layering.
  • Flattering: The high collar can elongate the neck and create a polished look.
  • Timeless: The turtleneck’s classic silhouette never goes out of style.

The Final Word

The next time you reach for your favorite turtleneck, remember its surprising journey. From medieval armor to Hollywood glamour, the turtleneck has come a long way. It’s a testament to the enduring power of fashion to adapt and evolve, and a reminder that even the most practical garments can become icons of style. So, wear your turtleneck with pride, knowing that you’re part of a long and fascinating fashion legacy!

Do you have a favorite turtleneck story? Share it in the comments below!

So, the next time you slip on a turtleneck, remember its fascinating journey. From medieval armor to fashion icon, it’s a garment that has stood the test of time and continues to evolve. Who knows what stylish twists the future holds for this versatile neck-hugger?

Bonus Tip: Experiment with different necklines, fabrics, and textures to find your perfect turtleneck match. And don’t be afraid to break the rules! The beauty of the turtleneck is its ability to be both classic and daring.

The Rise Of The TikTok Button Scroller Trend

Ah, TikTok. The land of endless scrolling, viral dances, and questionable life hacks. But let’s be real, all that swiping can leave your thumb feeling like it’s about to fall off. Enter the TikTok button scroller, the savior of tired thumbs and the bane of your procrastination tendencies.

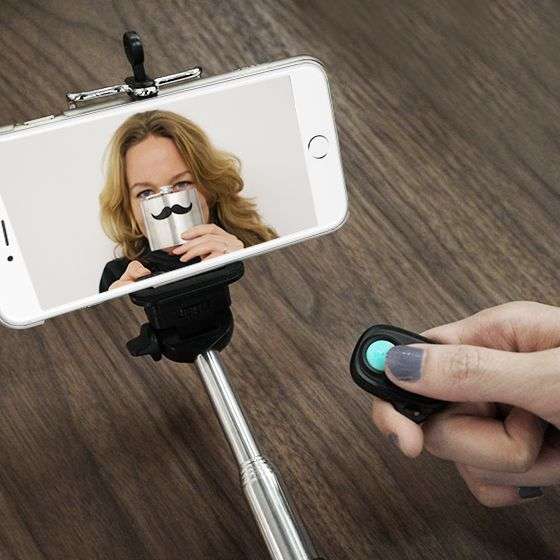
These nifty little gadgets come in various shapes and sizes, but they all share the same basic function: taking the scrolling out of your hands. Some clip onto the side of your phone, while others resemble rings you wear on your finger.

TikTok Button scrollers

How do they work? Most TikTok button scrollers use Bluetooth to connect to your phone. Once paired, you simply press a button on the scroller (some models offer scroll speeds too!), and voila, TikTok magic! Your thumb gets a well-deserved break, and you can continue your content marathon without missing a beat.

So, what are the benefits of using a TikTok button scroller?

  • Save your thumb: No more repetitive strain injuries or tired thumbs begging for mercy. Your scrolling hand will thank you!
  • Multitasking made easy: Scroll through TikTok while doing other things, like washing dishes, waiting in line, or even (gasp!) getting some exercise.
  • Accessibility: For people with hand injuries or limitations, a button scroller can be a game-changer, making TikTok accessible and enjoyable for everyone.
  • Endless scrolling (potentially dangerous): Let’s be honest, with a button scroller in hand, the TikTok rabbit hole gets even deeper. Prepare to lose yourself in the infinite loop of cat videos and dance challenges.
Rechargeable Remote control social media stroller

But before you rush out and buy every button scroller you see, here are a few things to consider:

  • Battery life: Some models require frequent charging, so keep that in mind if you’re a dedicated TikTok scroller.
  • Compatibility: Not all button scrollers work with all phone models, so check before you purchase.
  • Price: The price range can vary depending on the features and brand, so do your research and find one that fits your budget.

Say Goodbye to Scrolling Fatigue: TikTok Button Scrollers

Scrolling through endless TikTok videos is a pastime enjoyed by millions, but let’s be real: it can get tiring after a while. Your thumbs ache, your eyes glaze over, and you start questioning your life choices. Enter the TikTok button scroller, a revolutionary little gadget that’s here to save your sanity (and your thumbs) from the tyranny of endless swiping.

What is the button scroller?

These handy devices come in various shapes and sizes, but they all share a common goal: automate your TikTok scrolling. Some models clip onto your phone, while others resemble rings or even fidget spinners. They typically have buttons or levers that, when pressed, automatically scroll down the TikTok feed. Some even offer features like auto-liking, pausing videos, and adjusting the scrolling speed.

TikTok button scroller

Why use it?

The benefits of using a TikTok button scroller are numerous:

  • Reduced fatigue: No more sore thumbs or tired fingers! Let the scroller do the work while you relax and enjoy the content.
  • Increased efficiency: Scroll through your feed faster and never miss a beat. You can even multitask while the scroller takes care of the scrolling.
  • Improved accessibility: For people with hand injuries or limited dexterity, a scroller can be a game-changer, making TikTok accessible and enjoyable once again.
  • Added fun: Let’s face it, gadgets are fun! Using a scroller adds a playful element to your TikTok experience.

Is it right for you?

If you’re a dedicated TikTok user who spends hours scrolling through the feed, then a button scroller is definitely worth considering. It’s also a great option for anyone who experiences hand fatigue or has difficulty using their hands for extended periods. However, if you’re a casual user who only watches TikTok occasionally, you might not find the need for this gadget.

Things to consider before buying:

  • Price: Button scrollers range in price from around $10 to $50, depending on the features and brand.
  • Compatibility: Make sure the scroller you choose is compatible with your phone model.
  • Features: Decide which features are important to you, such as auto-liking or adjustable speed.
  • Reviews: Read online reviews to get an idea of how well different scrollers work.

The Final Scroll

The TikTok button scroller is a clever little invention that can make your TikTok experience more enjoyable and effortless. If you’re tired of scrolling fatigue, give one a try and see if it becomes your new favorite gadget. Just remember to look up occasionally and give your eyes a break!

Have you tried a TikTok button scroller? Share your thoughts and experiences in the comments below!

Overall, the TikTok button scroller is a fun and practical gadget that can make your TikTok experience more enjoyable and save your thumb from a world of pain. Just remember, like any tool, use it responsibly and avoid getting sucked into the TikTok vortex for too long (unless, of course, that’s your goal). Now, go forth and scroll, but do it with care, and a happy thumb!

Do you have any experience with TikTok button scrollers? Share your thoughts and recommendations in the comments below!

Easy French Manicure Tips And Techniques

Mastering the Art of Elegance: Top Techniques for a Flawless French Manicure

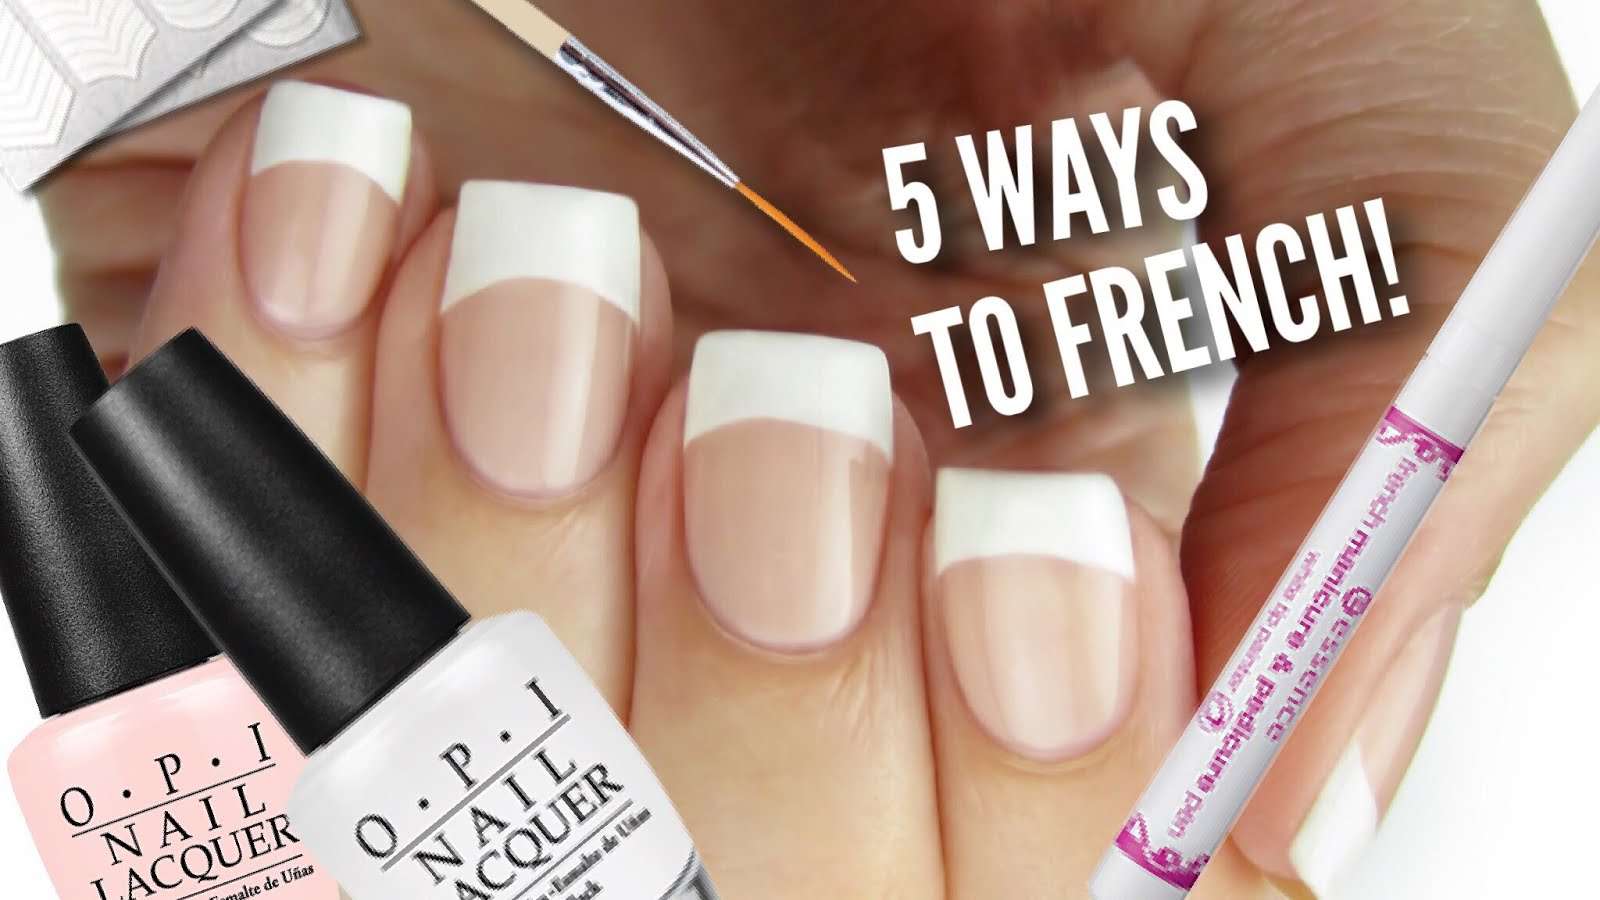
A French manicure is a popular and timeless nail design that gives a clean, polished, and sophisticated look. French Manicure tips are a versatile design that can be worn for any occasion, and it’s surprisingly easy to achieve with the right techniques. To achieve the perfect French manicure, you’ll need to follow a few simple steps. First, you’ll need to prepare your nails by cleaning and filing them to the desired shape.

Then, you’ll need to apply a base coat to protect your nails and provide a smooth surface for the polish. Next, you’ll apply a sheer pink or nude polish to the entire nail bed. You can choose any shade of pink or nude that complements your skin tone. After the base coat dries, you’ll need to apply white polish to the tips of your nails. You can use a white nail polish or a French manicure kit that comes with white nail polish and a tip guide.

Once you’ve applied the white polish, you’ll need to carefully remove the tip guide and allow the polish to dry completely. After the polish is dry, you can apply a topcoat to protect the polish and give your nails a glossy finish.Whether you’re a seasoned nail polish pro or a curious newbie, following these steps will help you achieve the perfect French manicure.

Essential Tools For French Manicure Tips:

  • Base coat: Protects your nails and provides a smooth canvas.
  • White nail polish: Opt for a true white, not off-white, for a crisp line.
  • Clear or sheer pink nail polish: Choose a shade that complements your skin tone.
  • Top coat: Seals the polish and adds shine.
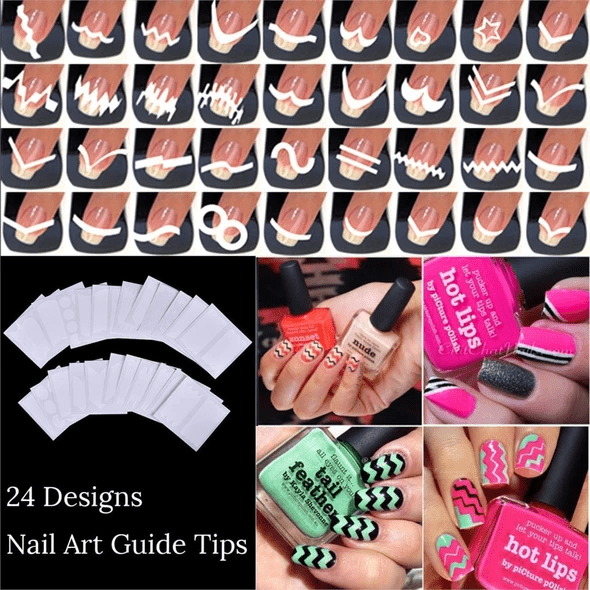
  • French manicure guides (optional): These are usually stickers that will provide a perfect template for the white tips.
  • Cotton swabs and nail polish remover: These items will be used for clean-up.
French Manicure Tips

Classic French Manicure tips can be achieved with several methods:

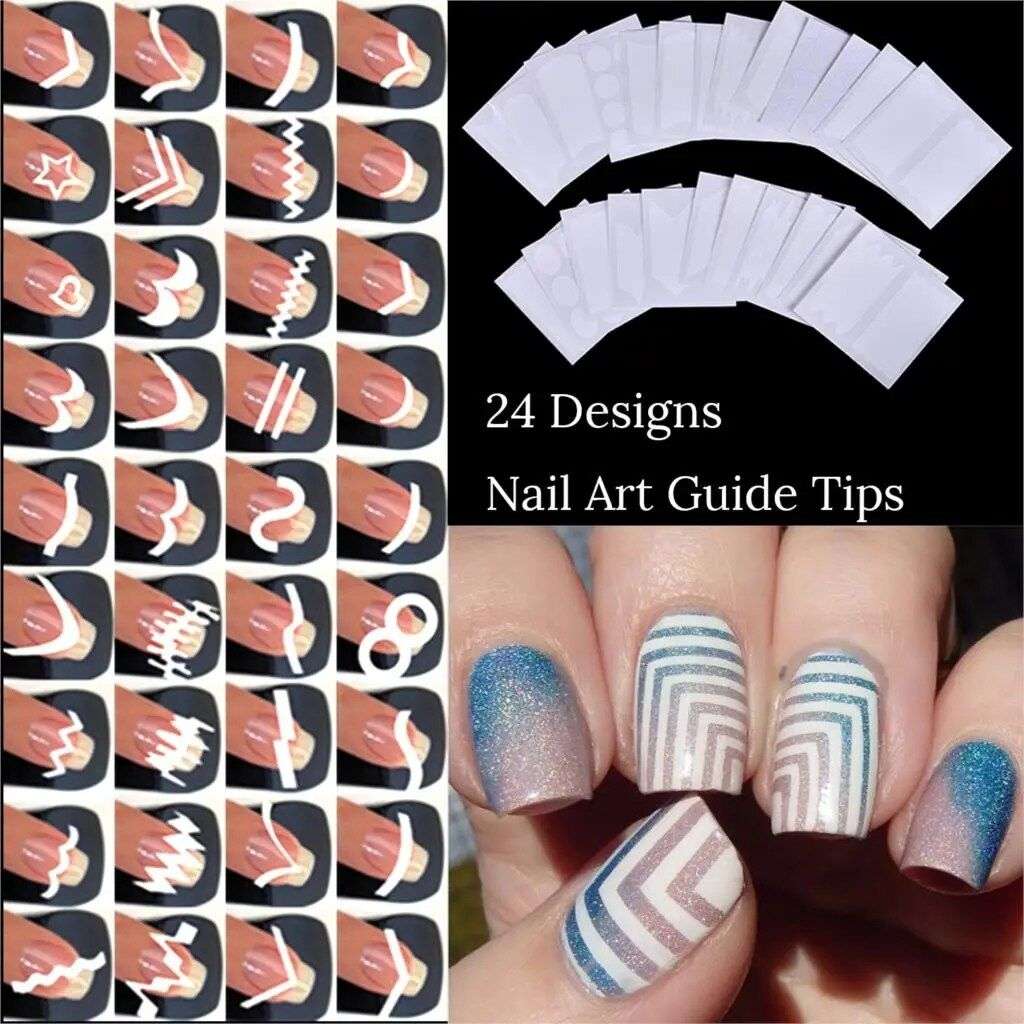
Guides: Pre-cut adhesive stickers in various shapes guide polish application, ensuring perfect lines, ideal for beginners.

Stamps: Special nail stamps with white tip designs allow for quick and precise application, suitable for those who struggle with freehand or guides.

Airbrushing: Professional nail artists may use airbrushing for a flawless, even finish, though this requires specialized equipment and training.

Reverse French: Instead of the traditional white, for modern French manicure tips, the base of the nail is painted in a contrasting color, leaving the tips bare or nude.

Color Variations: Experiment with colored tips instead of white for a modern twist, like pinks, nudes, or metallics.

French Manicure Tips

Technique 1: Freehand Finesse

Experienced nail artists can paint the white tips directly onto the nail, requiring a steady hand and practice.

  1. Apply a base coat and let it dry completely.
  2. Using the white polish, paint a thin crescent moon shape at the tip of each nail. Start with the center and work your way outwards.
  3. If you wobble, don’t panic! Dip a cotton swab in nail polish remover and gently clean up any mistakes.
  4. Repeat step 2 and 3 for a thicker, more opaque white tip.
  5. Once the white is dry, apply your chosen pink or clear polish to the entire nail bed.
  6. Finish off your french manicure tips off with a top coat for extra shine and protection.

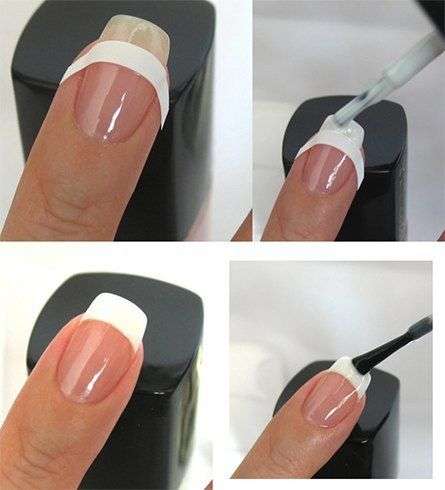
Technique 2: Sticker Stencils for Perfect Tips

  1. Apply a base coat and let it dry.
  2. Carefully peel and place the French manicure tips guide on your nails, ensuring they’re positioned correctly.
  3. Paint the white polish over the exposed nail tips, following the guide’s edge.
  4. Gently remove the stickers while the white polish is still wet.
  5. Apply your chosen pink or clear polish to the entire nail bed.
  6. Finish with a top coat for extra shine and protection.

No matter the method, flawless French manicure tips require clean nails, base coat, white tip polish, top coat, and careful cleanup. With practice and these techniques, you can achieve salon-worthy results at home!

Perfect Gel French Manicure Pro Tips:

  • Use thin coats of polish and let each layer dry completely before applying the next.
  • Apply light pressure with the brush for a cleaner line.
  • Clean up any smudges around the cuticles with a cotton swab dipped in nail polish remover.
  • Don’t be afraid to experiment with your French manicure tips and nail designs! Try different white and pink shades, or even metallic tips for a twist on the classic.

With a little practice and these helpful techniques, you’ll be a French manicure master in no time! So grab your tools, unleash your inner artist, and get ready to rock those elegant fingertips.

Bonus: For extra long-lasting wear, consider getting gel French manicure tips at a nail salon. Share your favorite French manicure tips and tricks in the comments below!

Happy polishing!

Quick And Easy Christmas Breakfast Ideas

Christmas morning is a time for magic, anticipation, and of course, delicious food! While gifts and decorations are exciting, nothing quite sets the tone for a joyous holiday like a warm and inviting breakfast. But with so many options, choosing the perfect Christmas morning feast can be overwhelming.
Fear not, fellow holiday foodies, for this blog post is here to fuel your festive feast with a sleigh-full of delicious and delightful Christmas breakfast ideas. These goodies will tantalize your taste buds and will have everyone gathered around the table in no time!

Deck the Halls with Christmas Breakfast Delights: Festive Morning Ideas

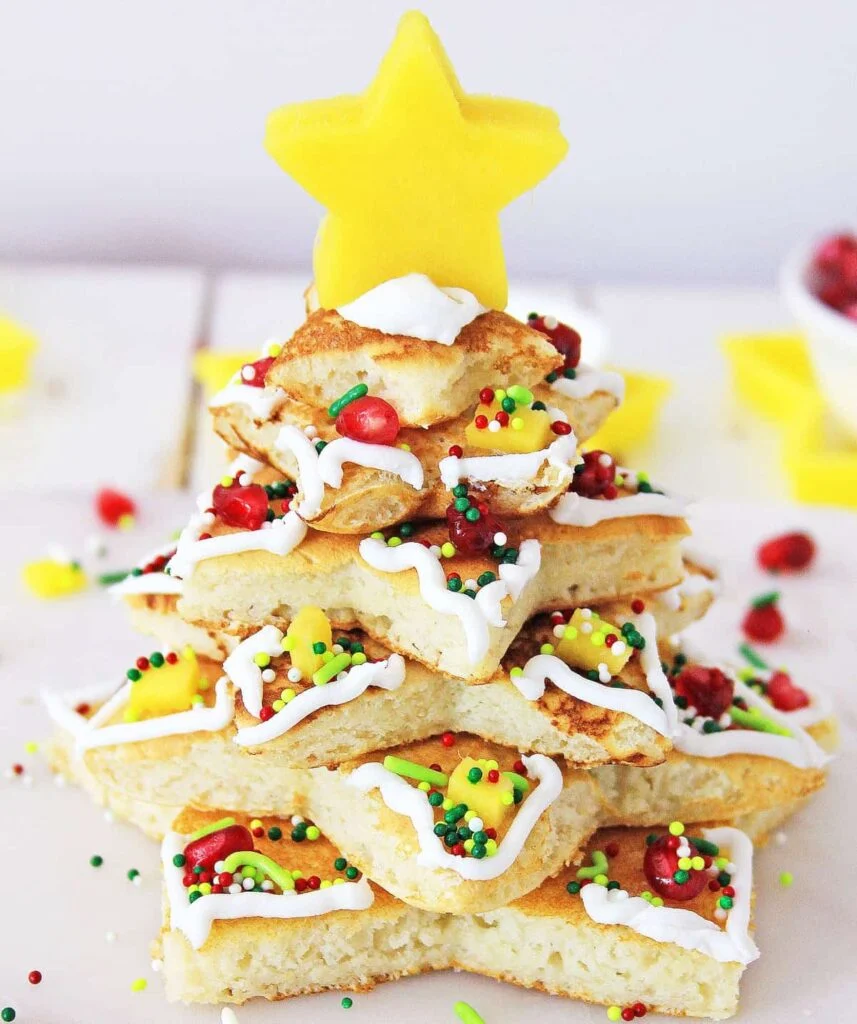
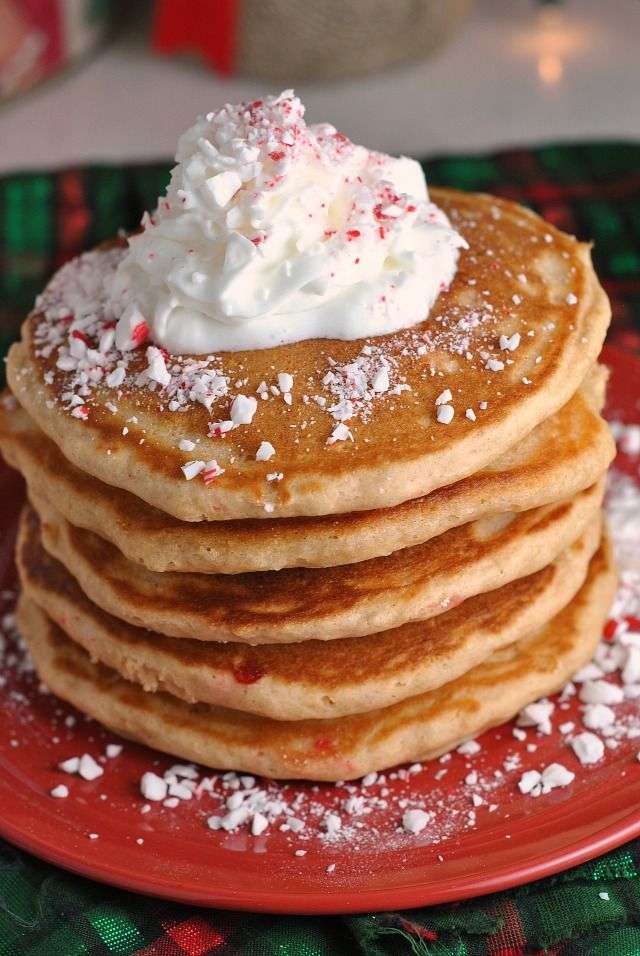
Christmas breakfast Peppermint pancakes

Classics with a Twist:

  • Peppermint Pancakes: Add a festive touch to your fluffy pancakes with a swirl of peppermint extract in the batter and a drizzle of peppermint syrup. Top with fresh berries and whipped cream for a breakfast that’s as merry as it is delicious!
  • Eggnog French Toast: Elevate your usual French toast with a dunk in eggnog custard before a generous sprinkle of cinnamon and a dollop of whipped cream. It’s like Christmas in every bite!
  • Candy Cane Bacon: Take your bacon game to the next level with a sprinkle of crushed candy canes before frying. The sweet and salty combo is surprisingly addictive!
Sweet Treats to Start the Day:

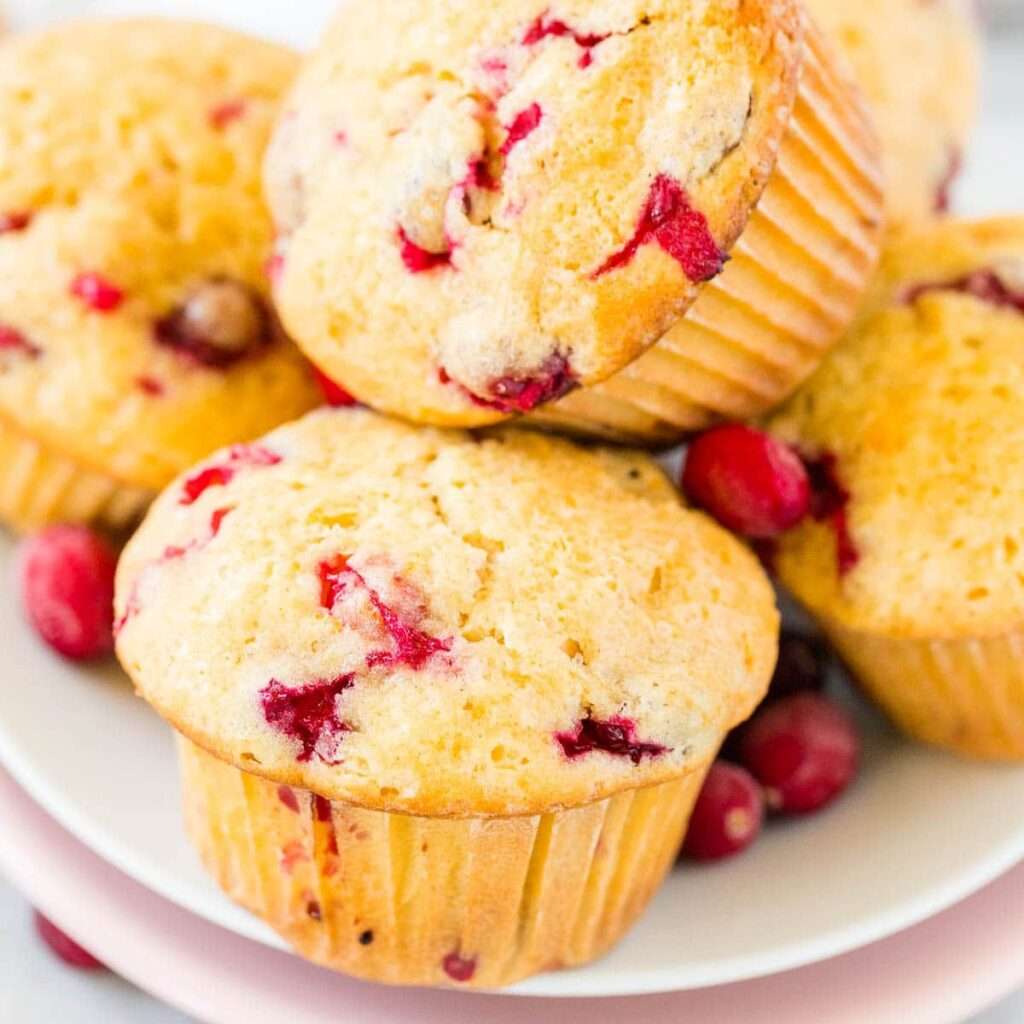
  • Cranberry Orange Muffins: These muffins are bursting with the flavors of Christmas with their tart cranberries, sweet orange zest, and a hint of warm spices. They’re perfect for grabbing on the go or enjoying with a steaming cup of cocoa.
  • Gingerbread Waffles: Give your waffles a festive makeover with gingerbread spice and molasses. Top them with whipped cream, a drizzle of maple syrup, and a sprinkle of gingerbread cookie crumbs for an extra special treat.
  • Cinnamon Roll Casserole: This overnight casserole is a lifesaver for busy mornings. Layers of gooey cinnamon rolls, cream cheese, and pecans create a decadent breakfast that’s sure to please everyone.

Something Savory for the Early Birds:

  • Breakfast Sausage Wreath: Form your breakfast sausage into a wreath and bake it in the oven. Once cooked, fill the center with scrambled eggs, cheese, and your favorite toppings. It’s a fun and festive way to serve up a hearty breakfast.
  • Smoked Salmon Bagels: Elevate your usual bagel and lox with smoked salmon, cream cheese, capers, red onion, and fresh dill. It’s a sophisticated and satisfying way to start the day.
  • Frittata with Roasted Vegetables: This dish is packed with flavor and nutrients. Roast your favorite vegetables like peppers, onions, and potatoes, then combine them with eggs, cheese, and herbs in a frittata pan. It’s a hearty and healthy option that’s perfect for a crowd.

For the Classic Connoisseur:

  • Cinnamon rolls with cream cheese frosting: A timeless treat that’s as easy to make as it is to devour. Pro tip: whip up a batch of homemade frosting for an extra touch of holiday magic.
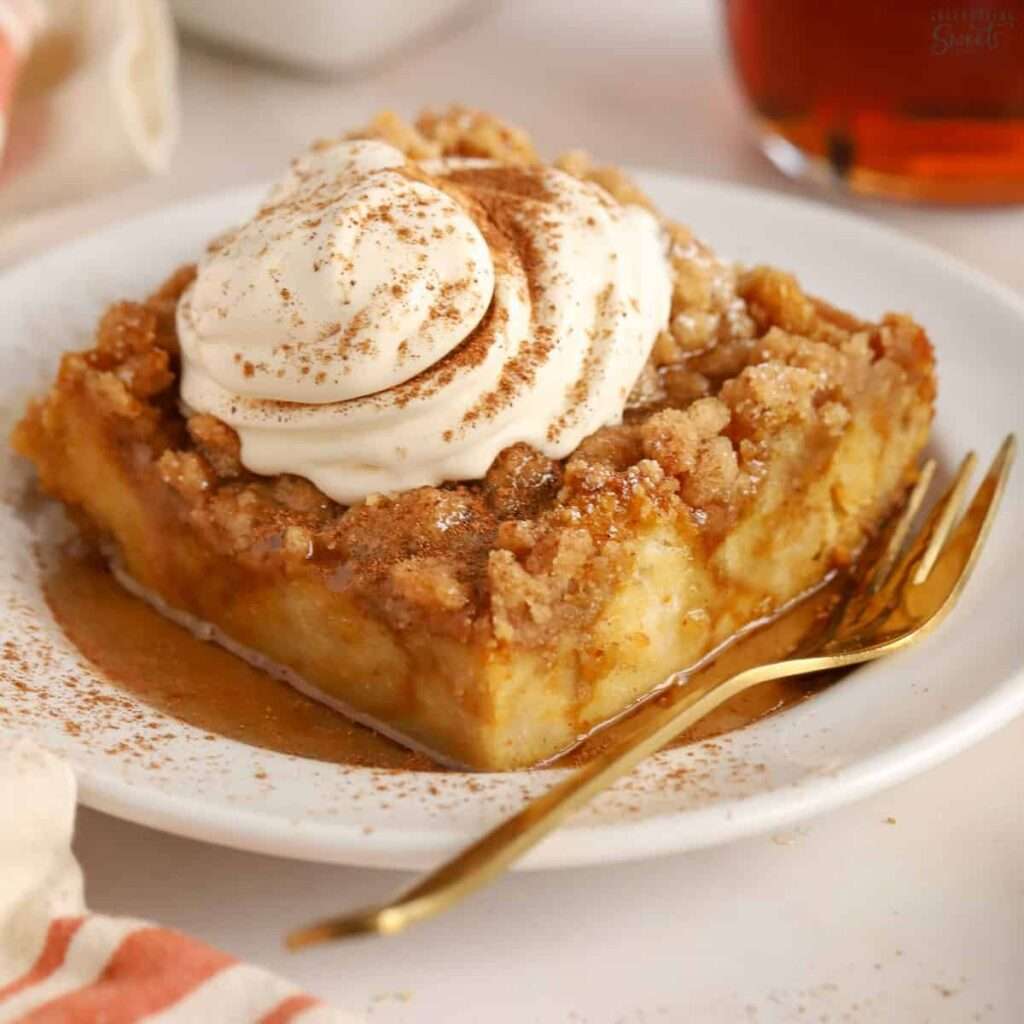
  • French toast casserole: This overnight wonder is a lifesaver for busy mornings. Layers of bread, eggnog, and spices bake up into a gooey, golden dream. Top with fresh berries and maple syrup for a breakfast that’s both decadent and delightful.
  • Scrambled eggs with smoked salmon and chives: This elegant dish is perfect for a special Christmas brunch. The rich, smoky salmon pairs beautifully with the creamy eggs, while the chives add a touch of festive freshness.

For the Adventurous Eater:

  • Shakshuka with chorizo and peppers: This spicy North African dish is a vibrant way to wake up your taste buds. Serve it with crusty bread for dipping and scooping up all that delicious tomato sauce.
  • Sweet potato pancakes with cranberry pecan topping: These fluffy pancakes are a healthy and festive twist on a classic breakfast. The sweet potato adds a touch of natural sweetness, while the cranberry pecan topping bursts with tart and nutty goodness.
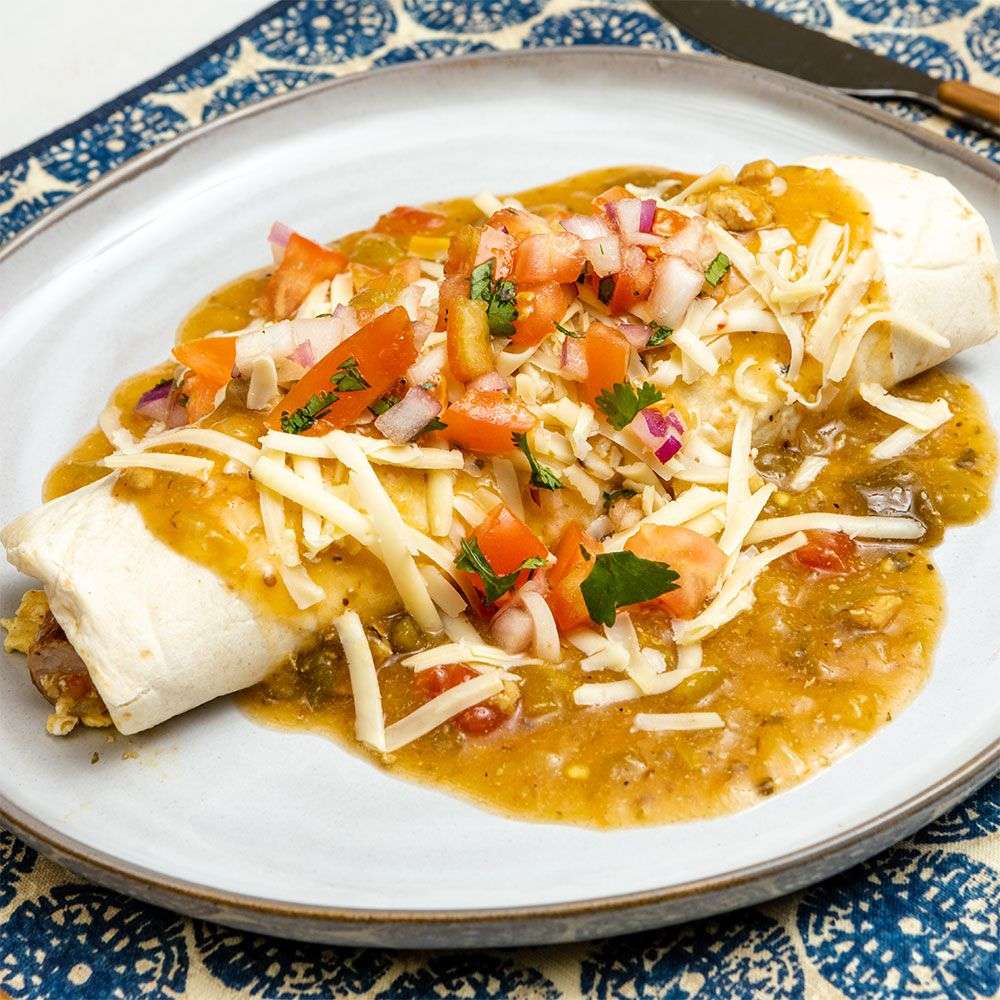
  • Breakfast burritos with green chile and chorizo: These hearty burritos are packed with flavor and perfect for a fuel-up before a day of gift-giving. The green chile adds a touch of heat, while the chorizo provides a satisfyingly savory punch.

For the Time-Crunched:

  • Smoothies with gingerbread cookies and eggnog: This quick and easy breakfast is perfect for those mornings when you’re short on time. Simply blend together your favorite ingredients and enjoy a healthy and festive sip.
  • Baked oatmeal with berries and nuts: This make-ahead breakfast is a lifesaver for busy mornings. Simply assemble the ingredients the night before, pop it in the oven, and wake up to a warm and satisfying breakfast.
  • Yogurt parfaits with granola, fruit, and honey: This customizable breakfast is perfect for satisfying any taste bud. Layer your favorite yogurt, granola, fruit, and honey for a healthy and delicious start to your day.

Bonus Tip: Don’t forget the festive touches! Set the table with a festive tablecloth and serve your breakfast on holiday-themed plates and napkins. Set out a bowl of candy canes for dipping, and let the Christmas carols fill the air. Light some candles and play some holiday music to create a truly magical atmosphere. After all, it’s the little things that make Christmas morning truly special.

No matter what your taste or dietary needs, there’s a perfect Christmas breakfast out there waiting to be discovered. So, get creative, have fun, and most importantly, savor the joy of sharing a delicious meal with loved ones. Merry Christmas and happy eating!

I hope this blog post has inspired you to create a Christmas breakfast that’s as merry and bright as the holiday itself. Now go forth and spread holiday cheer, one delicious bite at a time!

Festive Holiday Drinks For The Whole Family

Christmas is a time for gathering around the fire, sharing stories, and indulging in delicious treats. And what better way to warm your spirits than with a steaming mug of something festive and flavorful? Ditch the eggnog and spiked cider this year, and explore these delightful holiday drinks that are non-alcoholic options that everyone can enjoy:

Festive Holiday Drinks That Are Non-Alcoholic

mulled cider

Classic Cozy Delights:

  • Mulled Cider: This timeless favorite is a must-have for any Christmas breakfast celebration. To create these holiday drinks simmer apple cider with cinnamon sticks, cloves, star anise, and orange peel for a fragrant and heartwarming drink.
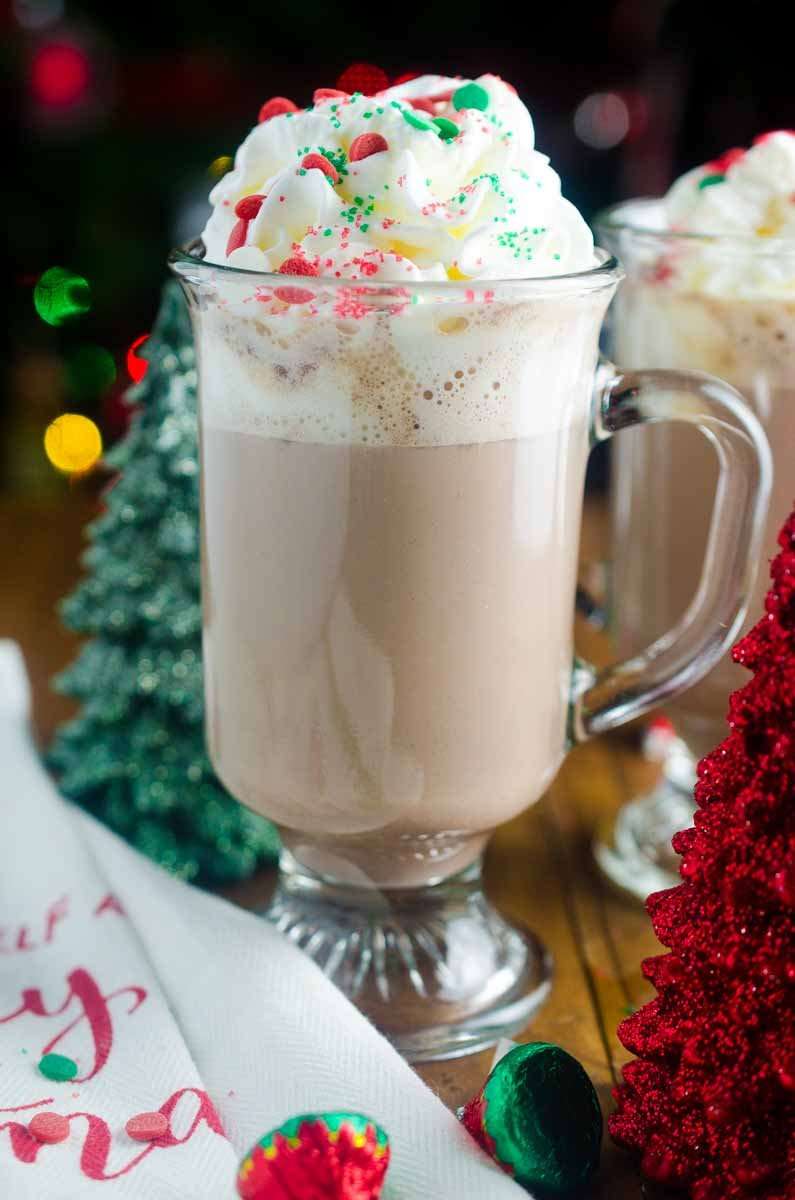
  • Hot Chocolate: Who can resist a mug of rich, creamy hot chocolate? Spice things up with a pinch of cayenne pepper or chili powder for a grown-up twist. Don’t forget the marshmallows and whipped cream for your drink toppers!
  • Spiced Pear and Cranberry Tea: This is a fragrant tea that is packed with antioxidants and festive flavors. Steep black tea with pear slices, cranberries, cinnamon, and ginger for a warm and comforting beverage.
  • Spiced Chai Tea Latte: Give your chai latte a holiday makeover this Christmas with warming spices like cinnamon, cardamom, and ginger. Add a splash of almond milk or vanilla extract for extra creaminess in your holiday drinks.
Sparkling Pomegranate mocktail holiday drinks

Fruity and Refreshing:

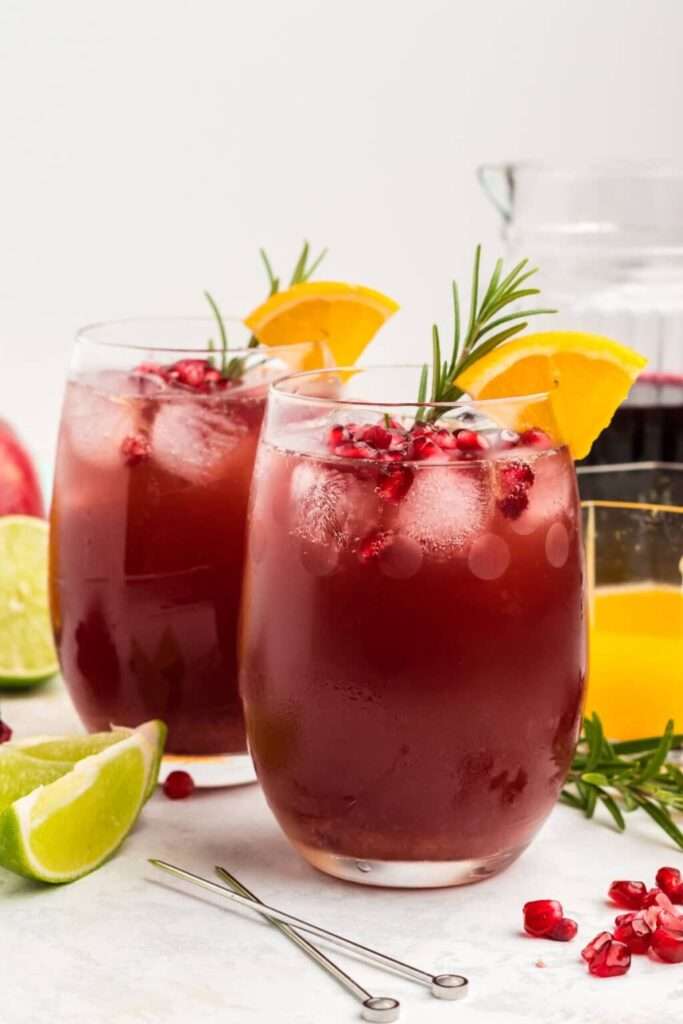
  • Sparkling Pomegranate Mocktail: This bubbly mocktail is perfect for celebrating with friends and family. Mix pomegranate juice with sparkling water, a squeeze of lime, and a sprig of rosemary for a sophisticated and delicious drink.
  • Cranberry Orange Punch: This vibrant punch is bursting with vitamin C and holiday cheer. Combine cranberry juice, orange juice, sparkling water, and a splash of grenadine for a festive and refreshing drink.
  • Peppermint Hot Chocolate Smoothie: This creamy smoothie is a fun and festive twist on classic hot chocolate. Blend together milk, banana, cocoa powder, peppermint extract, and ice for a refreshing and satisfying treat.
  • Cranberry Pear Hot Toddy: This holiday drink is a little bit tart and tangy. These holiday drinks are perfect for a cold winter day. Muddle cranberries with honey and ginger, then pour over hot apple cider with a splash of pear juice. Garnish with a fresh cranberry.
image

Warm and Comforting:

  • Vanilla Bean Latte: This creamy latte is a luxurious way to start your Christmas morning. Steam milk with vanilla extract and a touch of honey, then pour it over your favorite espresso or strong coffee.
  • Cinnamon Milk with Dates: This creamy and nostalgic drink is perfect for a cozy Christmas night. Warm milk with cinnamon sticks and dates for a naturally sweet and comforting beverage.
  • Caramel Apple Cider: This decadent cider is a treat for the senses. Simmer apple cider with brown sugar, cinnamon, and vanilla extract, then top with a dollop of whipped cream and a drizzle of caramel sauce.
  • Eggnog: This rich and creamy custard drink is a holiday tradition for many. Make your own from scratch or opt for a store-bought version, and top it with grated nutmeg for a festive touch.
  • Cinnamon Apple Cider: This naturally sweet and refreshing drink is perfect for those who prefer something lighter. Simply simmer apple cider with cinnamon sticks for a warm and healthy treat.

No matter your taste preferences, there’s a non-alcoholic holiday beverage out there to warm your heart and spread holiday cheer. So grab your mugs, gather your loved ones, and get ready to toast to a merry and delicious Christmas! Of course you can add alcohol if it’s an item on your holiday drink Christmas list.

Bonus Tip: For an extra festive touch, garnish your drinks with cranberries, orange slices, cinnamon sticks, or sprigs of rosemary. You can also set out a variety of spices and syrups for guests to personalize their drinks.

How To Create A Podcast Using Your Niche

From Brainstorm to Boom:

Your Guide to Launching a Captivating Podcast

This guide is here to help you take your passion to the next level. It will provide you with constructive steps to brainstorm and create a podcast. Are you a fan of podcasts and interested in creating your own? You’re in luck! Podcasts have become increasingly popular due to their engaging storytelling and diverse voices. With this guide, you’ll be one step closer to sharing your unique voice with the world through the power of podcasting.

Step 1: Ignite the Spark – Find Your Niche

  • Passion first: Before you create a podcast you need to factor in a few things. What are you genuinely excited to talk about? Whether it’s true crime, space exploration, or crocheting, your enthusiasm will fuel your content and resonate with listeners.
  • Target your tribe: Who are you hoping to reach? Defining your audience helps tailor your show’s format, tone, and topics. By identifying your target audience, you can create content that resonates with them on a deeper level. Knowing their demographics, interests, and preferences will help you craft a show that appeals to their specific needs and desires. This, in turn, can help you build a loyal following and ultimately achieve success in your podcasting endeavors.
  • Unique angle: What fresh perspective can you bring to your niche? Stand out from the crowd by offering a unique twist or actionable insights. In order to distinguish yourself from competitors in your chosen field, it’s important to provide a fresh perspective that sets you apart. This can be achieved by offering a unique angle or by providing valuable insights that can be put into action. So if you’re looking to make an impact and stand out from the crowd, consider what you can bring to the table that hasn’t been done before.

Step 2: Craft Your Masterpiece – Build Your Show

  • Forge a catchy title: When you create a podcast first impressions matter! Choose a title that’s memorable, reflects your show’s essence, and piques curiosity.
  • Format your flow: Will it be solo storytelling, engaging interviews, or dynamic co-hosts? Experiment with different formats to find the one that sparks your creative fire.
  • Outline your episodes: Plan themes, topics, and guest ideas for at least the first few episodes. This creates a roadmap for your content and ensures consistency.
How to create a podcast

Step 3: Gear Up for Glory – Tech and Tools

  • Recording equipment: Start with a decent microphone and headphones. Invest in quality audio as it’s the foundation of your podcast’s professional feel.
  • Editing software: Free or paid options abound, from Audacity to Descript. Choose one that suits your budget and editing comfort level.
  • Hosting platform: Find a reliable platform like Anchor or Buzzsprout to upload, distribute, and track your podcast.

Step 4: Spread the Word – Create A Podcast Launch and Promote

  • Captivating trailer: Create a short, punchy trailer that encapsulates your show’s essence and hooks listeners. Share it on social media and your website.
  • Network and connect: Reach out to potential guests, fellow podcasters, and relevant online communities. Building relationships expands your reach and strengthens your presence.
  • Social media savvy: Engage with your audience on platforms like Instagram and TikTok. Share snippets, behind-the-scenes moments, and interact with comments.
How to create a podcast

Step 5: Embrace the Journey – Keep Learning and Growing

  • Analyze and adapt: Track your podcast’s performance using analytics tools. See what resonates with your audience and adjust your content accordingly.
  • Seek feedback: Encourage listeners to leave reviews and offer constructive criticism. Openness to feedback helps you refine your show and cater to your audience’s needs.
  • Collaborate and evolve: Partner with other creators for cross-promotion, guest appearances, or even co-hosted episodes. Collaboration keeps things fresh and expands your reach.

Remember, launching a successful podcast takes dedication, passion, and a touch of strategic planning. So, grab your ideas, a dash of creativity, and get ready to share your voice with the world. The microphone awaits, future podcast star!

Bonus Tip: Consistency is key! Commit to a regular upload schedule and stick to it. Your loyal listeners will thank you for the steady stream of content.

Now, go forth and create a podcast! The world needs your voice and your unique story. Happy recording!

10 Popular Setting Lotions For Roller Sets

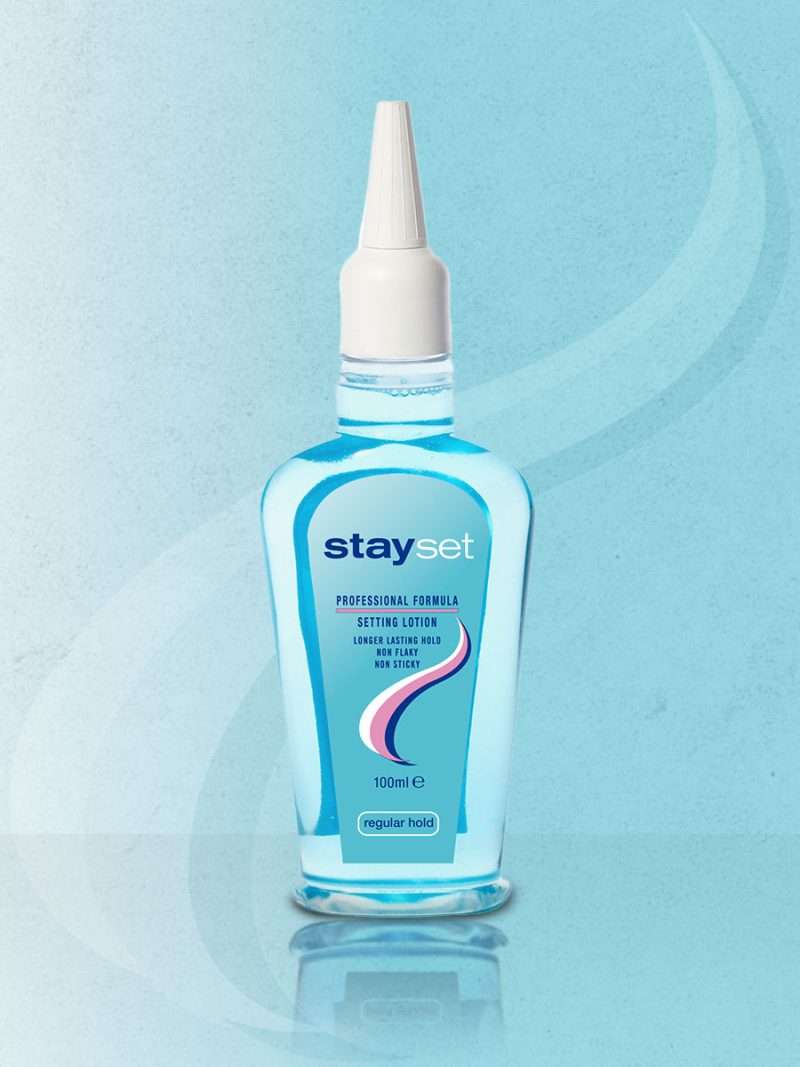
Lotta Body Setting Lotion

Top 10 Setting Lotions for Roller Sets on Natural Hair:

  1. Lottabody Setting Lotion: This classic favorite offers strong hold without weighing down your curls. It’s available in different strengths and works well on all hair types.
  2. Tgin Honey Curls Custard: This rich custard defines and holds curls while adding moisture and shine. It’s ideal for looser curl patterns and thicker hair.
  3. KeraCare Foam Wrap Set Lotion: This lightweight foam penetrates the hair cuticle for deep conditioning and heat protection. It provides flexible hold and enhances curl definition.
image
  1. Maui Moisture Flexible Hold + Coconut Milk Curl Foam Mousse: This hydrating mousse provides medium hold and definition without leaving crunch or frizz, making it ideal for fine hair textures and looser curl patterns. Plus, it contains coconut milk, which helps to nourish and moisturize your curls, leaving them looking healthy and bouncy.
  2. Design Essentials Define & Shine 2 N 1 Dry Finishing Lotion: This versatile lotion adds shine, tames frizz, and refreshes curls without weighing them down. It’s a great option for touch-ups and second-day hair.
  3. Mielle Avocado Moisturizing Hair Milk: This lightweight milk detangles, hydrates, and defines curls without flaking or buildup. It’s a great option for dry or delicate hair.
setting lotions
  1. Black Earth Taliah Waajid Crinkles & Curls: This concentrated setting lotion packs a punch, offering long-lasting hold and curl definition. It’s ideal for thick or coarse hair and tighter curl patterns.
  2. SheaMoisture Manuka Honey & Mafura Oil Wrap & Set Mousse: This nourishing mousse conditions, defines, and holds curls while adding shine and fighting frizz. It’s ideal for all hair types and curl patterns.
  3. Nubian Heritage Heat Protectant Keratin Wrap Mousse: This mousse protects hair from heat damage while setting and defining curls. It’s ideal for those who regularly use heat styling tools.
  4. Jane Carter Solution Wrap & Roll: This lightweight gel defines and holds curls while adding moisture and shine. It’s a great all-around option for all hair types and curl patterns.

Remember, the best setting lotion for you will depend on your hair type, curl pattern, and desired hold. Experiment with different options to find your perfect match!

Bonus Tip: Always apply a leave-in conditioner before using a setting lotion to prevent dryness and breakage.

How To Do Simple Roller Sets On Natural Hair

Roller Set Magic: Achieving Defined Curls on Natural Hair

Natural hair, with its beautiful texture and endless possibilities, can sometimes be a challenge to style. But fear not, curly queens! Roller sets are here to your rescue, offering a gentle, heat-free way to achieve those coveted defined curls.

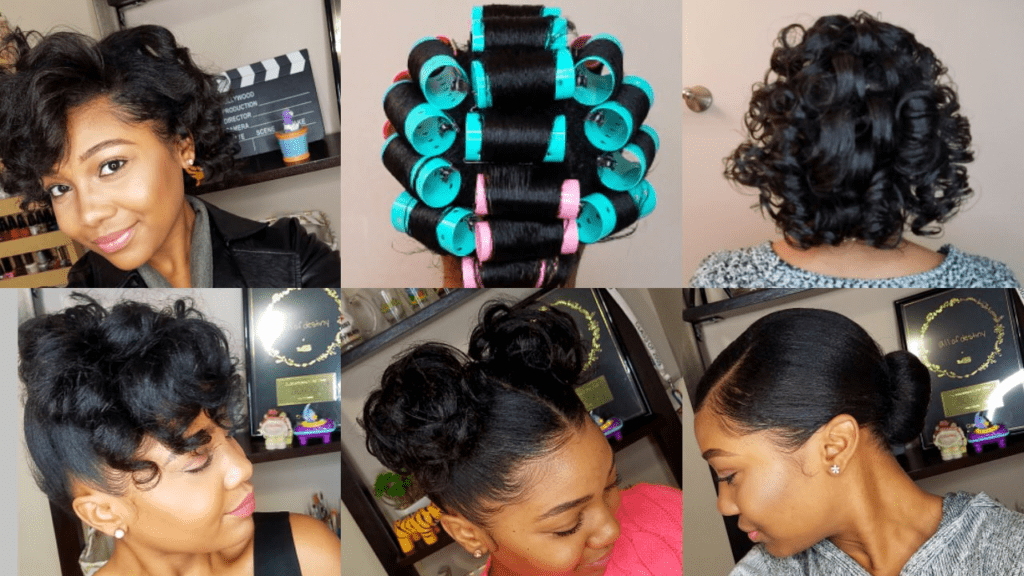
Craving those defined, bouncy curls without the heat damage? Look no further than the roller set! This tried-and-true technique has been around for ages, and for good reason – it’s a versatile and effective way to achieve stunning curls on natural hair without subjecting your strands to the harsh effects of hot styling tools.

roller set

But before you grab those rollers and dive in, let’s break down the process into manageable steps to ensure you achieve roller set success on your natural hair: Ready to transform your strands into a masterpiece of coiled perfection? Let’s get rolling!

Before You Begin:

  • Prep your hair: Cleanse and condition your hair with products designed for natural textures. Deep conditioning beforehand can add extra moisture and prevent breakage.
  • Detangle with love: Gently detangle your hair while it’s still wet to avoid breakage. Wide-tooth combs and detangling sprays are your best friends.
  • Section smart: Divide your hair into manageable sections for easier rolling. Clips or hair ties will be your allies.
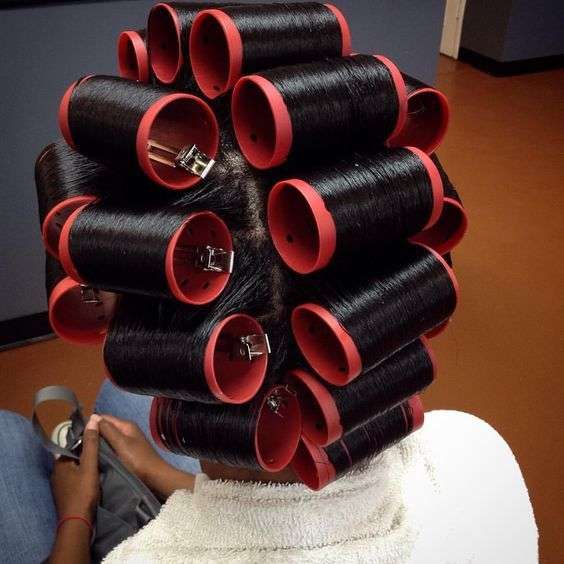
Pin by Bobbydan Emerson on Rare Vintage Pics of Rollers, Rods in Nets ...

Choosing Your Rollers:

  • Size matters: The size of your hair rollers determines the tightness of your curls. If you want a set of loose waves, choose larger rollers for your set. For more tighter ringlets, opt for smaller ones.
  • Material matters: Choose hair rollers that won’t snag or damage your hair. Foam rollers are gentle and versatile, while flexi-rods offer flexibility and hold.

Rolling Technique:

  1. Work with damp hair: Apply a leave-in conditioner or styling cream to define your curls and prevent frizz. Setting lotion is the most popular option for creating a smooth, frizz free hairstyle that is voluminous with a shiny finish.
  2. Start at the ends: Take a small section of hair and twist it around your finger to create a curl shape.
  3. Roll and secure: Place the curl base onto the roller and roll it towards your scalp, gently securing it with a clip or bobby pin.
  4. Repeat and refine: Continue rolling sections throughout your head, ensuring even distribution and consistent curl direction.
image

Setting and Sealing:

  • Let it sit: Allow your rollers to work their magic for a few hours, or overnight for maximum curl definition. After your hair is completely rolled place a bonnet or covering over your hair. If you are in a rush you can sit under a hooded dryer or blow drying cap to speed up the drying process. allow your hair rollers to cool after using this method to let the curls set properly before removing the hair rollers.
  • Diffusing is optional: If you’re short on time, use a diffuser on a low heat setting to gently dry your hair.
  • Seal the deal: Apply a holding gel or mousse to lock in your curls and prevent frizz.

Roller Set Revelations:

  • Experiment with different roller sizes and patterns for a variety of curl styles.
  • Moisturize regularly to keep your curls healthy and prevent dryness.
  • Sleep in a satin or silk scarf to minimize friction and maintain your curls overnight.

With a little practice and these handy tips, you’ll be a roller set pro in no time! So, grab your rollers, unleash your inner curl queen, and embrace the beautiful, defined texture of your natural hair!

Bonus Tip: Check out YouTube tutorials for visual guidance and inspiration! There are countless talented natural hair vloggers ready to share their roller set secrets.

Remember, confidence is the best accessory! Rock your natural curls with pride and enjoy the endless possibilities of roller set magic!

5 Popular IMVU Events And Fashion Shows

In the ever-evolving world of IMVU events, where your avatar is your canvas and fashion is the language, events are where the magic truly happens. From dazzling fashion shows to pulsating dance parties, there’s something for every style and mood in this virtual playground. So, ditch the solo room decor and dive into the vibrant world of IMVU events!

Dress Up and Dance It Out: The Most Popular IMVU Events To Elevate Your Virtual Life

1. Fashion Shows:

Channel your inner Anna Wintour and strut your stuff in IMVU’s iconic fashion shows. These catwalk extravaganzas showcase the latest trends, hottest designers, and jaw-dropping creations from both IMVU and user-generated content. Whether you’re a seasoned designer eager to debut your masterpiece or a fashion enthusiast craving inspiration, these events are front-row seats to their haute couture scene.

IMVU Events

2. Theme Parties:

Prepare to be transported! IMVU’s theme parties are portals to fantastical worlds, from roaring 20s speakeasies to neon-drenched cyberpunk nights. Dress up as your favorite character, participate in themed contests, and mingle with fellow partygoers in immersive virtual landscapes. Get ready to let loose and unleash your inner party animal amidst the dazzling lights and pulsating beats.

IMVU Parties

3. Dance Battles:

Dust off your dancing shoes and get ready to groove! Their dance battles are electrifying competitions where avatars move to the rhythm, battling it out for bragging rights and coveted prizes. Hone your moves, master the hottest trends, and join the electrifying atmosphere as the dance floor becomes a battlefield of rhythm and style.

4. Live Music Events:

Forget canned tunes, IMVU brings the real deal! Live music events feature talented DJs and performers from around the world, spinning tunes and serenading avatars in real-time. Sing along, dance the night away, or simply relax and enjoy the musical journey from the comfort of your virtual seat.

IMVU community events

5. Community Contests:

Showcase your skills and creativity in IMVU’s diverse contests! From room design competitions to selfie challenges, there’s something for everyone to participate in. Win exclusive rewards, gain recognition, and connect with fellow creative minds as you push your boundaries and express yourself in unique ways.

Bonus Tip: Join IMVU’s official forums and social media groups to stay updated on the latest events, connect with fellow players, and discover hidden gems in the virtual world.

So, whether you’re a seasoned gaming veteran or a curious newbie, step out of your room and into the vibrant world of events. Dress up, dance it out, and connect with others – the possibilities are endless in the ever-evolving landscape of IMVU’s virtual festivities.

Ready to experience the magic? Download the app today and discover the joy of connecting, expressing yourself, and celebrating fashion in this unique virtual world!

The IMVU Fashion Game For New Fashionistas

Dress to Impress: IMVU – The Fashion Game Where You Rule the Runway

Forget Candy Crush and Farmville, there’s a new game in town where the stakes are high and the fashion is even higher. Enter IMVU, the virtual world where your wardrobe is your weapon and your avatar is your runway model. Buckle up, fashionistas, because we’re diving into the world of IMVU and exploring why it’s the ultimate playground for your inner fashionista.

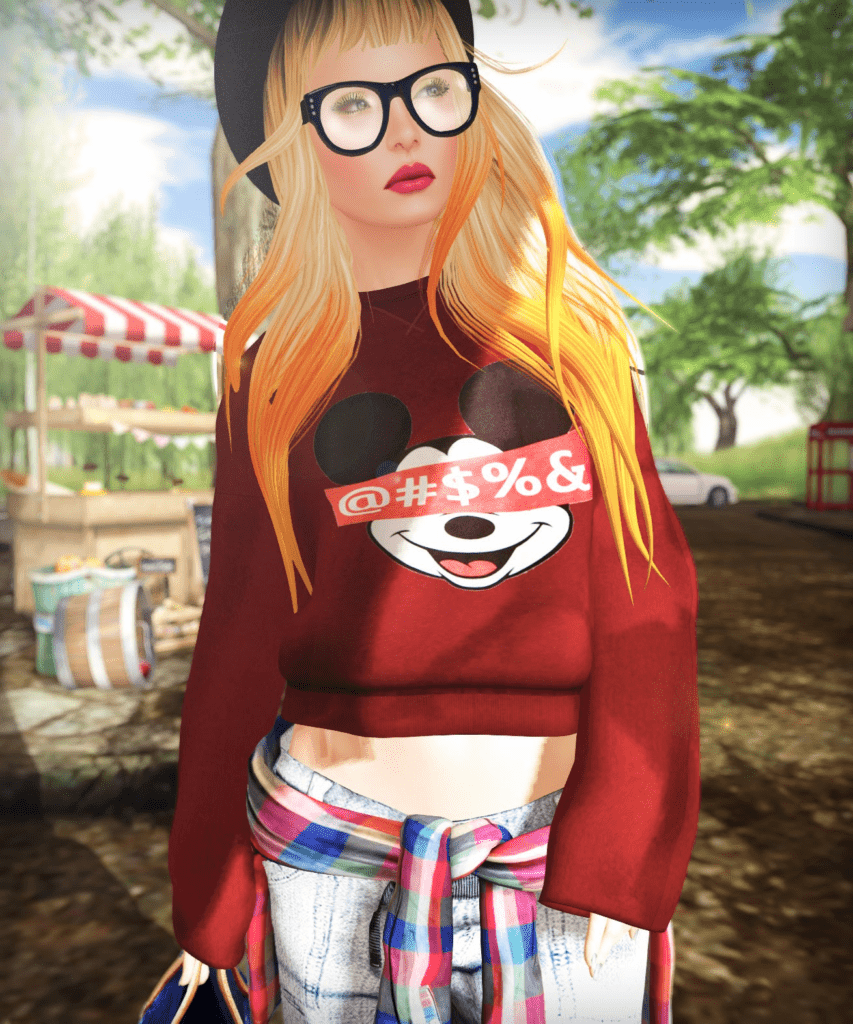
Fashion game models

More Than Just a Dress-Up Game:

IMVU is more than just a digital closet explosion. It’s a vibrant community teeming with creative souls who share your passion for fashion. Here’s what makes it stand out:

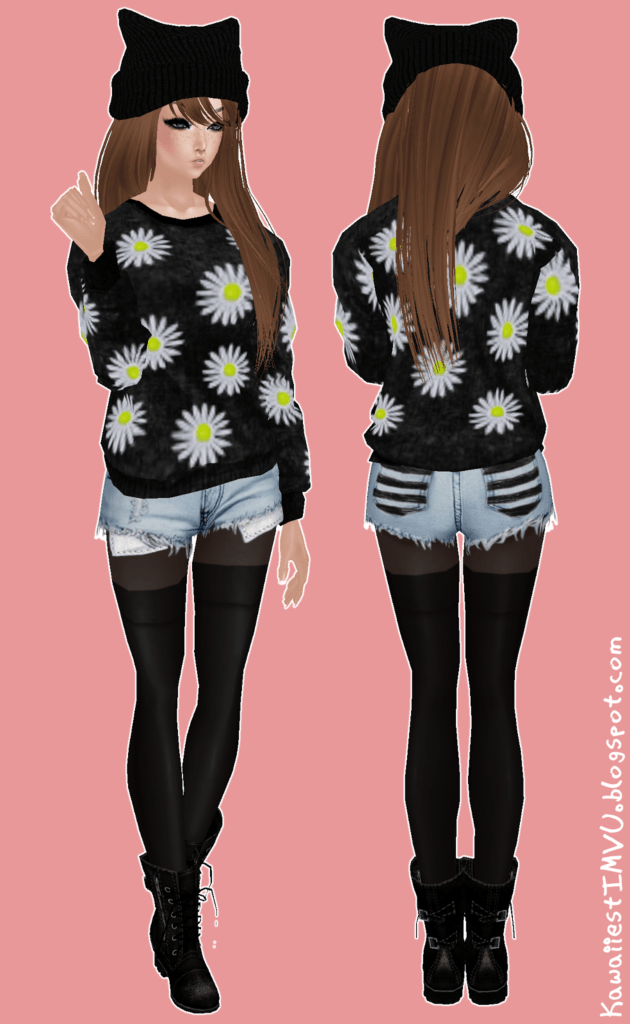
  • Endless Customization: Create your dream avatar from a vast library of features, hairstyles, and accessories. Express your unique style, be it edgy goth, playful kawaii, or sophisticated chic.
  • A Fashion Feast: Explore a mind-boggling ocean of user-created and brand-licensed clothing and accessories. From iconic designer labels to quirky indie finds, there’s something for every taste and budget.
  • Design Your Destiny: Unleash your inner fashion designer! IMVU offers tools to create and sell your own clothing and accessories, transforming your passion into profit.
  • Social Butterfly Playground: Connect with other fashion enthusiasts, strut your stuff in virtual fashion shows, and even host your own events. The community is as diverse and vibrant as the fashion itself.
  • Beyond the Dress: IMVU isn’t just about clothes. Explore virtual rooms, chat with friends, and participate in events like scavenger hunts and dance parties. It’s a full-fledged social experience.
IMVU Outfits

More Than Just Pixels:

IMVU isn’t just a game, it’s a platform for self-expression and creativity. It’s a place where you can:

  • Boost Your Confidence: Experiment with different looks and styles without the real-world pressure. Discover what makes you feel confident and beautiful in your virtual skin.
  • Unleash Your Creativity: Design clothes, decorate rooms, and even create your own fashion shows. This is your canvas, your runway, your world to build.
  • Connect with Like-Minded Souls: Find other fashion lovers who share your passion and understand the thrill of the perfect outfit. Build friendships and collaborations in this unique community.
IMVU Fashion outfits

So, are you ready to step onto the virtual runway and claim your fashion crown? Download IMVU and unleash your inner fashionista. Who knows, you might just discover a hidden talent or make lifelong friends along the way.

Bonus Tip: Check out the “Trending” section in IMVU to discover the hottest new outfits and accessories. You might just find your next obsession!

Remember, fashion is about expressing yourself, and IMVU is the perfect platform to do just that. So go out there, experiment, and have fun!

Happy styling!

New York Style Pizza, A Saucy Slice Of History

A Slice of History: Unraveling the Origins of New York Style Pizza

Ah, New York pizza. Those thin, foldable slices dripping with cheese, the iconic symbol of the city that never sleeps. But where did this culinary masterpiece come from? Buckle up, pizza lovers, because we’re taking a bite out of the Big Apple’s pizza history!

image

From Naples to New York:

The story starts around 1905, when Italian immigrants brought their pizza-making traditions to the bustling streets of New York City. Little Italy, located in Lower Manhattan, became a hotbed for wood-fired ovens churning out Neapolitan-style pizzas. These pies were thicker, with a softer crust and a focus on fresh, local ingredients.

The Rise of the Slice:

But New Yorkers, ever the efficient bunch, craved a faster, more portable way to enjoy their pizza. Enter the visionary Gennaro Lombardi, credited with opening the first pizzeria in the US in 1905. He started selling individual slices, a concept unheard of in Italy. This innovation sparked a pizza revolution!

New York Style Pizza

Evolution of the Dough:

The traditional Neapolitan crust, while delicious, wasn’t ideal for the fast-paced New York lifestyle. Dough makers experimented, using higher-gluten flour and slightly less water, resulting in a thinner, crispier crust that could be folded and eaten on the go. This became the hallmark of New York-style pizza.

Cheese, Glorious Cheese:

Mozzarella became the undisputed cheese of choice, shredded and piled generously to create a gooey, satisfying layer. While some parlors experimented with other toppings, pepperoni and sausage quickly became classics.

Coal fired oven

Coal-Fired Ovens:

The early pizzerias used coal-fired ovens, which reached scorching temperatures and imparted a unique smoky flavor to the crust. Today, while gas ovens are more common, some dedicated pizzerias still maintain the coal-fired tradition.

Beyond Little Italy:

New York-style pie’s popularity exploded, spreading throughout the city and beyond. Brooklyn pizzerias developed their own distinct style, often featuring a thicker crust and unique toppings. The boom reached the suburbs and eventually the world, making it a global phenomenon.

More Than Just Food:

New York-style pizza is more than just a delicious meal; it’s a cultural icon. It represents the hustle and bustle of the city, the melting pot of cultures, and the shared love for simple, satisfying food. It fuels late-night conversations, fuels lunchtime breaks, and fuels memories that last a lifetime.

Today, New York-style pizza has transcended its humble beginnings to become a global phenomenon. From pizzerias in Tokyo to food trucks in London, its influence is undeniable. It’s a symbol of New York’s fast-paced energy, its melting pot of cultures, and its unapologetic love for delicious food.

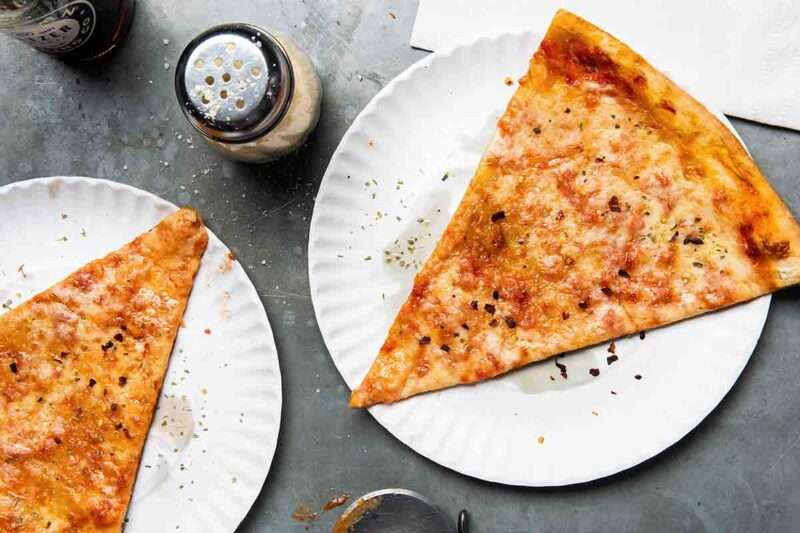
pizza slices

So next time you grab a slice, take a moment to appreciate its rich history. It’s a testament to the power of simple ingredients, culinary adaptation, and a city that never sleeps. It’s also a taste of tradition, innovation, and pure culinary magic, all wrapped up in a foldable masterpiece.

Bonus Tip: Explore different pizzerias in different neighborhoods to discover your own favorite New York-style slice! And remember, the best way to experience pizza history is to fold it and take a bite.

Buon appetito!

Hair Growth Smoothies For Increased Length

Sip Your Way to Stronger Strands: Hair Smoothies for Growth and Shine

Forget the kale and protein powders, it’s time to blend something for your hair! Hair growth smoothies are taking the beauty world by storm, promising luscious locks with every delicious sip. But are these fruity concoctions mere hype, or do they hold the key to stronger, faster-growing hair?

The Science Behind Hair Growth Smoothies:

Our hair thrives on a diet of essential nutrients, including vitamins A, C, E, and B-complex, along with minerals like iron and zinc. Hair smoothies pack these nutrients in a delicious, bioavailable form, making them readily absorbed by your body and delivered directly to your follicles.

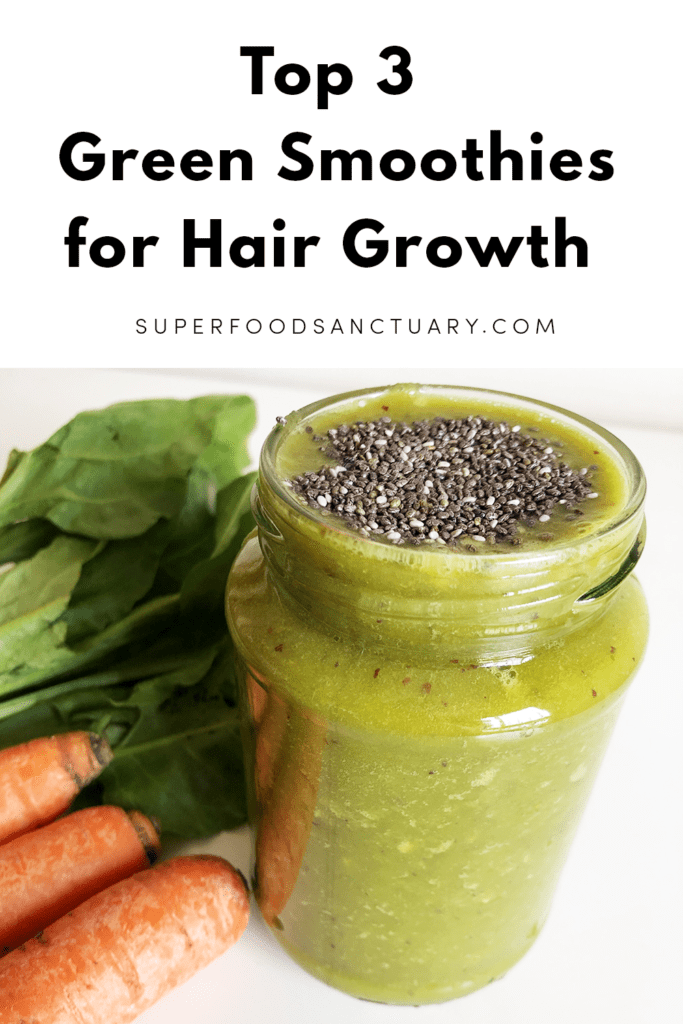
Hair growth smoothies

Growth-Boosting Ingredients:

  • Spinach and Kale: Powerhouses of iron and vitamin C, these leafy greens promote scalp health and collagen production, crucial for hair growth.
  • Berries: Rich in antioxidants and vitamin C, berries protect hair from damage and boost collagen production.
  • Avocado: Loaded with healthy fats and biotin, avocado nourishes your scalp and strengthens hair strands.
  • Flaxseeds: A great source of omega-3 fatty acids and vitamin E, flaxseeds fight inflammation and promote hair growth.
  • Bananas: Packed with potassium and vitamin B6, bananas prevent breakage and add shine to your hair.
image

Beyond Growth:

Hair smoothies aren’t just about length. They can also tackle common hair concerns like:

  • Dryness: Ingredients like avocado and coconut oil deeply nourish and hydrate your strands.
  • Dandruff: Anti-inflammatory properties of spinach and turmeric can soothe an itchy scalp.
  • Thinning: Iron-rich ingredients like spinach and lentils promote hair follicle health and prevent thinning.
image

Crafting Your Perfect Hair Smoothies:

The beauty of hair smoothies lies in their customization. Choose ingredients based on your hair type and needs. Blend them with your favorite fruits and liquids for a taste you’ll love. Here are some tips:

  • Start with a base: Leafy greens like spinach or kale are a great foundation.
  • Add protein: Greek yogurt or nut butter provide protein for hair growth and thickness.
  • Don’t forget the fat: Healthy fats from avocado or coconut oil nourish your hair.
  • Sweeten naturally: Honey or dates add sweetness without refined sugar.
  • Customize for your hair type: Add berries for shine, bananas for hydration, or flaxseeds for scalp health.

Remember, hair smoothies are not a magic bullet. Consistency is key! Aim for 2-3 smoothies per week for optimal results. And, of course, maintain a healthy diet and lifestyle for overall hair health. Ditch the chemical-laden hair products and whip up a delicious, nutrient-packed hair smoothie. Your scalp and strands will thank you for it!

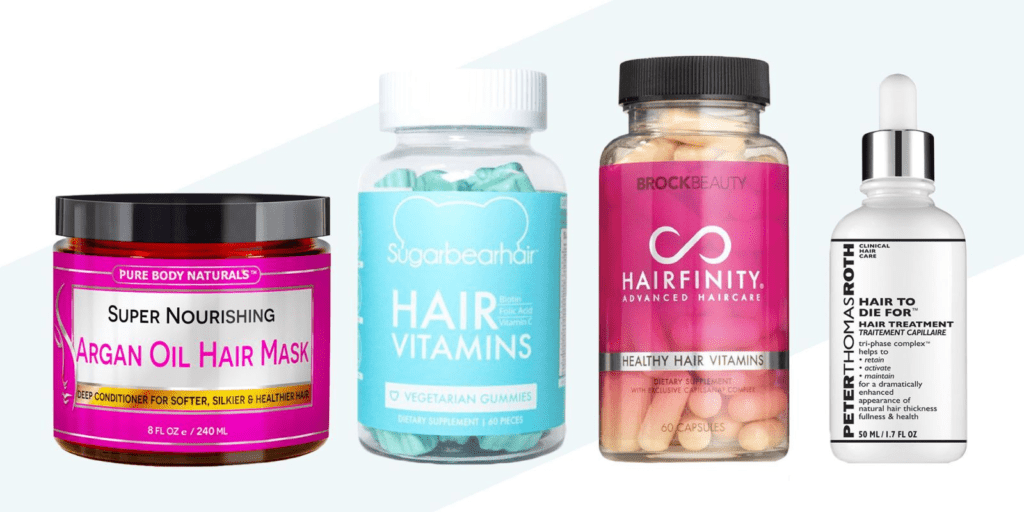
Bonus Tip: Add a scoop of collagen powder or biotin supplement to your smoothie for an extra boost of hair-growth goodness.

Cheers to healthy, happy hair!