Blog Posts

New Scentsy Catalog For Fall/Winter 2022

Scentsy Warmers
Scentsy Warmers

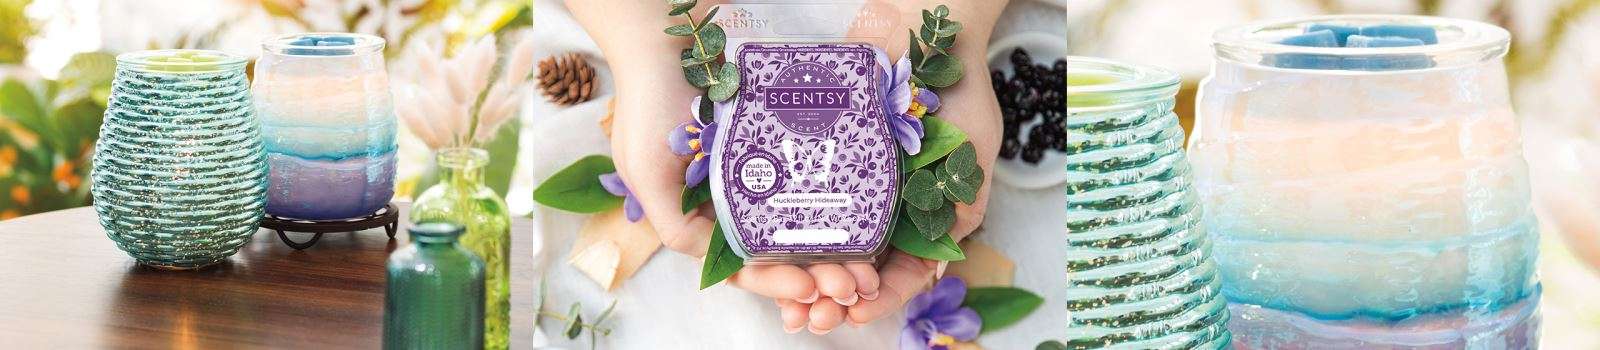
What is a Wax warmer?

A wax warmer is best known as being an alternative to a scented candle. Usually, the warmers are filled with fragrant wax melts. These melts are very similar in scent and material structure compared to a traditional candle. They do away with the candle wick and usually warm without a flame. There are some warmers that are sold and used without batteries or power cords to light the waxes.

Those warmers heat the wax in the warmer by using tealight candles underneath the base of the warmer. They are typically constructed using glass with a bowl-shaped top and a hollow cavelike base that holds the tealight candle underneath. Add the wax cube to the top of the dish and place the lighted candle inside the hollow area of the warmer. Be sure to use these with caution and pay close attention to the placement of these items. They should be safe for use but they can break or shatter if dropped.

Scentsy Wax Warmers:

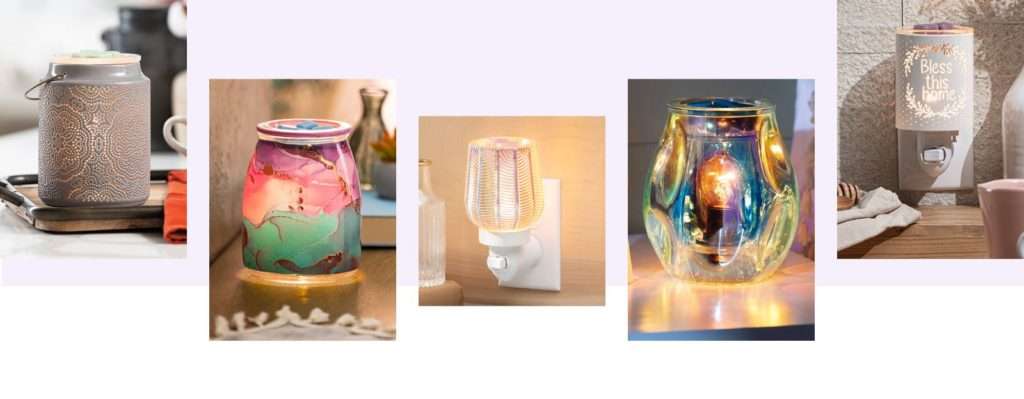
There are three types of Scentsy Wax warmers. A Regular warmer, an Element warmer, and a mini warmer.

1. Standard Scentsy Warmer

This warmer melts scented wax with the heat of a low-watt light bulb. This allows the warmer to give off a candle-like ambiance added with fragrance. This is great for those soothing late-night baths after a long day. Perfect for quiet time while reading a good book before bed. Also, they can be used for those movie nights where you want the feel of a movie theater at home, but also don’t want to be sit in the dark.

2. Element Scentsy Warmer

This warmer features a heating element in which you are able to safely warm the scented wax cubes without having to use a lightbulb. This warmer is perfect for those days when you want the fragrant smell but prefer to have less lighting in the room or area being used.

3. Mini Scentsy Warmer

These warmers are good for smaller spaces. The mini warmer is typically a wall plug-in. This would be a good option to use for the kitchen, bathroom, or kid’s room. It allows you to freshen the area without worrying about having to watch the area for safety hazards. You can basically set it and forget. Be sure to refill the plug-in to ensure it is continuously emitting fragrance.

Features and Benefits:

There are four different types of warmers and warmer finishes. These include Crackle glaze, glow, hand-painted, and reactive glaze. The warmers are all flame, smoke, and soot free. They have lifetime replacement warranties against manufacturer defects.

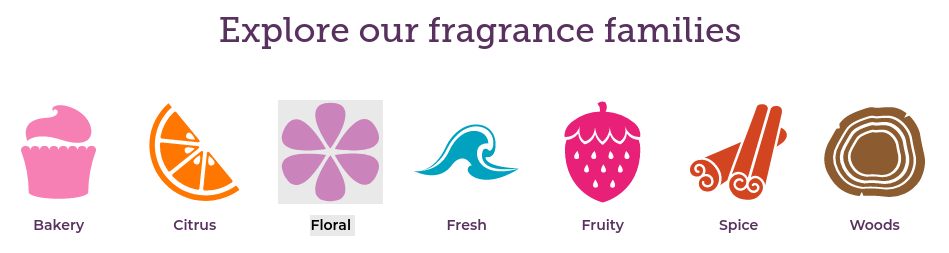
There are more than 80 fragrances available for purchase. The Scentsy bars are all arranged in categories ensuring the ease of finding the scents you love. The Fall/ Winter catalog has the following categories for all you need. They are listed below and the hyperlink will allow you to go straight to the page for the scents.

New Scentsy Warmer Wax Releases:

All the new Scentsy releases are available as Scentsy Bars, Room Sprays, and Scent Circles!

Black Currant & PlumHuckleberry Hideaway
Blackberry SpicePear-fect Day
Cranapple CrumbleSips of Cider
Fall-ing ApplesVelvet Moon
Frosted VanillaWhite Amber & Silk

Holiday Scents:

Be MerryPerfect Peppermint
Christmas CottagePolar Bear Hug
Dancing Sugar PlumsVery Merry Cranberry
Fluffy FleeceVery Snowy Spruce
Icicles & EvergreenWinterberry Apple Tea

Spice:

All the Flavors in this category give off a sense of warmth and Confort. They include notes like cinnamon, cardamom, and black pepper. The scents that are in this set include:

Spice List

Apple & Cinnamon sticksFarmstand Pumpkin
Autumn HearthFirst Day of Fall
Autumn SunsetHarvest Blessings
Christmas CottageMaple Apple Bourbon
Cider MillPumpkin Chai
Cinnamon BearPumpkin Cinnamon Swirl
Clove & CinnamonSpiced Ember Glow
Dancing Sugar PlumsWelcome Home

Bakery:

These scents are perfect for those sweet and sensual moments. They include notes like vanilla, caramel, cocoa, and pie crusts. The flavor choices available are:

Bakery List

Apple Cherry StrudelHug in a mug
Baked Apple PiePumpkin Roll
Blueberry CheesecakeSalted caramel toffee
Cinnamon buttercreamScary Good
Clementine CupcakeSugar Cookie
Cranapple CrumbleVanilla Bean Buttercream
Graham Cracker CrunchVanilla Cinnamon Maple

Fresh:

These scents are perfect for relaxation from the spa to the beach or a sunny stroll through the meadow. They include notes like fresh air, linen, lavender, mint, and freshly cut grass. Those scents are:

Fresh List

Aloe Water & CucumberFluffy Fleece
Amazon RainFrosted Vanilla
Artic KissIcicles & Evergreen
By the SeaNewborn Nursery
Clean BreezePerfect Peppermint
ClotheslinePolar Bear Hug
Cozy CardiganSilver Bells
Eucalyptus WreathWhite Amber & Silk

Woods:

The smells that come with this category are full-bodied and masculine. They include notes such as cedar, sandalwood, pine, and leather. The woods list includes these scents:

Wood List

Around the CampfireIced Pine
Be MerryMystery Man
Blue Sage & TonkaToasted Acorn & Oak
Cashmere & CorduroyVery Snowy Spruce
Cedar CiderWeathered Leather
Fall-ing ApplesWhite Amber & Teak
Huckleberry Hideaway

Fruity:

This category is full of ripe, fresh squeezed, and always sweet scents. They include smells that have hints of pineapple, peach, strawberry, and apple. This list includes these flavors:

Fruity List

Autumn Road TripOrchard Apple & Spice
Berry BlessedPear-fect Day
Black Currant & PlumPomegranate Prosecco
Black Raspberry VanillaScarlet Sunflower
Bright Cider LifeTinsel Berry
Caramel Apple CrazeVery Merry Cranberry
Fairy Tale PumpkinWinterberry Apple Tea
Johnny Appleseed

Citrus

This is full of classic to sparkling citrus blends. This selection has notes like orange, grapefruit, mandarin, and lemon. The list is as follows:

Citrus List

Blue Grotto
Coconut Lemongrass
Sips of Cider

Floral:

This category brings fantasy to real-life floral bouquets. They include notes such as hibiscus, lilac, rose, and freesia. The scents available in this category are:

Floral List

Luna
Velvet Moon

All the fragrance bars are created with premium ingredients for a long-lasting fragrance. The intensity of the scents can be intensified by using additional wax cubes. This can also be done by combining one or all of your favorite scents for a custom blend. They are safe to use. They do not have a wick, a flame, smoke, or soot.

Build Your Pinterest Presence In 6 Easy Steps

Pinterest is a visual social networking platform where users can save and share images and videos on a variety of topics. It’s a great place to find inspiration for DIY projects, recipes, home décor, and more.

1. Create A Pinterest account:

There are two main types of Pinterest accounts: personal and business.

Personal accounts

Personal accounts are the most common type of Pinterest account. They’re perfect for users who want to save and share ideas for their own personal use. Personal accounts don’t have access to any special features, but they’re still a great way to use Pinterest.

Business accounts

How To Create A Pinterest Account.
How To Create A Pinterest Account. Sign Up

Business accounts are designed for businesses and brands to promote their products and services on Pinterest. Business accounts have access to a variety of features that can help them reach a wider audience and track their results.

Some of the benefits of having a Pinterest business account include:

  • Access to Pinterest Analytics, which provides insights into your audience and how they’re interacting with your content.
  • The ability to run Pinterest ads to reach a wider audience and promote your products or services.
  • The ability to create Rich Pins, which provide additional information about your content, such as pricing and product availability

Log in to the Pinterest app or website and create an account. Choose your username and create a STRONG password. Be mindful of how you plan on using this account when picking your username and password. It should correlate with your business or personal identity. This should be the first step you take when building your online presence and assisting with your brand and marketing.

Which type of Pinterest account should you create?

The type of Pinterest account that you create will depend on your goals. If you’re just looking for a place to save and share ideas for your own personal use, then a personal account is fine. But if you’re a business or brand, then you should consider creating a business account.

If you’re not sure which type of account to create, you can always start with a personal account and convert it to a business account later. To do this, simply go to your account settings and click on the “Convert to Business Account” button.

  • If you’re not sure which type of account to create, start with a personal account. You can always upgrade to a business or creator account later.
  • If you’re creating a business account, make sure to choose a name and profile photo that is relevant to your business. You should also include a link to your website in your bio.
  • If you’re creating a creator account, make sure to link to your other social media accounts and website in your bio. You should also include a brief description of what kind of content you create.
Choosing your topic board on the Pinterest app
Pinterest Boards

2. Choose a Niche Category and create your first board:

A board on Pinterest is basically a collection of posts and ideas for a specific topic or niche. This is a great way to organize your thoughts and ideas for future use. Once you create your board, you can add posts and pages to your collection. This is called “pinning.”

The most popular Pinterest categories for creating pins (2023)

  1. Home décor
  2. DIY and crafts
  3. Food and drink
  4. Women’s Fashion
  5. Health and wellness
  6. Beauty
  7. Travel
  8. Wedding planning
  9. Photography
  10. Animals

These categories are popular because they offer a wide range of ideas and inspiration for people from all walks of life. Whether you’re looking for new ways to decorate your home, learn a new craft, find new recipes, or get inspired for your next vacation, you’re sure to find something of interest in these categories.

Saving your first pin
How To Save Pins on Pinterest.

3. Save Your First Pin:

A saved post or page is known as a pin on Pinterest. After choosing which particular topic you want to create a board for, begin adding pins. When you log into the home page, you will see your “Feed”. The feed is a collection of posts that are automatically generated depending on your interests.

There will be a “Save’ button on the right-hand side of the pin thumbnail. Click this button to save the pin. The board where the pin will be saved should be located on the left-hand side of the thumbnail. There is a small arrow that, if clicked, will create a drop-down menu that allows you to switch the board. (This is only if you have multiple boards.)

creating a research topic list
Create a List of Topics To Research.

4. Make A Topic List For Your boards:

Write a list of things that interest you. This could be anything from the most popular food recipes to Fashion trends, DIY crafts, and Hobbies.  After you make your list type the topic into the search bar at the top of the page and search for that topic. Once you find a post you like and want to add it to your board collection, choose the board from the drop-down menu. Click the save button and repeat this for the other pins for your boards. 

  • how to open pins
  • how to follow boards
  • How To follow Pinterest Boards using the follow adds

5. Join Group Boards:

This was very challenging for me to figure out when I first started on Pinterest. I knew there was a way to do it but I couldn’t figure out where the “Join Board” button was because it wasn’t a simple button that told me to join. It’s more like following other complete board collections created by others.

To do this first you must go to your home feed. Scroll to a pin that corresponds with the topic you want to follow. After you click on the pin to open it scroll to the bottom of the pinned post. In the right-hand corner of the screen, it should tell you the username for the pin and which board the pin was saved to. Click the title of the board for that pin. This should open up the board and take you to the entire collection of pins for that board.

The name of the board will be listed at the top of the page if you click on the correct item. There will be an Ellipsis (Those three little dots) on the right side of the board title. Click the three dots and it will open up a tab with board options. 

Clicking on the follow option in the drop-down tab will allow you to follow the board. This will add the board to your collection. You can repeat this process for numerous boards. All your saved and followed boards will be housed in one area for your convenience.

creating a pin
How To Create A Pin on Pinterest.

6. Creating pins:

To create your first pin click the Create button on the home screen at the top left of the page. This should release a drop-down menu with other options. Click the Create option from the menu tab. This will open up a new screen and take you to the pin builder screen.

Choose the photo or video you would like to use for your pin. Pick the title of the pin and add it to the header. Give a description of the photo or video in the description box. You can add links to the pin if you want guests to view your website or if you have a product that you would like to sell. This link is optional and you do NOT have to add a link. This can be used for Facebook links as well as links to your Instagram pages.

Before publishing your pins choose the board that you want this pin to be saved to. Double-check your pins for errors and to make sure you included everything you needed in the post. Once that is done choose when you want to publish your post. This can be immediate or published at a later date using the schedule option. Click the publish button and your post will be saved and available for viewing on your home screen. 

How To Use Pinterest For Blogging

Quick Tips

QUICK TIPS:

  • Choose a variety of topics to search for.
  • Create multiple boards. This can be for one Category of pins or multiple niches.
  • Organize your pins after you save them to a board. 
  • Use good keywords when naming your boards or creating pins.
    • This will be extremely helpful when others are looking or searching for specific pins. It will allow them to get exactly what they need quickly and add to your engagements.
  • Be sure to use good images for the pins that you create.
  • Save pins to the proper boards when possible and keep them ORGANIZED!
  • Create a daily schedule when posting or saving pins. This will help you remain consistent. 
  • Reorganize existing posts after time has passed to give you fresh ideas.

The Best Peach Nail Designs & Nail Art

With the summer coming to a close we anticipate putting our best foot forward, or hands for that matter. How do we intend on doing that? First, as the saying goes “out with the old, and in with the new”.

That means all the pretty flowers and bright colors have to go back into the treasure chest. I know we all hate this part but you don’t want to be wearing hot pink and neon nails during those winter months. (Yes we do even though we aren’t supposed to). Although we all love the warmth the spring and summer months bring we have to prepare for the fall.

Before we get to that I would like to boast about the above photo. Why would I do such a thing? I would do just that because it’s actually one of my top pins on Pinterest! When I initially came across the pin I thought these nails were very cute and simple. I would definitely wear them and I thought that other people may be interested in them as well. Yes, they were too! So, I saved the post and added it to my collection to prepare for next year.

Peach Nail Designs& Nail Art:

I love the colored polish on the nails. I want to say it’s peachy but it may actually be coral or salmon. Normally I’m a square-nail kinda girl, but I have recently been experimenting with other nail shapes. These nails are almond-shaped which I absolutely LOVE these days. My other favorite nail shapes happen to be short square nails and coffin-shaped. The Ballerina-style nails are my favorite shape as well but it’s fairly close to the coffin shape. I shouldn’t say they are the same because they are NOT, but it’s pretty much the same concept.

I like the fact that this set contains glitter, but not too much glitter because sometimes it can be overpowering. The colors blend nicely with the nail decals, adding a bit of flare but maintaining the simplicity of the complete nail design. This nail pin is especially popular due to the growing press on nail trends.

I would like to assume that these are acrylic nails but they may possibly be a press-on set. Which is another reason this particular pin caught my attention. These would be great beach nails or perfect for a summer wedding. If you like the nail design and color incorporate a fall or winter color (darker polish) along with the peach polish for an Autumn or Winter look.

Nail Talk:

Now, while we are on the topic of glitter, I have a few quick questions. I looked up the answers to the questions before posting but would like additional feedback. Feel free to leave your comments and opinions down below. Always remember “There are no wrong questions with right answers. “

  1. Would you consider glitter nail art, designs, or decals?
    • After conducting a bit of research I found that glitter had been made and used as a form of decoration. In my opinion, I would consider glitter as a polish instead of a decorative item. Normally we associate decorative items with “Decals”.
    • When you think of a decal you assume it was something that you placed onto the nail to decorate it.
  2. What Do you consider a nail decal?
    • Research considers a decal as a small decoration that is glued to your nail after painting them. This is done to enhance the appearance of the nail and provide an additional WOW factor. Basically, they state that a nail decal is actually a “Sticker” (Who would have known)?

Lays Flavor Swap Chips Doritos Vs. Cheetos Review

Doriots, Cheetos, Funyuns, Fritos
https://www.lays.com/

What is a Flavor Swap?

A flavor swap is basically a remix of an original potato chip to briefly explain this phenomenon. This applies in the potato chip world. This may also apply to other aspects of food and drinks etc. Now, on to the main reason for this post.

So like yeah, I was definitely in the grocery store one evening doing WAY too much. I originally only went shopping to get a few items. I’m not sure what I was looking for. So I’m in the store and walking around. I walk down the potato chip aisle and BOOM. This big foreign familiar bag of goodness captures my eyesight. Lays Doritos Cool Ranch flavored chips. At first, I couldn’t believe it. The second thought running through my mind is “Hmmmm. Let’s try it!”

I pick the bag up and drop it in my shopping cart. I finish shopping and head to the checkout area. Once there I glance at my bag one more time before placing it in my shopping bag and heading home.

Doritos Cool Ranch Lays:

I open the bag of Doritos flavored Lays and pop one chip into my mouth. The first bite was yummy as always. I couldn’t taste the Cool Ranch flavor it tasted more like sour cream and onion potato chip. So I decided to eat another then another then another.

Then BOOM a burst of Doritos creamy cool ranch flavor melted on my tongue. While I love the original Doritos, I will say that I appreciate the lays chip because it gives me the taste without the tortilla. This method allows you to savor the flavor. It remains on your taste buds for a longer period and adds to the goodness of the chip.

Doritos, Cheetos, Fritos, Funyuns

Cheetos Cheese Flavored Lays:

The second bag of Limited Time Flavor that I tried was the Cheetos flavored chips. Now, in this bag, I could taste the cheesiness from the first bite. That should be typical for most cheese or cheddar-flavored potato chips. This was also an indulgent moment as it was with the Dorito bag.

I ate a handful of these chips and I must say they were fairly good. I was waiting for the cheddar dust to stick to my fingers so I could have the full Cheetos puff effect. It tasted EXACTLY the same as if I was eating a Cheetos puff and not a Lays potato chip. I was impressed and couldn’t wait to go back for more but I didn’t. I had pretty much eaten two bags of chips in one sitting!

Doritos Cool Ranch

Both these chips are very flavorful but I do wish they would add EXTRA flavor to the “Remixed” chips. Like a total BOOM from the first bite. All in all, I would buy them again if they were a regular selection of potato chips. There are two other flavors that I have not tried yet. (Have to hunt these down)

The next bag of potato chips I would like to try would be the Funyun flavor if I can find them in the stores. My guess is either no one liked them so I can’t find them, or everyone LOVED them and they are sold OUT. I’m pretty sure I would enjoy these because I like the funyun flavor.

There is also a Frito Chilli and cheese bag of chips that I may or may not purchase. This would be an acquired test and something that I would have to be in the mood for. I like tortillas but am not sold on the “Fritos” chili cheese per se. I would have preferred to taste a Fritos Honey BBQ limited edition flavor but that may be somewhere in the near future hopefully.

MTV Presents The VMA Awards For 2022

This year’s MTV VMA awards ceremony was cohosted by LL Cool J, Nicki Minaj, and Jack Harlow who scooped up the first award with his feature on the hit song Industry Baby with Lil Nas X. This ceremony took place at the Prudential Center in Newark, New Jersey, this Sunday, August 28th, 2022.

The 2022 Video Vanguard Award Honoree Nicki Minaj.

THE 2022 VIDEO VANGUARD AWARD

The Michael Jackson Video Vanguard Award, is best known as the Video Vanguard Award. This is a special award of merit which is given to recording artists and music video directors at the MTV Video Music Awards (VMAs).

The VMA’s is a ceremony that was established in 1984 and continues on to the present day. This Year’s Honoree for such an award goes to none other than the Marvelous Onika Miraj better known as rap artist Nicki Minaj. The 17-time nominated and 5-time VMAs winner is being honored for breaking barriers for women in the music industry and cementing herself as a true leader in the world of hip-hop.

The 2022 MTV Video Vanguard Award Honoree Nicki Minaj.

Before accepting her award she took the stage along with a handful of beautiful ladies to perform many of her hit songs that paved the way.

Some of the songs included in her performance were tidbits of “All Things Go,” “Roman’s Revenge,” her verse on “Monster,” “Beez In The Trap,” “Chun-Li,” “Moment 4 Life,” “Super Bass,” “Anaconda,” and her recent single “Super Freaky Girl.”

Performances By:

This year, headlining performances for the MTV VMA ceremony include the following artists as well as Kane Brown, who is making history as the first male country singer to ever perform at the VMA Awards show.

Jack Harlow ft. FergieRed Hot Chilli Peppers
LizzoAnitta
Black Pink – Maneskin
Marshmello & KhalidBad Bunny
Nicki Minaj- CollectionPanic at the Disco
Eminem & Snoop Dogg
Kane Brown MTV VMA 2022 Performance.

Extended Play Performances:

Artist:Song Title:
Conan GrayDisaster
Flo MilliBed Time & Conceited
JIDDance & Surround Sound
Lauren Spencer SmithFingers Crossed

Global Icon Award:

WINNER: RED HOT CHILLI PEPPERS

Red Hot Chilli Pepper’s New album release October 14th 2022.

VMA Awards Honorees & Nominees

The following list includes all the artists who received a nomination in the respective categories. The WINNER for each VMA Award is pinned to the top and highlighted in BOLD.

Offset & Dj Khaled Presenting Best Collab:

WINNER: Lil Nas X ft.Jack Harlow – Industry BabyPost Malone & The Weeknd – “One Right Now”
Drake ft. Future & Young Thug – “Way 2 Sexy”Rosalía ft. The Weeknd – “La Fama”
Elton John & Dua Lipa – “Cold Heart (PNAU Remix)”The Kid Laroi & Justin Bieber – “Stay”
Megan Thee Stallion & Dua Lipa – “Sweetest Pie”

Avril Levine Presenting BEST NEW ARTIST :

WINNER: Dove CameronLatto
Baby KeemMåneskin
GayleSeventeen

BEST LONGFORM VIDEO:

WINNER: Taylor Swift – All Too Well (10-minute version) (Taylor’s version)
Billie Eilish – Happier Than Ever: A Love Letter to Los Angeles
Foo Fighters – Studio 666
Kacey Musgraves – Star-Crossed
Madonna – Madame X
Olivia Rodrigo – Driving Home 2 U

ALBUM OF THE YEAR:

WINNER: Harry Styles – Harry’s House
Adele – 30
Bad Bunny – Un Verano Sin Ti
Billie Eilish – Happier Than Ever
Drake – Certified Lover Boy

BEST K-POP:

WINNER: Lisa – “Lalisa”
BTS – “Yet to Come (The Most Beautiful Moment)”
Itzy – “Loco”
Seventeen – “Hot”
Stray Kids – “Maniac”
Twice – “The Feels”

VIDEO FOR GOOD:

WINNER: Lizzo – “About Damn Time”
Kendrick Lamar – “The Heart Part 5”
Latto – “P*ssy”
Rina Sawayama – “This Hell”
Stromae – “Fils de joie”

BEST LATIN:

WINNER: Anitta – “Envolver”
Bad Bunny – “Tití Me Preguntó”
Becky G x Karol G – “Mamiii”
Daddy Yankee – “Remix”
Farruko – “Pepas”
J Balvin & Skrillex – “In Da Getto”

BEST HIP-HOP:

WINNER: Nicki Minaj ft. Lil Baby – “Do We Have a Problem?”
Eminem & Snoop Dogg – “From the D 2 the LBC”
Future ft. Drake, Tems – “Wait for U”
Kendrick Lamar – “N95”
Latto – “Big Energy”
Pusha T – “Diet Coke”

VIDEO OF THE YEAR:

WINNER: Taylor Swift – “All Too Well” (10-minute version) (Taylor’s version)
Doja Cat – “Woman”
Drake ft. Future & Young Thug – “Way 2 Sexy”
Ed Sheeran – “Shivers”
Harry Styles – “As It Was”
Lil Nas X, Jack Harlow – “Industry Baby”
Olivia Rodrigo – “Brutal”

Artist of the year:

WINNER: Bad Bunny
Drake
Ed Sheeran
Harry Styles
Jack Harlow
Lil Nas X
Lizzo

SONG OF THE YEAR:

WINNER: Billie Eilish – “Happier Than Ever”
Adele – “Easy on Me”
Doja Cat – “Woman”
Elton John & Dua Lipa – “Cold Heart (PNAU Remix)”
Lizzo – “About Damn Time”
The Kid Laroi & Justin Bieber – “Stay”

BEST POP:

WINNER: Harry Styles – “As It Was”
Billie Eilish – “Happier Than Ever”
Doja Cat – “Woman”
Ed Sheeran – “Shivers”
Lizzo – “About Damn Time”
Olivia Rodrigo – “Traitor”

BEST ROCK:

WINNER: Red Hot Chili Peppers – “Black Summer”
Foo Fighters – “Love Dies Young”
Jack White – “Taking Me Back”
Muse – “Won’t Stand Down”
Shinedown – “Planet Zero”
Three Days Grace – “So Called Life”

BEST METAVERSE PERFORMANCE:

WINNER: Blackpink The Virtual | PUBG
BTS | Minecraft/YouTube
Charli XCX | Roblox
Justin Bieber – An Interactive Virtual Experience | Wave
Rift Tour ft. Ariana Grande | Fortnite
Twenty One Pilots Concert Experience | Roblox

BEST ALTERNATIVE:

WINNER: Måneskin – “I Wanna Be Your Slave”
Avril Lavigne ft. Blackbear – “Love It When You Hate Me”
Imagine Dragons x JID – “Enemy”
Machine Gun Kelly ft. Willow – “emo girl”
Panic! at the Disco – “Viva Las Vengeance”
Twenty One Pilots – “Saturday”
Willow, Avril Lavigne ft. Travis Barker – “Grow”

BEST CINEMATOGRAPHY:

WINNER: Harry Styles – “As It Was”
Baby Keem & Kendrick Lamar – “Family Ties”
Camila Cabello ft. Ed Sheeran – “Bam Bam”
Kendrick Lamar – “N95”
Normani ft. Cardi B – “Wild Side”
Taylor Swift – “All Too Well” (10-minute version) (Taylor’s version)

BEST DIRECTION:

WINNER: Taylor Swift – “All Too Well” (10-minute version) (Taylor’s version)
Baby Keem & Kendrick Lamar – “Family Ties”
Billie Eilish – “Happier Than Ever”
Ed Sheeran – “Shivers”
Harry Styles – “As It Was”
Lil Nas X, Jack Harlow – “Industry Baby”

BEST ART DIRECTION:

WINNER: Lil Nas X, Jack Harlow – “Industry Baby”
Adele – “Oh My God”
Doja Cat – “Get Into It (Yuh)”
Drake ft. Future & Young Thug – “Way 2 Sexy”
Kacey Musgraves – “Simple Times”
Megan Thee Stallion ft. Dua Lipa – “Sweetest Pie”

BEST VISUAL EFFECTS:

WINNER: Lil Nas X, Jack Harlow – “Industry Baby”
Billie Eilish – “Happier Than Ever”
Coldplay x BTS – “My Universe”
Kendrick Lamar – “The Heart Part 5”
Megan Thee Stallion & Dua Lipa – “Sweetest Pie”
The Kid Laroi & Justin Bieber – “Stay”

BEST CHOREOGRAPHY:

WINNER: Doja Cat – “Woman”
BTS – “Permission to Dance”
FKA Twigs ft. The Weeknd – “Tears in the Club”
Harry Styles – “As It Was”
Lil Nas X, Jack Harlow – “Industry Baby”
Normani ft. Cardi B – “Wild Side”

BEST EDITING:

WINNER: Rosalía – “Saoko”
Baby Keem & Kendrick Lamar – “Family Ties”
Doja Cat – “Get Into It (Yuh)”
Olivia Rodrigo – “Brutal”
Taylor Swift – “All Too Well” (10-minute version) (Taylor’s version)
The Weeknd – “Take My Breath”

Song of Summer:

WINNER: Jack Harlow – “First Class”Latto x Mariah Carey – “Big Energy (Remix) ft. DJ Khaled”
Bad Bunny & Chencho Corleone – “Me Porto Bonito”Lizzo – “About Damn Time”
Beyoncé – “Break My Soul”Marshmello x Khalid – “Numb”
Charlie Puth – “Left and Right (feat. Jung Kook of BTS)”Nicki Minaj – “Super Freaky Girl”
Doja Cat – “Vegas (from the Original Motion Picture Soundtrack Elvis)”Nicky Youre & Dazy – “Sunroof”
Future ft. Drake, Tems – “Wait for U”Post Malone with Doja Cat – “I Like You (a Happier Song)”
Harry Styles – “Late Night Talking”ROSALÍA – “BIZCOCHITO”
Kane Brown – “Grand”Steve Lacy – “Bad Habit”

GROUP OF THE YEAR:

WINNER: BTSImagine Dragons
BlackpinkMåneskin
City GirlsRed Hot Chili Peppers
Foo FightersSilk Sonic

Best R&B:

WINNER: The Weeknd – “Out of Time”
Alicia Keys – “City of Gods (Part II)”
Chlöe – “Have Mercy”
H.E.R. – “For Anyone”
Normani (featuring Cardi B) – “Wild Side”
Summer Walker, SZA and Cardi B – “No Love” (Extended Version)

Sponsors:

Corolla“Let’s go places.”
Doritos” For the BOLD.”
Extra“Chew it before you do it”
Secret“All Strength, no sweat”

Gel Nail Lamps: UV vs LED | Which One Is Better?

What Is The Difference Between A UV Lamp And an LED Lamp?

UV and LED nail lamps are both used to cure gel nail polish, but they work in different ways.

  • UV nail lamps emit ultraviolet light, which causes the molecules in gel polish to react and harden. UV lamps typically take longer to cure gel polish than LED lamps.
  • UV lamps emit a broader spectrum of UV light than LED lamps. This means that UV lamps can cure a wider variety of gel polishes, but it also means that they can be more harmful to the skin.
  • LED nail lamps emit light at a specific wavelength that causes the molecules in gel polish to react and harden. LED lamps typically cure gel polish faster than UV lamps.
  • LED lamps emit a narrower spectrum of UV light than UV lamps. This means that LED lamps can only cure gel polishes that are specifically designed for LED lamps, but it also means that they are less harmful to the skin.
  • LED lamps typically last longer than UV lamps. LED lamps can last for up to 50,000 hours, while UV lamps typically only last for 1,000 hours.
  • LED lamps are more expensive than UV lamps. However, the cost of LED lamps has been decreasing in recent years, and they are now a more affordable option for many people.
FeatureUV LampLED Lamp
Type of light emittedUltraviolet lightLight at a specific wavelength
Curing TimeLongerShorter
DurabilityLess DurableMore Durable
PriceLess ExpensiveMore Expensive
Health RisksPotential for skin cancer and premature agingLower risk of skin cancer and premature aging

Ultimately, the best type of lamp for you depends on your individual needs and preferences. If you are looking for a more affordable option and don’t mind the longer curing time, a UV lamp may be a good choice for you. If you are looking for a faster curing time and a more durable lamp, a LED lamp may be a better choice.

UV nail lamps are a must-have for anyone who loves to do their own gel nails at home. They use ultraviolet light to cure gel polish, which hardens it and makes it last longer. There are many different UV nail lamps on the market, so it can be tough to choose the right one. No matter which UV nail lamp you choose, make sure to follow the manufacturer’s instructions for use. This will help you get the best results and avoid any damage to your nails. When choosing a UV nail lamp, it is important to consider the following factors:

  • Power: The power of the nail lamps will determine how quickly it cures gel polish. A more powerful lamp will cure polish in less time, which is ideal if you are short on time.
  • Price: UV nail lamps range in price from around $20 to $100.
  • Curing time: The curing time is the amount of time it takes for the lamp to cure gel polish. A shorter curing time is ideal if you are impatient or if you want to do multiple layers of polish.
  • The number of LED lights: The more LED lights a UV nail lamp has, the more evenly it will cure gel polish.
  • Timer: A built-in timer will help you avoid over-curing your nails.
  • Sensor: A sensor will automatically turn on the UV nail lamp when you place your hand inside.
  • Durability: The durability of the lamp is important if you want it to last for a long time. A durable lamp is made of sturdy material and has a sturdy base.

The Best UV Nail Lamps For 2023:

Lavinda UV LED Nail Lamp is a 54W Rechargeable cordless UV LED nail lamp. This flash cure lamp can fast dry all types of manicures and nail art. This nail dryer provides fast curing with any nail gel brands and polishes.

SUNUV Gel Lamp is a high-quality UV nail lamp that is perfect for home use. It has 48 LED lights that cure gel polish in just 60 seconds. The lamp also has a built-in timer and sensor, so you don’t have to worry about over-curing your nails.

SUNUV Gel Lamp

Beetles Professional LED Nail Lamp is another great option for a home UV nail lamp. It has 36 LED lights that cure gel polish in just 90 seconds. The lamp also has a built-in timer and sensor, and it is available in a variety of colors.

Beetles Professional LED Nail Lamps

AIMEILI Gel Nail Lamp is a budget-friendly option for a UV nail lamp. It has 36 LED lights that cure gel polish in just 120 seconds. The lamp also has a built-in timer and sensor.

AIMEILI Gel Nail Lamps,

Gelish LED Light Curing Lamp is a great option for those who want a professional-grade UV nail lamp. It has 36 LED lights that cure gel polish in just 30 seconds. It also has a built-in fan to help keep your nails cool while they are curing.

Here are some additional tips for using a UV nail lamp:

  • Always use a base coat before applying gel polish. This will help protect your nails and prevent staining.
  • Apply two coats of gel polish for a more opaque look.
  • Cure each coat of gel polish for the amount of time specified in the instructions.
  • Use a top coat to seal in the polish and protect it from chipping

How To Celebrate Labor Day This September

God sells us all things at the price of labor.

~Leonardo da Vinci
Use code: LABORDAYSAVE

What Is Labor Day?

Labor Day is a US holiday that is typically celebrated every September on the first Monday of the month. The annual holiday was created to celebrate American workers. During the late nineteenth century, labor activists longed for a federal holiday that would be used to recognize the many contributions American workers have made toward the strength, prosperity, and well-being of the country. 

According to History.com, Labor Day originated at a time when working conditions in the U.S. were often poor and unsafe. The state of New York was the first state to introduce a bill. Oregon was the first state to officially pass a law recognizing Labor Day as an actual holiday. This was said to have taken place in February of 1887. 

Who Founded Labor Day?

Labor Day
Labor is the ladder through which human dignity and creative excellence are expressed.

Historical records mention two possible founders of the annual holiday. During the year 1882, Peter J. McGuire co-founder of the American Federation of Labor and general secretary of the Brotherhood of Carpenters and Joiners suggested the notion. He proposed the idea of setting aside a day for the laboring classes. This day would be to honor those who have “delved and carved all the grandeur we behold.”

Many people credit him as a founder but also believe that machinist Matthew Maguire, not Peter McGuire, actually founded the holiday. (Does founder mean the thought of?)Other studies support the contention that Matthew Maguire, later the secretary of Local 344 of the International Association of Machinists in Paterson, New Jersey, proposed the holiday in 1882 while serving as secretary of the Central Labor Union in New York.

US flag during celebrations.

A Nationwide Holiday:

The first Labor Day holiday was celebrated on Tuesday, September 5, 1882. The day was celebrated with a picnic, concert, and speeches by prominent men and women. Ten thousand workers marched in a parade from City Hall to Union Square. This became the pattern for the celebrations of Labor Day.

According to the New Jersey Historical Society, after President Cleveland signed the law creating a national Labor Day, the Paterson Morning Call published an opinion piece stating that “the souvenir pen should go to Alderman Matthew Maguire of this city, who is the undisputed author of Labor Day as a holiday.”

Both Maguire and McGuire attended the country’s first Labor Day parade in New York City that year. President Grover Cleveland signed a law making the first Monday in September of each year a national holiday. Labor Day is a patriotic holiday, and a time to show pride if you are counted among the American workers.

Labor Day Activities and Ideas For The Youth:

This labor day schedule a time to show your children what labor you perform in your community. Take your children on a walk or car ride and show them where you work. when they grow up. While on the outing talk about all the contributions children can and do make in society. Some of these things can be any of the following:

  • Babysitting
  • Delivering newspapers in the neighborhood
  • Passing out local event flyers
  • Dog walking or pet care
  • Yard work
  • Tutoring other kids or their elders
  • Volunteer at a kids club
  • Start a kid-friendly business
  • Donate to a charity
How To Celebrate Labor Day 2022

Why Working is Important:

Discuss the importance of work and what we can learn while we are working. This can be a good time to talk with your children and young adults about the benefits of setting goals. Labor teaches you all the fundamentals of learning and earning. Some of these things include:

Time management:

They will learn how to properly manage their time. While doing this allows them to be more organized. Teach them how to set schedules and plan so their work gets completed and they have more free time.

Responsibility:

When you make a commitment to take on work or chores, teach them the benefits of having people counting on you. Let them know why being responsible is important. This will help them get better jobs and be better parents when they grow up and have children of their own.

Money Management:

Kids should learn quickly the value of money and why it is so much better when you earn it yourself. This allows them to decide how much money they want to make. They can decide which career fields they want to go into as well.

How much money they would like to spend, and what they want to spend their money on when they have it. They should begin to learn what it is to set a budget and the benefits of paying bills on time and saving for retirement.

Additional Resources:

  1. 29 Unique Labor Day Activities for Kids
  2. All About Labor Day Research Activity
  3. Activities for Labor Day
  4. Labor day worksheets
  5. Labor Day Teacher Resources
  6. 9 Labor Day activities for kids

Basic Tools For Professional Manicures

Before we begin, I will say this: you do NOT need to be a professional to perform a manicure and pedicure. A normal “manicure and pedicure” typically consists of clipping the nails, filing the tips, and painting them with nail polish. And that’s basically it. Anyone can perform this service including small children minus the nail clipping but you get what I am trying to say.

In the real world of licensed technicians and professionals, there are several other components that come along with performing this service. These are tools used at a manicure & pedicure salon. The following content will provide you with additional information about all the necessary tools that will be best suited for a complete PROFESSIONAL manicure and pedicure.

Manicure and Pedicure Tools & Equipment:

These tools will be used during the removal of prior nail polish or false nails. These include any of the following:

  •  Hand Gloves
  • Disinfectant Spray
  • Paper Towel mats
  • Nail Polish Remover 100% Acetone
  • Cotton Nail Polish Remover pads
  • Gloves
    • Used to cover the hands during the manicure and pedicure. They also protect you and the client from germs and bacteria. If you are performing this service uncovered there is a greater chance that this could cause infections.
  • HandDisinfectant
    • This spray will be used to sanitize the client’s hands and prevent the spread of germs. These can come in many forms. Some will be created as an aerosol and others with a spray pump. If you are unable to find any of these you can use hand sanitizer.
  • Surface Disinfectant
    • This spray will be used to sanitize your workspace and disinfect the tools that will be used during the manicure.
  • Cotton Pads, Q- tips, or cotton balls
    • These will assist you in the removal of unwanted nail polish from a prior application. Apply nail polish remover to the pad and wipe the nail applying slight pressure to release the polish.
  • Nail polish remover (With or without acetone)
    • Apply this product to a cotton pad or cotton ball to remove polish from the nail bed and surrounding areas.
  • Soak Bath or bowl
    • Fill with water, liquid soap, and or nail polish remover. Soak the hands and nails using the bowl for the desired method being performed.
  • Hand cloth, mat, or paper towels
    • Best to be used for protecting the workspace or can be used to dry the hands after being removed from the soak bath.
  • Finger Nail Clipper
  • Nail Buffer and Nail Files
  • Finger Nail Brush

Finger Nail Shaping:

These items will be used for filing down the nails to equal lengths and forming the shape of the nails.

  • Nail clipper
    • Trims the fingernails and hangnails from the fingers.
  • Nail file
    • Grinds and shaves down the nails on the tips and sides of the fingers.
  • Electric Nail File
    • Sands the natural nails, nail tips, and files or finish areas of the nail that are harder to reach.
  • Nail buffer
    • Smooth out ridges, and makes your nails look shiny and healthy.
  • Dusting brush
    • Removes the dust left on the nails after filing or buffing.

Cuticle Care:

These items will be used to clean the cuticle area and remove excess skin surrounding the nail bed.

  • Cuticle softener
    • Softens the cuticle and hard skin build-up around the nail fold. Can be found in three forms may be either a liquid, a gel, or a cuticle cream.
  • Cuticle pusher
    • Pushes the skin from your cuticles back and away from your nails to help your nails grow stronger. 
  • Nail nipper
    • Used to clip and remove the skin around the cuticle area.
  • Cuticle oil
    •  Nourishes and smooths the skin surrounding the cuticle stimulating nail growth. It helps improve the appearance of your nails.
Manicure finishes

Manicure Finishes:

These tools will be used to finish the manicure.

  • Liquid Primer
    • This should be applied before the base coat. It smoothes the nail’s surface, fills ridges, and increases color adhesion.
  • Permanent nail polish (Base coat, color & top coat)
    • Nail polish is applied to the nail as decoration and protects the nail bed and nail plates.
  • Hand cream
    • Hydrates the skin and softens the hands after the manicure.

Quick Tips:

  • If you are not sure which tools you may need, visit your local beauty supply store and ask for suggestions.
  • If you would prefer to shop online look around the internet for a basic manicure kit that should have all the supplies needed.

How To Reduce 6 of Your Fixed Expenses

Fixed Expenses

Rent:

A mortgage or rent payment is oftentimes one of the biggest fixed expenses most families incur each month. Typically when a person is in the market to buy a house the real estate agent is most likely going to showcase the most expensive rentals FIRST. This will always be the highest home in your agreed-upon price range. If you need to make a significant change to your budget moving to a less expensive place would be in your best interest.

Although moving may be expensive be sure to factor that into your potential savings and financial budget. If you are relocating to save on fixed expenses make sure you will be saving enough to make the move worthwhile. For homeowners consider the option of downsizing to a smaller home or apartment. Also refinancing an existing home can be a great way to get a better rate or reduce your monthly payment. 

How To reduce Fixed expenses.
What Does Home Owner Insurance Cover?

Home and Car insurance:

In order to protect your home and car against potential damage and expenses, you have to have insurance. Shop around the market to compare prices. This will be good for first-time purchases or if you are changing existing coverage. Increasing your deductible will help reduce the monthly payment. Before doing this be sure you have access to the increased deductible amount should an accident occur.

Car Loan Application Approval

Car Payments:

Of course, nobody wants to be caught driving a 1987 honda in 2022. (Is that even possible? But you get what I’m saying. P.s I LOVE Hondas) Most people incur excessive care payment expenses when opting for a newer model vehicle and popular brands.

The best thing you can do is get something that you can pay for in full or something you can afford. This will ensure you don’t struggle to make monthly payments. If you owe more than your car is worth, consider trading your vehicle for one you can buy outright instead of making monthly payments. Also, consider getting rid of a vehicle that is paid off or financed if it is no longer in use. 

Cable and Internet:

Although the internet is vital for school and work, payment reduction can always be done in this area of fixed expenses budget. Instead of cable invest in just the internet. If you happen to have the urge to watch tv try streaming it online. Consider different streaming options such as Netflix or Hulu. These typically come at a fraction of the cost and contain most or all of the shows you normally enjoy. This allows you to choose what you want to watch at any point in time.

Phone:

People these days rarely use home phones. If you work from home having a landline may be ideal. If you rarely use the home phone there isn’t a need to have one unless you get it at a cheaper price using a bundle deal. If it costs you more than its use you should probably ditch the bill. Check with your cell phone carrier for any promotional deals to lower your monthly payments or save on a new phone.

How To Reduce Fixed Expenses. Paying down student loan debts.

Loans and Tuition:

Tuition payments are one fixed expense that may be hard to reduce when your child is in college or private school. Look into applying for scholarships or grants when applying for school or continuing education courses. If you have an existing loan try to refinance the loan through a private lender to reduce or lower the payment. This will be very beneficial in gifting your child financial freedom. 

Other installments:

Try to pay off debts as quickly as possible. The snowball method is the best way to do this. Once you have no debt try to commit yourself to staying that way. 

The Best Nail Decal Must Haves For Your Nail Kit

What Are Nail Decals?

Nail decals are any type of item that can be used on your nails in addition to nail polish. Using nail decals can be a great way to spice up your nail designs. They add a sense of flash and flair, which can be very appealing. It can be a way to add interest to your hands and feet or attract potential clients.

Nail Art Stickers

Nail art stickers are an easy nail art design staple. They typically come in sheets that can be placed onto your nails. They can be used by moistening them with water. Cut the size of the sticker you will be using then wet it with water. Allow it to soak for about 10-15 seconds before applying them to your nails. After applying them slide off the paper backing and seal with a top coat.

Rhinestones

Rhinestones are another must-have in your nail art kit. This can make decorating your nails simple and easy. If you aren’t quite confident about your design skills just add a few rhinestones to your polished nails. To apply your rhinestones use rhinestone nail glue. Super glue or nail glue can also be applied. The only downside to using superglue is that it can be a bit messy. It also dries fairly quickly and may leave a hard white residue. Rhinestone glue is preferred because it takes a few minutes before it dries completely. This is great for moving the stones around if you make a mistake or want to change the design.

Nail Art Decals

Foil Sheets

Using foil sheets can enhance your nail design tremendously. This is an easy way to get a beautiful set of nails in the fastest amount of time. Foil sheets can also be very complicated to use. The process is fairly easy but it may take a couple of tries before you get the perfect set. This is a better option compared to having to polish your nails and create nail art designs by hand. If you make a mistake you will need to remove the polish and start over.

If you use the foil sheets incorrectly, you may easily remove the design by buffing it off with a nail file. After buffing the nail, wipe it with an alcohol pad and reapply the nail foil glue. Let it dry until it turns clear, then reapply the foil. You can repeat this method until you get it right. Typically, you get a long sheet of nail foil, so it will be okay if you have to reapply the nail design to the nails.

gold glitter with jar
Photo by Alexander Grey

Glitter

Nail glitter is an easy way to add shimmer and shine to your nails. You can use nail powder, glitter nail polish, or nail liner for application. This can be applied over your regular nail polish to add a shimmery effect. It can also be used to add shimmer to a select portion of your nail within the nail design. Using glitter on a whole nail can add a bit of spice to your nails. This works well if you are using solid colors without nail art.

Sequins

Sequins are small, shiny, transparent, or colorful nail decals. They typically come in a variety of shapes and designs. They can be applied to your nails before or after applying nail polish or acrylics. These are best when used along with acrylic or gel polish. If an acrylic or gel polish isn’t used, the sequins may begin to fall off. This will cause you to have to either have a polish change or change the design more frequently.

3D Nail Charms

3d Nail charms are another type of nail decal used to enhance the appearance of your nails. These are likely to be larger in size and resemble the actual object just in a smaller size. They are applied on top of the nails with nail glue. They should be applied over your nail polish and acrylic due to their large size. This type of nail decal is perfect for creating fancy and over-the-top nail designs. Due to their large size, these decals may fall off. Make sure they have adhered properly so they don’t come loose during everyday wear.

Nail Bling

Nail bling decals are made of shiny materials similar to rhinestones. They are very shiny and expensive nail jewelry. These are used to give your nails a little extra shine. This type of nail decal is usually used for a more classy and elegant nail design. They can be applied with a nail adhesive and arranged to form a variety of nail designs.

Stamper & Plates

Stamper plates are used along with a nail stamper to create nail designs. The nail stampers have a plastic body with a rubberized tip. Using this product to create nail designs is fairly simple and easy to do. Using stamping nail polish, apply the polish to the nail design plate. Scrape the excess polish from the plate using the plastic scraper. Place the rubberized stamper on the plate to pick up the design. Gently place the stamper onto the nail to complete the transfer. You can create a better placement of the design by looking through the back end of the nail stamper window.

While this process is fairly simple it can come with a few challenges. Make sure you are using a polish that is made to be used with the stamping plates. I would suggest a gel polish or stamping polish kit. Cleaning your stamping plates after each use will also be helpful if you are using the same plate for multiple designs. Carefully place the stamper onto the nail and try to avoid smudging. In most cases, regular polishes do not produce the most pigmented designs. This must be taken into consideration when choosing your nail designs and polish colors.

Crystals

Nail crystals give off a glass-like appearance. They also add shimmer and shine to your nail designs and are similar to nail jewelry. Some types of crystal nail decals can be used similarly to glitter. Others come in the form of a rhinestone but have the same transparent glass-like appearance. They can be used to create a multitude of nail designs and patterns.

The Complete Professional Manicure Process

Sanitizing hands during professional manicure

Sanitation & Disinfecting:

The first step of the manicure process entails creating the nail shape or form. Before you begin performing any type of service on your client you should wash and sanitize your hands. After this is complete use your latex gloves to cover your hands. You should always perform this step first to ensure the client’s health and safety.

Spray the client’s hands with the disinfectant spray. Disinfect the skin on the hands and cleanse all surrounding areas of the hand including the palms and fingers. After the solution is applied and the hands have been sanitized dry the hands using a washcloth or paper towel.

Client Consultation & Nail Formation:

Perform a client consultation and inquire about the nail shape they prefer for their service that day. Check the client’s nail length and use nail clippers to clip the nails into equal lengths. After the nails have been clipped to create uniformity, use the nail file to shape them into the desired forms.

To begin shaping the nail, start by filing the nails using the edge of the file that is the most coarse or highest grit amount. Be sure to file the nails in one direction when filing to avoid damage to the cuticle area.

The reason for using one direction to file the nails is that you will later be soaking the nails. This will soften the cuticles and you do not want to cause infection underneath the skin. This will give you a better look at which areas you may need to correct using the softer or silk side of the nail file for a more complete look.

Softening the Cuticles:

Fill the soaker tub with warm water set to the client’s desired temperature. Add a few drops of liquid soap to the water to assist with the cleansing process. A special skin softener can also be used. Soak the hands for 10 to 15 minutes. After you remove the hands from the water apply the cuticle softener. (This may be applied before or after you soak the hands depending on the product being used).

Use a metal cuticle pusher or cuticle stick to push back the cuticles on the fingers. Try not to damage the skin around the cuticles. Clean any debris or dirt from underneath the nails. Complete this step for all the nails on both hands.

Removal of Excess Skin:

Starting on the sides of the nails use your nail nipper tool to snip away any excess skin surrounding the cuticle area. (A two-prong nail nipper may be used if you are nervous about cutting with the nail nipper). Start at one edge of the cuticle and nip away at the raised skin while pulling away from the finger. Be careful performing this step so you do not cause injury to the client.

Keep the nail nipper flat against the finger and be sure not to cut too much. This may cause damage to the skin and bleeding may occur. If an accident does happen and you clip or cut too much of the skin special products can be applied. These products may stop the bleeding and disinfect the wounds after application. Once all the excess skin has been removed the area should be smooth and show no sign of protrusion, or dry skin.

Buffing the Nails

After clipping the excess skin from around the cuticle the next step will be to buff the nails. To do this you should use your nail buffer. Often times you can purchase a buffer that has multiple sides indicating what each side should be used for. A regular standard buffer will be enough to complete this task. The main goal of the use of the nail buffer is to give the nail shine. Lightly buff the nail bed until the desired texture is achieved.

Once the buffing is complete apply the cuticle oil onto the finger around the nail and rub it in. If a massage will be given apply the hand cream to the hands rubbing in circular motions. Be sure to gently massage the fingertips and the palms. If the client does not want a hand massage just add the cream and rub it in until clear.

Manicure process

Polishing the Nails

Apply the primer to the nail bed to set the foundation for the nail polish. Apply the base coat on both hands before the colored paint. Allow the client to dry their nails under a nail dryer while the other hand is being painted. Apply two coats of this polish before finishing the manicure with the top coat.

How To Use Nail Foil Sheets And Foil Glue

Picture this: you’re in the store and shopping for nail decals and nail art. You come across these beautiful, shiny pieces of nail foil sheets, and you want them. You pick them up, put them into your cart, and whisk them away. When you return home, you realize you aren’t sure what to do next.

From personal experience, I would agree that these sheets are very challenging to use and could be very confusing. If you do not know what I am referring to it’s a nail foil sheet.

Nail Foil Sheets

What is a Nail Foil?

Nail foil sheets are typically a solid metallic, colored, striped, or patterned sheet material. They come in various colors and are made with a thin clear plastic that is adhered to the pattern. In order to use these sheets on your nails, the plastic must be released from the design. In most cases, this must be done using a special type of foil glue. (There are other methods of doing this as well).

Nail Foil Glue, Nail Art Foil Adhesive, Nail Foil Adhesive
Nail Foil Glue

What is Nail Foil Glue?

Nail foil glue is an adhesive that can transfer nail designs from foil sheets onto the nail. This is usually applied as you would apply regular nail polish. This product is packaged in a bottle with an applicator brush that will be used to guide the adhesive along the nail bed. This is the easiest part of the foil application. Once the foil glue dries slightly then the foil sheet may be applied. Rub the sheet onto the nail while the foil glue is still wet to allow the pattern to stick.

The Nail Foil Application:

There are many different ways to use nail foil sheets with or without nail foil glue. The most used method includes using nail foil glue or some form of adhesive. This process seems fairly easy but it takes a bit of trial and error for most. In order to begin the process of foiling some tools will be necessary.

Makartt Nail Art Foil Glers Soak Off Foil Transfer Gel Strong Adhesion

What Items Do I Need?

  • Nail Foil Sheets
  • Foil Glue
  • Scissors
  • Manicure Stick
  • Nail File or buffer
  • Base Coat
  • Top Coat
  • Fingernail polish (Optional)
  • Art Decals (Optional)
  • Polish Remover (Optional)
  • Cotton balls or remover pads (Optional)
  • False nails or acrylic tips (Optional)
  • Extra hold nail glue

How To Get Started Using Nail Foils:

To begin the foiling process the first step should always be to gather your materials. If you are using acrylic nails for foiling be sure to place these on first. After that step is complete, paint your fingernails with the base coat or polish of your choice. Let this dry under a nail dryer or cure under UV light if you are using gel nail polish.

Once completed, decide where you want to place each foil and how many sheets will be used. Use a pair of scissors to cut the nail foil sheets in the desired shape and size for the nail. Open your foil polish and brush the foil adhesive glue in the desired location for the nail foil placement. The adhesive should look like a white paste once applied. Let the nail foil glue dry for a few minutes until it turns into a sticky clear consistency.

The Application Process:

Apply the foil to the nail as precisely as possible avoiding any folding of the foil or air pockets. Use the end of your cuticle stick to help with the process. Once that is done take your nail file or buffer and gently rub the top layer of the foil to smooth the sheet and allow a better transfer to the nail. Smooth the nail with the buffer until the foil sheet looks like clear plastic. This will indicate that the transfer was successful.

Slowly peel off the foil sheet paying close attention to the nail and make sure the pattern is not lifting. If this happens lay the foil sheet back down on the nail and buff that area again until the pattern is thoroughly removed. Once you are satisfied with the design move on to the other nails. After all of the nails have been completed apply your nail art decals if desired and finish with your top coat.

Top Foil Glues By Brand

  • Makartt Nail Foil Glue Gel
  • Beetles Nail Art Foil Glue Gel
  • Maniology Nail Foil Glue
  • Orly Nail Foil Glue
  • Born Pretty Nail Foil Glue Gel

Quick Tips:

Quick Tips
  • Instead of using glue, gel polish may be used as an adhesive instead. Once the gel polish begins to dry attach the sheet to the sticky layer to make the transfer.
  • Use the hard edge of the nail file to smooth the sheet along the nail bed to eliminate air pockets and folding.
  • The nail buffer works best to rub the pattern onto the nail but slight pressure from the nail file may be needed in some areas.
  • Be sure to allow the glue to dry as long as possible to create additional stickiness. Try not to apply the sheet immediately after brushing on the glue.
  • If you need to fill in missing spots, look at the pattern sheet and pick which area best matches the nail design. Apply the glue to the area of the missing spot and reapply the sheet. Repeat the transfer process until satisfied.
  • If the transfer wasn’t correct or there were missing spots use your nail file to buff off the pattern and try the process again.