Blog Posts

The Best Tech Savvy Man's Holiday Gift Guide

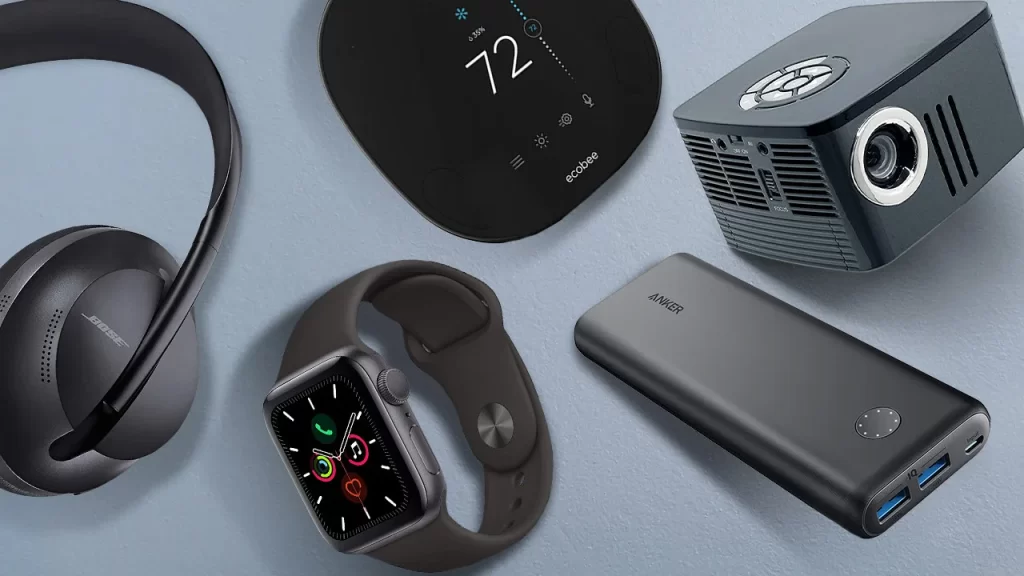
Christmas is quickly approaching, so it’s time to start considering what to get your special someone. Do you have a tech savvy man in your life? This can include granddad, dad, spouse, uncles, brothers, and children. What do you gift him, though? Men might be difficult to find, as we all know, but a great gift shouldn’t be. Don’t worry, though—we’ve got this all taken care of this season. This blog post will highlight a few of the top Christmas presents for guys to keep them busy during the holiday season. So keep reading if you’re hunting for a gift that will delight you!

A Tech Savvy Man’s Gift Guide

Smartphones and tablets make great gifts for tech-savvy men. It’s hard to decide which one to buy these days because there are so many good options. You can teach your man how to become more tech savvy by giving him electronic gifts. If your guy already owns an iPhone or Android device, think about buying him a new case, phone charger, headphones, or other accessories. The good news is that there are plenty of affordable options currently available if he wants to upgrade this holiday. He may find a better deal if he waits until later in the year to upgrade.

This gives him the opportunity to revamp his old device and save the new purchase for another holiday. While this may seem unlikely, there are some old-school guys out there who aren’t quite sold on smartphones. They don’t use their devices much other than to say hello and goodbye. Smart phones, tablets, and phone cases are great electronic gifts for teens. This could also be a great idea for your grandfather or your spouse.  For those guys in your life who don’t have a smartphone yet and want one, there are some great budget-friendly options available to you.

Best Affordable Smartphones

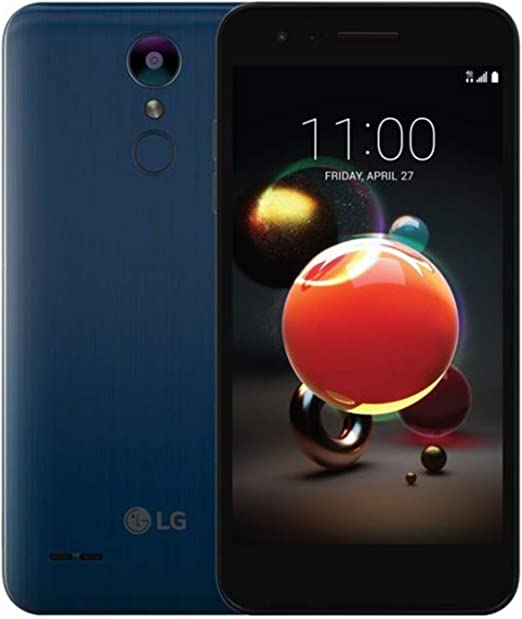
Verizon Prepaid Zone 4– This is a Verizon prepaid wireless device. It has an Android 7.1 operating system, 4G cellular technology, and Wi-Fi connectivity compatibility. It also has 16 GB of memory storage, an LTE wireless network, and a 5-inch screen. This phone is one of the most cost-effective electronic gifts for teens.

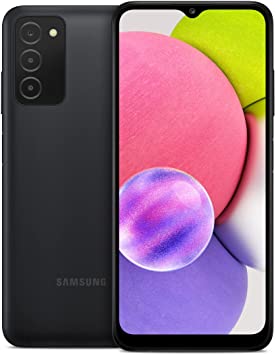
SAMSUNG Galaxy A03s– Unlocked for use with any carrier, this phone would be a perfect holiday gift. It has an android operating system, LTE, GSM, & UMTS cellular technology, and Wi-Fi connectivity. It is equipped with 32 GB memory storage and has a 6.5- inch screen size.

Apple iPhone 11– Buying a refurbished phone can be discouraging. This Apple phone is renewed to a functional condition. It has an AT&T wireless carrier, IOS operating system, and Wi-Fi connectivity. It also has 64 GB memory storage and a 6.1-inch screen.

How To Become More Tech Savvy

Learning how technology works can be very challenging for some guys. You would think that this would be something men would enjoy. If you need an inexpensive gift item for your spouse, these free courses to become tech savvy will be right on spot. This would be a wonderful opportunity for them to familiarize themselves with their new electronics and learn a new skill after receiving them.That is the gift of giving! All these courses on how to become more tech-savvy are FREE. Simply click the link down below, create an account and you are all set. Happy Happy Holidays!

Best Laptops

A laptop would be one of the best gifts you could get for a tech-savvy man. This would be great for the men in your lives who are avid gamers, social media gurus, or have businesses that require them to work from home. They would be extremely happy even if this was the only gift they got for Christmas. With so many items to choose from, it could be hard to decide which one to get.

When shopping for a laptop focus on what the items will be used for rather than how much they cost. If they will be playing simple games look for a tablet or a laptop that doubles as a tablet. If they will be doing more business than gaming be sure to look for laptops that have larger storage capacity and better hard drives and speed.

Other gifts you may want to pick of for your tech savvy guys can include car chargers and handheld stands. A car charger would be great to keep handy for long trips and family outings. When looking for a car charger buy the ones that have the USB port that uses any cord. Get an additional cord to go with the charger so they have two gifts in one. Look for handheld stands that can be used without obstructing the diving capabilities. If not using a a handheld stand try getting them a GPS navigation system instead.

Electronic gifts for men are a great way to show your appreciation for the tech-savvy individuals in your life. Gift-giving unique electronic gifts is an art, the art of giving and receiving, and it is a skill. It is also the main way of showing your love for someone.

The Best Holiday Gifts For You To Use Year-Round

Although holiday items are enjoyable and thrilling, be sure to look for pieces that can be worn all year when purchasing holiday apparel as gifts. Each of us enjoys shopping to a different degree, some more than others. In most cases, we are unsure of what to buy for the upcoming holidays. Clothing was a fairly common gift to give and receive as a present during that time period. How do we decide what items to buy right away and what to put off for later?

Photo by Olivia Bollen
“I get a small commission for purchases or clicks made through links in this post.”

Apparel Gifts For The Holidays

There are many different types of appeal that can be created and constructed for the holidays. These are often the first things we select when shopping for gifts. These items can include shoes, clothes, purses, accessories, and more. The following list is a few ideas to consider when making those purchases.

Sweaters

Sweaters we all love a good ugly sweater during the holidays. While most of them are meant to be fashionable and less “ugly” they can be great holiday gifts. Once again we have to be mindful of who we are getting these for. When we plan on giving these gifts, how they should be worn and why we are giving them at all. When choosing these items as gifts try to look for items that contain movie themes, scenery, or character prints. While these colors may be extra festive and bright they can be worn as pullovers or accessory pieces instead of the main focal point for your outfit.

Ugly Christmas sweater gifts
Ugly Christmas Sweater gifts

T-Shirts

T-Shirts are a great buy during any season. They are the easiest items to find during the holidays and often come at very affordable prices. They have tons of prints, designs, shapes, sizes, and all the glitz and glam for days on end. You can wear holiday T-shirts year-round if you wanted to. They have prints that incorporate all the elements for whatever time of the day or month. These can be very humorous, fun, and entertaining. Don’t buy just one buy them all. I highly recommend this item as a gift. You can eventually use these as sleepwear, headdresses, towels, and more once the holidays are over.

These are just a few of the best winter clothing items that you can wear year-round. All of these are perfect for any season and they will be sure to keep you warm during any type of weather. So let’s get out there and go shopping. Red Light, Green light, One, Two, Christmas Tree!

Holiday Gift T-Shirts

Boots

Boots make for a long-term investment. Depending on the brand and style you select, they may also be rather pricey. You want these things. These are items you want to be very selective of when gift-giving. Consider whether you would be able to wear these items during the spring and fall as opposed to getting a pair of Reindeer ugg boots. Look for something that is on sale, in a solid or neutral color, and without all the frills and tinsel toes.

Cardigans

Cardigans can be worn throughout the year. These are ideal for keeping cozy during the fall and winter months and can be incorporated into your spring and summer months when the AC is booming. When the days are a little bit warmer and the evenings a little bit cooler, you can wear these as wraparound skirts. Since these accessories won’t be the focal point of your attire, you can be much more festive with them. They will be designed to ornament and re-purpose your envisioned spring cleaning.

Holiday Gift Cardigans

Jeans

There are several styles, colors, and forms of jeans. When it comes to gift-giving and shopping, this would be a fantastic gift. While a great pair of blue jeans may be nice you might also consider picking up those red or green jeans as well. Despite what seems to be celebratory colors, these are garments that may be worn all year long. We absolutely love a superb, distinctive outfit with bold, striking elements. These jeans are suitable for all four seasons; simply add some personal touch with complementary hues that reflect the changing seasons.

Jackets

Jackets are a staple closet item. Finding holiday coats may be harder than you would think but would be a great holiday gift. When choosing festive coats be mindful of the person who you are buying these items for. If you do want to buy a holiday coat look for items that are colorful instead of ornamental. This would mean no Santa pics, Christmas trees, or Jungle bells although you may get away with wearing the jingle bells year round. Stick to fireplaces, Snowmen, and elves they may be more season friendly than other items.

Dresses

Dresses are great items to purchase during the holidays. While a big frilly Cinderella ball gown would be great for holiday photos they are only worn once a year. And when you purchase these items you must use them. This would be a nice gift idea but we also need to be mindful of when these gifts will be opened. And I would definitely need Santa to come down the chimney extra early to wear my dress in time for Christmas!

If you want to buy holiday dresses shop for materials that are lightweight and thinner fabrics. Contain holiday designs without all the extras and are not very formal. If you want to wear these to holiday parties that will be fine but by doing this you can also wear them as sleepwear once the festivities end. I’m pretty sure your kids or spouse won’t mind you going to bed wearing the grinch every other weekend. It would surely be a silent night.

Socks

Socks are the least favorite gift item for most people. We don’t typically want to stay up all night on Christmas Eve and fall asleep right before Santa sneaks down the chimney. Only to wake up and begin opening a high number of boxed socks. That would definitely ruin Christmas Day. On the other hand, festive socks and not the simple standard issue ones would excite anyone. This is a gift worth giving. You can be as festive as you want and select a variety of different pairs.

You can start with Christmas designs, New Year’s, Valentine’s Day,’s and so on. And PLUS as an added measure these can be worn year-round or even every day for that matter. I love designer socks. They are fun to play around with and guess what? No one will notice that you are wearing Christmas socks during the Easter Sunday Church service! Long socks are more festive but ankle socks can provide better coverage if that makes any cents.

Scarves

Scarves are probably the least purchased item during the holiday depending on where you live. They typically don’t have many items you wouldn’t buy as a gift. This would be a great idea for your gift-giving if you decide to go down that route. When looking for these types of items you can be as creative as you like. Stick to sheer or thin fabrics when choosing these instead of heavy wool. If anything we can use them as headdresses, belts, or shawls during the not-so-merry seasons.

10 Simple And Easy Gift Wrapping Tips

1. Wrapping Papers

It can be extremely challenging for you to remember which gift goes to which recipient if you are wrapping several presents at once. This is especially true if you have children. I would consider choosing a paper that will be designed for each person when you choose your ideal paper. For instance, feminine paper for women and masculine paper for men. The Disney Princess, Spongebob, Rainbow High, Peppa Pig, Cars, Barbie, Batman, Superman, and other characters fall under this category. You can follow the same procedure or use more neutral paper when wrapping adult gifts to save money.

2. Make It Personal

Before starting, sort your presents into distinct piles. Each pile will be for a different person. Pick up the appropriate wrapping paper for that person and wrap everything at once. Before you start, tally up the presents for each recipient and label the tags with their names.  When you have finished wrapping the items, you can quickly attach the labels to the gifts. The specified paper can also be used to identify the recipient of the gift, but you might need to use it for additional items in case you run out.

Gift Wrapping

3. Use Basic Colors

Choosing paper with little to no patterns or designs simply means choosing paper in solid or simple colors. For those who are unsure of how to package their presents, this is the ideal option. If you happen to underestimate the size of your gift goods and the amount of extra wrapping paper you have, using solid colors will disguise all of your errors and be the best at hiding the flaws.

Gift Wrapping

4. Use Bags & Gift Boxes

These are best to be used for presents that you don’t plan to wrap. These function better when used for larger objects that require more paper to cover them. This would also necessitate a longer-sized paper, which you might have trouble locating in stores. The ultimate solution for all the random goods you don’t want to pile in a bag is a gift box.

They work wonderfully for the majority of your apparel items including t-shirts, pajamas, socks, and underwear. These can be useful for occasions when giving money or gift cards to friends and family are preferable. Jewelry and accessories including wallets, purses, and wristwatches.

Gift Wrapping

5. Buy Gift Bags In Bulk

You can put everything in Holiday sacks if you don’t want to hand-wrap your presents. Make sure you have plenty of them on hand in case you decide to purchase additional items and run out of paper. This will also be a terrific option in the event that you have goods with irregular shapes that you intended to wrap but find that you don’t like how they look once you’re done. If you don’t have any tissue paper, you can keep the item wrapped that way and just put it in the bag, or you can unwrap it and use the wrapping for another gift.

Gift Wrapping

6. Use Sticky Tabs

When it comes time to label your goods, sticky tabs can simplify your life. You can use various colors for various people. Additionally, if the sticky tab comes off the items during stacking or because it wasn’t placed correctly, it can be easy for you to lose track of who the item is actually for. The designated paper would be used in this situation.

Gift Wrapping

7. Add Extras

By including brief messages in your gift bags, you can enhance your presents. You can also attach holiday cards, ribbons, and candy canes to your bags and boxes. To improve the smell of your clothing, you can spray them or use dryer sheets with seasonal scents. This will add a nice holiday scent to your garments.

Be considerate of the people receiving these items. Even if the majority of these selections shouldn’t be too problematic, pay attention to allergies and similar things. To avoid giving the recipients uselessly wrapped products, make sure to wrap items that contain toys that require batteries together. Despite the fact that they were meant to be useful.

Gift Wrapping

8. Don’t Overdo The Details

During the holidays, some people have a tendency to overdo a lot of things. This may involve the packaging and wrapping of their holiday presents. To avoid having to endure the extra required amount of time to cover your presents, I advise you to keep it simple. A gift box or gift bag doesn’t need to have many bows on it. Four gifts can be spruced up with just one bow. If you want to be unique or are out of paper, you don’t need to add numerous different paper designs to one present. Holiday or flashing lights are not required unless they are an integral component of the gift. There will be enough light from the Christmas tree.

Gift Wrapping

9. Re-Roll Paper

To save your paper properly, make sure to reroll it. By doing this, you should be confident that the paper will still be usable the following year. You can save money by skipping the purchase of wrapping paper as you haven’t used it all up the previous year. This will also be beneficial if you need to buy additional gifts or if there is anything you neglected to wrap during your gift-wrapping session.

How To Easily Organize Your Closet in 2023

The easiest method to sort through and locate your favorite items is to have a well-organized closet. You may also save a lot of room by organizing your closet. Additionally, it makes dressing for the day easy. After washing and replacing, you will be able to pinpoint exactly where everything is and where it belongs.

How To Organize Your Clothes

organize your closet
Photo by Becca McHaffie
“I get a small commission for purchases or clicks made through links in this post.”

There are numerous ways to organize your clothing. Utilizing a closet organizer is the simplest method to go about doing this. You might want to organize your clothes by specific pieces. You can separate your closet into sections for your work clothes and your social gear. To further organize your closet, try separating your garments by color instead of a specific type of material.

How To Organize Your Closet By Color

The matching pieces would all go in the same place, and so on. You have the option to choose whether to fold some articles of clothing and hang the rest. For example, you can hang or fold all your clothing items that are the same color. You would put all the blue items together. This would be everything that is blue such ass pants, shirts, coats, socks, and shoes. All the pink items would go together until you run out of colors. Another way you can do this is by color-coding specific items. All your white shirts would go together. All your blue jeans would go together. All your black socks would go together and so on.

Photo by Greg Rosenke

Generally, people would prefer to fold their jeans, pants, skirts, and shorts while hanging up their shirts, blouses, and dresses. Set your pants in one location and all of your shirts in another. Arrange your dresses in one group keeping shorts and skirts apart in the closet or dresser draws. Usually, people keep their underwear in a dresser drawer. This is due to the fact that they are often utilized and typically smaller materials.

How To Organize Your Shoes

To help you manage this setup, there are many different types of closet organizers available on the market. These consist of hangers, shelving, storage bins, and clothes racks. Hanging shelves, S-type hangers, and drawer organizers are a few examples of different kinds of closet accessories. Hanging shelves are shelves that are suspended from a hook or pole, while S-type hangers are long hangers that loop to the left and right in the shape of the letter “S.”

Consider placing a bin on a shelf in your closet and filling it with all of your socks. There are several distinct styles of shoe racks. Shoe racks are available for hanging over doors. These are the best options because they conserve a lot of space. If you have multiple pairs of shoes, you can place one on each door in your home if you like.

There are also shoe boxes for the storage of your shoes. These are plastic containers in which you place your shoes to avoid dust and damage. This can also entail grouping your shoes together. They can frequently be stacked and transferred from one area to another. This guarantees that you can stack some on a shelf, in a corner of your room, or at the bottom of a closet. They may be used for more than just your shoes, so this would be a wise purchase. You can use them for your ties, hats, underwear, purses, and even socks.

organize your closet
Photo by Fikri Rasyid

To store your shoes, there are shoe racks with shelves available. Although they can be used in a closet, it would be ideal to place them by the front door. If you usually take your shoes off before entering the house, place them near the entrance or mud room. As those are the shoes you’ll be using the most frequently.

Storage Bags

Bags for closet organization are a form of organizer that function well for goods that won’t be used often. They are primarily used to store seasonal or holiday items. When changing your wardrobe throughout the season, you should utilize these products. When people refer to undergoing spring cleaning, they essentially mean getting rid of anything they won’t need during that season. This can incur putting away the entirety of their winter clothing to make room for their spring and summer gear.

organize your closet

This is a fantastic approach that would save space and enables you to assess what supplies you currently have before making additional purchases. These bags are often constructed of soft fabric or plastic. When not in use, they can be folded and stored away. This style of closure, which is entirely zippable, shields your items from water, bugs, and dust damage.

Most of the time, they have clear plastic-like glass so you can easily see what’s within the storage bags. This cuts down on the amount of time you’ll need to spend looking for the things you need. These bags are potentially available in huge sizes with lots of space for seasonal clothing, bedding, linens, holiday decorations, toys, and other items.

10 Best Must-Haves For Your Skincare Routine

Skincare Routine Products

My Skin Care Routine

When it comes to skincare I have to be very careful about which products I use. People who have sensitive skin break out very easily. When breakouts occur they can cause pimples or skin rashes. After a breakout, these areas can cause dark spots on your skin. These marks are known as blemishes and can be very irritating. These are the products I use for my skincare routine and I swear to them. They don’t cause irritation to my skin and I have minor breakouts if I have any at all.

Skincare Cleansing

When I begin my cleansing process I wet my face with water. You can do this by slashing water on your face with your hands. A washcloth or facial wipe will also get the job done. Many people prefer to use a washcloth when doing this but I would recommend using a facial wipe instead. I also use washcloths because it better removes the cleanser from your skin. Using a facial wipe would be more gentle on the skin, but it can be very soapy. This would require more rinses of the cloth and add additional time to your cleansing.

After applying water to my face I place the facial cleanser on the back of my hand. It makes massaging the product into my skin a lot simpler. When I do cleanse my face I mix three products together. You don’t have to use this method using one product at a time is fine. I think it’s the easiest way for me to get all the cleansing I need to do in one wash. Also, I have noticed that using these products separately causes my face to have a burning sensation. That can cause skin irritations and additional acne.

Skincare Routine Products

I use the Epielle pore cleanser with baking soda, Proactiv renewing cleanser, and the Tea Tree cleanser in conjunction with one another. I place the Proactiv cleanser on my hand first followed by the pore cleanser and then the tea tree. I do this because the proactive product is thicker and the other two are more liquidy. This can cause the product to run along the back of your hand and you have to chase it to avoid spillage. They have small bowls with spatulas that you can use to make this process easier.

The cons of using the bowl and spatula could cause you to waste some products and have more things to wash. This is all dependent upon the types of products you use, how often you use them, and how much they cost you. I lightly rub the product in with my finger to mix the items and then apply it to my face. I apply the mixture to the area that has the most blemishes first. This allows the product to sit longer as I apply the product to the rest of my face. I massage the mixture into my skin for about 2 minutes before rinsing the cleanser from my face.

Proactiv Skin Toner

I fan my face with my hand to allow it to air dry instead of using a towel. This can cause your skin to dry out which may lead to irritation. After my skin dries, I use a cotton pad to apply my facial toner. Using the Proactiv facial toner I apply a small amount of the liquid to the bad and rub it into my skin using circular motions. Always be sure to start toning your skin in the area that is mostly covered in acne. After toning, apply the acne fade removal cream.

Post Acne Dark Mark Relief

Sometimes I would apply the post-acne dark mark relief by itself. I would also mix the cream with the repairing treatment and apply it to my face all at once. I would alternate between using the repairing treatment and the Ponds beauty cream. This would be the end of my skincare routine. If I recently had a breakout I would just apply the post-acne dark mark relief followed by the post-acne scar gel and then apply the repairing treatment as the final step. 

Repairing Treatment

When my skincare routine changes it’s only because I add a mask to my initial routine. I would follow the same steps but I would apply the Freeman peel-off mask to my face after cleansing and wait for it to dry completely before peeling it off. After peeling the mask off I would tone my skin and apply the post-acne dark mark relief and repair cream. This would be my final step.

At least once a month or so I would use cleansers, peel-off masks, toners, post-acne dark mark relief, scar gel, and repairing treatment followed by a Burt’s Bees brightening mask or the Sally Hansen aftercare lotion. The brightening mask doesn’t need to be washed off. It is simply an additional moisturizing tool to hydrate your skin. And there you have it, beautifully hydrated, glowing, fresh skin.

Skincare Routine Products

Products Used:

  1. Epielle pore cleanser with baking soda
  2. Proactiv renewing cleanser
  3. Tea Tree cleanser
  4. Proactiv Skin Toner
  5. Proactiv post-acne dark mark relief
  6. Ponds beauty cream
  7. Freeman peel-off mask
  8. Proactiv post-acne scar gel
  9. Burt’s Bees brightening mask
  10. Sally Hansen aftercare lotion

Is Shrinkage Hiding Your Natural Hair Growth?

Natural Hair Shrinkage

When your hair begins to grow it also begins to shrink. We call this process “Hair shrinkage” in the world of natural hair. This is one of the biggest struggles naturalistas face when embarking on their hair journey. It can be upsetting and surprising at the same time. Once you begin to straighten your natural hair from its shrunken state you can be quite surprised at how long your real hair is.

For instance, Let’s say that you are finally done with chemically processed hair. Yes, I did say chemically processed for two main reasons. The first reason is that I do NOT want to offend my relaxed hair people. I too was once an avid relaxer girl at one point or another in my lifetime. The second reason is that the term “chemically processed” can include a multitude of products.

What is Chemically Processed Hair?

Chemically processing is intended to alter or change a person’s hair texture. The types of products used during this process can include hair relaxers, hair color, permanent waves, or whatever else we have grown accustomed to these days. Don’t get me wrong I am not against having processed hair. There are many people who are capable of having healthy chemically processed hair. I would just prefer to continue with my natural hair because although it entails more work, it’s easier for me to manage.

Hair Shrinkage perms and relaxers

Regardless of your natural hair type and texture, determining your growth cycle is important. You can transition or do a big chop. Transitioning is growing out your natural hair at the roots and being determined to hold on to your relaxed ends for length. You would essentially allow your hair to grow as it is but care for it a lot better. You would use less heat on your hair, maintain its moisture, and regularly clip your relaxed ends. If you don’t use the transition method you could just go ahead and do a big chop. A big chop is a process of cutting all your hair off and starting from scratch.

A big chop can also be similar to the transition method. Instead of gradually clipping the relaxed ends during a trim, you would cut the relaxed ends and keep only your new growth. While shrinkage is never a good thing it affects both equally the same. In my opinion hair shrinkage while transitioning is terrible. It just looks BAD. I would suggest gradually clipping away at it over time, but either way, it MUST go. Now you have a whole head full of new gr

Hair Shrinkage

What Is Hair Shrinkage?

Hair shrinkage is basically the process of natural hair basically hiding your actual hair growth. This happens when it draws up closer to the scalp area than you would like. This can cause your hair to look a lot shorter than it actually is. Shrinkage happens most often when your hair comes in contact with any source of moisture. This can be from hair washing, applying products, or any type of changes in the weather. Typically people who have type A, B, or C hair experience greater shrinkage due to the fact that their curls, kinks, or coils are fairly tighter than the other hair types. 

Do not be discouraged, shrinkage is a natural process. It doesn’t mean that your hair isn’t growing or that it is falling out. It’s simply your hair doing what hair does. This can be easily fixed in a different number of ways. You can pull your hair down as long as possible to track your actual length. You can straighten it with a flat iron or use a hair stretching source. When using a flat iron be mindful of your hair texture.

Black woman’s hair from thick afro to straight long hair.

Often times your natural hair will not remain straight for long periods of time. Straightening your hair will only last for about a day or two before shrinkage begins to take force. Your hair may become frizzy or “puff up” shortly after depending on the method and products used.

Stretching your hair can also include the hair band method, hair products, or twists. The hairband method is done by using rubber bands or hair ties. You can section off some of your hair or all of it and wrap them around your hair strands. You will do this all the way down the whole section from the root to the tip. This can be used to dry your hair or simply retain your hair’s length. You can twist your hair and then place the bands to group them all together.

There are many products on the market that can also be used to elongate your hair. These are not “hair growth products” but they are used to stretch your hair. This is to prevent shrinkage by blocking the amount of moisture being produced. These types of products work well by weighing your hair down and holding it in place while it dries.

How To Prepare For Your Nail Set Designs

Designing a new nail set is always fun and exciting. While that may be true it is also very time-consuming. If you are just practicing this won’t be an issue because it’s best for you to take your time and not rush. Rushing could cause you to become frustrated and give up, don’t quit keep going! Ensuring a smoother transition from practicing to having clients requires a well-thought-out and detailed plan.

This can be something you do regularly or need to become a habit. While I will admit I’m not an expert, I’m in the beginning stages of creating something bigger than a hobby. These are some of the steps that help me move a bit faster when creating. It also helps me stay a bit more organized and makes the cleanup process a lot faster. Especially if you don’t have a designated nail art area or station. 

1. Gather Nail Set Supplies

When you do this you don’t have to take all your nail supplies out at once. You can simply gather all your nail boxes and supplies and have them near you at first. It will cause a bigger mess than you would like having to continuously dig into them to remove one item at a time. Placing them near you is beneficial in case you forget something. Having them close by will save you the hassle of going back and forth to get supplies. Once you have all your supplies make a list of the things you will need to take out. 

2. Decide Your Nail Set Type

Many people like to create their nail sets from scratch. This can also be known as a freestyle set. It basically just means the design will be random and they will create it as they go along. They don’t have a clear idea of what colors they want to use or the design they want to be the final result. Other people like to recreate looks for their nail sets. This can be a nail set that they saw on a friend, a video, a Pinterest pin, a tv ad, or a set that they previously made. Knowing what you want to create will help you better prepare the supplies you will need for your nail art design.

3. Create A List

After deciding what you want to make create a list of the nail supplies you will need. When you make your list start with the essential items first then add your nail art pieces. So Let’s say you will be doing an acrylic set of nails on a client. You would start off by adding your sanitation items, manicure tools, table cloth, nail drills, drill bits, and acrylic powders and monomers. Then you would add your nail polishes, UV/LED light, nail decals, liner brushes, polish removers, etc. If you are doing a press-on set you would start off by listing your nail stands, nail adhesive putty, packaging boxes, and double-sided tape. and the other items included in the previous statement.

4. Unbox Nail Set Supplies

Go through your nail supplies and place all the items on your list off to the side. This can be in a separate box or laying them out on your workstation. This is so that you avoid making several trips back and forth between your nail supplies and your workstation. Some designated workstations have draws where you can house your nail supplies which makes this process easier.

5. Arrange Your Workstation

Organize your items in the order that you will be using them. This means sanitizing your workstation, setting up your nail stands, placing your powders and acrylics, and so on and so forth.

6. Sanitize Your Workstation & Nail Tools

Spray your workstation with disinfectant or wipe it down with disinfectant wipes. Place your nail art implements into a sanitizer and let them sit. You can continue to organize and lay out the rest of your supplies while they are sanitized. 

7. Prepare Your Nail Supplies

Place your powders and monomers into your specified glass jars or containers. Set up your nail drill and nail bits, nail files, and buffers. After your nail brushes finish the sanitizing process place them on your station with the rest of your supplies.

Nail Set Design preperation

8. Setup Nail Stands

  • Remove all the nail polish and excess putty from your nail stands.
  • Sanitize your nail stands using a disinfectant spray. You can use disinfectant wipes for your nail stands but using a spray would speed up your preparation stage. 
  • Place all the putty from the stands into one large ball. Manipulate the large ball for a few seconds by stretching it out and rolling it back together. This will ensure that your putty is extra sticky and adheres to the nail stands.
  • Count the number of individual pieces you will be placing putty on for your nail stands. After you do this separate the putty out into small tiny balls for the number of nail stands and set them aside. This is done to make sure that you have enough putty to fit on all your stands before beginning your nail sets. Make sure that the balls are completely rounded so that the sticky ends are not too wet when you take your nails off the stands, It will cause you to take more time to clean out the inside of the nails. We want this process to save you time and not waste it. 
  • After rolling all the balls out place them on your individual stands. If some of your putty balls are too thin add more from a thicker ball or get additional product. 
  • Rotate your stands so that all of them are vertically placed for better placement of your artificial nails. 
  • Choose your nail sizes and place them on the nail stands. If you will be making multiple sets place all your nails on the stands at one time. I would suggest doing each nail at once. For example, placing all the thumbnails on the stand then all the ring fingernails, etc. Set the other stands to the side once completed.
Gel nail polish for Nail Set Designs

9. Arrange Polishes & Nail decals

If you will be using nail polish place your base coats first, then the color nail polishes, UV/LED light, and top coat grouped together. Place the nail foils, and decals together with your foil glue and nail adhesives.

10. Cleaning up

After completing your nail sets place all the items back into your nail supply spaces for easy cleanup.

My Simple And Easy Brick Grafitti DIY Nail Art

As I was doing my research, I decided that I should probably take a “brick” from work. I will admit that creating and maintaining a website and blog is very time-consuming. So I was organizing my Pinterest nail artboards and came across a picture of a set of nails that I thought were dope. This initially seemed like a simple design for nail art. I had no idea how the actual nail art design was created but decided to attempt it.

I wouldn’t say that I was a beginner when it came to simple nail art designs. I will say that I appreciate all the nail technicians and designers out there. I can kinda look at a nail design and create it mentally before transforming it into the nail. If you have never tried to recreate a look you saw online, you don’t feel my pain. I just knew it was going to be a simple design for nail art and would be an easy set to create. It was a clear picture in my mind, but the execution didn’t agree with me. Anyway, here are the nails that I ended up with.

While it didn’t quite come out like the photo from my Pinterest nail art board that I started with, I came up with my own cool design to recreate. Yall don’t beat me up since it isn’t the greatest, but I haven’t been doing nails as often because I have been obsessed with my hair and this website’s creation. Plus, I’m not going to lie, I rushed through these. (Insert laugh here.) Here are the other nails that I created while doing my Brick Grafitti nail art set.

Brick Grafitti Nail Art

Brick Grafitti Nail Art

Creating the brick DIY nail art design was simple and easy. The way I did these is very beginner-friendly, but it will take a steady hand and possibly a bit more tools than I used. To begin, decide on the colors you want for your nails. I chose to use a gray, light pink, sky blue, and neon green color scheme. I painted all the nails and let them dry. The gray nails were the nails that I would be using for the rick pattern and would leave all the other nails plain or solid colored.

To create the brick design I painted straight lines going horizontally across the nail bed. I did about 7 or 8 lines using a liner nail polish brush. After that was done I painted small vertical lines going downward in an alternating fashion. This means placing my lines inward on one block and outward on the next block until the design was complete. You can basically do your lines as large or as small as you wish. It is entirely up to you.

Brick Grafitti Nail Art

I was placing them anywhere and in any size, not trying to make them perfect, just attempting to see if I could create the design. I would suggest using nail liner tape for straighter lines, but I did not use it when doing this look. After creating the block-style pattern, I placed a small drop of polish on a plastic sheet that would be used to fill in the colored squares. I would suggest that you only use a small amount each time so that you do not waste your polish. The paint will dry quickly, and you may end up with thick, sticky paint, which will be very messy.

I used the three colors to fill in the blocks without using a specific placement method. You can add color to any design you like. You can even color in all the squares; I thought it would be overcrowded. After letting the color blocks dry, I painted them with a top coat and set them to the side. Mission complete. The design didn’t come out quite like the photograph, but all in all, I was pleased with how they came out. And here is my token to the simple design for the nail art collection.

10+ Best Women's Peacoats For The Winter Season

Peacoat Styles
Peacoat Styles
“I get a small commission for purchases or clicks made through links in this post.”
Peacoat Styles

Having a thick heavy coat to keep warm is very essential. A peacoat should be one of those necessary items in your wardrobe. A peacoat is a thick piece of outerwear worn by many women and men alike. It is normally of a darker-colored fabric made out of heavy wool. While the standard colors are navy blue or black they come in an array of colors and fabric types.

Peacoat Styles
Peacoat Styles
Peacoat Styles

What Is A Peacoat?

Peacoats are characterized by short-length, broad folded flaps of fabric on the front below the collar. They have double-breasted fronts and often have large or medium-sized buttons. The buttons can be made out of large wooden, metal, or plastic buttons. They usually have at least three or four buttons. Sometimes they are in a single line although they can have two columns of three or four rows of buttons. Many times these styles of coats have vertical or slash pockets.

The winter season entails many bouts of cold weather. You should be careful when the temperatures drop too low to avoid being sick. Pair any one of these peacoat styles with a warm set of cloves, a snuggly hat, and a scarf to ensure that you’ll be all set for the winter!

How To Decorate Christmas Cookies

Christmas Cookies

The Christmas Holiday is always a great time for decorating. It’s the perfect time to showcase your festive spirit and cheerful personality. This can include hanging Christmas lights, decorating the tree, and baking cookies! Why just bake when you can decorate?

Christmas Cookie Decorating Kits

You can find many different types of cookie kits at your local grocery store or even online. They have snowmen, gingerbread houses, ugly sweater cookies, and even Christmas trees. They come with either the powder to mix and make them on your own or you can buy premade cookies that you just need to decorate. The icing and decorative edible candies will also be included in most of the boxes so you don’t need to shop for additional items.

Here are a few of the cookies I made one year when I was feeling pretty festive. The kit that I used included pre-made cookies so there was no need to bake them. Each was individually wrapped so you can save some for use at a later date without them being stale. You could also give them out as Christmas gifts to your guests during the holiday season and allow them to decorate their own cookies. This is great for children and adults because they are simple and easy to make since the kits include everything you need.

Christmas Cookies

These are a set of ugly sweater cookies that I made that same year. These were more fun for me to make than the gingerbread sugar cookies. This kit came with a better color variety of icing and smaller edible candies. The gingerbread kit had larger round edible pearls that were pretty to look at but not so great as the tastebuds. They were kinda like mini jawbreakers.

You could eat them but they wouldn’t be safe for small children to eat. I would recommend that you take the candy pearls off before eating but still allow them to use for decorating. The ugly sweater cookies are more grown up and less “kid friendly”. Even though they could possibly decorate their own sweaters how they like. My daughter actually decorated the bottom two cookies on the left-hand side. She had fun while she was making them but eventually left me to finish the rest of them.

50 Appetizers To Make This Christmas Season

A well-prepared Holiday dinner is always the main event during the holiday season. Appetizers can be used as a great centerpiece for your holiday table. They can also be used to entertain and wow your guests while keeping them occupied until dinner is ready.

Let’s be honest making holiday meals can be very time-consuming. Not just for the cooking time but planning for these events can also be a struggle. Making appetizers give you the chance to try out new recipes and get guest opinions. If they end up liking the items this year it can also be a great way for you to prepare next year’s menu.

Don’t be afraid to recycle your favorite Thanksgiving appetizers this Christmas. I would suggest that you at least try to include some new festive seasonal favorites too. If you always have new and fresh items on the menu it will keep your guests happy and looking forward to next year’s meals. During the holidays most people rush to make and taste finger foods. They are usually the easiest to make and always guest favorites. Some of these include dips, smokies, pizza bites, pinwheels, And assorted cheese platters. They also contain sliders, cheeseballs, deviled eggs, and meatballs.

Here are a few Christmas appetizers that will hopefully fill your home with new scents, and variety and melt on your holiday tastebuds.

Holiday Appetizer Ideas

  • Asparagus parcels
  • Bacon cheese ball wreath
  • Bacon cheese dip
  • Bistro beef bites
  • Bourbon glazed meatballs
  • Brown sugar smokies
  • Canapes
  • Caramelized onion dip
  • Cheese logs
  • Chicken crescent wreath
  • Chocolate caramel fondue
  • Christmas deviled eggs
  • Christmas fruit wreath
  •  Christmas tree pizzas
  • Corn in a cup
  • Corn pudding
  • Crabmeat cocktails
  • Cranberry cream cheese spread
  • Cranberry salsa
  • Crostini with cheese
  • Egg rolls w/ food coloring sauces
  • Festive dips
  • Festive sliders
  • Fruit cakes
  • Garlic tomato bruschetta
  • Ginger  and brown sugar smoked ham
  • Grinch holiday popcorn
  • Hot chicken swirls
  • Hot crab dip
  • Hummus wreath
Christmas Holiday Appetizers
Holiday Reindeer Sliders
  • Italian Cheese loaf
  • Meatballs
  • Meatloaf muffins w/ mash potato tops
  • Mini cheese ball bites
  • Mini corn dogs
  • Parmesan-crusted Brussel sprouts
  • Party crab puffs
  • Potato cakes
  • Pot pies
  • Pumpkin deviled eggs
  • Puff pastries
  • Scones
  • Shrimp & gouda grits
  • Smoked gouda and bacon potato
  • Smoky BLT deviled eggs
  • Snowman cheeseballs
  • Spicy johnny cakes w/ smoked salmon & lemon creme fraiche
  • Stuffed crescents
  • Toasted ravioli
  • Tortilla pinwheels

The Amora Coffee Black Friday 3Pack Bundle Sale

Amora Coffee has been my go-to Joe for the time being. Drinking coffee is often a necessity for people who need a sudden burst of energy. It’s an item that we drink every day and sometimes more than one cup. So we would need to have these items in abundance to ensure that we never run out and always have what we need when we need it.

Black Friday is one of the most popular holidays many people look forward to. It’s an official un-official holiday that we cannot wait to celebrate. This is the time of the year that we spend the most money but save the most at the same time. There is a great backstory behind this Black Friday purchase I made at Amora Coffee.

The Amora Coffee Company

I was surfing the web as always and I came across an offer for Amora Coffee. This was during my trial and error as a product tester. I can’t remember what the offer was at the time, it had been a few years ago. I would like to say that it was a free bag of coffee. It may have been $1 for a bag or just the shipping and handling. It all depends on the time of year and what deals they have available. So I decided that this was a product that I was willing to try.

Amora Coffee

After paying the small fee the bag of coffee was sent straight to my doorstep. The item was delivered on time and without any damages or defects. The first cup was very tasty. The coffee grinds were heavily scented but the coffee itself was very mild to the taste. It also tasted just as good as the initial brew after letting it sit for a few hours during the day. I must say that I was very impressed with my purchase.

A few days ago I had been checking my email and saw that they had sent me multiple black Friday sales and deals. Most of them I saw too late but there were new ones posted within a few hours of me looking through my emails.

The initial email that I saw was to save 24% off on any purchase of coffee. The link also contained a new flavor so I clicked the link and went to the website. I went to the list that contained all the coffee flavors. There was one flavor I wanted which was initially the reason I went to the site. The new flavor being promoted was a birthday cake-flavored coffee. I have tried sugar cookie coffee creamers and loved them so I thought this might actually be goodness in a cup. They had a pumpkin spice flavor that was also of interest to me and headed straight into my cart.

I placed the into my cart and as I got ready to check out I saw a bundle deal code flashing above the page. With this deal, It said that I could save $20 on any 3-pack bundle deal. So I leave my cart and go see which bundles they had before making my final decision. There was only one bundle that had the birthday cake flavor which I really wanted. The only thing it didn’t have was the pumpkin spice flavor. So I settled for the 3-pack bundle with the birthday cake, caramel vanilla, and hazelnut cinnamon.