Blog Posts

How To Choose Which Colors To Wear More Often

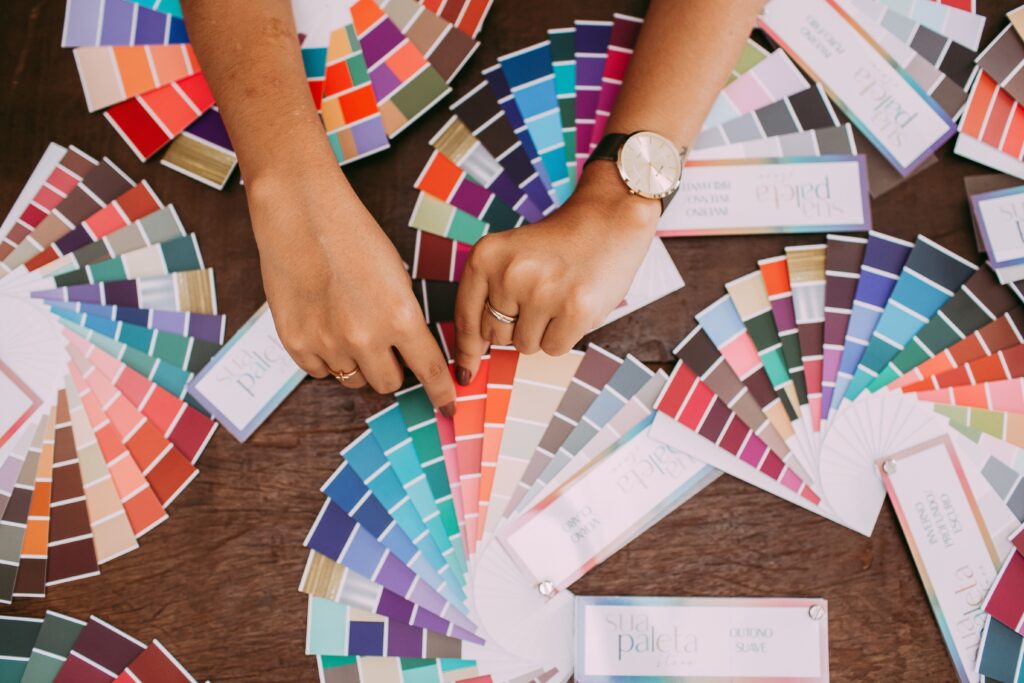
Are you unsure about which colors look best on you? Having a hard time deciding which colors to wear more often? Do you have a hard time when it comes to mixing your fashion hues? Hopefully, this post will help you when it comes to wearing colors together to achieve the most complete fashion results.

Colors To Wear More Often

colors to wear more often Violet
Photo by Jr Korpa
“I get a small commission for purchases or clicks made through links in this post.”

Violet

There are hints of both purple and blue in the color violet. It’s a great color to use when you want to combine the best aspects of both worlds and have a tone that stands out from the crowd without being overpowering. The most attractive of all the colors is usually this one. The main reason for this is that it is soft enough to complement any skin tone or complexion. Although that might be the case, it is also vivid enough to draw attention to your focal points.

When incorporated into soft knits, the color violet looks its best. These include clothing items like scarves and sweaters. When used as a bright color, this hue is also aesthetically pleasing. This hue works well as a vibrant substitute for many cocktail dresses. Dark neutrals and the color violet go together beautifully. It is the perfect option to add a splash of color to something that is black, gray, or navy in color.

Blue

Of course, blue is a vivid, assertive color. For the majority of skin tones, blue looks great on them. It provides the ideal contrast to light hues like white and tan. all while giving an outfit a splash of color. Additionally, blue can be energizing when it is more saturated or calming and soothing when it is lighter. It is an excellent option for adding a dash of color to any look because of how well its vibrancy goes with neutral tones. Unlike many other vibrant colors like lime green and hot pink, it is very flattering when worn.

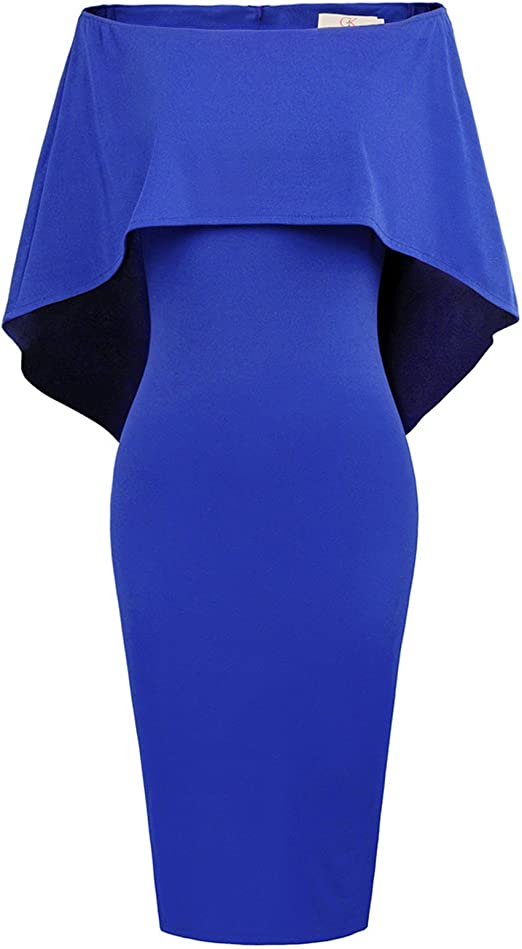
Bright blue is a fantastic color for evening wear. This is particularly true if it is used in various shiny fabrics. The calming qualities of blue make it a fantastic choice for professional settings. When paired with silver, white, and white, it exudes luxury and style. Beautiful and versatile, bright blue can be used to create a number of looks. It goes well with basic t-shirts and wool coats and is very wearable. The ideal accent color for accessories is also bright blue.
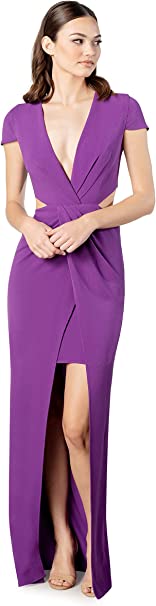
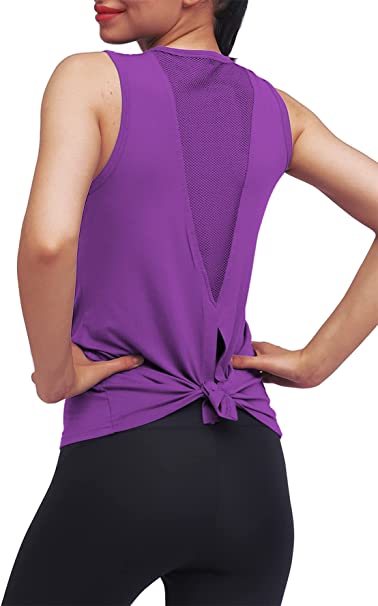
high-rise buildings
Photo by Jan Baborák

Purple

Purple is a timeless color that will always be in vogue. The best way to describe me is as a deep jewel tone. Purple is a seductive color that can be worn in a variety of ways, from bold to understated. The majority of skin tones look beautiful against the deep purple color. This could be a skin tone that is darker or lighter. Typically, people wear these hues in the winter. This typically happens in the fall and winter.

Wearing purple is appropriate in a variety of situations, including social gatherings and the workplace. With the appropriate pairing, it can also be worn in the spring and summer. Workwear gets a jolt of sophistication from a deeper shade of purple. A purple blouse can be worn with a pencil skirt and casual wear. The color purple looks best when paired with most denim fabrics.

white and black boat on sea during daytime
Photo by Prajjwal Garg

Teal

Teal is the ideal color to pair with various hair colors without looking out of place. It is a great alternative for people who dislike bright colors but still want to make a statement. This ideal shade of blueish-green looks great on many redheads, blondes, and brunettes. Even though teal looks good on its own, patterns and plaids make it look even better. They look fantastic in tie-dyes and polka-dotted clothing. For a refined mix, combine teal with neutrals like camel or chocolate brown.

a small model of a house
Photo by Alabaster Co

Burgundy

Burgundy is a striking color that can give any outfit a dramatic flair. It is a classic and elegant color that is always in style. Any season is perfect for the color burgundy. Because of its adaptability, it is the ideal choice for any situation. Burgundy is the ideal shade for a dramatic outfit. It is a darker shade of red wine that is also known as maroon. Burgundy goes well with a variety of neutrals, from camel to chocolate brown. Shades of burgundy can be used to create a classic yet daring look in accessories like shoes and handbags.

It works well for stunning evening gowns and dresses. Any outfit can benefit from a touch of glitz brought on by adding a hint of burgundy. For a regal appearance, combine burgundy pieces with expensive prints (brocades, paisleys, and silk stripes). Alternately, opt for a more toned-down appearance by wearing it with complementary hues, such as a rust-colored skirt, an ivory blouse, and a burgundy handbag. Choose career clothes with burgundy as a neutral color (it mixes with colors like charcoal gray and olive).
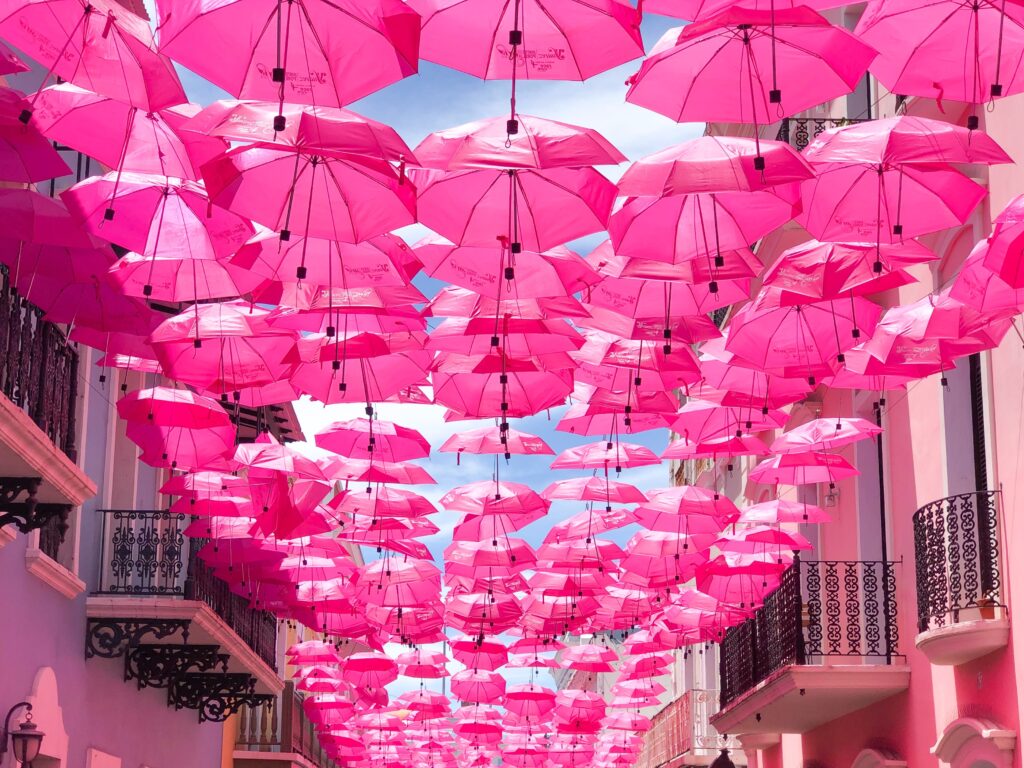
Pink

When it comes to colors and shades, pink is the ultimate fountain of youth. Combine it with bright and light hues like cream, powder blue, and ivory for a vibrant, fresh look. When worn by people of different ages, it gives off a very fresh and youthful appearance. It gives any woman who wears it a youthful glow. You can cover yourself in pink from head to toe.

This is only if you enjoy the feminine vibe or can wear it sparingly. For a more subdued appearance, try combining pink with colors like navy, beige, grey, or black. For a less girly appearance, you can put on a scarf, a crop top, socks, or pink accessories. Pink goes well with denim and neutral colors.

gold framed eyeglasses beside pink lipstick and white ceramic mug
Photo by Valiant Made

Bronze

The most popular metallic colors are silver and gold, but most women prefer bronze due to its warm undertones. Because bronze comes in a variety of colors, styling with it is simple. When combined with other colors, it looks fantastic. Green, yellow, red, blue, or white are some examples of these hues.

Dark hues like navy, black, and dark green, as well as delicate hues like blush and cream, can be combined with them. When worn, it doesn’t make a loud statement and complements many hair colors. Save bronze for accent pieces because a little bit goes a long way. Don’t be afraid to combine various shades of bronze to complete an outfit by adding a bronze necklace, belt, or shoes.

red and white painted wall
Photo by K8

Coral

This color is much easier to wear than one with a strong orange undertone. It is understated but makes a noticeable statement without being overpowering. Coral is frequently a great color choice for when you want to look polished because it has a certain subtle sophistication to it. Soft coral clothing looks lovely on people with fair skin as well as tans or deeper skin tones. For warmer weather, coral is the ideal color. Why not combine your coral shade with complementary colors if you want to make a statement? White, yellow, and navy can make a striking summer ensemble. Additionally, it blends beautifully with other vivid mid-tone colors like turquoise.

How To Use A Basic Content Calendar For Blogging

Creating a content calendar is a crucial organizational tool for most creators. Having this tool in place can help you, tremendously. I haven’t quite gotten the hang of this method, but I have been working on creating a content schedule that will best suit my needs. Having a functioning content calendar will give you a better shot at managing your content creations. It allows you to plan your posts in advance, manage your organic and sponsored content, and helps you to stick to a rigid and structured schedule.

Set Content Calendar Goals

Before starting your content calendar be sure to choose the type of layout you want to have. This would entail evaluating what you would like to accomplish as a creator. Write down 3 short-term goals. 3 long-term goals and 3 goals that can be completed within any time frame. Keep them in mind while you are creating your content.

Start with what you know

Do you have a bunch of great ideas you want to begin blogging about? Write them all down as often as possible so that you can see them. Go through your list and pick out everything you know a lot about. When creating content, you can start blogging about these first since they do not require much research. This is something that will give you a head start on your content creation when you first get started. If you have a bad week in your content creation, you can easily pick one of these topics to create content around in no time. 

person reading book
Photo by Austin Distel

Determine your goals

Determine what goals you want to complete by the end of a certain time frame. Let’s say you want to have your website active for 3 years. This would mean that you would need to have a plan to make sure that you have those things in place. Perhaps you have 100 blog posts now, and you want to have 500 posts by next year. You’d need to schedule a time to determine how many posts you’ll need to write each month.

Outline your weekly posts

Set a weekly post goal of possibly creating seven posts each week. This would be one post a day, every day. These posts can all be created at once and scheduled throughout the week, or you can create one post every day. You can also take a break from posting and just do your research to get a jumpstart on your content creation for a few weeks to a couple of months in advance. 

Create your post outlines by deciding what topic you want to create content for. Think of your title names and write down specific highlights and bullets for a better-focused post. You can add or omit items once you begging to create. 

photo of planner and writing materials
Photo by Bich Tran

Determine what you want to create and when

You can pick what day, week, or month you want to blog about specific topics. For example, you may want to create a month dedicated to finance. You would create finance posts for that whole month. You can choose to do a week about finance, a week about travel, one week about business management and another week discussing company policies. 

You can further break this down into days. Perhaps you want to discuss finance on Tuesdays and Thursdays. Travel on Wednesday and Friday. Management on Sundays and company policies on Mondays. This will allow you to stay focused and create content routinely, It will also give your viewers insight on when to expect these types of posts on your site. They can set alarms for their favorite posts and make sure to be active around the time these items should be suspected to arrive on your site.

calendar dates paper schedule
Photo by Pixabay

Schedule your posts.

You can write the title name on your content calendar for the month, week, or specific day you want to have the articles posted. This will help you remember what needs to be researched, created, posted, or promoted. You can check these off your list when they are done and you can save them for a later date if you get stuck during the creation process. This will also allow you to take notes and decide what still needs to be completed that day such as scheduling, advertising, social media shares, or SEO updates.

How To Hydrate And Condition Drenched Curls

Hydrated hair is a sign of healthy hair. In order to have healthy hair you need to have a proper moisturizing routine. This would include a good shampoo, conditioner, oil, and hair grease.

Hydrate

Shampoo

Shampoo your hair with a shampoo that would benefit your hair condition in its current state. When shampooing your hair you should do this in sections or quadrants for less detangling time. If you are brave just go for all of it at once. I tend to do this most often and section my hair off after adding the conditioner. I am currently using the Aussie brand miracle coils shampoo for my hair. I love the way it makes my hair feel. I have been using this shampoo for the past 2 months and it works wonders I would highly recommend it.

Hydrate and condition

Condition

Add the conditioner to your hair as you normally would. Make sure that you do this in sections. This is so that you coat your whole head with conditioner. Use smaller sections and smooth the product over the entire strand all the way down to the ends. Conditioner is meant for the hair and not so much for the scalp so be sure to take that into consideration when applying the product. I typically use less shampoo and more conditioner. When I buy hair products I focus more on conditioner than I do shampoo. Do NOT be stingy when it comes to this step.

Be sure that your hair is SATURATED and not dry. That’s how the product will be the most effective. I cannot stress enough when I say add as much conditioner as needed to make sure the hair strands are COVERED. Twist them into a large jumbo twist as you go along to warm the conditioner onto your hair. When rinsing untwist one section at a time and rinse thoroughly. Re-twist that section after completion then continue the same process until all the conditioner is washed out. I am currently using Palmers Retention conditioner with Biotin. I have just begun to use this product but so far I don’t have many complaints. 

Section Hair & Clip Away

Section your hair off in as many sections as you need to. I would suggest doing this in either 4, 6, or 8 sections. 4 will allow you to work faster but you will still have to clip off some of the hair in that section. 8 sections will give you a better product application and 8 sections will give you a faster application time and more thorough hydration results.

Hydrate Scalp With Oil

It is very beneficial for you to moisturize your scalp as well as your hair strands. Choose an oil that has essential ingredients to promote healthy hair and hair growth. Section your hair while doing this for the best results and faster application time. When applying be sure to use the balls of your fingertips to massage the product into your scalp. Rub it in for a few seconds before moving to the next section. I am currently using the Mane Choice H2Oh hydration therapy oil. Try not to use too much of this oil when applying to your scalp.

Grease Scalp Area

Add your hair grease in small amounts over the hair oil for added measures. This is an optional step but it is a method that I have begun using. I think that this will allow you a longer period of time between applications. It’s a protective barrier for the oil and a double moisturizer for your scalp. Currently, I am using Proclaim coconut oil hair and scalp conditioner. I apply this as scalp grease and use it to help seal my ends.

Mix and Apply lotion, oil & grease

Use a small container, plate, or even the product lid to mix together your lotion oils and grease. Once you do this section off a portion of hair and apply the mixture. You can use as much as needed but make sure that the hair is thoroughly coated. Smooth the product along the hair strands while straightening the hair with your hands. After this is done move to the next step. To create my mixture I’m using the Palmers length retention leave-in conditioner, proclaim coconut oil grease, and the Mane Choice H2Oh hair oil.

Detangle hair strands

Starting at the bottom end of your hair use a wide tooth comb or detangling brush to detangle your hair. I use a Denman brush to do my detangling at this stage. Some people say that it pulls their hair out but you have to be patient when doing this step. The smaller the sections the better the results. If you have thicker hair try not to become frustrated in the crown area. That is one of the areas where I have the toughest detangling time. Be sure to thoroughly detangle this section because it will help train those areas for the future.

Twist Hair

After you detangle that portion of hair twist it down and be sure to seal the ends. You can seal the ends of your hair with hair wax, edge control, or hair grease. This can be done by simply adding the product to your fingertips before nearing the end of your twists and smoothing over.

Wrap with Cap & Bonnet

Place your hair under a wig or wave cap. Be mindful of your edges when doing so. After placing the wig cap over your head cover it with a satin bonnet. I do this because it keeps my hair in place while warming the hair products on my scalp.

Reapply Hair Oil

It is best to oil your scalp every 3-4 days or whenever you notice a lack of moisture. Keeping your scalp moisturized is essential for healthy hair and hair growth.

How To Increase Blog Traffic To Your Website

Blog traffic is essential when you create any type of site. Having an understanding of how to drive traffic to your site and create content that will be read and engaged with is key to the success of any blog or website. There are many different types of traffic that you can use for advertising and branding your business. The main categories this traffic falls into are known as either paid or organic.

Paid traffic is usually associated with buying advertisements on different platforms, such as search engines, social media platforms, or even other websites. Paid traffic is traffic that is generated from a subscription to a web traffic source. Organic traffic is traffic that is derived from a search engine or word of mouth. This is also done by creating content that people will naturally search for and read.

Blog traffic

How do you get blog traffic?

You can get organic traffic in many ways. The easiest way for you to get blog traffic is through word of mouth. Talk about your website or blog all the time. Let people know that you have a site that you are working on. Don’t attempt to force them to view it; simply let them know it is available.

Another method for increasing website or blog traffic is social media. On your social media platforms, you can share some of your images, videos, and text. Use your personal social media if you have a personal blog or website. You might want to create a different account to link to your more commercial website. Make sure to share valuable content along with information on how visitors can explore your website further. Some of the social media sites that are great for website traffic include Facebook, Twitter, Instagram, TikTok, and YouTube.

Blog traffic

Facebook

  • Generating traffic on Facebook has become a bit more challenging than it used to be. This is due to many different posts being present on your feed at any given time. This can cause some, many, or all of your posts to be ignored or even viewed with no interest.
  • Facebook traffic can include a variety of engagement methods. Some of these include liking, sharing, reposting, and commenting. If you have a very intriguing site or post, it may actually lead to an outbound click or visit to your actual site.
  • To gain traffic to your site, you need to create shareable content for your Facebook page. This will increase viewer interest and make them more likely to repost your site’s content and share it with their friends.
  • Learn the best times to post on Facebook. Schedule your posts for when most of your viewers are typically online. This increases the likelihood that they will see and interact with your content.
  • post updates regularly. By creating content on a regular basis, you will inform your visitors about the type of content you have on your page. If it is something they are interested in, they are more likely to follow the link and view the content on your site rather than simply engage on Facebook.
  • Boost your favorite posts. This would be the moment where you decide which of your posts are your favorites. Choose the posts that will best appeal to your audience and increase engagement. This may incur a small fee, but the rewards may be worth the benefit.
Blog traffic

Instagram

  • You need to optimize your Instagram bio in order to increase traffic to it and the number of followers it attracts. Give people a reason to follow you in your bio. This gives them a clear picture of what to expect from your current and future content. Focus on quality followers when creating your content and posts. Be sure to share your site link and make sure that it is visible and actively able to be clicked.
  • Stories and stickers are a great way to visually engage your viewers. This is usually one of the first things they will see if they frequently use their stories for entertainment. The feature allows you to have direct conversations with your followers. While this may be a good way to see your products or services, it doesn’t incur the most actual engagement with the content.
  • When using the photo gallery for content creation, be sure to use good graphics, videos, and great captions. Use hashtags to get the right type of followers. People use hashtags to search for a large amount of content all at once. It will help you increase your following list and grow your platform base.
  • Host a raffle or contest. This would increase your users’ engagement tremendously. Who wouldn’t love the option to win a prize for simple content interaction? This may include instructions for how they would enter the contest. Resharing, liking, following, leaving comments, and recreating a video with new content information are all examples of this.
  • Collaborate with other creators. Collaboration with other creators increases the number of potential viewers who may see your content. If they are interested in the creator’s content, they will be more active during the posting times and may actually view the content.
red and white google logo
Photo by Brett Jordan

Pinterest

  • Do your keyword research. Include keywords in your pins that will engage your viewers. Make sure that these are relevant to your photo and site content. In order for your content to rank higher in search results, you must conduct keyword research to find the most common search terms people enter into search engines.
  • The second technique is using Pinterest’s explore page and checking out what type of content is popular in your niche. After you click on a topic, Pinterest will show you things like featured articles, trending searches, and popular ideas. This is a great way to not only see what’s popular but also what keywords your competitors are targeting.
  • Make sure that your website post title matches your Pinterest pin title. This will make the transition a lot smoother when searching for saved or pinned content. They will expect to see content that is related to the content that was pinned in the hopes that the blog post will show them more of the same type of content. This will save the viewer time and energy since they don’t have to search through hundreds of other Pinterest pins.
  • Pin your own content. Doing this will help you understand your Pinterest analytics. It will show you which of your pins and boards your followers enjoy the most. Having this information may give you insight into what type of content you should focus on the most and what you can hold off on for another time.
  • Get active on Pinterest with relevant pins and boards. Create boards with great pins that will be attractive and relevant. This should lead to the same type of content on your niche site or blog. Post regular content and refresh old content that may not get as many views. If your pin contains multiple items, edit their descriptions and possibly add a photo or change the initial cover photo.
  • Follow other people who have similar interests to yours. This may lead to board collaboration and give you some ideas on what other types of content you may want to blog about. You can link with Pinterest creators and possibly exchange shares or be featured on their page if they have one, and vice versa.

YouTube

  • Create engaging title captions. These are the first things that most people see when they go to a YouTube page. When typing keywords into the search bar, this is the content that they will be looking for. Be sure to include exactly what your content is about when choosing your video title.
  • Find out what type of content your YouTube community wants to see more of. After you have this information, be sure to create more of that type of content. Make sure your videos are a good length with great graphics and clear spaces to see your work.
  • Engage with your viewer community. Being a content creator can be very time-consuming, and it may be hard for you to be able to engage with your followers every day. Be sure to be as responsive as possible. Engaging with your subscribers can help you foster a stronger connection with your audience. “Liking” comments only take a few seconds, as does pinning a top comment as a sort of personal note to your subscribers.
  • Make a series out of it. A specific video series that covers a recurring theme or topic will give your viewers something to look forward to in your next video. A content series follows the initial type of created content with videos that follow the main topic or theme.
  • Paid ad subscriptions
  • Affiliate links
  • Twitter
  • Tumblur
  • LinkedIn
  • TikTok
  • Snapchat

How To Tweeze Your Eyebrows

What You Will Need:

  • Washcloth
  • Mild soap or facial cleanser
  • Tweezers
  • Brow Brush (Optional)
  • Small eyebrow scissors
  • Magnifying Mirror (Optional)
  • Aloe Vera Gel (Optional)

How To Tweeze Your Eyebrows

  • Cleanse your skin with a washcloth and mild soap. A facial cleanser can be used prior to the hair removal process. You may also want to use a makeup removal or facial wipe for a more convenient cleanse. If pain will be an issue for you during this process, you can apply a numbing or pain relief cream to the skin. Be sure not to apply this heavily and keep it far away from the eye socket to avoid irritation. After applying the facial cleanser, rinse thoroughly and proceed to the next step.
  • Brush your eyebrows up and outward using a clean toothbrush, a miniature comb, a brow brush, or your fingers. You should be careful not to irritate the delicate skin around your eyebrows, as this can cause redness and discomfort Make sure that the hair is standing straight up in a vertical position. This will allow you to see how long the hairs are and in which area you will need to remove the most hair.
  • Situate yourself in a well-lit area before you begin the hair removal process. A magnifying mirror or ring light works best, but in some cases, you have to make do with what you have handy. A bathroom mirror will work just as well as long as the lighting is sufficient. Stand as close to the mirror as possible and lean forward if necessary for a better inspection of your brows.
  • Clip away the longest hairs standing above the designated eyebrow line. This should be done with small scissors. For the best results, clip the hairs in the opposite direction of your hair growth. This will ensure that the hair doesn’t lie down while attempting to be removed.
  • Get your tweezers. Make sure to use a good pair of tweezers for the hair removal process. Your tweezers must be very sharp with a pointy, slanted edge. Also, double-check to make sure that the ends are very sharp, free from debris and hairs, and not dull.
  • Tweeze hair in the direction of growth. Hold the skin around the eyebrow taut (flat against the skin and pulled tightly) as you pluck the hairs. Try your best not to grab too many strands at one time. Pluck at least one or two hairs at a time. Plucking too many hairs at one time can cause you to have uneven brows and bald spots.
    1. The best eyebrows have a slight arch. To find your arch, start by taking a long eye shadow brush or pencil and holding it parallel to the outside edge of the colored part of your eye (known as the iris). Where the brush meets the brow is where the highest part of your eyebrow should be. Tweeze the hairs underneath the arch.
    2. The space between your brows should be equal to, or a little wider than, your eyes. To find where your brow should be placed, start by taking the brush or pencil and holding it parallel to the side of your nose. Where the brush meets your brow is where your brow should begin. Tweeze all the stray hairs in between.
  • Pluck both the top and bottom hairs. Essentially, you will pluck more hairs from the top of your eyebrow than from the bottom. Make sure to pluck under the arch, above, and in between the brows.
  • Stop in between those areas during the process and look at the eyebrow shape. Make sure the brows are forming the desired shape, and remember not to over-pluck. If you have thin or sparse eyebrows, you can add a brow tint or fill them in with an eyebrow pencil. For best results when using an eyebrow pencil, it is recommended to use light feathery strokes.

Apply an Aloe Vera gel or soothing cream once completed. This will soothe the skin and calm any redness that may occur. To prevent any bumps or ingrown hairs in the brow area, you can also use a shaving aftercare gel.

How To Use The Snowball Method To Pay Off Debts

The snowball method is a financial trick that will help you make debt payments as quickly as possible. This is a debt-reduction strategy that can be applied to revolving credit or loans.

What is the snowball method?

Using finance jargon This method is supposedly a do-it-yourself strategy to reduce debt. This particular method focuses on paying down your smallest debt balances before moving on to larger ones. It is based on the idea of gaining momentum with each debt that is paid off. This method was initially populated by Dave Ramsey, a well-known personal finance expert. The main focus would be on your smallest balances first, while making minimum debt payments on all other bills. This “snowball” method is known for creating an empowering feeling of progress. This can be a motivating factor when tackling debt repayment.

Once you complete the balance payout, take those previously allocated funds and use them towards the next inexpensive balance. Thus the snowballing of payments. (Head, stomach, and body) used to pay off debts. Repeat this cycle until your debt is paid off. This process may not save you money, depending on how much debt you owe. The snowballing of payments involves making the minimum payments on all your debts and then taking the money you would have spent on other debts and putting it towards one debt at a time. This will allow you to use debt-paying finances to pay your debt. If that makes any cents.

Imagine a snowball at the top of a hill. As you begin to roll the snowball, you gather more momentum. Continue adding the minimum payment for each paid-off bill to the next one until all your debt is repaid. This is perfect for student loan debt payments.

How is the snowball method used?

  • The snowball method is an easy place to start, as you may already be paying all these bills as a whole anyway.

Create a list of all your debts.

  • Write down every penny you owe. This may be very painful for some and enlightening for others. Go through all your bills and list their totals. Using your current credit report will be extremely helpful. 
  • Don’t forget that your daily expenses and subscriptions won’t be included. These just list credit cards, loans, and collection accounts.
  • First, be sure that you’ve budgeted enough to cover the minimum monthly payment for every debt. Now, arrange the debts by balance, from smallest to largest. disregard the interest rate on each.

Sort bills by size, from smallest to largest.

  • This may not make sense, but it will help you determine the order in which these bills should begin to be fully paid off.

Pay off the smallest bill first.

  • This will be the bill with the lowest balance. Let’s say you have a credit card with a balance of $50 and a $25 minimum payment. You would make the last two minimum payments or, if possible, pay off the entire $50 balance. This would eliminate that entire bill.

Use the payment for the paid-off bill for the next payment.

  • After one bill is paid off completely, use that money to pay your other bill payments. Using the above example, let’s say you pay off the entire $50 balance. This would free up $25 a month from not having to make that monthly payment. You would use that monthly payment to add extra payments to your existing bills.
  • Let’s say your second smallest bill has a $100 balance with a monthly payment of $25. You already paid off one of your bills and saved $25 a month. You would normally make a $25.00 payment on this bill. This month, you can make a $50 payment. Using the money you saved, you can pay this bill off in two payments instead of four monthly payments of $25.00.

Continue using the monthly savings to pay off the rest of your debt.

  • Use the money saved to add extra funds to your already designated monthly payment. If you save $50 a month by paying off two bills, you can add that whole payment to one bill, or you can split it up and add some of that money toward your other debt payments. Whatever payment option you choose, the extra money you are now able to save should be used to pay off the rest of your debts. If you complete the snowball effect, you will be on your way to paying off your debts in record time.

How To Jumpstart Your Blogging Game In 2023

Blogging can be very challenging when you first get started. It’s always fun and exciting to think of new ideas and income streams. Starting a new hobby or learning a new skill as well. It takes a great deal of time and dedication to master your craft. This is especially true when it comes to creating a blog or website and being consistent in your blogging routine. Blogging does not have to be as hard as it seems, but a bit of hard work will be required to be successful.

As with anything else in life it all depends on your specific blog goals. When I first got started blogging I was mainly attempting to create a website from scratch. It was more of an engineering standpoint and not so much as being a writer. I typically write fairly well if you would allow me to have a moment to boast. The writing part did not seem like it much of a challenge for me compared to coding and layout designing. So my main goal was to see if I could actually follow the steps to building my blog. Once I completed that I started to create content focusing on a specific niche.

At that time it was when I had started my natural hair journey so I was basically a hair blogger. My website went off the air for a while due to unforeseen circumstances so that ended my life as a blogger. Then I decided that I wanted to give it one more try to see if I remember exactly what I was supposed to be doing as a site creator. After realizing I had partially mastered that aspect of creating I expanded my blogging to include a few more elements to keep me interested. While it added more work to my schedule it gave me a good reason to remain focused on blogging as a whole.

The three simple and easy tips I have learned along the way have kept me motivated. These tips may or may not cost you anything, but they will help you with EVERYTHING. These blogging tips will save you a headache and diminish minor frustrations. When you begin to blog, write everything down. Schedule your posts and stay organized. Blogging is really that simple.

1. Write Everything Down

Write down every thought or idea you have. This can be as simple as a single word. While this may sound insignificant it can be very helpful. Remember one word can turn into a million actions. A single word can lead you to a definition. That can turn into a sentence. This leads to a paragraph that can branch off into a collection of photos, videos, and or physical objects. See how easily this one sentence turned into a whole paragraph about why you should write everything down?

Blogging list of things to do
Photo by WanderLabs
  • Create tons of lists. These lists can be about anything. You may want to write down a bunch of words that you know but don’t have clear definitions for. It could be a list of names, dates to remember, a wishlist, or even what groceries you need to buy this week. You can blog about all of those things. Write everything down!
  • Write down all your blog topic ideas. Having a list of blog topic ideas can become very addicting. I am guilty of creating a bunch of blog post ideas and having them sitting idle. This might seem like a waste of time to do so but on those days when you aren’t quite sure what to write about you can look them over. While an item on your list can become your topic of the day it could also lead to becoming idle again but giving life to a new fresher topic of interest.
  • Keep a notebook for your ideas. After writing all your ideas in a notebook, gradually add them as word documents. This method is best for use when you aren’t able to carry your workspace with you, but want to do some work. You can easily pull up your list and begin blogging from anywhere on any device at any time.
white ceramic mug with coffee on top of a planner
Photo by Estée Janssens

2. Schedule Blog Posts

You can create all your posts at once if you wish. You could possibly do this by choosing how many posts you want to create during the month. I would say maybe you want to create a post every day. So in total, your goal would be to produce 30 posts a month. Typically that would result in you posting at least 7 posts a week. You don’t have to create a post every day you just need to make sure that at the end of the week you have at least 7 posts.

You can create a list of post ideas for the entire week on one day and create all your post outlines for the whole 7 days in advance. All your posts can be written at once, proofread, and edited simultaneously on the second day. On the third day, you can add your photos and videos to all 7 of your post for the week. Once that has been completed you can review your posts, add any affiliate links, or products, and factor in your SEO tools on the fourth day.

You can post all your posts on the fifth day of the week after the final review. You can also consider scheduling them for the next 7 days. If you publish them all on the same day, use the two remaining days of that week to market and promote your posts. You can do that while you get started on the outline needed for the next seven posts for the upcoming week.

3. Stay Organized

  • Organize your Pinterest boards
  • Organize your saved photos
  • Organize your word documents
  • Organize your Website traffic sites
  • Organize your Facebook posts
  • Organize your office tools and writing materials
  • Organize your social media accounts
  • Organize your blog post ideas and posts
  • Organize your bookmarked sites

My Blogging New Years Resolution For 2023

white printer paper on brown wooden table, New Years resolution
Photo by Tim Mossholder

Have you set a New Years resolution for this year? This is a question that I thought would be good to answer. The funny thing is that when I wrote down this question, I hadn’t quite thought of any new year’s resolutions. I had a few things in mind for what I wanted to accomplish next year, but it wasn’t a New Year’s resolution. So I guess I will use this time to create my New Year’s resolutions. My blog goals for next year include the following:

Website Layout

I would like to have a designated website layout that I do not have to make any changes to. I am happy with my page design but there are a few more elements that I will be adding later on my main focus right now is to concentrate on creating content. I want to refresh my layout design, possibly alter my color scheme, and add a sidebar and a few widgets for better site navigation. I also want to create subscriber forms for visiting guests.

Content Creation

Currently, I have about 130 posts on my website. While that may seem like many for some people I believe that it is a fairly low number compared to the number of categories I have on my page. This was a long-term goal that I had for my page in order to keep me motivated. I would like to have at least 100 posts in each category but that may seem like a large task for just one year. I have a goal set in place that I would like to have at least 500 articles on my website by the end of next year.

This seems like a very doable New Years’ Resolution for me. It would only require that I post at least one article every day for a total of 30 posts a month give or take. And this will have to be done for the whole twelve months so in other words, my new year’s resolution would be to create at least 30 posts every month for 12 months. This would give me about 500 article posts by the end of next year. 

Website Traffic

Website traffic will be one of my most important focus points for next year. I would like to increase my traffic to my website by A LOT. Next year my goal is to have at least 10,000 page views for the entire year. This is a very doable goal that can be achieved. With an increasing number of posts for my content goals, this would be something I will be able to generate. Hopefully, halfway through the year if everything goes as planned. Yes I know there are plenty of resources available to me that would generate those numbers in the first week of new year but I would actually like to create personal connections with my viewers. 

Viewer comments

Let’s be honest people don’t necessarily comment on website posts. They scroll for a few minutes reading a bit of text and exit. This is most likely the case with numerous websites regardless of how large the company is. My New Years’ resolution for my viewer comments is to have at least 50-100 article comments in total for the end of next year.

Return Visitors

Return visitors are people who I have captured the attention of with engaging content creation. They are guest who viewed your blog and liked it. They may have saved it to their bookmarks or remembered your website name and went back to it. They may have subscribed to your email list and followed a link in your email which brought them back to your content.

Subscribers

I don’t quite yet have an idea of what to do with my subscriber list just yet. My New Years Resolution for my subscribers is to actually create a subscriber list. I would like to have at least 100 Subscribers by the end of next year. That would be about 8 subscribers a month. This will be a resolution that may be the most challenging for me next year. I will have to put the proper forms in place for my viewers and make sure that they receive something of value by subscribing to my website.

Monetization

This is another New Years’ Resolution Goal that may also be a challenge for me going into the New Year. Of course, we all want to make money online. And yes we want to be compensated for the work and influence we provide. In reality, most people don’t really make much money online with their websites. If they do it comes from more than just creating posts and articles all day. So my Resolution here would be to at least make at least $500 from my website alone at the end of the year.

This is a very reasonable and doable goal for me which may seem pretty high for a beginner website. You can never underestimate the power of consistency. I chose this amount because it would basically be me gaining one dollar for every post that I have planned to create for that year. That sound pretty easy doesn’t it?

With the amount of creativity and content creation options available this seems like a very simple task to complete. This would entail strengthening my marketing and affiliate tactics to scale my website. This will be another important focus for me throughout the upcoming year.

Youtube

I always wanted to have a youtube channel. I just never really got around to creating one with the intent to use it for business. This year I would like to set a Resolution to actually create and organize a youtube channel that will be linked to my website. So My New Years’ Resolution would be to create a Youtube Channel and have at least 12 videos, 50 subscribers, 50 likes, and at least 12 comments. In my opinion, those numbers seem very low but that will allow me to be able to actually follow through with my resolution without taking time away from the other goals that will require the majority of my time.

Podcast

I would like to have an active podcast that is up and running for my business. This seems like a doable goal for me and with the right resources put into place, I can definitely make that happen. My goals for my podcast would be to have at least 25 audio posts on my podcast and at least 20 Subscribers. 

10 Simple & Easy Ways To Brand Your Blog

One of the best ways to be successful online is to thoroughly brand your blog. By doing this, you make it easier for your viewers to find you across the web. It makes it easier to follow you on social media and keep up with your latest content. It’s fairly easy for you to brand your blog. It may take a little bit of time, but the steps to do it are pretty simple and easy. Most of them can be done in as little as a few days, weeks, or even a couple of months.

person holding ballpoint pen writing on notebook, brand your blog
Photo by Thought Catalog

1. Be consistent with your blog content

  • Create a schedule and try to stick to a daily, weekly, or monthly routine.
  • Create post outlines in advance.
  • Set a monthly post goal and always attempt to complete them.
  • Post at least one or 2 posts every day. If you only create one full post be sure to at least start on your second post and save it as a draft.
  • Create at least 3 posts a week.
  • Create multiple drafts for your topic ideas even if they only contain a blog title.
  • Refresh your old posts. This can include updating your post titles, SEO details, photos, videos, and cycling out-of-stock products.

2. Stick to your own writing style

  • Choose how you want to speak to your readers
  • Use the tone and text type that will attract the customers you wish to attract
  • If you are an information website try to stay as professional as possible
  • If you are creating a blog that is more targeted at social input speak in a language that will be engaging for your readers
  • Don’t use long paragraphs and don’t overload your page with photos, videos, or ads
Photo by hannah grace

3. Post items that are in line with your blog type and niche

  • Post relevant photos, videos, and blog texts
  • Create products that match your blog type
  • Open an eCommerce store and add relevant items
  • Share content in groups or forums meant for your specific blog niche

4. Use a theme or similar color scheme or type of products

  • Stick to using the same color scheme
  • Use the same design elements for all your social media
  • Choose a layout or theme that works with your content
person holding white printer paper
Photo by Helena Lopes

5. Brand your blog name

  • Use the same name across all social media platforms
  • Choose an email address that is similar to your website title
  • Choose a Facebook page, Instagram, Twitter, etc using the same blog site name 
two person standing on gray tile paving
Photo by Ian Schneider

6. Provide real value

  • Be sure to create factual content
  • Do your research if you are not quite an expert in the field you will be blogging about
  • Don’t be afraid to learn or take constructive criticism

7. Aim to educate your audience

  • Post How to posts
  • Post tutorials
  • Ask for reader input
  • Create polls that can be answered
  • Create quizzes that will provide correct answers after completion
MacBook Air beside gold-colored study lamp and spiral books
Photo by Arnel Hasanovic

8. Define your target audience

  • Decide who you want to view your page
  • Do you want older readers, Educated readers, gamers, creators, and business people?
  • Are you looking for collaborators? Customers? Friends, subscribers, or followers?

9. Choose a good brand logo

  • Create a brand logo that you can use across all social media
  • Once you have your logo use it for EVERYTHING
person holding black iphone 7
Photo by Melyna Vallea

10. Be active on social media

  • Maintain an active social media profile
  • Post as often as possible
  • Schedule your posts ahead of time if you will be spending the majority of your time posting articles and doing marketing for your page and products.

Can Your Ego Challenge Your Decision-Making?

Egos and decision making

Upon reading a request for an ego decision making article, I learned two things. The first thing that I learned is that we are the decision-makers. The second thing I learned is that the ego is the driving force when making decisions. Your ego is best defined as your self-esteem, or how you assess your own worth. Your ego is the part of your identity that you identify with the most. It is the part of your inner being that you yourself believe to be true, even though others may have a different opinion of who they think you are.

Maybe you sing and have written a few of your own songs. You might have produced the beat or instrumental, written the lyrics by hand, and directed the video. You thought while you were creating that it was of excellent quality and composition. Your ego was trying to convince you that you were the best performer in the business. There may have been rumors that you would become very wealthy and well-known with this material.

woman laying on bed near gray radio
Photo by Eric Nopanen

Your music was good when you finally released it, but it wasn’t as popular as you had anticipated. Your pride may be telling you that you need better marketing, even though your ego may have taken a hit. The real world may be telling you that the content was terrible. Instead of taking constructive criticism, you argue with your viewers and on social media platforms.

Some people exhibit extreme egotism, even to the point of being narcissistic. They exaggerate their sense of importance, which is unfounded in reality. When someone has narcissism, they have a personality disorder or mental illness that causes them to be excessively self-centered. These people seek praise for all of their accomplishments, no matter how small or significant they may be. They desire to always be the center of attention and anticipate receiving special treatment. When they want people to pay attention to them, they may throw temper tantrums or have other outbursts.

Some people frequently allow their egos to get in the way of good judgment. In some circumstances, people amplify things rather than acting morally. They find it difficult to acknowledge when they are mistaken or possibly in error. They tend to be more concerned with what would be beneficial to themselves than with how things will affect those around them. They ignore the facts of the matter at hand in favor of self-gratification because they believe they are greater than any penalties they may face. Sports, politics, disputes, business, etc. are all examples of this.

HOW TO REMOVE EGO FROM DECISION MAKING

For egotistical people who think they are better than others, it can be challenging to put their egos aside in social situations. This can become a huge burden when faced with decision-making. There are many ways you can do this if you want to swallow your pride. Before acting, you can first pause and think. Consider the impact your choice will have on others. Will this choice harm others or prevent them from achieving certain objectives? If the answer is yes, you might need to give yourself a little more time for strategic decision making.

Think about how this will affect you. Will your choice help others while severely hurting you? Your ego might tell you that you don’t deserve to go through this. You might act and feel as though you are superior to the situation. Let’s say you share a close relationship with a coworker who puts in a lot of effort. You recently received a promotion and used the extra money to buy a new home. We talked about the possibility of taking over the business since the current owner will soon be retiring. Your preferred coworker was one of the two candidates who were up for consideration.

egos and decision making
Businessman and businesswoman looks through a telescope. They fly high up in the clouds, like the arrows, reach fame, wealth and success in the world of business. Vector business concept illustration.

You might feel that you are equally deserving of the position in this circumstance as they are. You want to be cordial and helpful to your coworker, but you also just bought a house and could use the additional funds. Due to your interest in the job, you might be more competitive. Additionally, if you feel you deserve the job, you may have a conflict with a coworker. In this situation, you can allow your ego to lead you in the right direction, but avoid being overly arrogant or you might miss your chance. Every choice we make is motivated by either love or fear.

Strategic Decision Making

Nearly every bad choice is the result of an ego that is in poor health. Even when your ego is used for good, it can occasionally work against you rather than for you. You might have a failure-type ego. You might feel inferior or like you’re not good enough. When making decisions, this may be detrimental. Because it would be a waste of time, you might feel like you don’t want to work as hard as you should. This kind of thinking frequently results from an ego seeking to defend itself. People who belittle others in order to feel more important require a sense of power in order to feel important.

When making decisions, you should put aside your ego and consider how you can benefit others rather than harm them. Explain to them why you believe you are deserving of a powerful position. Show them that with your action as well. Conflict-avoiders try to make problems go away by acting as if they don’t exist. Since the issue is never resolved, this makes things worse. When there are underlying problems, they behave as if everything is in perfect harmony. Your ego tells you that you lack the courage to take on the challenges in your life. You have to have the courage necessary to speak up for yourself.

Defining The Best Hair Care Products For Your Hair

hair care products
Photo by Jessica Felicio

When choosing hair care products, it’s always best for you to choose the product that is best for the condition of your hair. This may range from being relaxed, color-treated, having hair that is damaged, or seeking dandruff relief.

When choosing your hair care products, be sure to purchase items in the same brand family. If you use Pantene, Use the entire line. If you use Creme of Nature, use the entire line. This is because they were created to be used together. Now, let me just go ahead and let you know one thing. While you should trust the brand and products you use, don’t automatically assume that all of them will work.

Yes, they will get the job done. No, not all those particular brand products will work for your hair. You may get a really good shampoo and conditioner, and that could be it. They may have additional products such as grease, leave-in, hair oils, gels, and jams that may not work for you. With some products, I only use one specific thing from the line. My favorite conditioners are often more effective than my least favorite shampoos.

I may not like the shampoo, conditioner, or deep conditioners, but I like the hair oils. Many times when we buy gels, jams, and grease, we don’t typically look for a shampoo and conditioner from that particular brand type. If it ain’t broke, don’t fix it. Basically, if you have a product that you swear by, keep using it. Only look for something else if you notice additional drying, breakage, tangles, and dandruff. Finish it since you already have it, and LET IT GO.

Know Your Hair Type

Know your hair type before you decide which brands you “like.” Let’s be honest: when people shop for hair products, they buy the best affordable hair care products. They look for the most inexpensive product that will clean their hair because, really, “I just need to wash it.” 

I was once one of those people who thought that way. This was before I went to cosmetology school. Afterward, I submerged myself in proper hair care. I had no idea there was more to shampoo than just “washing it.” Now I can tell if hair products don’t work for me. When I say hair products I mean shampoos & conditioners, creams, gels, edge controls, combs, brushes, and detanglers, etc.

Your hair just feels different. You will have more dryness, itching, balding, and breakage. I don’t really recommend products that I haven’t heard about before, read reviews on, or tested myself.

Know Your Hair Texture

Knowing your hair texture is very important when buying hair care products. They will typically place this information on the product label. It may say “for fine, thinning, or coarse hair.” Some of these products will say they work for all hair types”. If you have thinning hair, you may want to get a hair product that states this on the label for the best results. They will be lighter shampoos and will not weigh your hair down, causing additional thinning or breakage.

Hair Porosity Test

A hair porosity test determines how well your hair absorbs water. If you have low-porosity hair, your hair is more resistant to absorbing water. If you have high porosity hair, it means you have a better chance of absorbing moisture. This can vary from time to time. I have both, depending on when I want to define my hair.

You can tell the type of hair porosity you have after washing your hair. You can perform a hair porosity test by washing it, wrapping a towel around your head, and quickly removing it. You have high porosity hair if it is dripping wet. Your hair is low porosity if it is primarily dry with hardly any dripping.

Listen To Your Hair

The leave-in conditioner and moisturizer I use will sometimes sit on top of my hair after use. In one experiment, I used a curl-defining gel and allowed it to sit for about 5 minutes. After using the product, I removed my twist, and it had already curled completely. My guess was that my hair quickly soaked up the product. This would imply that it had a high porosity after using a hydrating shampoo and conditioner on wash day. I will still need to do additional research.

Trial & Error

“A higher price hair care product is simply one that is more expensive.” It doesn’t matter how much you pay for a product if it DOES NOT WORK. Let’s just say you have dry hair. You would need to use a product that will service your hair condition, which has been described as lacking moisture.

You go out and buy this $49.99 hair care kit for color-treated hair and wonder why your hair is still dry. It’s because you need to get a hydrating line that will add moisture to your hair. Similar to you adding oil or grease to your scalp after washing your hair. Similar symptoms to dry hair may appear in hair that has been colored. Depending on the product you bought, it might not have been designed to add moisture to your hair. Instead, it was designed to prevent your hair color from fading too quickly.

So you just went to get an expensive product that will do you no good. If you can afford to buy name-brand products, go for it. Don’t let anyone stop you. Make sure you are getting the goods you need and not trying to look like you have an expensive grade of damaged hair. Because essentially, if you are attempting to dump tons of money on your hair, it’s because it’s broken. Stick to buying the best affordable hair care products for your condition.

Use Generic or Basic Hair Care Products

basic hair care products work just as well as name-brand hair care products. Many times, big-name companies are partnered with smaller companies. They work to create a line that is accessible to people who cannot afford the more expensive products. There is no intention to dupe you with the same products at a higher price. It’s more like paying for a stronger dose of medicine when the low dosage wears off.

In order to figure out what you need, start off using a generic brand product until you have completed the entire container. Assess how your hair feels and what you like or dislike about the product. Then purchase a more expensive brand that you can afford and compare the outcomes of the products.

Stick with the generic brand if you like it. Buy the pricey brand if you prefer it. If you can’t make up your mind between two products, buying both is a good option. Perhaps you prefer the expensive brand but had no issues with the generic version. If you can, purchase both, and combine them to create a larger overall quantity. If neither appealed to you, pick a different brand and repeat the process. To make your comparison much better, make sure the ingredient lists of the two products are comparable.

Selfie WRLD, How To Be Your Best Selfie

Selfie WRLD ought to be at the top of the list in a world full of filters and photography. Selfie WRLD offers a special opportunity to connect with other selfie enthusiasts from around the world. While engaging in this, it could be a great benefit for you to exhibit your work. A museum devoted to oneself is definitely allowed to be called Selfie WRLD. In that particular order: point, blank, period. This museum is designed to be all about you, along with a few potential family members and friends.

A Selfie WRLD Museum

It features a colorful arrangement of photo booth blocks with a musical theme. The museum offers an unforgettable experience that can be shared with family and friends with Point, Blank, Period and its assortment of colorful photo booth blocks.

The Point, Blank, Period museum provides a one-of-a-kind experience featuring a vibrant and lively arrangement of photo booth blocks with a musical theme. Each block is adorned with colorful and eye-catching designs, making for a fun and exciting photo opportunity for visitors of all ages. Whether you’re looking to capture a special moment with family or friends, or simply want to have some fun and let loose, the assortment of photo booth blocks at Point, Blank, Period is sure to provide an unforgettable experience.

From silly and playful poses to more serious and introspective shots, the photo booth blocks offer endless possibilities for creative expression and personalization. So why not plan a visit to Point, Blank, Period and experience the joy and excitement of their unique and interactive photo booth display? You’ll have a blast exploring the museum and snapping some memorable photos with your loved ones

Selfies taken in each space will be as distinctive as you are thanks to the props used in the design. Selfie WRLD is the perfect place to up your personal style and wow your Instagram, Facebook, Pinterest Pins, and Twitter followers.

Selfie WRLD Museum in Virginia Beach

The museum offers an innovative and engaging experience. It allows visitors to explore their personal style in distinctive photo booths.

You can also record moments that will last a lifetime. You won’t forget this unique experience, which is absolutely one of a kind. Birthday celebrations, prom, bridal showers, holidays, and other events are perfect in this studio. Virginia Beach, Virginia is the home of Selfie WRLD.

Selfie WRLD

They are open every day of the week if you need a great photo opportunity, an upbeat atmosphere, or a pick-me-up. Admission to the event is by ticket only. These are available at the studio door or online. I a ctually came across this treasure while searching Groupon. Isn’t it ironic ? You can purchase 4 tickets through the Groupon deal for $78.00. This is only for a limited time. You can purchase your tickets using the hyperlink site code.