Blog Posts

Columbia Winter Coats For Durability And Style

Columbia is a well-known brand for outdoor apparel and gear. Columbia winter coats are some of the most popular and well-respected on the market, thanks to their combination of warmth, durability, and style. Whether you’re looking for a lightweight down jacket for everyday wear or a heavy-duty parka for extreme winter conditions, Columbia has a coat that’s perfect for you. Here are a few of their most popular winter coats:

Popular Columbia Winter Coats
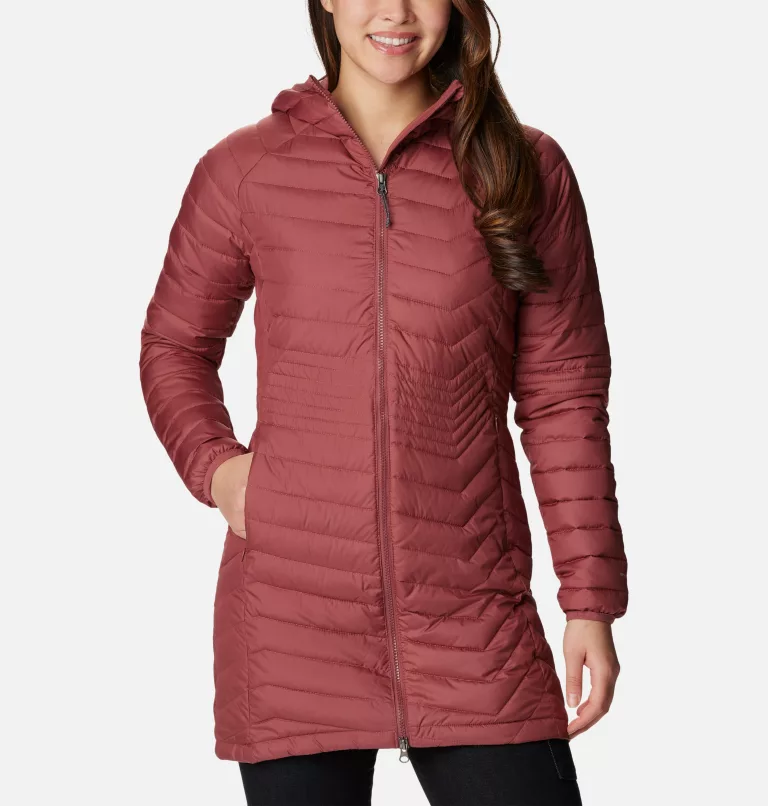
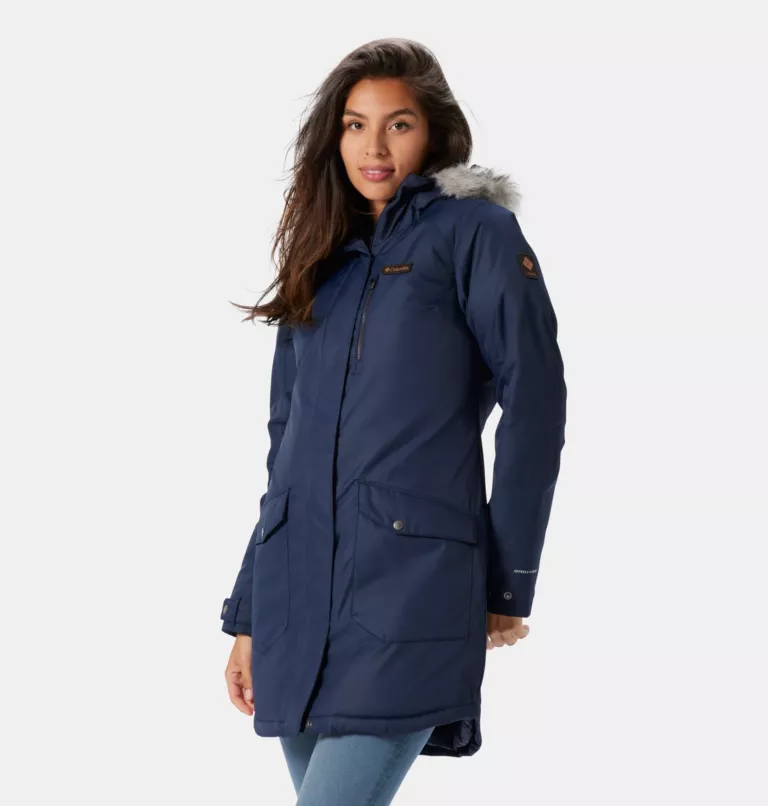
beetroot colored columbia winter coat

Columbia Powder Lite Hooded Jacket: 

This is a great option for skiers and snowboarders. It’s constructed with a durable water-resistant shell. This is a lightweight jacket with a 2-way zipper which is incredibly warm and cozy. It’s also water-resistant and windproof.

Columbia Heavenly Jacket: 

This is a great option for everyday wear. It’s made with Omni-Heat reflective technology, which helps to trap heat and keep you warm. It’s also water-resistant and windproof, so you can stay dry and comfortable in even the harshest winter weather.

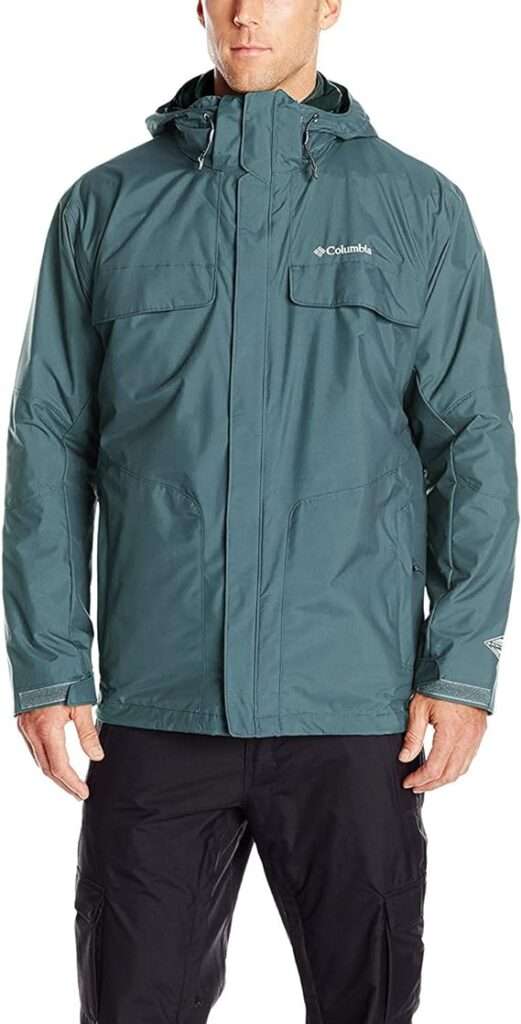
Columbia winter coats
Columbia Mens Bugaboo Sportswear Jacket

Columbia Bugaboo Interchange Jacket: 

This is a versatile 3-in-1 jacket that can be worn as a jacket, a vest, or both. It’s made with Omni-Tech waterproof and breathable technology, and it has a removable insulated liner.

No matter what your needs are, Columbia has a winter coat that’s perfect for you. So stay warm and dry this winter with a coat from Columbia. The following list are a few additional things to consider when choosing a Columbia winter coat:

  • Insulation: The type of insulation used will affect the warmth and weight of the coat. Down is the warmest option, but it’s also the most expensive. Synthetic insulation is less expensive and still provides good warmth.
  • Water resistance: If you’ll be spending time in wet weather, look for a coat that is water-resistant or waterproof.
  • Windproofness: A windproof coat will help to keep you warm by blocking out the wind.
  • Features: Consider the features that are important to you, such as a removable hood, hand warmer pockets, or a storm flap.

With so many great options to choose from, you’re sure to find the perfect Columbia winter coat to keep you warm and dry this winter. Here are some additional tips for choosing a winter coat:

  • Try on the coat in person. This is the best way to ensure that it fits well and is the right size for you.
  • Consider your activities. What will you be using the coat for? If you’ll be doing a lot of outdoor activities, you’ll need a coat that is water-resistant and windproof.
  • Think about your budget. Winter coats can range in price from a few hundred dollars to a few thousand dollars. Set a budget before you start shopping so that you don’t overspend.

With these tips in mind, you’re sure to find the perfect Columbia winter coat to keep you warm and dry this winter.

Additional Columbia Winter Coat Options

  1. Women’s Karis Gale Long Jacket: This jacket is built for ultimate protection with it’s water-resistant fabric, synthetic insulation, and an adjustable hood.
  2. Women’s Suttle Mountain Long-Insulated Jacket: This is a long, down jacket with a thermal-reflective lining on the inside of the jacket and a Sherpa-lined hood.
  3. Women’s Apres Arson Winter Long Down Jacket: This winter coat provides the wearer with serious warmth and is very fashionable and stylish. It is an insulated, thermal-reflective jacket perfect for the colder winter months.
  4. Women’s Panorama Full-Length Jacket: Prepare yourself for a warm and cozy outing wearing this long fleece jacket. It is also equipped with a thermal-reflective lining for locking in plenty of cozy winter warmth.
  5. Women’s Whirlibird IV Interchange Jacket: This jacket is a very versatile 3-in-1 jacket that keeps the wet weather out of your hair and off your clothes and keeps the warmth in on or off the slopes.
  6. Men’s Watertight II Rain Jacket: This is an ultra-lightweight rain jacket with a packable rain shell, full seam sealing, and waterproof-breathable fabric.
  7. Men’s Steens Mountain Printed Fleece Jacket: A lightweight fleece jacket that features buffalo check or camo prints.
  8. Men’s Puffect II Jacket:This is a water-resistant puffer jacket that features synthetic insulation that provides incredible warmth during the fall and winter seasons.
8 Paraffin Wax Treatment Uses And Benefits

What is Paraffin Wax?

Paraffin wax is a soft, solid wax that is made from saturated hydrocarbons. It is often used in skin-softening salon and spa treatments on the hands, cuticles, and feet because it is colorless, tasteless, and odorless. Paraffin wax can also be used to provide pain relief to sore joints and muscles. Paraffin wax has many other uses, too. It is often used as lubrication, electrical insulation, and to make candles and crayons.
How Does Paraffin Wax Treatment Work?

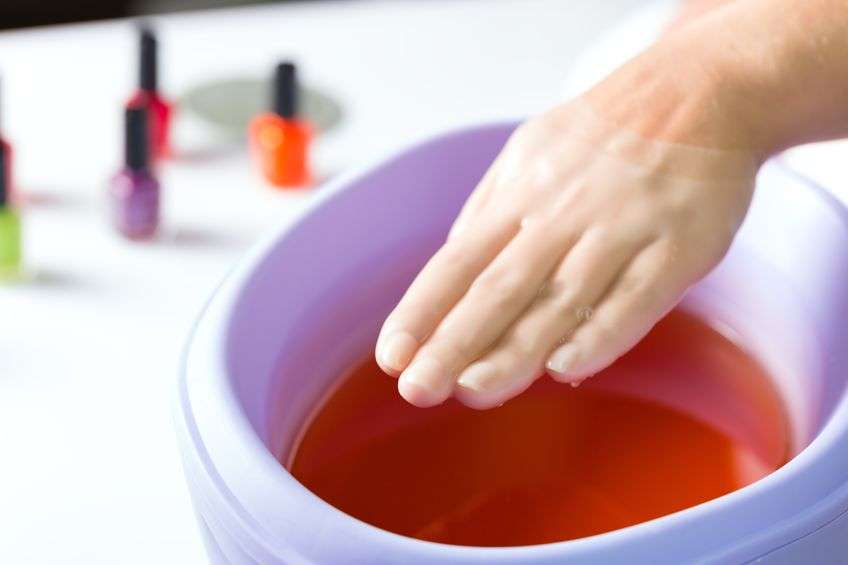
A paraffin wax treatment involves the use of warm, liquid paraffin wax to immerse your hands or feet, creating a soothing cocoon for your skin. This treatment, commonly found in spas, has gained popularity due to its fantastic skincare and relaxation properties.

Paraffin wax treatment is a type of heat therapy that uses paraffin wax to warm and soothe the body. The wax is melted in a paraffin wax bath and then applied to the hands, feet, or other affected area. The heat from the wax helps to increase blood flow, relax muscles, and relieve pain and stiffness. Paraffin wax also acts as an emollient, which means that it helps to soften and moisturize the skin.

before and after a paraffin wax

Benefits of Paraffin Wax Treatment

Paraffin wax is a natural emollient, meaning it has the ability to lock in moisture and create a protective barrier on the skin’s surface. When heated and applied to the skin, it opens up the pores and allows for deep moisturization. Paraffin wax treatment has a number of benefits, including:

  • Improves circulation: The heat from the paraffin wax helps to increase blood flow to the affected area. It is vital for overall skin health. This can help to reduce pain and inflammation, and it can also promote healing.
  • Relieves pain and stiffness: The heat and warmth from the paraffin wax can alleviate pain and discomfort in joints and muscles, making it an excellent option for individuals with arthritis or other musculoskeletal conditions. The heat from the paraffin wax helps to relax muscles and reduce spasms. This can help to relieve pain and stiffness in the hands, feet, and joints.
  • Moisturizes the skin: One of the most immediate and noticeable benefits of paraffin wax treatment is the hydration it offers. Dry, rough skin becomes smooth and supple. Paraffin wax is an emollient, which means that it helps to soften and moisturize the skin. This can be especially beneficial for people with dry, cracked, or scaly skin.
  • Promotes relaxation: Paraffin wax treatment can be a very relaxing experience. The heat from the wax can help to melt away stress and tension.
  • Skin Softening Paraffin wax has an amazing ability to soften the skin, making it particularly beneficial for dry, calloused areas on your hands or feet.
  • Anti-Aging Effects In addition to its therapeutic properties, paraffin wax can also have anti-aging effects. The deep moisturization and increased blood flow contribute to a more youthful appearance.
  • Nail Health Paraffin wax treatments can also work wonders for your nails. It can strengthen and improve the health of your nails while softening the cuticles.
  • The Aromatherapy Connection Many paraffin wax products come in various scents, offering an element of aromatherapy. This enhances your relaxation experience and helps you de-stress after a long day.
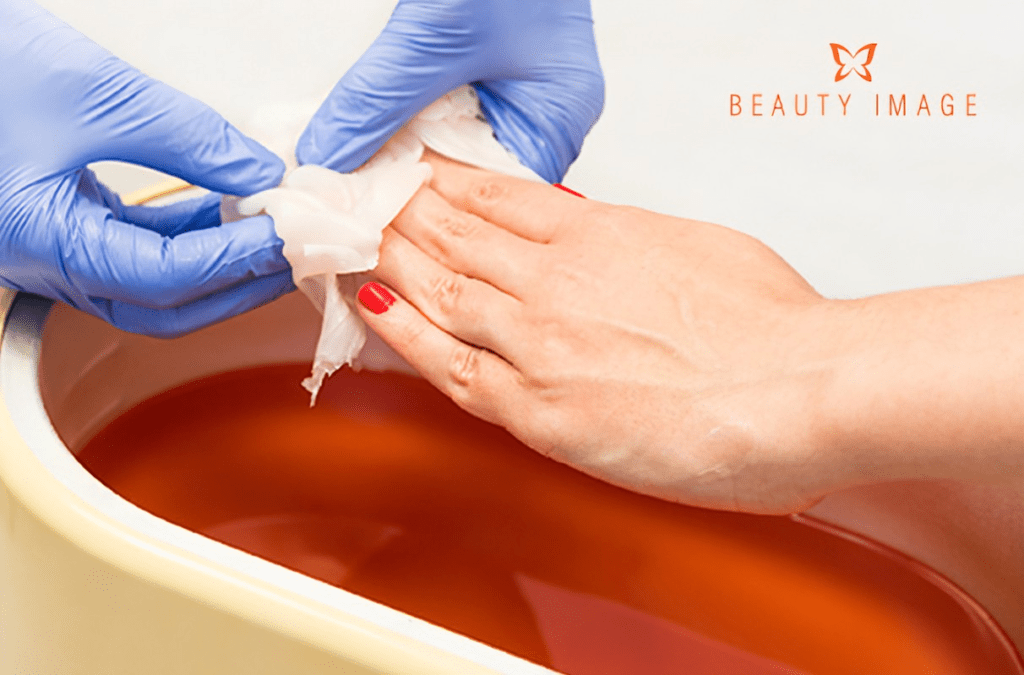
paraffin wax treatment

How to Do a Paraffin Wax Treatment at Home

To do a paraffin wax treatment at home, you will need the following equipment:

Paraffin Wax Treatment Item List
Paraffin Wax Bath
Paraffin Wax
Plastic Bags
Towels

Instructions:

  1. Melt the paraffin wax in the paraffin wax bath.
  2. Test the temperature of the wax to make sure that it is not too hot.
  3. Dip your hands or feet into the wax and hold them there for a few seconds.
  4. Remove your hands or feet from the wax and let them cool for a few minutes.
  5. Place your hands or feet in a plastic bag and wrap them in a towel.
  6. Relax for 10-15 minutes.
  7. Remove the plastic bags and towels.
  8. Gently massage your hands or feet to remove any remaining wax.

Safety Tips

Risks of Paraffin Wax Treatment
Burns
Allergic Reactions
Infections
Worsening certain conditions
  • Test the temperature of the wax before applying it to your skin.
  • Be careful not to overheat the paraffin wax. The wax should be warm but not hot to the touch.
  • Do not use paraffin wax treatment if you have any open wounds or sores.
  • Be careful not to get paraffin wax in your eyes.
  • If you have any concerns, talk to your doctor before having a paraffin wax treatment
Parffin wax spa treatment

Frequently Asked Questions

Q: How often can I do a paraffin wax treatment?

A: You can do a paraffin wax treatment 2-3 times per week.

Q: Is paraffin wax treatment safe for everyone?

A: Paraffin wax treatment is generally safe for most people. However, you should avoid paraffin wax treatment if you have any of the following conditions:

  • Open wounds or sores
  • Skin infections
  • Diabetes
  • Circulatory problems
  • Nerve damage
  • Allergies to paraffin wax

Q: How can I minimize the risk of burns when doing a paraffin wax treatment?

A: To minimize the risk of burns, be sure to test the temperature of the wax before dipping your hands or feet in it. The wax should be warm, but not too hot. You should also be careful not to leave your hands or feet in the wax for too long.

Q: What can I do if I do get burned by paraffin wax?

A: If you do get burned by paraffin wax, immediately remove your hand or foot from the wax and cool the burn with cold water. You can also apply a cold compress to the burn. If the burn is severe, seek medical attention.

Q: How can I prevent paraffin wax from sticking to my skin?

A: To prevent paraffin wax from sticking to your skin, you can apply a thin layer of lotion or oil to your hands or feet before dipping them in the wax. You can also use disposable plastic bags to cover your hands or feet before wrapping them in towels.

Are Nail Dip Powders Better Than Acrylic Powders?

Nail dip powder and acrylic powders are both popular methods for creating artificial nails. However, there are some key differences between the two products.

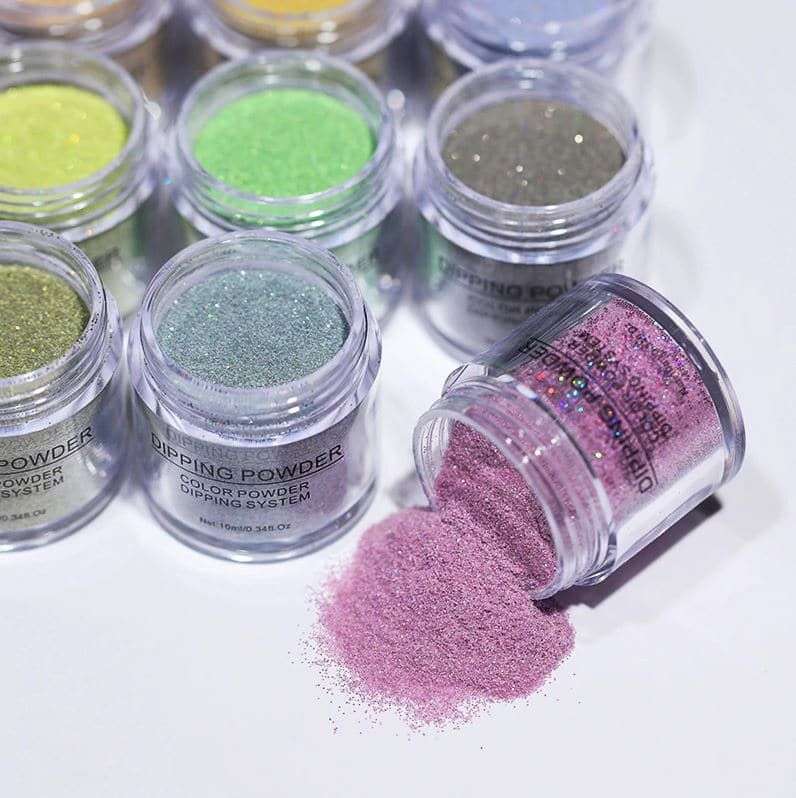
Nail Dipping powder
Nail Dipping powder

Nail Dip Powder

Nail dip powder is a fine powder that is made from a mixture of polymers and pigments. It is a newer type of nail product that has become increasingly popular over the last few years. This is due to its ease of use and durability. The two-step system consists of a base coat and a colored or decorated powder.

The base coat is applied to the nail, and then the nail is dipped into the colored powder. The powder is then sealed with a top coat. Nail dip powder is a good option for people who are looking for a durable and long-lasting manicure. It can last for up to four weeks without chipping or peeling. Nail dip powder is also relatively easy to apply, even at home.

Acrylic powder

Acrylic Powders

Acrylic powders are a type of plastic that is mixed with a liquid monomer to create a doughy substance. This substance is then applied to the nails and sculpted into the desired shape. Acrylic nails are known for their strength and durability, and they can last for several weeks.

Acrylic powder is a more traditional type of artificial nail product. It is a three-step system that consists of a primer, a monomer, and an acrylic powder. The primer is applied to the nail to prepare it for the acrylic powder. The monomer is then applied to the nail, and then the acrylic powder is sprinkled on top. The acrylic powder and monomer then harden together to form a hard shell over the nail.

Acrylic powder is also a good option for people who are looking for a durable and long-lasting manicure. It can last for up to four weeks without chipping or peeling. Acrylic powder can be more difficult to apply than nail dip powder so it is recommended to have it done by a professional nail technician.

Nail dip powder and acrylic powders are both popular choices for artificial nail enhancements. Both products offer a durable and long-lasting manicure, but there are some key differences between the two.

acrylic powder nail application

Application

Nail dip powder is applied by dipping the nail into a jar of colored powder. The powder is then sealed with a top coat. Acrylic powder is applied using a brush and monomer. The monomer is a liquid that activates the acrylic powder and causes it to harden.

Ingredients

Nail dip powder is made from a combination of acrylic powder, pigments, and other additives. Acrylic powder is made from a combination of polymethyl methacrylate (PMMA) and other additives.

Durability

Both types of powder offer a durable and long-lasting manicure. However, acrylic nails are generally considered to be more durable than nails that have been dipped in powder.

Removal

Nails dipped in powder can be removed by soaking the nails in acetone for 10-15 minutes. Acrylic nails are removed by filing the nails down until the acrylic layer is thin enough to be peeled off.

Cost

Nail dip powder is generally less expensive than acrylic powder.

Which one is right for you?

If you are looking for a durable and long-lasting manicure that is also affordable, nail dip powder is a good option. If you are looking for a manicure that is extremely durable and can withstand a lot of wear and tear, acrylic powder is a good option.Ultimately, the best way to decide which product is right for you is to consult with a professional nail technician. They can help you assess your needs and choose the best product for your desired results.

Which one should you choose?

The best way to choose between nail dip powder and acrylic powders is to consider your individual needs and preferences. If you are looking for a quick and easy way to apply artificial nails, then nail dip powder is a good option. If you are looking for the most durable type of artificial nails, then acrylic powders are the better choice.

If you are looking for a durable and long-lasting manicure that is easy to apply, then nail dip powder is a good option. If you are looking for a durable and long-lasting manicure that can be customized to create a variety of designs, then acrylic powder is a good option.

If you are unsure which type of artificial nail product is right for you, it is always best to consult with a professional nail technician. Some additional factors to consider when choosing between nail dip powder and acrylic powders:

  • Skill level: Nail dip powder is easier to apply than acrylic powders, so it is a good option for beginners. Acrylic powders require more skill and practice to apply correctly.
  • Budget: Nail dip powder is more affordable than acrylic powders.
  • Time commitment: Nail dip powder manicures can be done in about an hour, while acrylic manicures can take up to two hours.
  • Lifestyle: If you have a busy lifestyle, then nail dip powder is a good option because it is quick and easy to apply. If you are active or have a job that is hard on your hands, then acrylic powders are a better choice because they are more durable.

Easy Wash And Go Hairstyles For Natural Hair

Wash-and-go hairstyles are a great option for people with natural hair who want a low-maintenance, quick and easy-to-style look. These hairstyle types are simple but still look polished and professional. They can be worn in a variety of ways, from simple to intricate, and can be dressed up or down.

Wash-and-go hairstyles are simply hairstyles that are worn after washing and conditioning the hair. They do not require any heat styling or special tools, so they are perfect for busy people or those who want to avoid damaging their hair.

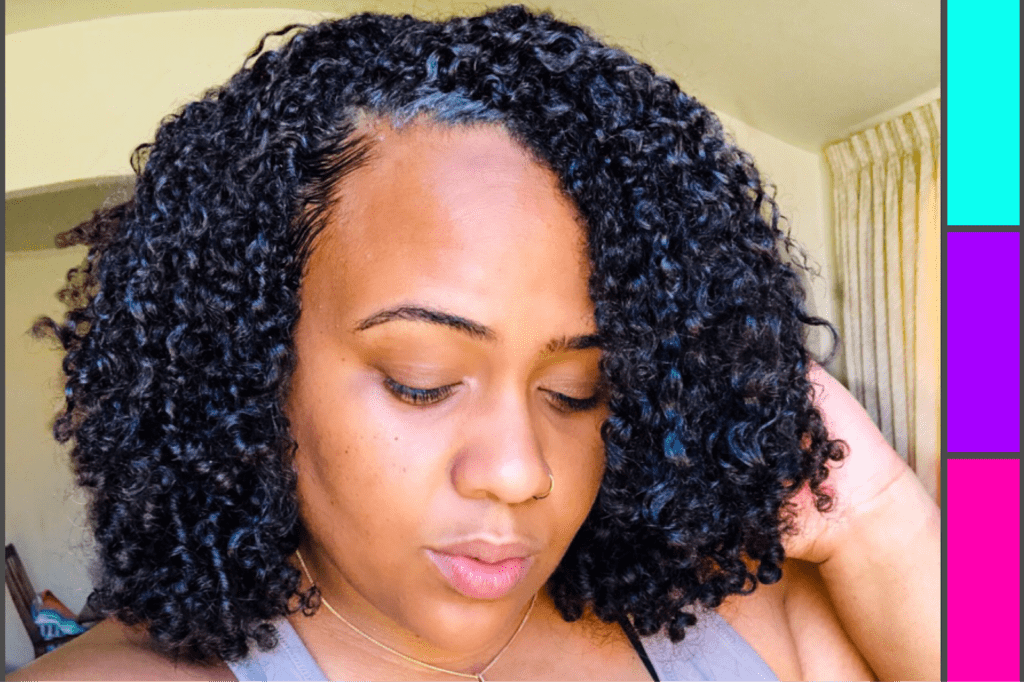
Wash and go hairstyles on natural hair

Wash-and-go hairstyles are a great option for people with natural hair because they are easy to do and can be styled in a variety of ways. Wash-and-go hairstyles are also a great way to protect your hair from damage.

To do a wash-and-go hairstyle, simply wash your hair with a clarifying shampoo to remove any build-up. Then, deep condition your hair to hydrate and nourish it. Once your hair is conditioned, rinse it out and apply a leave-in conditioner. Finally, style your hair into the desired wash-and-go hairstyle.

  • Simple wash-and-go: This is a classic wash-and-go hairstyle that is both easy to do and stylish. To do a simple wash-and-go, simply air dry your hair or diffuse it on a low heat setting.
  • Wash-and-go updo: Wash-and-go updos are a great way to keep your hair out of your face and neck. There are many different ways to style a wash-and-go updo, such as buns, twists, and chignons.
  • Wash-and-go ponytail: Wash-and-go ponytails are another easy and stylish way to wear your hair. To do a wash-and-go ponytail, simply gather your hair into a ponytail and secure it with a hair tie. You can also add a headband or scarf to dress up your ponytail.
  • Wash-and-go twists: Wash-and-go twists are a great way to protect your hair and create defined curls.This is a classic wash-and-go hairstyle that is perfect for all hair types. You can twist your hair tightly or loosely, depending on the desired look. To do wash-and-go twists, section your hair and twist two sections of hair together. Then, secure the ends of the twist with a hair tie. Repeat this process until all of your hair is in twists.
  • Wash-and-go braid out: This is another classic wash-and-go hairstyle that is perfect for all hair types. To create a wash-and-go braid out, simply section your hair and braid each section. You can braid your hair tightly or loosely, depending on the desired look.
  • Wash-and-go pineapple: This is a simple and stylish wash-and-go hairstyle that is perfect for busy people. To create a wash-and-go pineapple, simply gather your hair at the top of your head and secure it with a ponytail holder. You can then leave your ponytail down or twist it into a bun.
Natural hair bantu knots
  • Wash-and-go bantu knots: Are a great way to protect your hair and create voluminous curls. This is a fun and unique wash-and-go hairstyle that is perfect for special occasions. Bantu knots are a great way to protect your wash and go hair and create defined curls. To create bantu knots, section your hair and twist each section. Then, wrap the twisted section around itself to create a knot. Secure the knot with a hair bobby pins or with hair ties. Once your hair is dry, unravel the bantu knots and fluff your hair with your hands. create wash-and-go bantu knots,
  • Wash-and-go fro: This is a simple and natural wash-and-go hairstyle that is perfect for people with short hair. To create a wash-and-go fro, simply apply a leave-in conditioner or styling product to your hair and fluff it up with your fingers. You can also use a pick to add volume to your fro.
  • Classic wash and go: This is a simple and classic wash and go style that is perfect for everyday wear. Simply twist or braid your hair and allow it to dry completely. Once your hair is dry, gently unravel your twists or braids and fluff your hair with your hands.
  • Wash and go bun: This is a versatile and stylish way to wear your wash and go hair. Simply twist or braid your hair and allow it to dry completely. Once your hair is dry, gently unravel your twists or braids and gather your hair into a bun. Secure the bun with bobby pins. You can also add a headband or scarf to dress up your bun.
  • Wash and go half-up, half-down: This is a romantic and stylish way to wear your wash and go hair. Simply twist or braid the top half of your hair and allow it to dry completely. Once your hair is dry, gently unravel your twists or braids and pin them back. You can also add a headband or scarf to dress up your half-up, half-down style.
wash-and-go hairstyles

How To style wash-and-go hairstyles on natural hair

  1. Start with clean, conditioned hair. This will help to hydrate and detangle your hair, making it easier to style.
  2. Apply a leave-in conditioner and styling product to your hair. This will help to define your curls and reduce frizz.
  3. Section your hair and start twisting or braiding each section. This will help to create definition and prevent your hair from shrinking.
  4. Once you have finished twisting or braiding your hair, allow it to dry completely. You can either air dry your hair or use a diffuser attachment on your hair dryer.
  5. Once your hair is dry, gently unravel your twists or braids. You can use a pick or finger detangler to help separate your curls.
  6. Fluff your hair with your hands and add a little bit of shine serum. This will help to reduce frizz and give your hair a natural-looking sheen.
  • Air dry your natural hair or diffuse it on low heat.
  • Avoid using heat styling tools on your hair, as this can damage it.
  • If you are going to be swimming, be sure to wear a swim cap to protect your hair from the chlorine and saltwater.
  • Refresh your wash-and-go hairstyle in the morning by spritzing it with water and reapplying a leave-in conditioner.
  • Refresh your curls with a leave-in conditioner or styling product in the morning.
  • Sleep on a satin pillowcase to help reduce friction and frizz.
  • Get regular trims to remove split ends and keep your curls looking healthy.

No matter what your natural hair style or preferences are, there is a wash-and-go hairstyle that is perfect for you. With so many different options available, you are sure to find the perfect wash-and-go hairstyle to express your individuality. With proper care and maintenance, your wash-and-go hairstyle will last for many days. With proper care and maintenance, your wash-and-go hairstyle can last for days or even weeks.

The Best Types Of Dreadlock Hairstyles

Dreadlock hairstyles are a versatile and stylish way to express your unique personality. They can be worn in a variety of ways, from simple to elaborate. Whether you are looking for a hairstyle that is low-maintenance or one that is head-turning, there is a style that is perfect for you.

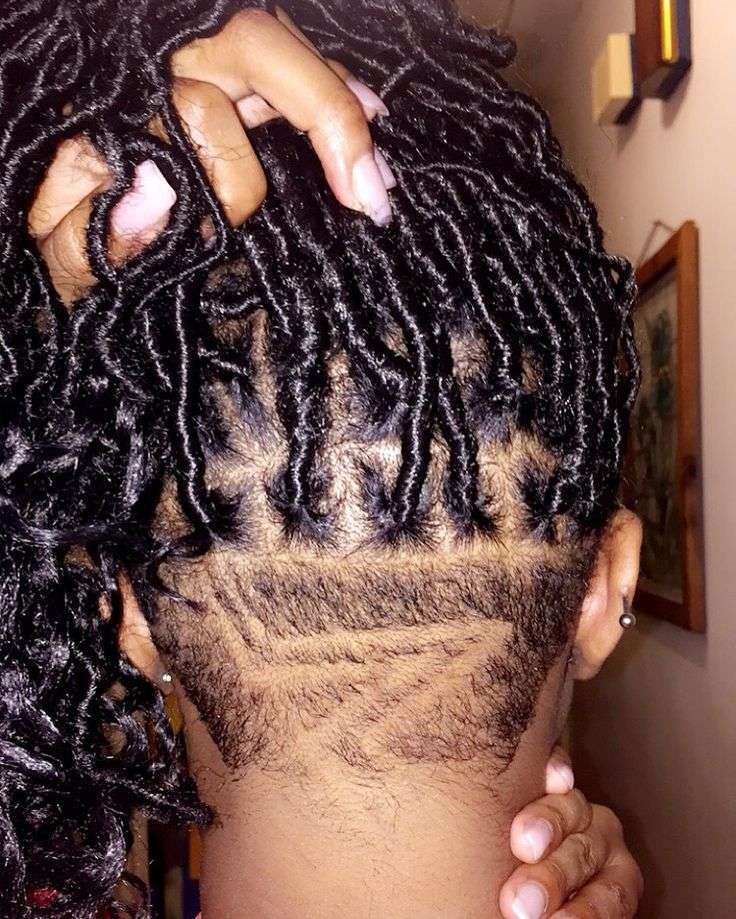
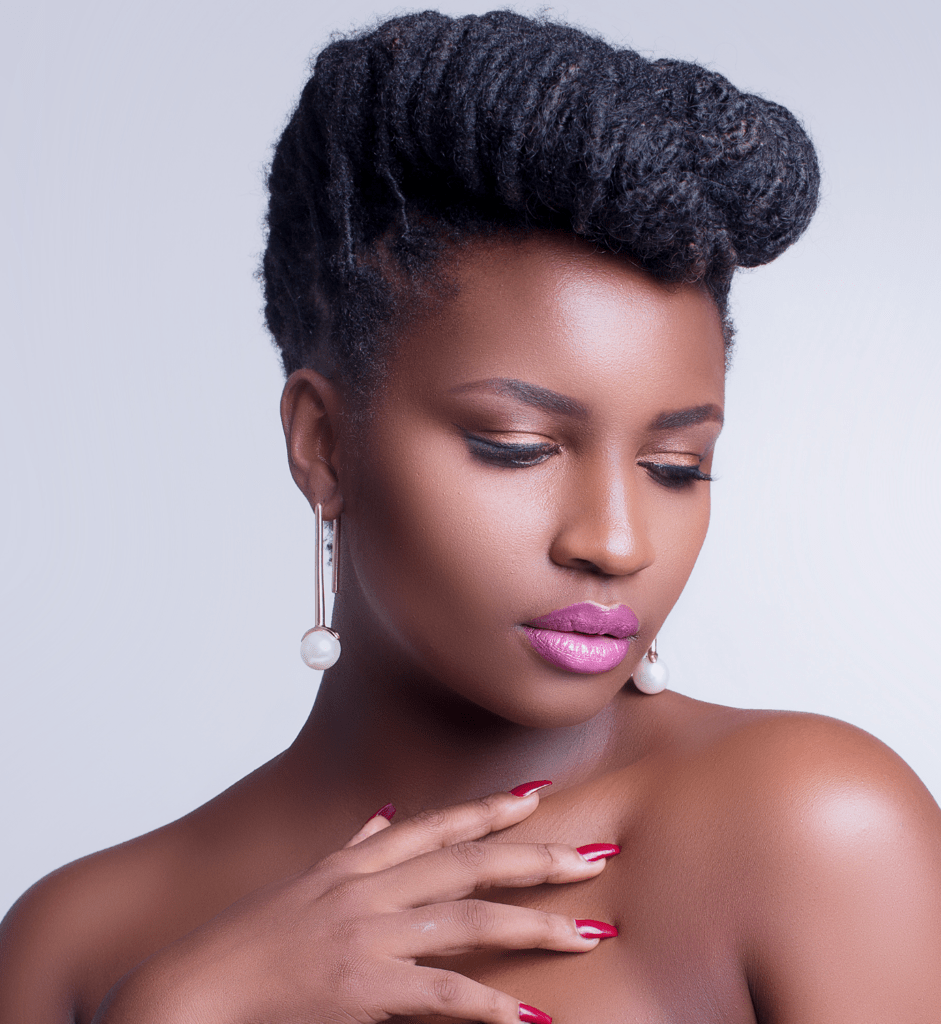
Dreadlock twisted updo pompadour

Dreadlock Hairstyles

  • Simple lock style: This is a classic style that is both easy to maintain and stylish. Leave your dreadlocks loose and natural, or you can twist them together at the ends for a more polished look.
  • Updo dreadlocks: Dreadlocks can be styled into a variety of updo hairstyles, such as buns, twists, and chignons. This is a great option for special occasions or when you want to keep your hair out of your face.
  • Side-swept dreadlocks: This is a trendy and stylish way to wear you hair when it’s in its locked state. Simply sweep your locks to one side of your head and secure them with bobby pins.
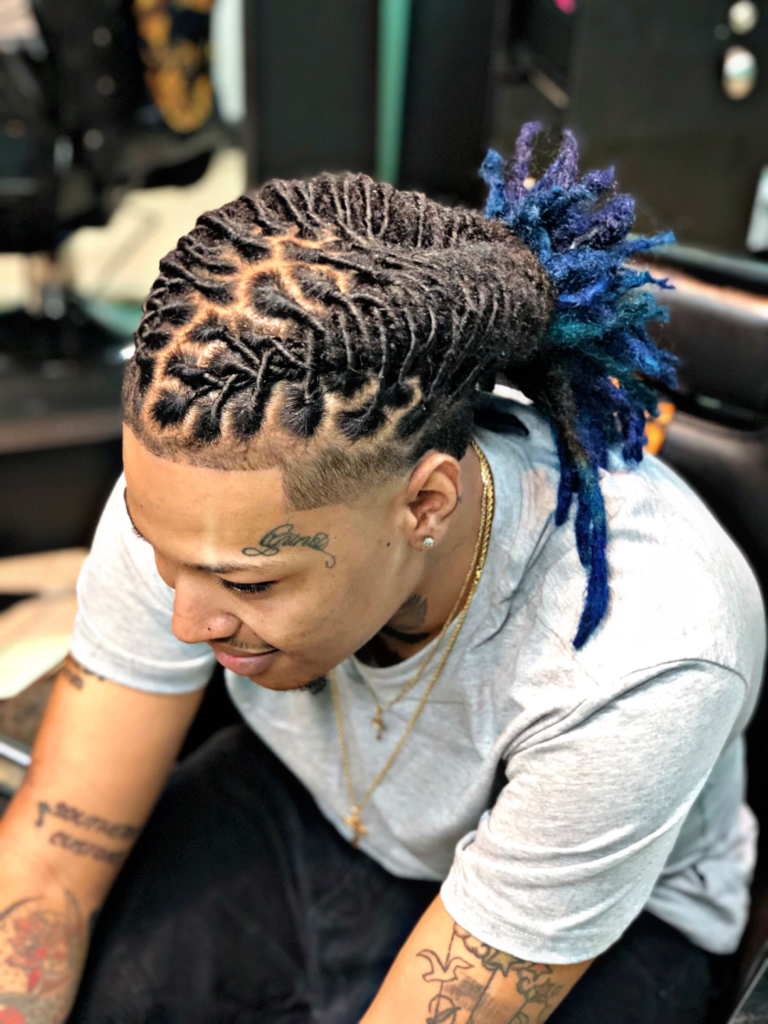
  • Dreadhawk: This is a fun and edgy hairstyle. Simply gather your locks at the top of your head and secure them with an elastic band. You can then leave the dreadhawk down or you can style it into a ponytail or bun.
  • Dreadlocks with beads: Beads are a popular way to decorate any hairstyle. You can add beads to your locks at the roots, at the ends, or throughout the length of the lock strands.
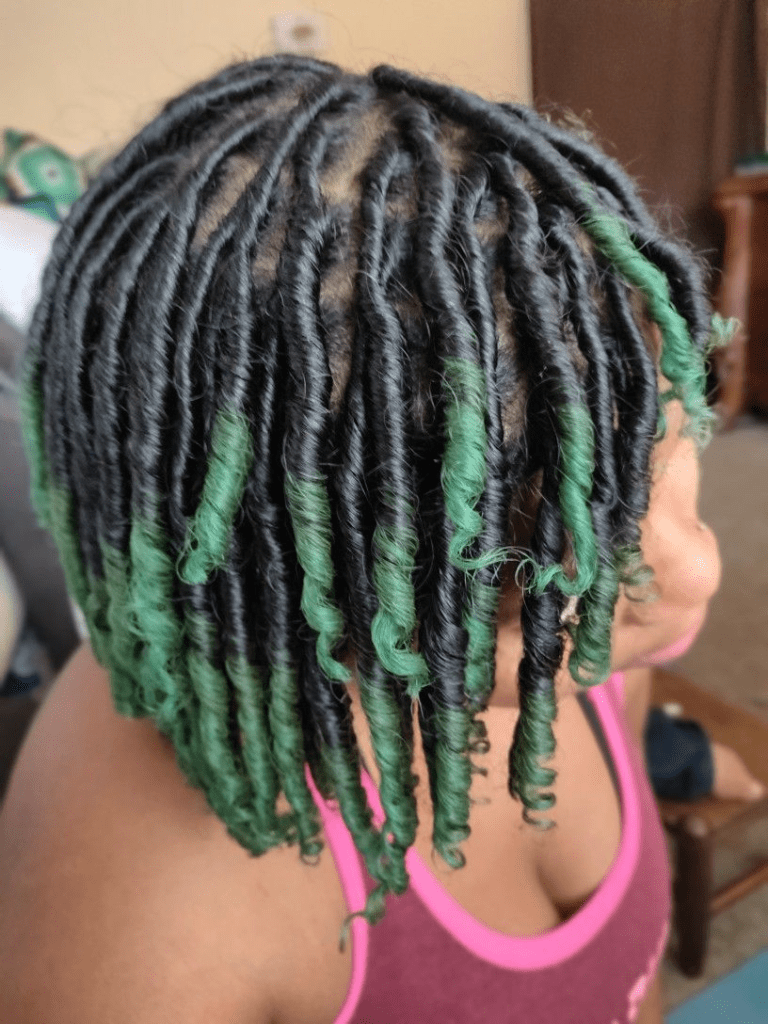
  • Dreadlocks with extensions: Extensions can be used to add length, volume, and color to your dreadlocks. These type of extensions are available in a variety of materials, including synthetic, human hair, and wool.
Dreadlock ponytail

Freeform dreadlocks

These are the most natural type of locks. They are formed by allowing the hair to dread on its own, without any intervention. Freeform locks can be a bit messy at first, but they eventually form into beautiful, unique locs.

Two-strand twists

Two-strand twists are a type of dreadlock that is formed by twisting two sections of hair together. Two-strand twists are a good option for people who want a more intricate and stylish hairstyle. Two-strand twists are created by twisting two sections of hair together. This results in a simple and elegant style.

Comb coils

Combed coils

Combed coils are a type of dreadlock that is formed by combing the hair into small sections and then twisting the sections tightly. Combed coils are a good option for people who want a more uniform and controlled lock style. Comb coils are created by twisting small sections of hair with a comb. This results in neat and uniform locks.

Interlocking dreadlocks

Interlocking locks are a type of dreadlock that is formed by interlocking two or more locks together using a tool. Interlocking dreads are a good option for people who want a more secure and durable lock style. Interlocking is a technique that involves hooking two dreadlocks together with a crochet hook. This creates a secure and durable style.

Dreadlock extensions

Dreadlock extensions are a great way to add length, volume, and color to your hair. These extensions types can be made from synthetic hair or human hair.

  • Backcombing: Backcombing is a technique that involves teasing the hair at the roots. This is then followed by twisting or braiding the hair to create dreadlocks.
Dreadlock hairstyles with color

No matter what your style is, there’s a dreadlock hairstyle that’s perfect for you. With so many different options to choose from, you’re sure to find a style that you love.

  • Use a leave-in conditioner to keep your dreadlocks hydrated and frizz-free. It also keeps your hair moisturized and hydrated.
  • Avoid using heat styling tools on your dreadlocks, as this can damage them.
  • If you are going to be swimming, be sure to wear a swim cap to protect your hair from the chlorine and saltwater.
  • Get your locks regularly retouched by a qualified loctician.
  • Use a lightweight moisturizer to keep your hair hydrated and prevent them from becoming dry and brittle.
  • Avoid using heat styling tools on your hair, as this can damage them.
  • If you’re going to be swimming or showering, be sure to wrap your dreadlocks in a shower cap or scarf to protect them from the water.
  • Get your locks trimmed regularly to keep them looking their best.
  • Avoid using products that contain alcohol or sulfates, as these can dry out your locks and make them brittle.
  • Detangle your locks regularly using a wide-tooth comb or your fingers.
  • Be patient and gentle when styling your dreadlocks. It takes time for dreadlocks to mature and form into their final shape.

Halo Braids| Stylish Hairstyles For All Hair Types

Halo braids are a beautiful and protective braided hairstyle that can be worn by people of all hair types. They are created by braiding the hair around the circumference of the head, creating a halo-like effect. Halo braids can be styled in a variety of ways, making them a versatile option for any occasion.They are a popular hairstyle for all occasions, from weddings and proms to everyday wear.

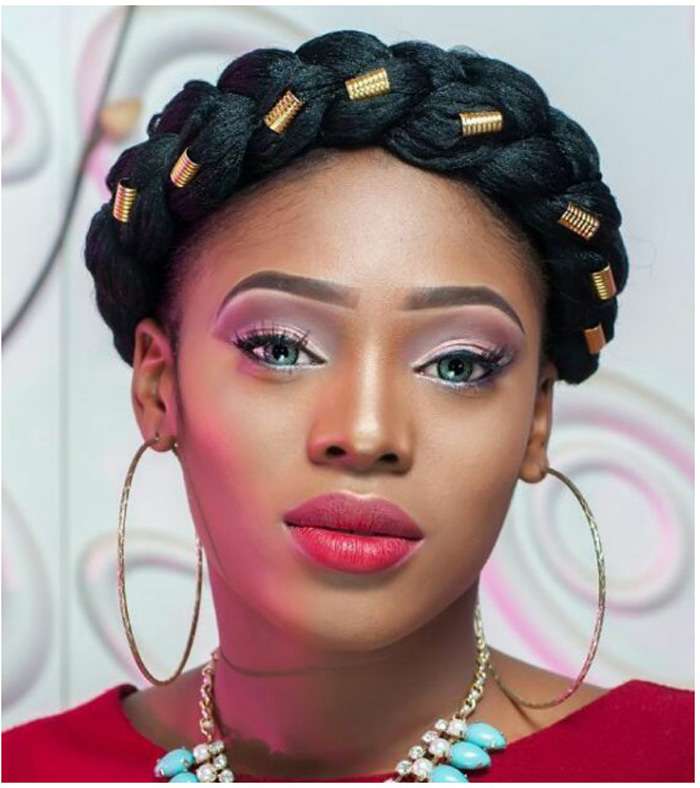
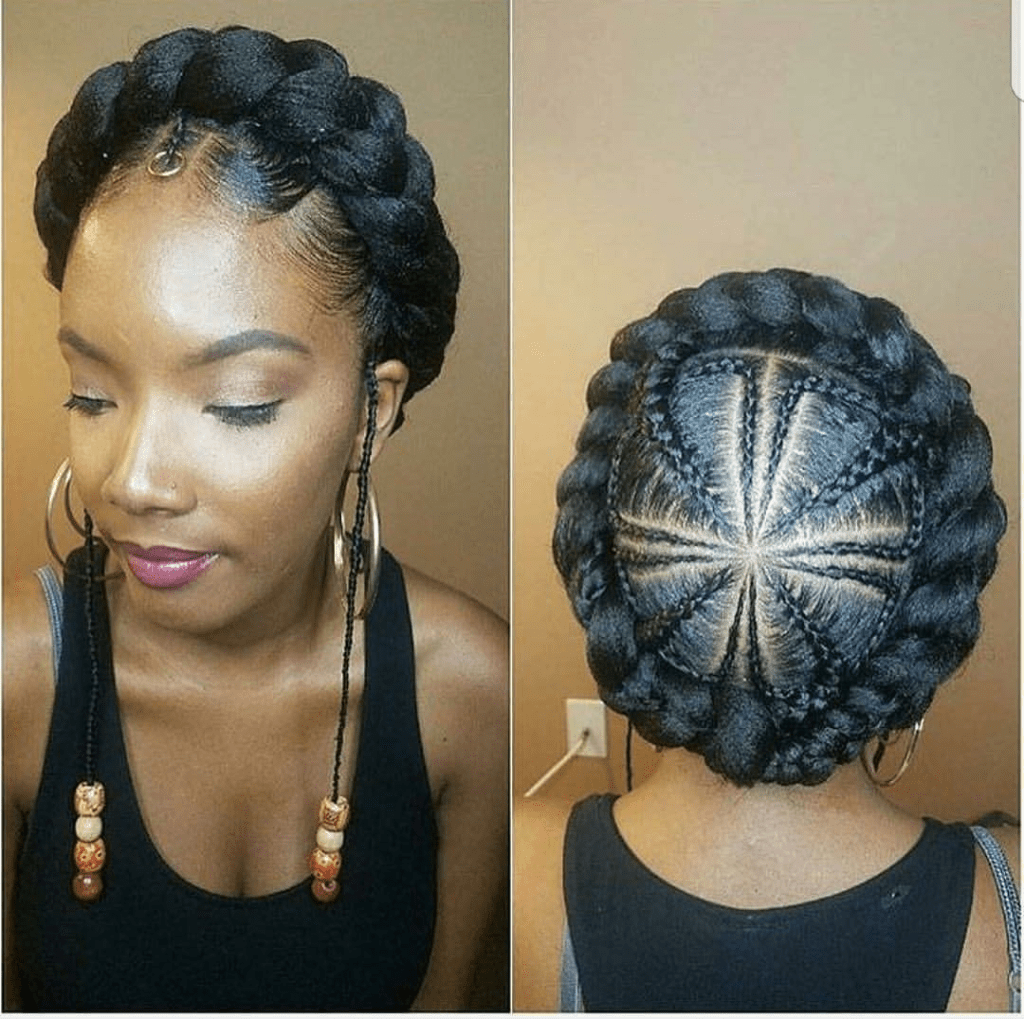
Halo braids collage

Benefits of halo braids

There are many benefits to halo braids, including:

  • Protection: Halo braids protect the hair from breakage and split ends. This is because the braids keep the hair tightly tucked away.
  • Versatility: Halo braids can be styled in a variety of ways, including braids, buns, and updos. This makes them a versatile option for any occasion.
  • Style: Halo braids are a stylish hairstyle that can be worn by people of all ages. They can be dressed up or down, depending on your own personal style.
  • Low-maintenance: Halo braids are a low-maintenance hairstyle. Once they are done, you can go for several days without having to do anything to your hair.

How to style halo braids

To create halo braids, you will need the following items before starting:

Tools List
Brush
Comb
Hair Ties
Bobby Pins
Beads (Optional)

Instructions:

  1. Brush and comb your hair to remove any tangles.
  2. Section your hair into three equal parts.
  3. Start braiding the middle section of hair.
  4. As you braid, add hair from the left and right sections.
  5. Continue braiding around the head until you reach the end of the hair.
  6. Secure the braid with a hair tie.
  7. Repeat steps 3-6 with the left and right sections of hair.
  8. Once all three braids are complete, tuck the ends under and secure them with bobby pins.
  9. Optional: Add beads or extensions to the braids for extra style.
Halo braids with wooden beads
  • Start with clean, dry hair.
  • Use a detangling spray to remove any knots or tangles from your hair.
  • Section your hair into manageable pieces.
  • Use a light-hold hairspray to keep your braids in place.
  • Finish with a shine serum to add extra shine and protect your hair from humidity.

  1. Brush your hair and divide it into two equal sections.
  2. Braid each section of hair tightly.
  3. Secure the ends of each braid with a hair tie.
  4. Cross the braids over each other at the back of your head.
  5. Pin the braids in place using bobby pins.
  6. Secure the braids with a hair tie or another braid.
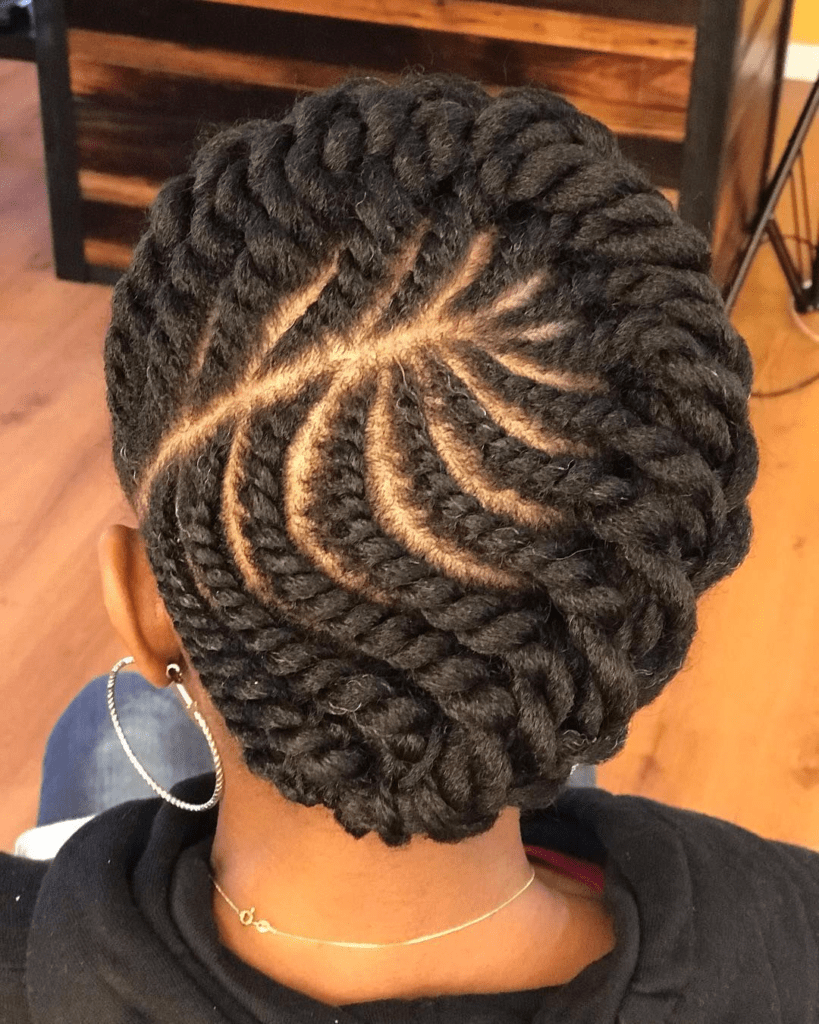
Two strand twist halo braid

How to style halo braids

Halo braids can be styled in a variety of ways. Here are a few ideas:

  • Simple halo braid: This is a classic style that is easy to do. To create a simple halo braid, simply braid your hair into a single braid and wrap it around your head like a halo. Secure the braid with bobby pins or hair ties.
  • Double halo braid: This style is a bit more intricate than the simple halo braid, but it is still relatively easy to do. To create a double halo braid, divide your hair into two sections and braid each section. Then, wrap each braid around your head like a halo and secure them with bobby pins or hair ties.
  • Halo braid with beads: This style is a fun and funky way to add personality to your halo braids. To create a halo braid with beads, simply add beads to your hair as you are braiding it.
  • Halo braid with extensions: This style is a great way to add length and volume to your halo braids. Add extensions to the braids for a longer, fuller look. To create a halo braid with extensions, braid your hair and the extensions together.
  • Add flowers or other decorations to your halo braids for a special occasion look.
  • Halo braid bun: Style your halo braids in a bun or ponytail for a more sophisticated look. Gather the braids into a bun at the top of the head and secure them with bobby pins.
  • Topknot Halo Braid your hair into a halo braid and then twist it into a topknot for a cute and casual look.

Halo braids are a stunning and versatile hairstyle that can be worn for any occasion. They are a great way to protect your hair, add length and volume, and express your personal style. They create a protective hairstyle that can be worn by people of all hair types. They are versatile, stylish, and low-maintenance. If you are looking for a new hairstyle to try, halo braids are a great option.

The Benefits Of A Silk Press On Natural Hair

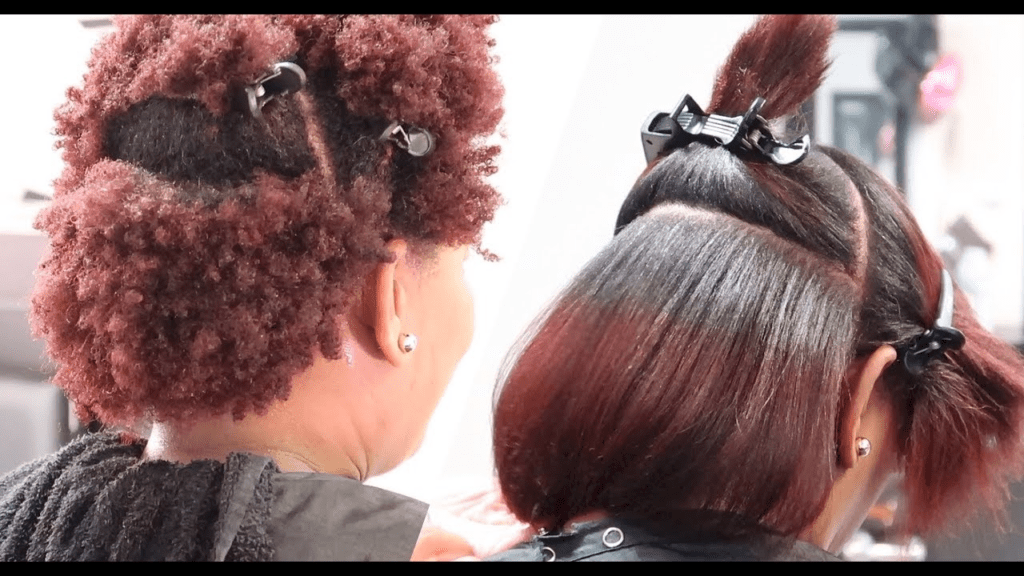
Silk press on short hair

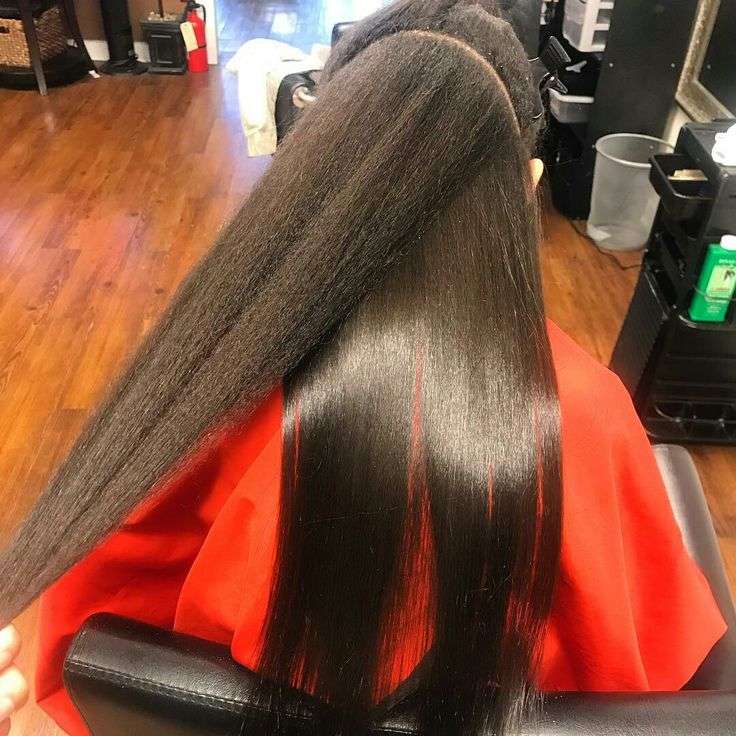
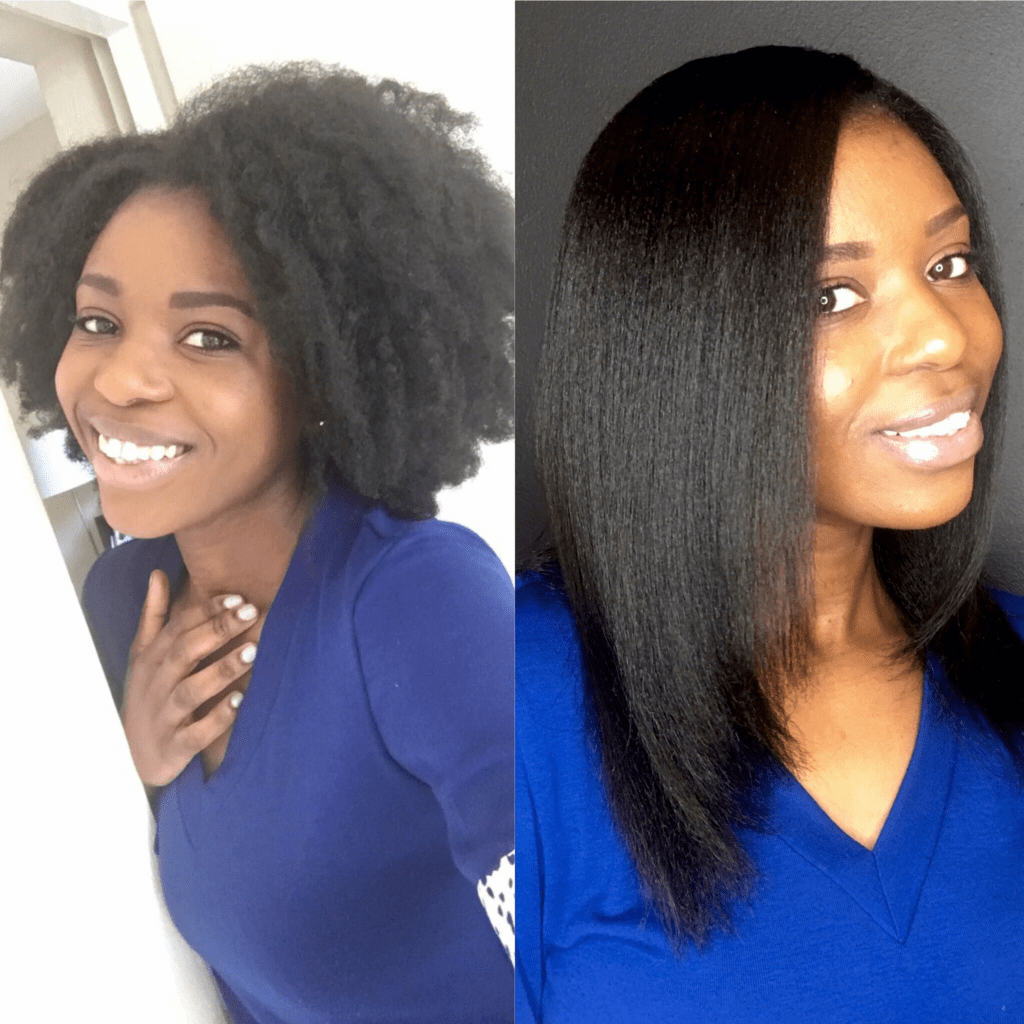
Silk presses on natural hair

A silk press is a hairstyle that uses heat to straighten natural hair. It is a popular choice for people who want to achieve a sleek, straight look without using chemicals. It provides a smooth, polished look that can last for days or even weeks.

They can be done at home or at a salon. If you are doing a silk press at home, it is important to use the right products and tools to avoid damaging your hair. A silk press can be done on any hair type, but it is most popular among people with natural hair. This is because natural hair tends to be curly or kinky, and a silk press can help you achieve a straight look without using chemicals.

To get a silk press, your hair will be washed, blow-dried, and then flat-ironed. The heat will help to relax your curls and create a smooth, straight finish.

Benefits of A silk press

There are a number of benefits to getting a silk press on natural hair. These include:

  • Helps to reduce frizz and tangles. This can make your hair easier to manage and style.
  • Adds shine and luster to your hair. This can make your hair look healthier and more vibrant. It gives your hair a sleek, shiny finish.
  • Protect your hair from damage. The heat from the flat iron can help seal the cuticle of your hair, which can help prevent breakage and split ends.
  • Elongates your natural hair. This can be a versatile hairstyle. You can wear your hair straight, down, or in a variety of updos. Can be styled in a variety of ways, such as straight, wavy, or curly.

Cons of getting a silk press on natural hair:

  • It can damage your hair if they are not done correctly.
  • They can be time-consuming and expensive.
  • It can somtimes make your hair more dry and brittle.
Silk press on natural hair

How to do a silk press at home

  1. Wash and condition your hair as usual.
  2. Apply a heat protectant to your hair.
  3. Blow dry your hair on a low heat setting until it is completely dry.
  4. Section your hair and flat iron each section from root to tip.
  5. Finish with a shine serum or hairspray to lock in the style and protect your hair from humidity.

Tips for a successful silk press

  • Use a good-quality flat iron. A cheap flat iron will not give you the same results as a good-quality one.
  • Section your hair before blow-drying and flat-ironing it. This will help you to achieve a more even finish. Section your hair small enough to flat iron each section thoroughly.
  • Use a heat-protectant spray. This will help to protect your hair from heat damage.
  • Use a wide-tooth comb to detangle your hair before blow-drying and flat-ironing it. This will help to prevent breakage and split ends.
  • Start at a low heat setting and gradually increase the heat as needed. This will help to prevent heat damage.
  • Less is more. Don’t over-straighten your hair, as this can damage it.
  • Be patient. It takes time to get a good silk press.
image

How long does a silk press last?

A silk press can last for up to two weeks, depending on your hair type and how well you care for it. To prolong the life of your hair in its straightened state, avoid washing your hair too often and use a dry shampoo to absorb excess oil. You should also sleep with your hair wrapped in a silk or satin scarf to prevent frizz.

How To maintain Your Hair

To help your silk press last as long as possible, there are a few things you can do:

  • Avoid washing your hair too often.
  • Use a dry shampoo to absorb excess oil.
  • Sleep with your hair wrapped in a silk or satin scarf.
  • Touch up your silk press with a flat iron as needed.
image
  • Use a heat protectant spray before blow-drying and flat-ironing your hair. This will help protect your hair from heat damage.
  • Use a wide-tooth comb to detangle your hair before blow-drying and flat-ironing it. This will help to prevent breakage and split ends.
  • Use a silk or satin pillowcase to sleep on. This will help to reduce friction and keep your hair frizz-free.
  • Avoid washing your hair too often. This can strip the natural oils from your hair and make it more prone to frizz.

How long does a silk press last?

A silk press can last anywhere from 1 week to 2 weeks, depending on your hair type and how well you care for it. If you have curly or kinky hair, your silk press may not last as long as someone with straighter hair.

steps for doing a silk press on natural hair:

  1. Wash your hair with a clarifying shampoo to remove any build-up.
  2. Deep condition your hair to hydrate and nourish it.
  3. Section your hair into manageable pieces.
  4. Apply a heat protectant to each section of hair.
  5. Use a blow dryer to blow dry each section of hair until it is straight.
  6. Use a flat iron to straighten each section of hair until it is smooth and silky.
  7. Finish with a shine serum to add extra shine and protect your hair from humidity.

Silk presses are a popular hairstyling technique for natural hair. This process is a great way to achieve sleek, straight hair while providing a smooth, polished look that can last for days or even weeks. However, it is important to use the right products and tools to avoid damaging your hair.

If you are considering getting a silk press, be sure to do your research and find a qualified hair stylist. Be sure to use a heat protectant and a low heat setting on your blow dryer and flat iron. You should also section your hair small enough to flat iron each section thoroughly.

Using Nail Dip Powder Kits For Nail Designs

Dip-powder nails are a popular choice for artificial nail enhancements. They are known for their durability, long-lasting shine, and resistance to chipping. Dipped nails are also relatively easy to apply, making them a good option for DIY manicures.

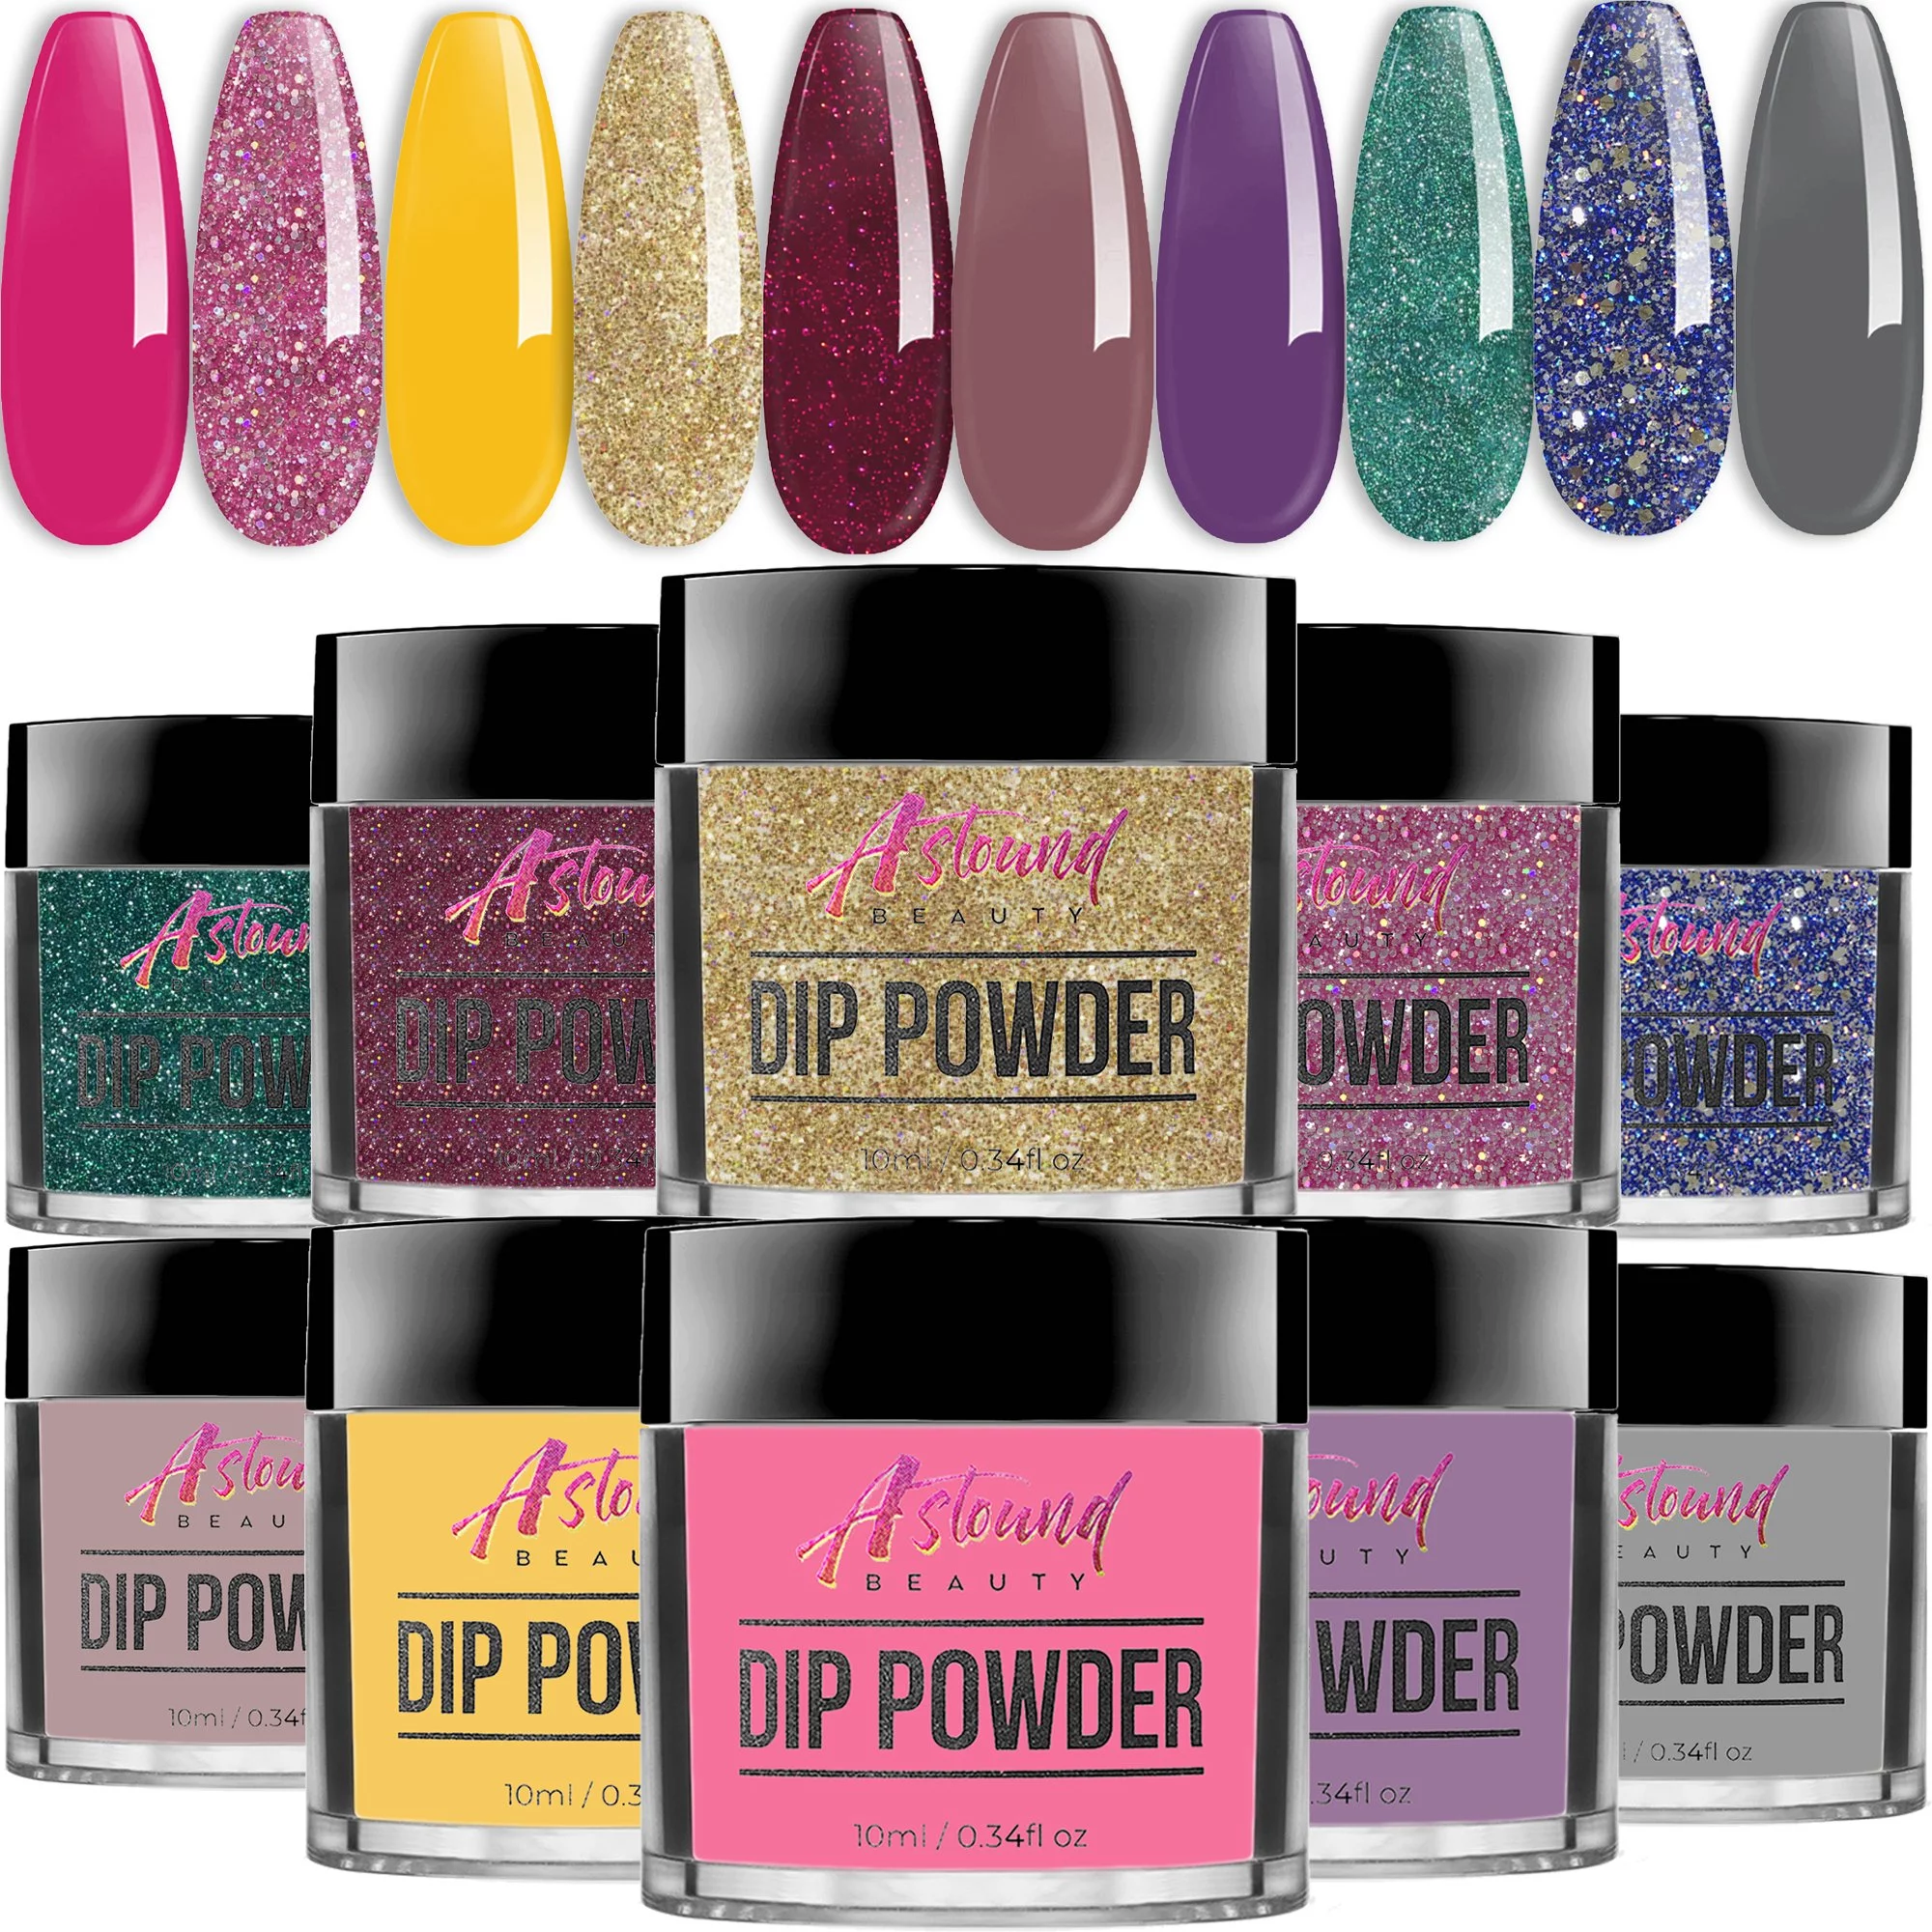
Traditional dip powder is the most common type of powder used for dipping nails. It’s made from a combination of acrylic powder, pigments, and other additives. You can find these types of powders in a wide variety of colors and finishes, and it offer a durable and long-lasting manicure. The powder is applied by dipping the nail into a jar of colored powder. The powder is then sealed with a top coat.

Teal Dip Powder nail design

Different types of dip powders

There are a variety of different types of dip powders available, each with its own unique properties and benefits. The numbered list below lists the most popular types of dip powders and provides a brief description of each powder type.

  1. Clear powder is a versatile option that can be used to create a variety of different looks. It can be worn on its own for a natural, polished look, or it can be used as a base for other dip powder colors and designs.
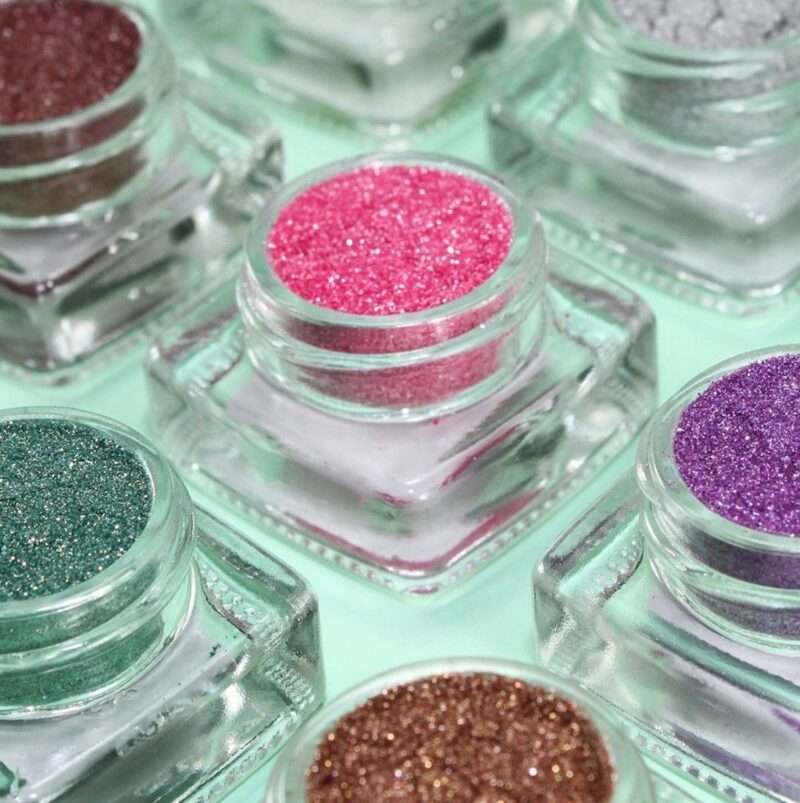
Chit Chat dip powder
  1. Colored powder is available in a wide range of colors, from neutrals to brights to glitters. This makes it easy to find the perfect color to match your personal style or any occasion.
  2. Chrome dip powder is a type of powder that gives the nails a mirror-like metallic finish. Chrome powder is a great way to add a touch of luxury to your manicure. It is available in a variety of colors and finishes, and it can be used to create a variety of different nail art designs. It’s a popular choice for special occasions and events.
  1. Holographic dip powder gives your nails a rainbow-like effect. Holographic powder is a type of dip powder that contains holographic pigments. Holographic powder is a great way to add a unique and eye-catching element to your manicure. It is available in a variety of colors and finishes, and it can be used to create a variety of different nail art designs.
  2. Matte powder gives your nails a velvety finish. It is a popular choice for a more sophisticated look.
  3. Metallic dip powder: is a type of dip powder that contains metallic pigments. Metallic powder is a great way to add a touch of glamour to your manicure. It is available in a variety of colors and finishes, and it can be used to create a variety of different nail art designs.
White glitter nail set with dip powder
  1. Glittered powder is a type of dip powder that contains glitter particles. Glitter powder is a great way to add sparkle and shine to your manicure. It is available in a variety of colors and finishes, and it can be used to create a variety of different nail art designs. Glitter powder adds sparkle and shine to your nails. It is a popular choice for holidays and special occasions.
  2. Ombre dip powder creates a gradual fade from one color to another. It is a popular choice for a more unique and stylish look.
  3. French tip powder creates a classic French manicure look. It is a popular choice for a more elegant and polished look.
Thermal Dip powder
  1. Thermal dip powder is a type of dip powder that changes color depending on the temperature. Thermal powder is a great way to add a fun and unique element to your manicure. It is available in a variety of colors and finishes, and it can be used to create a variety of different nail art designs.
  2. Glow-in-the-dark powder glows in the dark. It is a fun and festive option for parties and special occasions.
  3. 3D dip powder adds dimension and texture to your nails. It is a popular choice for a more unique and stylish look.

In addition to these traditional types of dip powder, there are also a number of specialty dip powders available. Specialty powders can be used to create a variety of different effects, such as ombre nails, marble nails, and cat eye nails.

Popular Nail Tip Brands For Acrylic Nails

There are a variety of nail tip brands on the market, but some are more popular than others. Nail tips are an essential part of acrylic nail applications. They provide a base for the acrylic powder and liquid to adhere to, and they help to create the desired shape and length of the nails.

Which Nail Tips Are The Best?

If you are an avid acrylic nails fan, then you are probably aware that selecting the right nail tips can significantly enhance the result of your manicure. Nail tips come in various shapes, sizes, and materials, such as plastic, fiberglass, and gel. When choosing nail tips, it is crucial to consider several factors, such as the shape and size of your natural nails, the desired length and shape of your acrylic nails, and the type of look you are trying to achieve. It is crucial to choose a brand that offers a diverse range of nail tip options to meet your specific needs.

Some brands offer a variety of nail tip designs, such as stiletto, coffin, and almond-shaped tips. Others offer different lengths, including short, medium, and long, to suit your preferences. Additionally, high-quality nail tips should be durable, easy to apply, and provide a seamless finish. Therefore, it is essential to do your research and choose a reputable brand that offers high-quality products that can help you achieve the perfect acrylic nails look.

MORGLES nail tip brands

Top Nail Tip Brands for Acrylic Nails in 2023

1. MORGLES

MORGLES is a popular brand for nail tips, offering a wide range of shapes and sizes, making them easy to find the perfect fit for your nails. They are also made from a durable material that can withstand the wear and tear of everyday life including clear, white, and natural colors. MORGLES nail tips are made of high-quality ABS plastic, which is durable and easy to work with. They’re very affordable, making them a great option for budget-minded nail techs and DIY enthusiasts.

2. Apres Gel-X

Apres Gel-X is a brand of nails that has recently gained popularity among fashion enthusiasts. The tips of Apres Gel-X are made of soft gel, which is a material that is more flexible and comfortable to wear than traditional acrylic tips. Soft gel is a form of polymer that is more gentle on the nails and doesn’t cause any damage to the natural nails. This makes Apres Gel-X a healthier and safer option for those who want to keep their nails healthy and strong. Another advantage of Apres Gel-X nails is that they are easier to remove than traditional acrylic tips.

Unlike acrylic tips, which require filing and drilling to remove, Apres Gel-X can be easily soaked off without any damage to the natural nails. This means that you can switch up your nail style more frequently without worrying about damage to your natural nails. In addition to the above-mentioned benefits, Apres Gel-X nails also come in a wide variety of colors and styles. You can choose from a wide range of shades, from bold and vibrant to subtle and sophisticated, to match your mood and style. Whether you are looking for a classic French style or a trendy ombré effect, Apres Gel-X has got you covered.

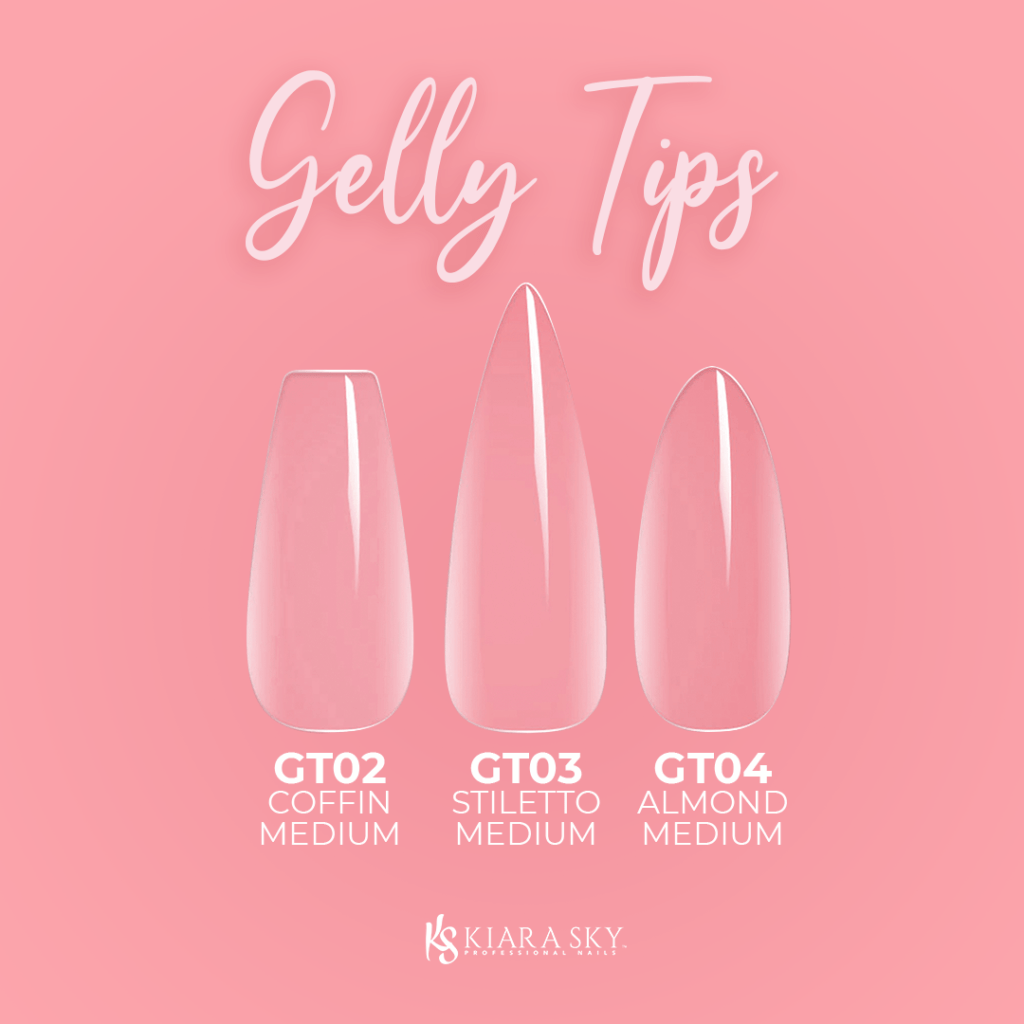
Kiara Sky Gelly Tips

3. Kiara Sky

Kiara Sky is a highly reputable brand in the nail industry, known for its extensive range of nail tips that cater to different preferences. The brand offers an array of shapes, including almond, stiletto, coffin, square, and oval, among others. The sizes range from short to long, catering to different nail lengths. Additionally, Kiara Sky nail tips come in a variety of colors and finishes, including glossy, matte, and glitter.

The brand’s nail tips are made of high-quality ABS plastic, which is a durable material that can withstand wear and tear. The tips are also easy to apply, making them ideal for both professional and at-home use. With Kiara Sky nail tips, you can achieve a flawless and stylish manicure that lasts for days.

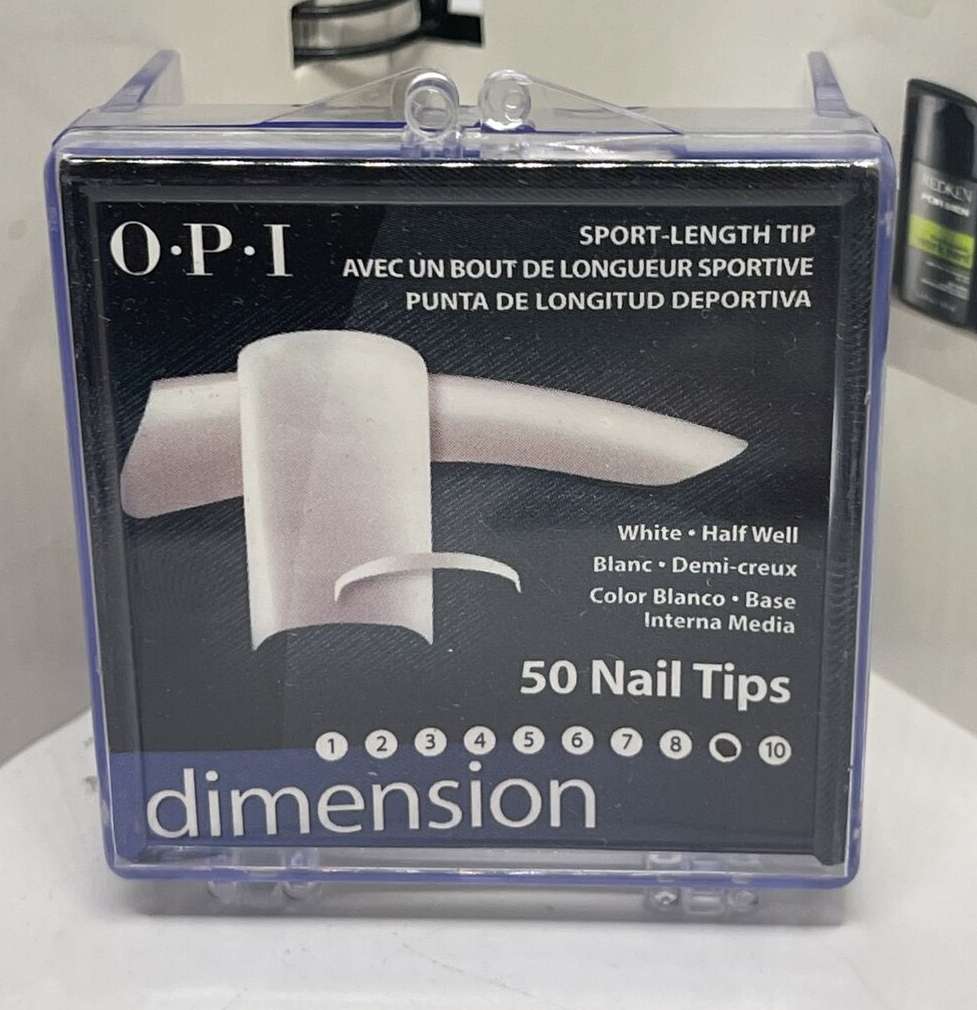
OPI Dimension Nail tips

4. OPI

OPI is a well-known brand in the nail industry, and their nail tips are no exception. OPI nail tips are made of high-quality ABS plastic and come in a variety of shapes and sizes. They’re also available in a variety of colors and finishes, so you can find the perfect tips to match your desired manicure.

Saviland nail tips

5. Saviland

Saviland is a widely recognized and trusted brand in the world of nail art. They offer a wide range of high-quality nail art supplies, including nail tips. These nail tips are made of premium-grade ABS plastic that is durable, long-lasting, and easy to work with. They come in a plethora of shapes and sizes, making it easy for nail technicians and DIY enthusiasts to find the perfect fit for their needs.

Whether you’re looking for stiletto, coffin, almond, or square-shaped nails, Saviland has got you covered. One of the best things about Saviland nail tips is that they are incredibly affordable. Despite their high quality and durability, they are priced competitively, making them a great choice for nail technicians who are working on a budget or DIY enthusiasts who want to try their hand at nail art.

Additionally, these nail tips are easy to apply and can be used with both gel and acrylic nail systems. In conclusion, if you’re looking for top-notch nail tips that are affordable, durable, and easy to work with, look no further than Saviland. Their high-quality ABS plastic nails come in a variety of shapes and sizes, making it easy for you to find the perfect fit for your next nail art project.

Beetles nail tips

6. Beetles

Beetles is a reputable and widely recognized brand that specializes in producing high-quality nails at an affordable price point. They are known for their attention to detail and the exceptional quality of their products. Beetles nail tips come in a wide range of shapes and sizes, making it easy to find the perfect fit for your nails. What sets Beetles nail tips apart is their durability.

They are made from a strong and sturdy material that can withstand the wear and tear of everyday use, making them ideal for acrylic nail applications. This means that you can enjoy beautiful, long-lasting nails without having to worry about them breaking or chipping easily. In addition to their quality and durability, Beetles nail tips are also easy to apply.

They are designed to fit comfortably on your nails and can be easily trimmed and shaped to your desired length and style. Whether you’re a professional nail technician or just like to do your own nails at home, Beetles nail tips are a great choice for anyone looking for high-quality, affordable nail products.

Tomicca no file nail tips

7. TOMICCA

TOMICCA is a popular brand of nails that is known for its trendy designs. These nail tips are available in a variety of shapes and sizes, and they come in a variety of colors and finishes.

When choosing tips for your nails it’s important to consider the following factors:

  • Shape: Nail tips come in a variety of shapes, including square, round, almond, and coffin. Choose a shape that flatters your natural nails and complements your personal style.
  • Size: Nail tips come in a variety of sizes, so it’s important to choose the right size for each nail. The tips should fit snugly on your nails without being too tight or too loose.
  • Material: Tips used for a nail application are typically made of ABS plastic, gel or acrylic. ABS plastic tips are more affordable and easier to work with, but they’re less durable than acrylic tips. Acrylic tips are more durable, but they can be more difficult to apply. Choose a material that is durable as well as comfortable to wear.
  • Color: Most tips for your nails can be purchased in a variety of colors, including clear, white, and natural colors. Choose a color that matches your desired manicure.

Once you have chosen the right nails for your needs, you can begin to apply your acrylic nails. Be sure to follow the instructions of your acrylic nail kit, and apply the acrylic powder and liquid carefully. By doing so you can ensure that you acheive the best results.

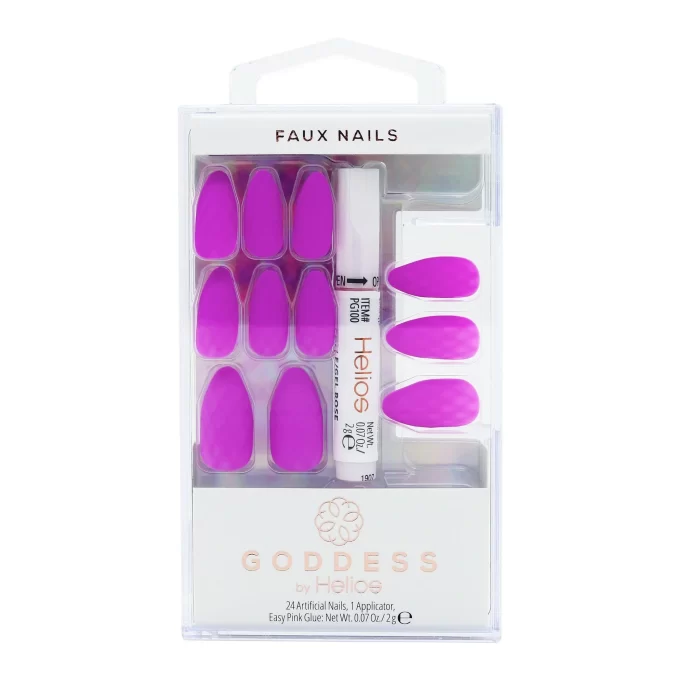
5 Super Popular Press-On Nail Brands

Many different Press-on nail brands have become increasingly popular in recent years, and for good reason. They’re convenient, affordable, and can give you a salon-quality manicure in minutes. If you’re thinking about starting a press-on nail business, one of the most important decisions you’ll need to make is which nail tip brand to use.

popular & Trending press-on nail brands

Olive and June Press-On Nail Brands

Olive & June

Olive & June is a popular brand known for its high-quality press-on nails. Their nails are made with a gel-like material that is durable and long-lasting. Olive & June nails also come in a wide variety of shapes and sizes, so you can find the perfect fit for your customers.

Dashing Diva press on nails

Dashing Diva

Dashing Diva is another popular brand of press-on nails. Their nails are known for being easy to apply and remove. Dashing Diva nails also come in a wide variety of colors, designs, and finishes.

Static nails press on nails

Static Nails

Static Nails is a great option for customers who are looking for reusable press-on nails. Their nails are made with a strong adhesive that can last for up to two weeks. Static Nails also come in a variety of colors and designs.

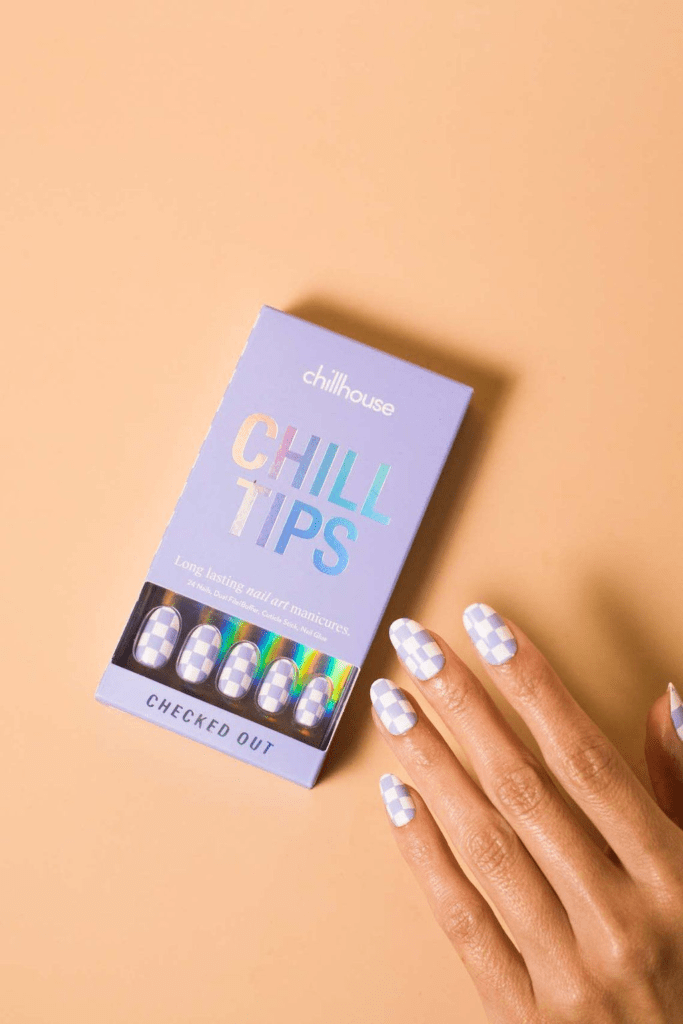
Chill House press on nails

Chillhouse

Chillhouse is a great option for customers who are looking for stylish and unique press-on nails. Their nails come in a variety of trendy designs, including abstract patterns, geometric shapes, and animal prints.

Paint Lab press-on nails

Paint Lab

Paint Lab is a great option for customers who are looking for high-quality press-on nails at an affordable price. Their nails are made with a durable material that is resistant to chipping and cracking. Paint Lab nails also come in a wide variety of colors and designs.

When choosing a nail tip brand for your press-on nail business, it’s important to consider factors such as quality, durability, price, and variety. You should also consider the target market for your business. If you’re targeting customers who are looking for high-quality, durable nails, then Olive & June or Dashing Diva would be good options.

If you’re targeting customers who are looking for affordable nails, then Paint Lab would be a good option. And if you’re targeting customers who are looking for stylish and unique nails, then Chillhouse would a good option.

No matter which nail tip brand you choose, make sure to offer your customers a variety of colors, designs, and finishes to choose from. This will help you to attract a wider range of customers and grow your business.

The Best Types Of Nail Decals And Nail Application

Nail decals are a fun and easy way to add personality to your manicure. They come in a wide variety of styles, colors, and designs, so you’re sure to find the perfect ones to match your look. Nail decals are a great way to add personality and style to your manicure.

They come in a wide variety of colors, designs, and materials, so there’s something for everyone. Whether you’re looking for a simple accent or a full-on nail art masterpiece, nail decals can help you achieve the look you want.

Types of nail decals and how to use them

nail art water transfer stickers

Water transfer decals: These decals are made of a thin film that dissolves when placed in water. To apply, simply soak the decal in water for a few seconds, then slide it onto your nail. Water transfer decals are available in a variety of designs, including flowers, animals, and geometric patterns.

1. Water decals

Water decals are one of the most versatile types of nail decals. They’re made of a thin, transparent film that can be easily applied to your nails using water. Water decals come in a wide variety of designs, including simple shapes, patterns, and images. To apply a water decal, simply soak it in water for a few seconds, then carefully slide it onto your nail. Once the decal is in place, seal it in with a top coat.

To apply water decals:

  1. Paint your nails with a base coat and let it dry completely.
  2. Cut out the decal you want to use and trim any excess film.
  3. Immerse the decal in a bowl of water for about 10-15 seconds, or until it begins to slide off the backing paper.
  4. Use tweezers to carefully slide the decal onto your nail.
  5. Position the decal where you want it and gently press it down to remove any air bubbles.
  6. Apply a top coat to seal the decal and protect your manicure.
Nail wraps

Nail wraps: Nail wraps are thin adhesive strips that cover the entire nail bed. They are available in a variety of colors and patterns, including solid colors, metallic finishes, and holographic designs. Nail wraps are a great option for beginners, as they are easy to apply and remove.

2. Nail wraps

Nail wraps are thin, adhesive strips that cover the entire nail bed. They’re made of a thin, flexible material that adheres to your nails using heat. Nail wraps are available in a wide variety of colors and designs, including solids, patterns, and images. The application is fairly easy to use. To apply a nail wrap, simply peel it off the backing and press it onto your nail. Smooth out any wrinkles and trim the excess wrap with nail scissors. Then, seal it in with a top coat.

To apply nail wraps:

  1. Buff your nails lightly to remove any shine.
  2. Apply a base coat to your nails and let it dry completely.
  3. Cut the nail wrap to the size of your nail.
  4. Heat the nail wrap with a hair dryer on the low setting for a few seconds.
  5. Apply the nail wrap to your nail and press it down firmly.
  6. Trim any excess nail wrap and file the edges smooth.
  7. Apply a top coat to seal the nail wrap and protect your manicure.
Nail clay nail decals

3D decals: These decals add dimension and texture to your manicure. They are typically made of acrylic, polymer clay, or gel. To apply, simply place the decal on your nail and press down gently.

3. 3D nail decals

3D nail decals are raised stickers that add texture and dimension to your manicure. They’re perfect for special occasions or when you want to make a statement. These nail decals add a unique and eye-catching element to your manicure. They’re made of a raised material, such as acrylic or resin, that gives them a textured look. In order to apply a 3D nail decal, simply peel it off the backing and press it onto your nail. Seal it in with a top coat to protect it from chipping.

To apply 3D nail decals:

  1. Paint your nails with a base coat and let it dry completely.
  2. Apply a thin layer of nail glue to the back of the decal.
  3. Place the decal on your nail and hold it in place for a few seconds until the glue dries.
  4. Apply a top coat to seal the decal and protect your manicure.
Nail foil sheets used as nail decals

Peel-and-stick decals: These decals are the easiest to apply, as they simply peel off the backing and stick to your nails. Peel-and-stick decals are available in a variety of materials, including vinyl, nail foil sheets, and glitter.

4. Nail foils

Nail foils are thin, metallic sheets that are applied to the nail using nail foil adhesive. They create a shiny, reflective finish that’s perfect for parties and other special events. To apply nail foil, simply brush a thin layer of nail foil adhesive onto your nail and then press the foil on top. Smooth out any wrinkles and trim off the excess foil with nail scissors. Then, seal it in with a top coat.

How To Use Nail Foil Sheets And Nail Foil Glue

5. Nail art stickers

Nail stickers are another easy-to-use type of nail decal. Nail art stickers are usually small, self-adhesive stickers that can be used to create a variety of designs on your nails. They’re a great way to add a touch of personality to your manicure without having to be a professional nail artist. To apply a nail art sticker, simply peel it off the backing and press it onto your nail. Seal it in with a top coat to protect it from chipping. They can be applied directly to your nails and are available in a wide variety of designs, including glitter, metallic, and 3D designs.

To apply nail stickers:

  1. Paint your nails with a base coat and let it dry completely.
  2. Peel the sticker off the backing paper and carefully apply it to your nail.
  3. Position the sticker where you want it and gently press it down to remove any air bubbles.
  4. Apply a top coat to seal the sticker and protect your manicure.

No matter what type of nail decals you choose, they’re a great way to add a touch of fun and creativity to your manicure. So next time you’re looking for a new way to style your nails, reach for a pack of nail decals and start to experiment with it. You might be surprised at what you can create.

Nail Decal Tips

  • Make sure your nails are clean and dry before applying the decals.
  • Use a top coat to seal in the decals and protect them from chipping.
  • If you’re using water decals, be sure to soak them in water for long enough before applying them to your nails.
  • If you soak them for too long, they will become difficult to apply.
  • If you’re using 3D nail decals, be careful not to apply them too thickly, because this can cause your nail designs to look bulky.
  • If you are using peel-and-stick decals, be careful not to overstretch the decals when applying them.
  • If you’re using nail art stickers, be creative and have fun with them. There are no rules when it comes to nail art.
  • If you are using 3D decals, be sure to press down on them gently to ensure that they adhere to your nails.
  • To remove nail decals, simply soak them in acetone nail polish remover for a few seconds, then peel them off.

The House Of Versace: For The Love Of Fashion

The House of Versace is a 2013 Canadian biographical drama television film directed by Sara Sugarman and starring Gina Gershon. It is based on the book House of Versace: The Untold Story of Genius, Murder, and Survival by Deborah Ball. The book was a biography that came out in 2010 about the Versace family. It tells the story of the Versace family, mainly depicting the designer Donatella Versace, inheriting the Versace fashion house following the murder of her brother Gianni Versace in 1997.

The beginning of the movie starts off with the murder of Gianni Versace on the steps of his Miami mansion in 1997. The film then flashes back to the early days of the Versace fashion house, and follows the rise and fall of the Versace dynasty. It then focuses on the relationship between Donatella and Gianni Versace. Donatella is portrayed as a loving and supportive sister, but she is also struggling to find her own identity in the shadow of her famous brother.

After Gianni’s death, Donatella takes over the Versace fashion house, and she proves to be a formidable leader. She brings the company back from the brink of bankruptcy, and she becomes one of the most successful fashion designers in the world.

The film was a critical and commercial success, winning the Canadian Screen Award for Best Television Movie and being nominated for several other awards, including the Golden Globe Award for Best Miniseries or Television Film and the Primetime Emmy Award for Outstanding Miniseries or Movie.

The House of Versace explores a number of themes, including:

  • Family: The film is ultimately a story about family, and the bond between Donatella and Gianni Versace.
  • Love: The film also explores the theme of love, both romantic and familial.
  • Loss: The film deals with the theme of loss, both in the death of Gianni Versace and in the struggles of Donatella Versace to find her own identity.
  • Success: The film also explores the theme of success, and the challenges of maintaining success in the face of adversity.

The House of Versace is a well-made and entertaining film. It is a fascinating look at the world of vintage fashion design, and it is a moving story about family, love, and loss. Gina Gershon gives a powerful performance as Donatella Versace, and she is supported by a strong cast that includes Enrico Colantoni as Gianni Versace, Raquel Welch as Guadalupe Versace, and Franco Nero as Santo Versace.

The House of Versace is a well-made and engaging film that tells the story of one of the most iconic fashion houses in the world. The film is well-acted, well-written, and well-directed. It is also visually stunning, with beautiful costumes and sets.

The House Of Versace movie

Why you should watch the movie

The House of Versace is a well-made and informative film that provides a fascinating glimpse into the world of the Versace fashion house. The film is well-acted, with Gina Gershon giving a particularly powerful performance as Donatella Versace. The film is also visually stunning, with beautiful costumes and sets.

If you’re a fan of fashion, then The House of Versace is a must-watch movie. The film provides a fascinating look at the rise and fall of one of the world’s most iconic fashion houses. The film is also well-made and acted, with beautiful costumes and sets.

  • To learn more about the Versace family and their fashion house.
  • To see Gina Gershon give a powerful performance as Donatella Versace.
  • To enjoy the film’s visually stunning cinematography and costumes.
  • To be entertained by a well-made and informative film.

Where to watch the movie

The House of Versace is available to watch on Amazon Prime Video and other streaming services. If you’re a fan of fashion or just looking for a well-made and entertaining movie, then I highly recommend checking out The House of Versace.

The House Of Versace movie image

The House of Versace: A Fashion Dynasty

The film is a must-see for any fan of fashion or pop culture. It is also a fascinating look at the inner workings of a family empire. Here are a few things to love about The House of Versace:

  • The performances are excellent. Gina Gershon is particularly good as Donatella Versace. She captures Donatella’s strength, determination, and vulnerability perfectly.
  • The film is well-written and well-directed. It tells the story of the Versace family in a compelling and engaging way.
  • The film is visually stunning. The costumes and sets are beautiful.
  • The film is a must-see for any fan of fashion or pop culture. It is also a fascinating look at the inner workings of a family empire.

Overall, The House of Versace is a well-made and engaging film that tells the story of one of the most iconic fashion houses in the world. It is a must-see for any fan of fashion or pop culture.

The House of Versace is a well-made and entertaining film. It is a fascinating look at the world of fashion, and it is a moving story about family, love, and loss. Gina Gershon gives a powerful performance as Donatella Versace, and she is supported by a strong cast. The film is a must-see for fans of fashion, and it is also a great film for anyone who enjoys a well-made drama.