Blog Posts

Castile Soap Benefits For Your Home & Body

Castile soap is a versatile and natural soap used for centuries. It is made from olive oil and other vegetable oils, and it is free of harsh chemicals and artificial fragrances. This type of soap is a great choice for people with sensitive skin, and it can be used for a variety of purposes, including:

A Versatile and Natural Solution for Your Body and Home

  • Cleaning your face and body: Castile soap is a gentle cleanser that can help to remove dirt, oil, and makeup without stripping your skin of its natural moisture. If you will be using this type of soap for your face, I would recommend using the liquid form instead of using a soap bar. This is more of a preference than a demand. In my opinion, I believe that it would be better for sanitation purposes. If you prefer the bar soap, cut the block into smaller pieces and use as needed.
  • Washing your hair: Castile soap is a natural and eco-friendly product made from vegetable oils. It’s a gentle cleanser that can be used to wash your hair and scalp, and is ideal for people with sensitive skin. In addition, the soap has antifungal properties that can help to remove dandruff and oily buildup.
    • To use Castile soap as a shampoo, you should first wet your hair with warm water. Then, wet the soap bar under running water and rub it onto your hands to create lather. Apply the lather onto your scalp and massage gently for a few minutes. Be sure to section your hair before you begin to avoid hair matting and tangles.
    • After massaging your scalp, rinse your hair thoroughly with warm water. You can follow up with a conditioner if desired. It’s important to note that Castile soap can be drying to the hair, so it’s recommended to use it sparingly, and no more than once or twice a week.
  • Shaving: Castile soap can be used as a shaving cream, and it can help reduce razor burn and irritation.
  • Cleaning your home: Castile soap can be used to clean your kitchen, bathroom, and floors. It is also a great choice for cleaning your car and boat.
  • Caring for your pets: This soap can be used to shampoo your pets and clean their paws.
  • Making your own DIY products: It can be used to make your own shampoos, conditioners, lotions, and cleaning products.
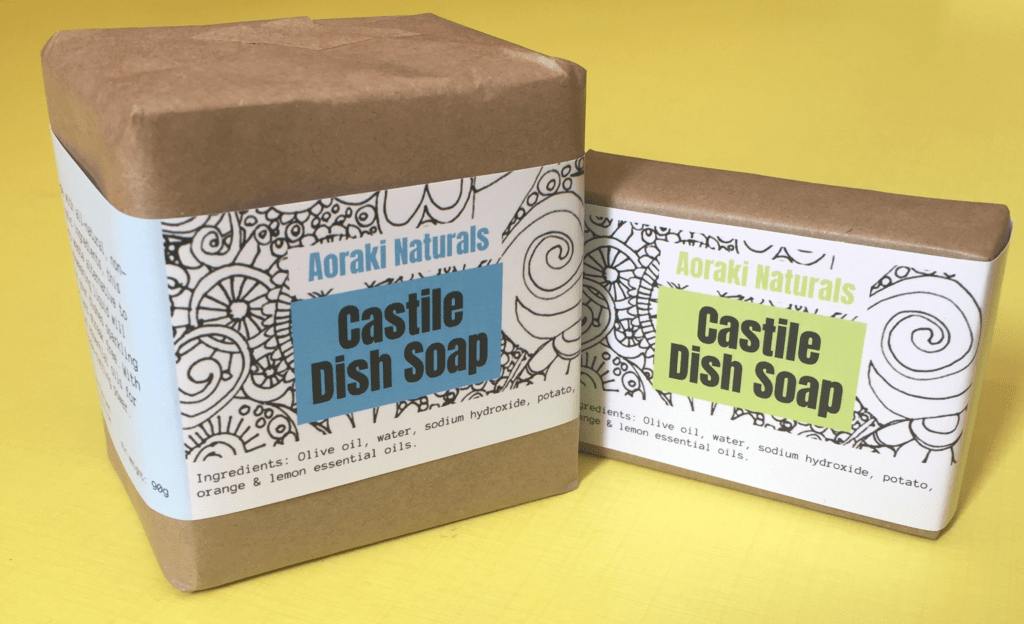
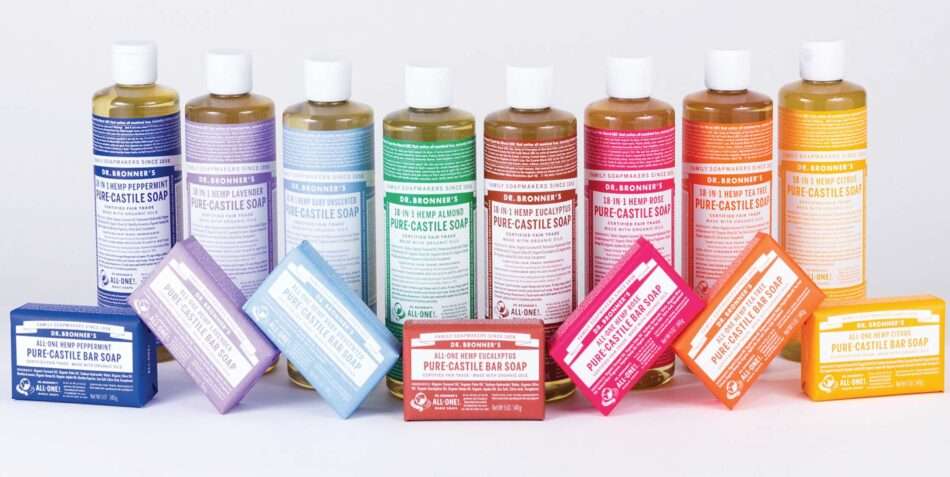
Castile dish soap

In addition to its many uses, Castile soap is also a sustainable choice. It is biodegradable and made from renewable resources.

Benefits of using Castile soap:

  • Gentle and moisturizing: Castile soap is the perfect cleanser for all skin types, including sensitive skin, providing gentle yet effective cleansing while keeping your skin moisturized and hydrated.
  • Versatile: Castile soap can be used for a variety of purposes, including cleaning your face, body, hair, and home.
  • Natural and biodegradable: This type of soap is made from natural ingredients and is biodegradable.
  • Affordable: Although this soap is very popular and useful, many people don’t know much about it. This can be one of the reasons that it is a very affordable soap with many uses.

Tips

  • Dilute the soap: When using Castile soap for the first time, it is a good idea to dilute it with water. This will help to make the soap less harsh.
  • Use a soap dispenser: A soap dispenser will help to keep your soap fresh and prevent it from drying out.
  • Store the soap in a cool, dry place: This will help you avoid and prevent it from molding or developing a bad odor.
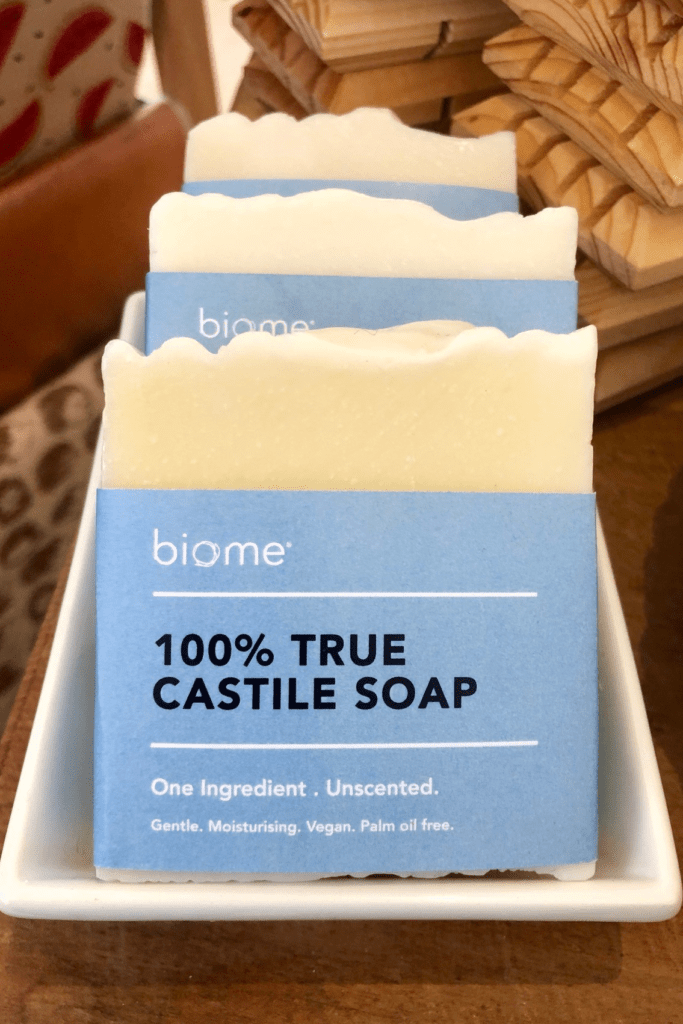
Catile Vodka soap bottle

Here are some additional benefits of using Castile soap:

  • It is vegan and cruelty-free.
  • It is fragrance-free.
  • It is hypoallergenic.
  • It is antibacterial.
  • It is antifungal.

Castile soap is a truly versatile and beneficial product. I hope this blog post has encouraged you to give Castile soap a try!
The Best Hot Rock Massage Spa Therapy

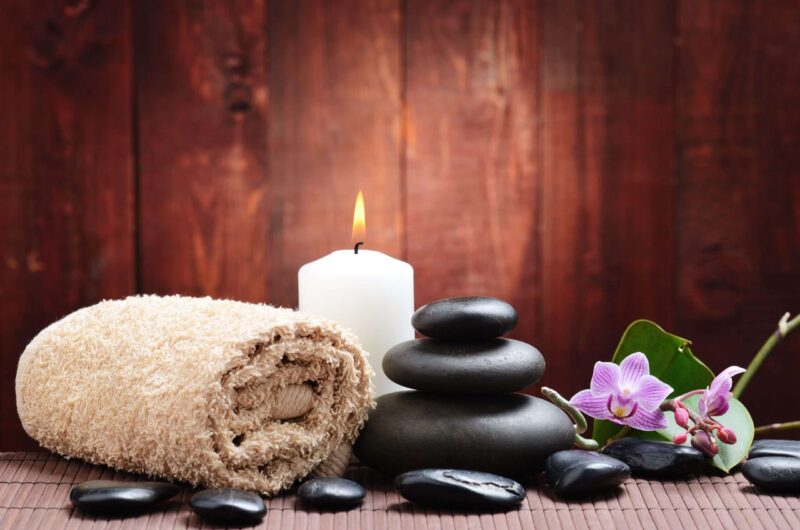
Hot rock massage is a type of massage therapy that is gaining popularity among people seeking a natural way to ease muscle tension and stress. During a hot stone massage, smooth and heated stones are placed on specific areas of the body, allowing the heat to penetrate the muscles and promote relaxation.

The stones used in a hot stone massage are typically made of basalt, which is a type of volcanic rock that has the ability to retain heat for a long period of time. The stones are heated in a special warmer to a temperature between 120 and 150 degrees Fahrenheit, which is safe and comfortable for most people.Before beginning the massage, the therapist will apply oil to the skin, allowing the stones to glide smoothly over the body.

The therapist will then use the heated stones as an extension of their hands, applying pressure to specific points on the body to ease tension and promote circulation.Hot stone massage has been shown to have many benefits, including reducing stress and anxiety, relieving muscle tension and pain, improving sleep, and increasing overall relaxation. It is a safe and effective way to promote healing in the body and mind, and can be a great addition to any wellness routine.

Massage Therapy

Benefits Of Hot Rock Massage

There are many benefits to hot rock massage, including:

  • Reduces muscle pain and tension: The heat from the stones helps to relax muscles and increase blood flow, which can help to reduce pain and tension.
  • Improves circulation: The heat from the stones can help to improve circulation, which can help to deliver oxygen and nutrients to your muscles and tissues.
  • Promotes relaxation: The heat from the stones can help to promote relaxation, which can help to reduce stress and anxiety.
  • Relieves headaches: The heat from the stones can help to relieve headaches by relaxing the muscles around your head and neck.
  • Improves sleep: The relaxation and pain relief from a hot rock massage can help to improve sleep quality.

What to expect during a hot rock massage

During the rock massage, the therapist will place the heated stones on your back, legs, arms, and abdomen. They may also use the stones to massage your muscles. The massage will typically last for 60 to 90 minutes.

Who can benefit from a hot rock massage?

This type of massage is a safe and effective treatment for people of all ages. It is a good option for people who are looking for:

  • Pain relief
  • Relaxation
  • Stress relief
  • Improved sleep
  • Improved circulation

How to find a hot rock massage therapist

If you are interested in trying a hot rock massage, you can find a qualified therapist in your area by asking your doctor for a referral or searching online.

Here are some additional tips for getting the most out of your massage:

  • Drink plenty of fluids before and after your massage to help flush out toxins.
  • Wear loose-fitting clothing that you can easily remove.
  • Tell your therapist about any medical conditions you have, such as high blood pressure or heart problems.
  • Relax and enjoy the experience!
Hot Rock Massage Benefits

Hot rock massage is a relaxing and beneficial treatment that can help to improve your overall health and well-being. If you are looking for a way to relieve pain, stress, or anxiety, I encourage you to try a hot rock massage.

Having a massage of any type is a great way to pamper yourself and de-stress. If you are looking for a special treat for yourself or a loved one, a hot rock massage is a perfect option. These can be done from the comfort of your own home or by a professional.

Festive Christmas Tree Decorating At Home

The festive season is upon us, and what better way to embrace the magic of Christmas than by Christmas tree decorating? This beloved holiday tradition brings families together, creating cherished memories that last a lifetime. Christmas tree decorating

When it comes to adorning your home with a beautifully decorated Christmas tree there are so many ornament options and decorating styles to choose from. Getting started can seem daunting. Don’t be afraid to get started; this simple guide will transform you into a Christmas tree decorating pro.

Christmas Tree Decorating To-Do List:

Natural Christmas Trees

1. Choosing the Perfect Tree

Before embarking on your decorating journey, it’s crucial to select the ideal Christmas tree that complements your home’s dĆ©cor and fits your living space. Whether you prefer the classic charm of a real fir or the enduring elegance of an artificial tree, consider the size, shape, and needle texture that best suit your preferences.

2. Laying the Foundation

Once your tree is in place, it’s time to create a captivating base. A tree skirt or collar adds a touch of whimsy and conceals the tree stand, ensuring a polished presentation. Choose a style that harmonizes with your chosen theme, whether it’s rustic burlap for a farmhouse feel or shimmering metallic for a glamorous touch. Make sure that your skirt or tree bottom is neatly arranged. This will ensure that your presentation is crisp and ready for gift placement. This may not be too big of a deal for some people depending on how many gifts will be under the tree.

Christmas tree decorating

3. Stringing the Lights

Lights are the lifeblood of a Christmas tree, illuminating it with warmth and sparkle. Start by wrapping the tree in warm white or cool white lights, ensuring even coverage from top to bottom. For added dimension and a touch of color, consider incorporating fairy lights or string lights in hues that complement your chosen theme.

Be sure to string your lights in the direction you desire, making mental notes of plugs and socket placement. You want to make sure that the ending of the light string is close to the wall socket and not hanging below the tree branches.

4. Adorning with Ornaments

Now comes the fun partā€”adorning your tree with an array of ornaments that reflect your personality and style. Start by hanging larger ornaments, such as family heirlooms or handcrafted creations, on the deeper branches. As you work your way towards the top, gradually use smaller ornaments to create a sense of balance and proportion.

5. Embracing a Theme

A cohesive theme ties the entire dƩcor together, creating a visually appealing and memorable display. From traditional red and green to rustic farmhouses or whimsical woodland creatures, let your imagination run wild. Incorporate ornaments, ribbons, and even garlands that align with your chosen theme.

6. Adding Personal Touches

Make your Christmas tree truly special by incorporating personal touches that represent your family’s traditions and cherished moments. Hang handmade ornaments, add photos of loved ones, or incorporate ornaments that hold special significance. These personal touches will transform your tree into a treasured family heirloom.

Decorated Christmas Tree

7. Topping it Off

No Christmas tree is complete without a stunning topper. Whether you prefer the traditional elegance of a star, or the whimsical charm of an angel, select a topper that complements your chosen theme and adds a touch of grandeur to your festive masterpiece.

8. Admiring Your Creation

Step back and admire your beautifully decorated Christmas tree. Take a moment to appreciate the time and effort you’ve put into creating this festive centerpiece. The warm glow of the lights, the sparkle of the ornaments, and the personal touches will undoubtedly bring joy to your home throughout the holiday season.

Remember, decorating your Christmas tree is a journey, not a destination. Enjoy the process, embrace creativity, and let your festive spirit shine through.

How To Style A Basic White T-Shirt In Multiple Ways

A basic white T-shirt is a staple in every wardrobe. It’s simple, versatile, and can be dressed up or down. But if you’re tired of wearing your white t-shirt the same way every day, here are a few ideas to help you style it in multiple ways:

Basic White T-Shirt Style Options

1. Tuck it in.

Tucking in your white t-shirt is a great way to dress it up. Pair it with a pair of tailored trousers or a skirt for a polished look. You can also add a blazer or cardigan for extra warmth.

image

2. Leave it untucked.

For a more casual look, leave your white t-shirt untucked. Pair it with jeans, shorts, or a skirt for a relaxed and comfortable outfit. You can also add a denim jacket or bomber jacket for a bit of edge.

image

3. Layer it up.

Layering is a great way to add interest to your white t-shirt. Pair it with a button-down shirt, a tank top, or a turtleneck for a layered look. You can also add a cardigan or blazer for extra warmth.

4. Add accessories.

Accessorizing is a great way to dress up your white t-shirt. Add a necklace, earrings, or a scarf to add a pop of color or pattern. You can also add a belt to cinch your waist and create a more fitted look.

Styling a basic white T-shirt

5. Experiment with different colors.

White is a classic color, but you can also experiment with different colors to add some variety to your wardrobe. Try a black, gray, or navy t-shirt for a more versatile option. You can also add a pop of color with a pastel or bright t-shirt.

6. Try different styles.

There are many different styles of white T-shirts available, so you’re sure to find one that suits your taste. Try a crew neck, v-neck, or scoop neck t-shirt for a different look. You can also try a different fabric, such as cotton, linen, or silk, for a more luxurious feel.

image

7. Have fun with it!

The white t-shirt is a blank canvas, so have fun with it and experiment with different styles and looks. The possibilities are endless!

Here are some additional tips for styling a basic white t-shirt:

  • Choose a t-shirt that fits well. A well-fitting T-shirt will look more polished and put together.
  • Pay attention to the fabric. A high-quality fabric will make your t-shirt look and feel better.
  • Consider the occasion. If you’re dressing for a formal event, you might want to choose a more fitted t-shirt and add a blazer or cardigan.
  • Don’t be afraid to accessorize. Accessories can add a pop of color or pattern to your outfit.
  • Have fun! The white t-shirt is a versatile piece of clothing, so have fun with it and experiment with different styles.

With a little creativity, you can style a basic white t-shirt in countless ways. So next time you’re feeling uninspired, reach for your white t-shirt and start experimenting!

Christmas Nail Foil Art Is Better Wrapped

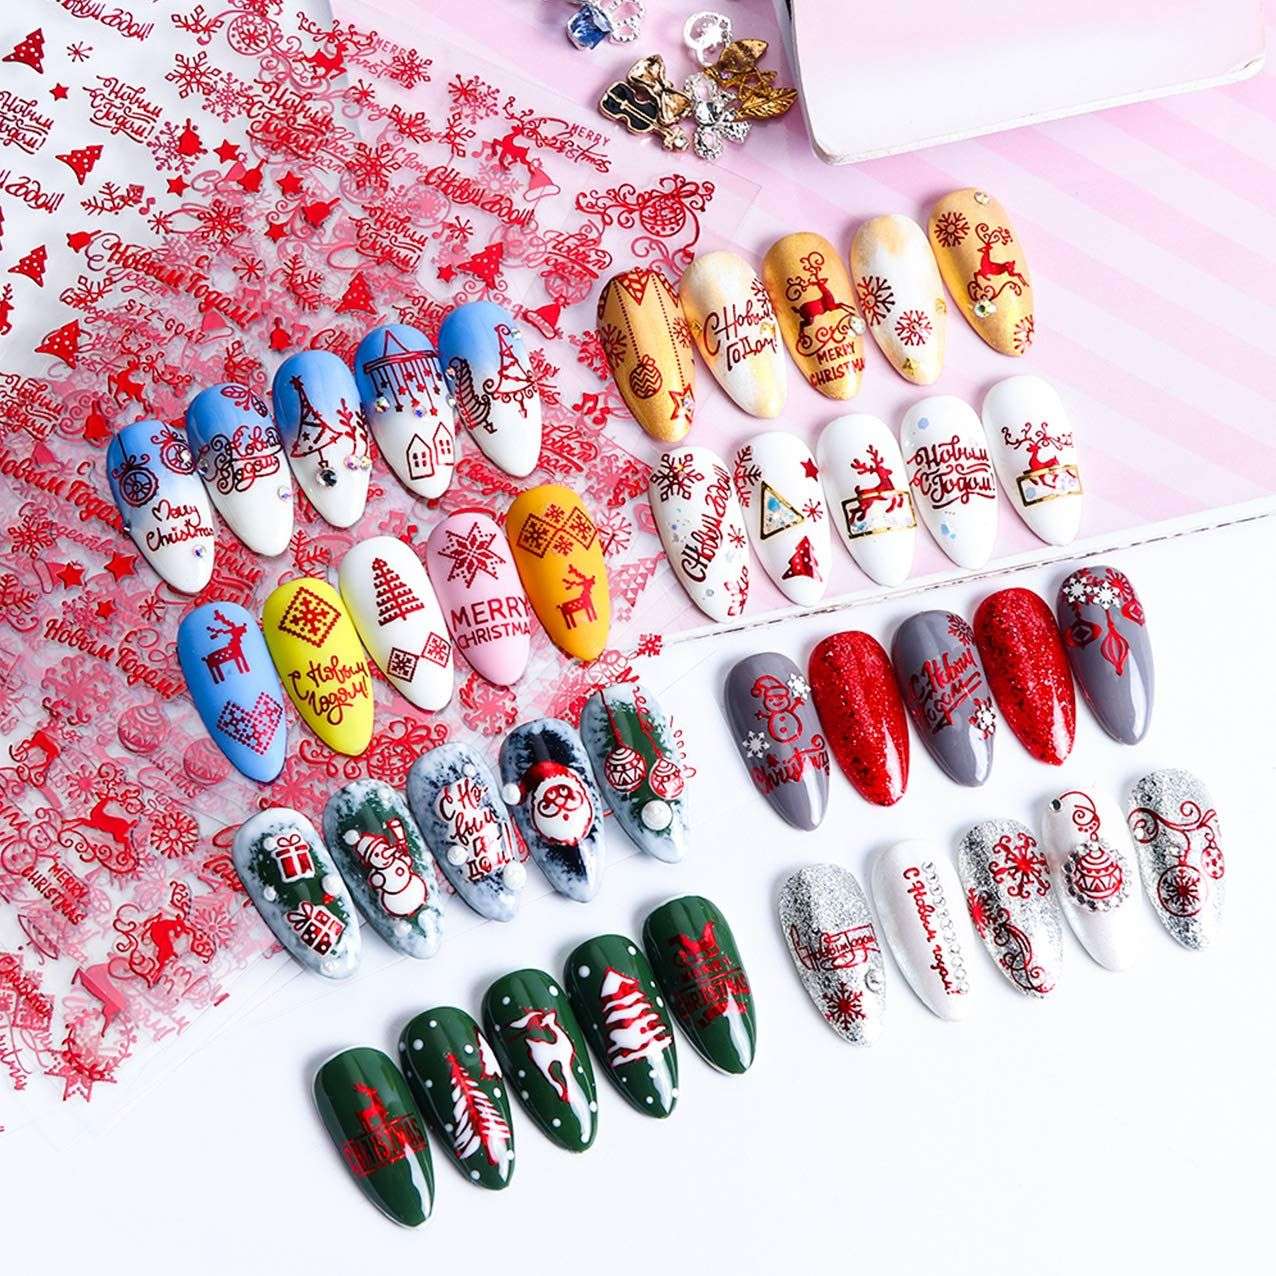
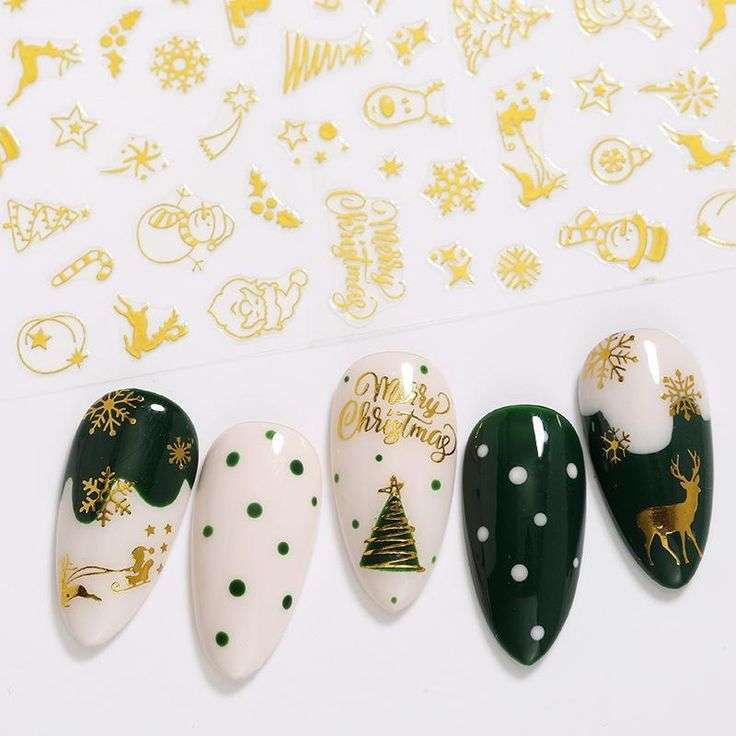
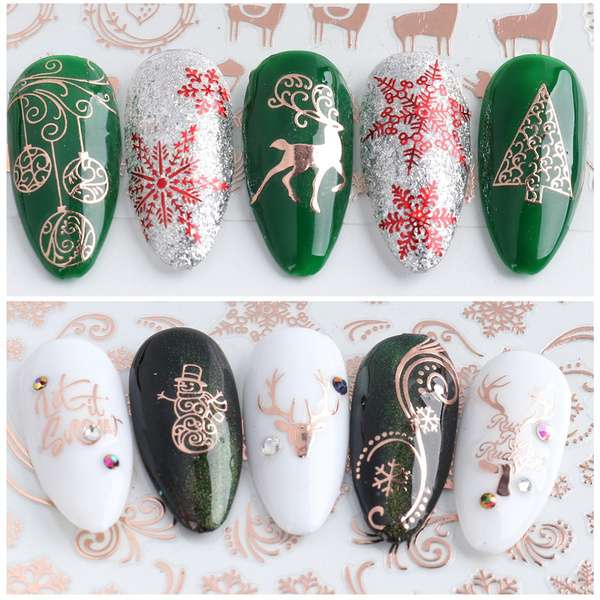
Festive Christmas nail foil art is a fun and easy way to show your holiday spirit. With the help of nail foils, you can create stunning designs that will make your nails the star of the show. The list below are some of the best Christmas nail foil art designs to try this year.

Popular Christmas Nail Foil Art

1. Classic Christmas Colors

Using red, green, and white nail foils, you can create a classic Christmas look that is both festive and elegant.

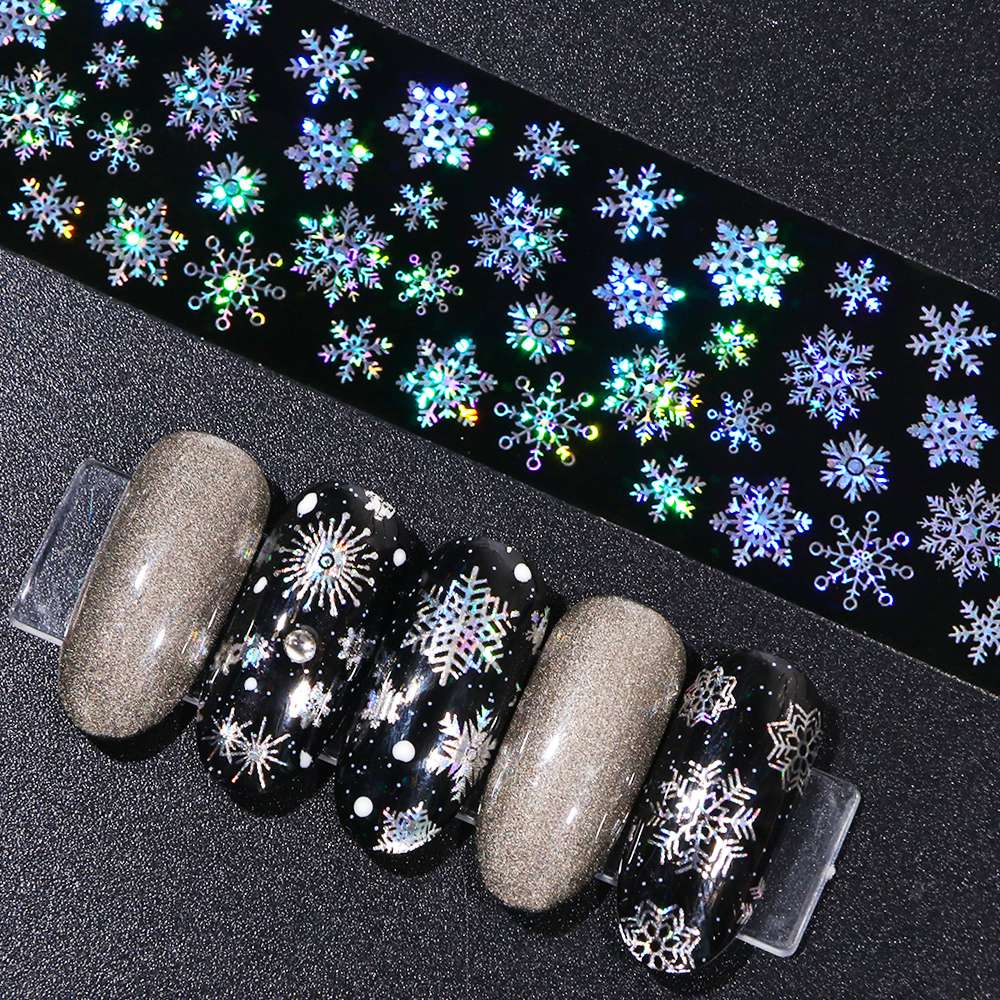
2. Snowflakes

Snowflakes are a must-have for any Christmas nail art design. You can use nail foils to create delicate snowflakes or bold, statement-making designs.

Snowflake Christmas Nail Foil Art

3. Christmas Trees

Christmas trees are another classic Christmas symbol that can be easily created with nail foils. Use different colors and patterns of foils to create a variety of looks.

4. Reindeer

Reindeer are a fun and festive way to add some personality to your Christmas nails. Use nail foils to create reindeer faces, silhouettes, or antlers.

5. Santa Claus

Santa Claus is the ultimate Christmas icon, and he can be easily created with nail foils. Use red and white foils to create Santa’s hat, beard, and belly.

6. Gifts

Gifts are another fun and festive way to add some Christmas cheer to your nails. Use nail foils to create wrapped gifts, gift tags, or bows.

Christmas Nail Foil

7. Gingerbread Men

Gingerbread men are a delicious and festive way to add some sweetness to your Christmas nails. Use brown and white foils to create gingerbread men faces and bodies.

8. Candy Canes

Candy canes are a classic Christmas candy that can be easily created with nail foils. Use red and white foils to create candy cane stripes.

9. Christmas Baubles

Christmas baubles are a festive way to add some sparkle to your nails. Use nail foils to create colorful and sparkly baubles.

10. Christmas Stars

Christmas stars are a symbol of hope and joy, and they can be easily created with nail foils. Use gold or silver foils to create stars of different sizes and patterns.

Gold Christmas Nail Foil

Unveiling the Allure of Christmas Nail Foil Art Designs

Christmas, the season of merriment and cheer, calls for an extra touch of sparkle, and what better way to embrace the festive spirit than with dazzling Christmas nail art? Among the myriad of nail art techniques, Christmas nail foil art has emerged as a frontrunner, captivating fashion enthusiasts and nail art aficionados alike with its ability to transform fingertips into miniature masterpieces.

Christmas is a time for joy, family, and, of course, festive fashion. And what better way to spread holiday cheer than with some dazzling Christmas nail designs?

The Magic of Foil Transfer

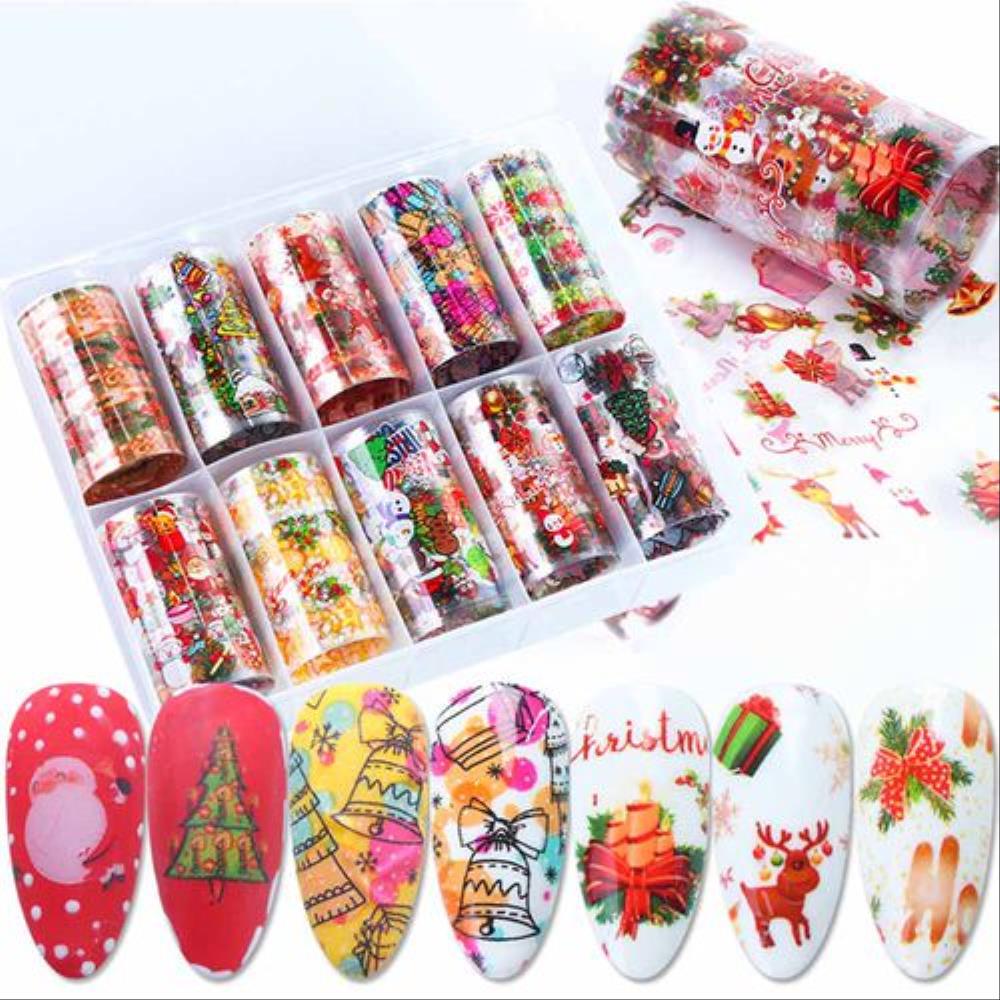
Nail Foil transfer art is a versatile technique that involves transferring intricate designs from nail foil sheets onto your nails. The result is a captivating fusion of texture and vibrancy, adding an irresistible touch of glamour to your holiday. Christmas nail foil art, in particular, offers a plethora of design possibilities, allowing you to create unique and personalized nail art that perfectly captures the essence of the season.

As you delve into the world of Christmas nail foil art, you’ll discover a treasure trove of mesmerizing designs, each with its own distinct charm. Here are a few captivating options to ignite your creativity:

  • Snowflake Extravaganza: Embrace the whimsical beauty of snowflakes, the quintessential symbol of winter and Christmas. Use foil sheets adorned with delicate snowflake patterns to create a mesmerizing winter wonderland on your fingertips.
  • Festive Tree Forest: Capture the essence of Christmas with a miniature forest of Christmas trees adorning your nails. Foil sheets featuring intricate evergreen designs will transform your fingertips into a charming winter wonderland.
  • Jolly Santa Parade: Spread the Christmas cheer with a parade of jolly Santas marching across your nails. Foil sheets showcasing Santa Claus in various poses will add a playful touch to your holiday manicure.
  • Twinkling Starry Night: Recreate the enchanting beauty of a starry night sky on your fingertips. Foil sheets featuring delicate star patterns will add a touch of celestial elegance to your Christmas nail art.
  • Traditional Holiday Patterns: Embrace the timeless elegance of traditional Christmas motifs. Foil sheets featuring classic patterns like candy canes, gingerbread men, and reindeer will add a touch of nostalgia to your holiday manicure.

These are just a few of the endless possibilities that Christmas nail foil art offers. Let your imagination run wild as you explore different color combinations, pattern variations, and design elements to create unique nail art masterpieces that perfectly capture the spirit of the season.

Tips for Foil Transfer Mastery

As you embark on your Christmas nail foil art journey, here are a few tips to ensure flawless results:

  1. Prep Your Nails: Begin by prepping your nails for the foil transfer process. This includes gently buffing the surface to create a smooth base for the foil.
  2. Choose Your Foils: Select high-quality foil sheets that feature intricate designs and vibrant colors.
  3. Apply Base Coat: Apply a base coat to your nails to protect them from staining and ensure better adhesion of the foil.
  4. Apply Nail Polish: Apply a thin layer of nail polish in a color that complements your chosen foil design. Allow the polish to dry completely before proceeding.
  5. Cut the Foil: Cut out small pieces of foil that correspond to the size of your nails.
  6. Apply Foil Transfer Gel: Apply a thin layer of foil transfer gel to your nails. Ensure the gel is tacky but not sticky.
  7. Press the Foil: Place the foil pieces onto your nails, gently pressing them down to transfer the design.
  8. Peel the Foil: Carefully peel off the foil, revealing the transferred design.
  9. Apply Top Coat: Seal the design with a layer of top coat for long-lasting wear and added shine.

Embrace the Festive Foils

With its versatility, ease of application, and stunning results, Christmas nail foil art has become a staple in the world of nail design. Embrace the trend and let your creativity shine through as you transform your fingertips into miniature masterpieces, capturing the essence of the season with every stroke of the foil.

Nail Striping Tape Designs For Flawless Lines

In the world of nail art, achieving intricate designs and patterns can often seem like an art form reserved for professionals. With the introduction of nail striping tape, even the most novice nail artists can create captivating nail art designs with ease. This versatile tool has revolutionized the way we approach nail art, making it accessible and fun for everyone.

What is Nail Striping Tape?

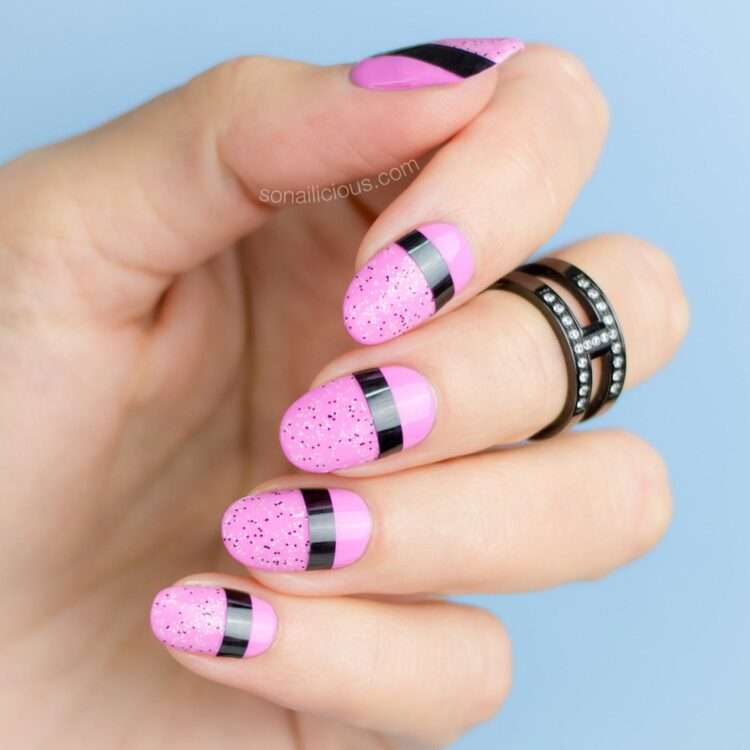
Nail striping tape is a thin adhesive tape with varying widths and colors. It offers a user-friendly approach to nail art, allowing you to create crisp, clean lines and geometric patterns with minimal effort. It is typically applied to the nail before painting, creating clean lines and precise designs that would be difficult to achieve with a freehand brush. Once the polish is dry, the tape is simply peeled off, leaving behind a perfectly defined pattern.

With the introduction of nail striping tape, even the most novice nail artists can create captivating nail art designs with ease. This versatile tool has revolutionized the way we approach nail art, making it accessible and fun for everyone.

Purple striped nail design

Benefits Of Using Nail Striping Tape

The benefits of using nail striping tape are numerous:

  • Ease of Use: Even beginners can create intricate designs with ease.
  • Precision: Nail striping tape produces clean, precise lines and shapes.
  • Versatility: It can be used to create a wide variety of designs, from simple stripes to complex patterns.
  • Variety: Nail striping tape comes in a wide array of colors and widths to suit any style.
  • Cost-Effective: Nail striping tape is an affordable way to create stunning nail art designs.

Essential Tools for Nail Striping Tape

To get started with nail striping tape, you will need a few essential tools:

  • Nail striping tape: Choose a variety of colors and widths to suit your needs.
  • Scissors or nail art tweezers: These are used to cut the tape to the desired length and apply it precisely.
  • Base coat and top coat: These are essential for protecting your nails and ensuring the longevity of your design.
  • Nail polish: Choose colors that complement the striping tape you have selected.
  • Cotton swabs or acetone: These are used to clean up any mistakes.

Getting Started with Nail Striping Tape

Once you have gathered your tools, you are ready to create your first nail art design using nail striping tape. Here’s a step-by-step guide:

  1. Prep your nails: Apply a base coat to protect your nails and create a smooth surface for the tape to adhere to.
  2. Apply striping tape: Cut a piece of striping tape to the desired length and apply it to your nail. You can use a variety of techniques, such as creating stripes, chevrons, or geometric patterns.
  3. Apply nail polish: Apply a thin layer of nail polish to your nails, ensuring that the polish covers the tape completely.
  4. Remove striping tape: Once the polish is dry, carefully peel off the striping tape.
  5. Apply top coat: Seal the design with a top coat for long-lasting wear and added shine.
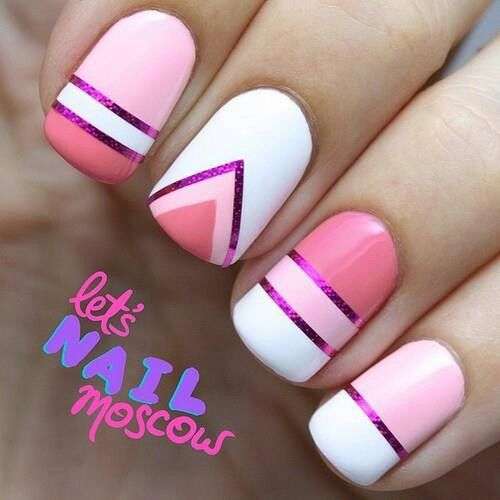
Multi color striped nail design using nail striping tape

Nail Striping Tape Design Ideas

Nail striping tape is incredibly versatile and can be used to create a wide variety of designs. Here are a few ideas to get you started:

  1. Classic Stripes: Create simple stripes in various colors for a clean and modern look.
  2. Chevron Patterns: Create zig-zag patterns using striping tape for a festive and fun look.
  3. Negative Space Designs: Leave some areas of your nails unpainted to create a negative space effect.
  4. French Manicure with a Twist: Use striping tape to create a unique twist on the classic French manicure.
  5. Color Blocking Extravaganza: Embrace bold color combinations by using striping tape to create color-blocked designs. Divide your nails into sections and fill them with different colors, creating a striking visual impact.
  6. Classic Pinstripes: Elevate your nails with timeless elegance by adding thin stripes of varying colors. Experiment with different color combinations and stripe widths to create a unique look.
  7. Geometric Masterpieces: Explore the world of geometry by using nail striping tape to create intricate geometric nail art patterns like triangles, squares, and chevrons. Play with negative space and color combinations to add visual interest.
  8. French Manicure Twist: Reinvent the classic French manicure by adding a touch of color and flair with nail striping tape. Use thin stripes of contrasting colors to accentuate the tip line or add decorative elements to the base of the nail.
  9. French Manicure Twist: Reinvent the classic French manicure by adding a touch of color and flair with nail striping tape. Use thin stripes of contrasting colors to accentuate the tip line or add decorative elements to the base of the nail.
  10. Double French Manicure: Elevate your French manicure with a double stripe twist. Use two thin stripes of contrasting colors to create a double tip line, adding depth and dimension to your manicure.
nail striping tape
nail striping tape

Tips for Nail Striping Tape Success

  • Cut the tape carefully: Use sharp scissors or nail art tweezers to ensure precise cuts.
  • Apply the tape smoothly: Avoid wrinkles or bubbles in the tape for a clean design.
  • Apply thin layers of polish: This will help prevent the tape from lifting.
  • Peel the tape slowly: Be patient to avoid removing the polish along with the tape.

Nail striping tape is an essential tool for anyone who wants to create stunning nail art designs with ease. With its versatility, ease of use, and affordability, nail striping tape is the perfect way to elevate your nail art game and add a touch of personality to your fingertips. So grab your striping tape and let your creativity shine through.

The Best Christmas Nail Designs For Festive Fingertips

Christmas is a time for joy, family, and, of course, festive fashion. And what better way to spread holiday cheer than with some dazzling Christmas nail designs? Whether you prefer classic red and green hues, winter nail polish colors or playful holiday characters, there’s are Christmas nail designs out there for everyone.

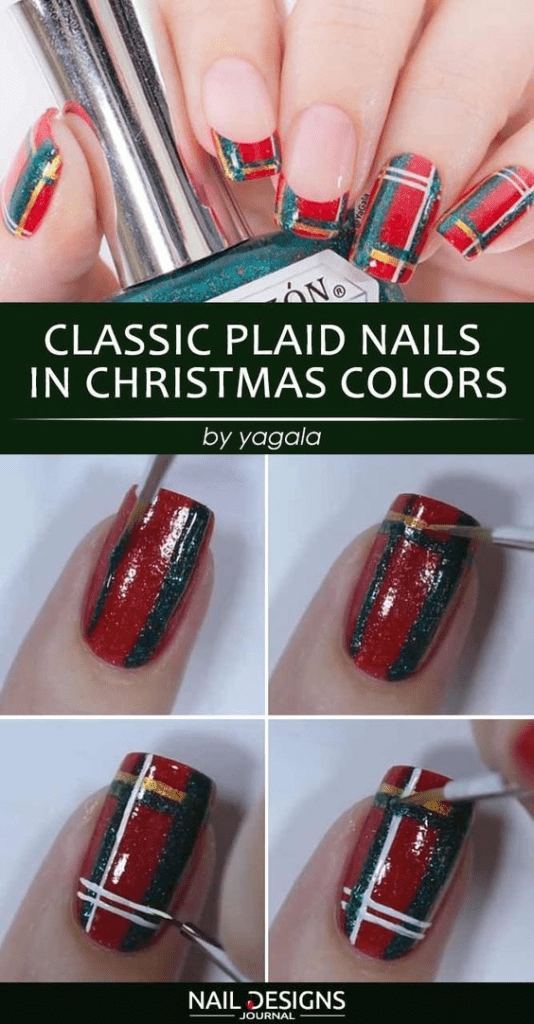
Classic Plaid Winter Christmas Nail Designs

Most Popular Christmas Nail Designs

1. Classic Christmas Colors

Nothing says Christmas quite like the classic trio of red, green, and white. This timeless combination is always a crowd-pleaser, and it’s easy to customize with different patterns and designs. For a simple yet elegant look, try painting each nail a different color. Or, for a more festive touch, add some glitter or snowflakes.

2. Festive Sweater Nails

Ugly Christmas sweaters are all the rage, and now you can bring the festive fun to your fingertips with sweater nails. This adorable design features Fair Isle-inspired patterns, like reindeer, snowflakes, and Christmas trees. It’s a great way to show off your holiday spirit in a unique and stylish way.

3. Christmas Character Nails

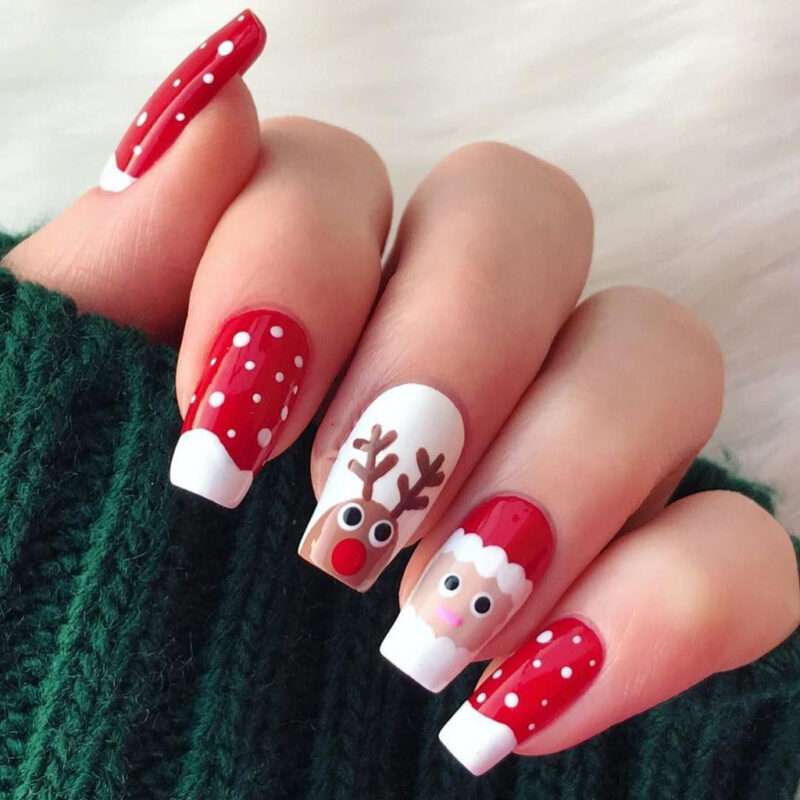
Bring your favorite Christmas characters to life with festive character nails. Paint Santa Claus, Mrs. Claus, Rudolph, or the Grinch on your nails for a fun and playful holiday look. You can even add some festive accessories, like Santa hats or reindeer antlers.

White Ombre snowflake nail design

4. Ombre Christmas Nails

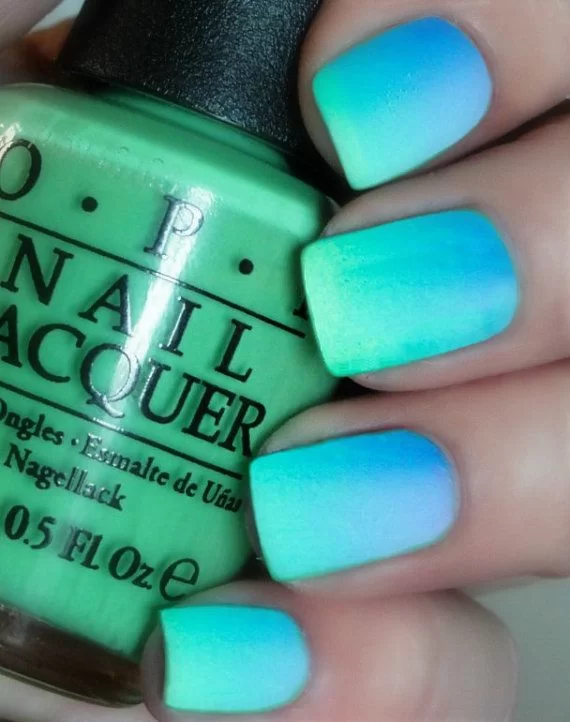
Create a seamless transition between two or more Christmas colors with ombre nails. This technique is surprisingly easy to do at home, and it results in a stunningly beautiful effect. Try ombreing red and green, gold and silver, or even three or four different colors for a truly eye-catching look.

5. Minimalist Christmas Nails

If you’re not a fan of bold colors or over-the-top designs, there are still plenty of minimalist Christmas nail art options for you. Try painting your nails a simple red or green, or add a subtle festive touch with a small snowflake or Christmas tree.

6. Matte Christmas Nails

Matte nail polish is a trendy choice for the holidays. It gives your nails a sophisticated and elegant look, and it can help to accentuate any glitter or embellishments you add. Try matte red or green nails, or add a matte top coat to your favorite holiday nail design.

image

7. Glitter Christmas Nails

Add some sparkle and shine to your holiday nails with glitter. You can use glitter polish, glitter powder, or even loose glitter to create a festive look. Try painting your nails a solid color and adding glitter accents, or go for a full-on glitter manicure.

8. Holiday French Manicure

Put a festive twist on the classic French manicure by using Christmas colors. Try painting your tips red or green, or add some festive embellishments, like snowflakes or glitter. You can play around with this type of holiday nail design. You can try creating solid color French nails or go for something more bold uby using alternating Christmas colors.

9. Holiday Nail Charms

Add some extra dimension and sparkle to your Christmas nails by using nail charms. There are endless possibilities when it comes to nail charms, so you can find something that matches your personal style. Try adding snowflakes, Christmas trees, reindeer, or even Santa Claus himself.

Santa nail wraps

10. Christmas Nail Wraps

If you’re short on time, or you’re not confident in your nail art skills, Christmas nail wraps are a quick and easy way to get a festive look. Simply apply the wraps to your nails and trim the edges. You can even layer them over your favorite nail polish for a unique effect. This is one of the more affordable nail design options for your festivities.

10 Ombre Nail Designs You Can Lay On Thick

Ombre nail art, also known as gradient nails, has taken the world of nail design by storm, captivating fashionistas and beauty enthusiasts alike with its mesmerizing blend of hues. The technique of creating ombre nail designs includes a seamless transition between two or more colors. This results in a stunning visual effect that mimics the natural gradation of shades found in nature.

Regardless of your level of experience, a seasoned nail artist or a novice just starting out, this step-by-step guide will equip you with the knowledge and skills necessary to master the art of ombre nails and achieve gradient perfection.

teal, blue and purple ombre nails

Mastering the Art of Ombre Nail Designs

Before embarking on your ombre nail art journey, it’s essential to gather the necessary tools and supplies. The items below are a few simple tools needed to create your ombre nail designs. The tools you need to get started include the following:

Small Nail Art BrushNail Polish Remover
Ombre Nail BrushAcetone
Base CoatDisposable Paper Towels
Top CoatMakeup Sponge
Nail Polish (2-3 Shades)Nail Decals (Oprional)

Prep Your Nails for Perfection

Begin by preparing your nails for the ombre treatment. Remove any existing nail polish using nail polish remover and cotton swabs. Gently file and shape your nails to your desired form. Apply a base coat to protect your nails from the staining effects of the polish.

Creating the Ombre Effect

purple red and orange ombre nail designs
  1. Layering the Colors:
    • Select two or three nail polish shades that complement each other well. For a subtle ombre effect, choose shades within the same color family. For a bolder look, opt for contrasting shades.
    • Apply a thin layer of the lightest shade of nail polish to all of your nails. Allow the first layer to dry completely before proceeding to the next step.
    • Using a makeup sponge or nail art brush, apply the second shade of nail polish to the tips of your nails. Ensure the application is slightly thicker than the first layer.
    • While the second shade is still wet, use the sponge or brush to gently blend the two colors together, creating a seamless transition.
  2. Enhancing the Gradient:
    • For a more defined ombre effect, apply a small amount of the darkest shade of nail polish to the very tips of your nails.
    • Once again, use the sponge or brush to blend the darkest shade into the existing gradient, ensuring a smooth transition between all three colors.
    • Repeat this process until you achieve the desired level of intensity and vibrancy.
Black and neon green ombre Nail designs

Applying the Finishing Touches:

  1. Top Coat for Shine and Protection:
    • Once the ombre gradient is complete and thoroughly dry, apply a generous layer of top coat to seal in the colors and add a high-gloss shine.
    • Allow the top coat to dry completely before admiring your masterpiece.
  2. Cleanup and Polish:
    • Using a small nail art brush dipped in acetone, carefully clean up any excess polish around the edges of your nails.
    • Apply cuticle oil to nourish and hydrate your cuticles, completing your ombre nail art experience.
pastel pink and powder blue ombre nail set

Ombre Nail Art Variations

The beauty of ombre nail art lies in its versatility. Experiment with different color combinations, techniques, and design elements to create unique and personalized nail art masterpieces.

teal glitter ombre nail art
  • Vertical Ombre: Apply the ombre gradient vertically instead of horizontally, creating a dramatic and eye-catching effect.
  • Sparkling Ombre: Incorporate glitter or shimmery polishes into your ombre design for an extra touch of glamour.
  • French Ombre: Combine the classic French manicure with ombre techniques, creating a sophisticated and modern twist on the traditional style.

Embrace the Ombre Trend:

With its endless possibilities and captivating aesthetic, ombre nail art has become a staple in the world of nail design. Embrace the trend and let your creativity shine through as you master the art of gradient perfection.

Fingerless Gloves: A Trendy Hand Accessory

Fingerless gloves, also known as half-finger gloves or mitts, are a versatile and stylish accessory that can be worn in a variety of settings. They offer the warmth and protection of gloves without sacrificing dexterity, making them a great choice for activities such as typing, driving, or using your smartphone.

Different Types Of Fingerless Gloves

Fingerless gloves come in a wide variety of styles and materials to suit different needs and preferences. Here are some of the most popular types:

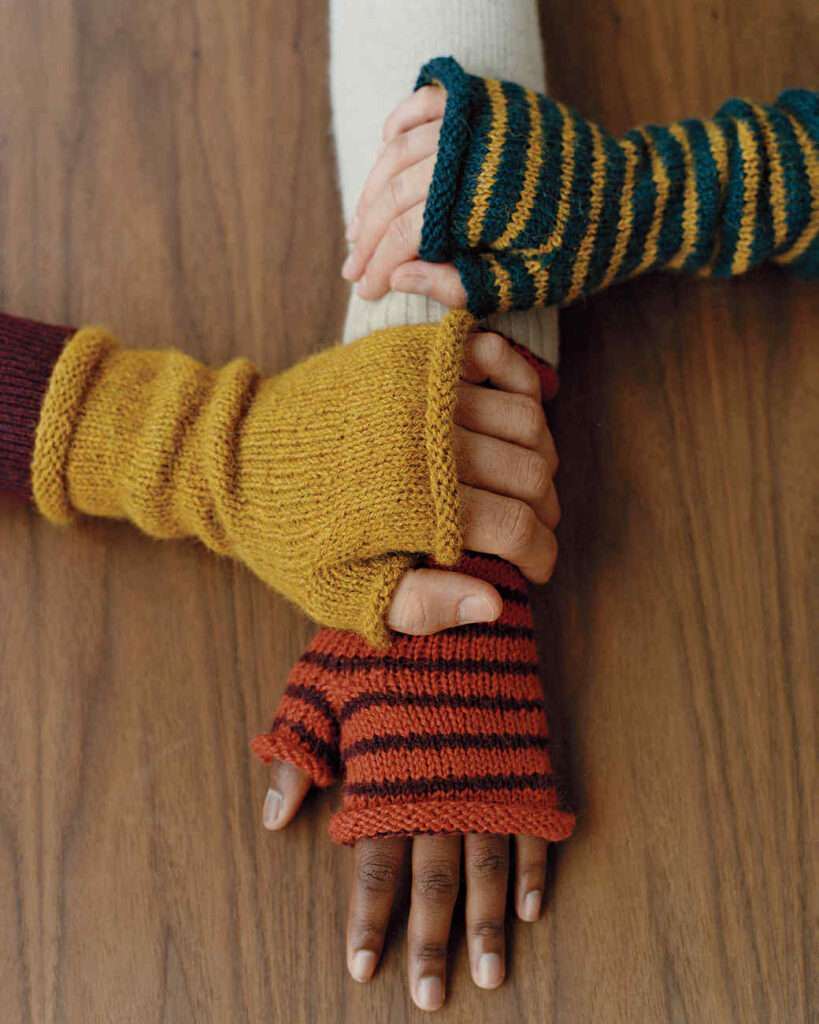
  • Knit gloves: Warm and cozy, knit fingerless gloves are ideal for cold weather. They are often made from natural fibers such as wool or cashmere, and they come in a wide range of colors and patterns.
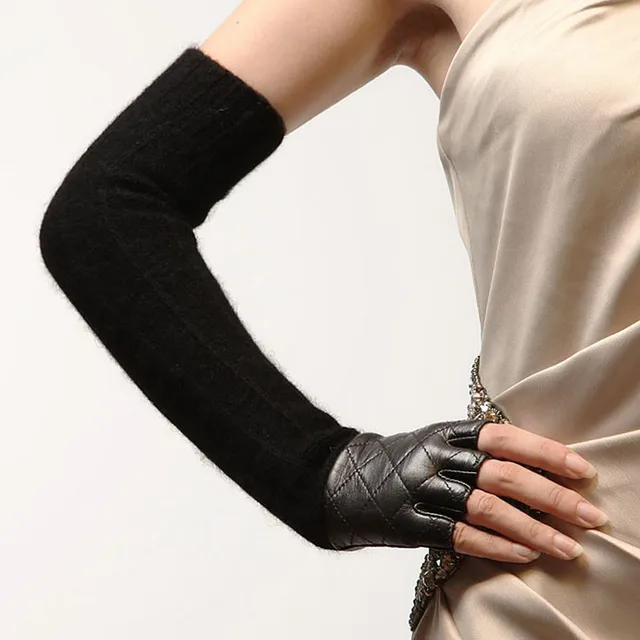
  • Leather gloves: Durable and stylish, leather fingerless gloves are a great choice for fashion or function. They are available in a variety of colors and styles, and they can be dressed up or down.
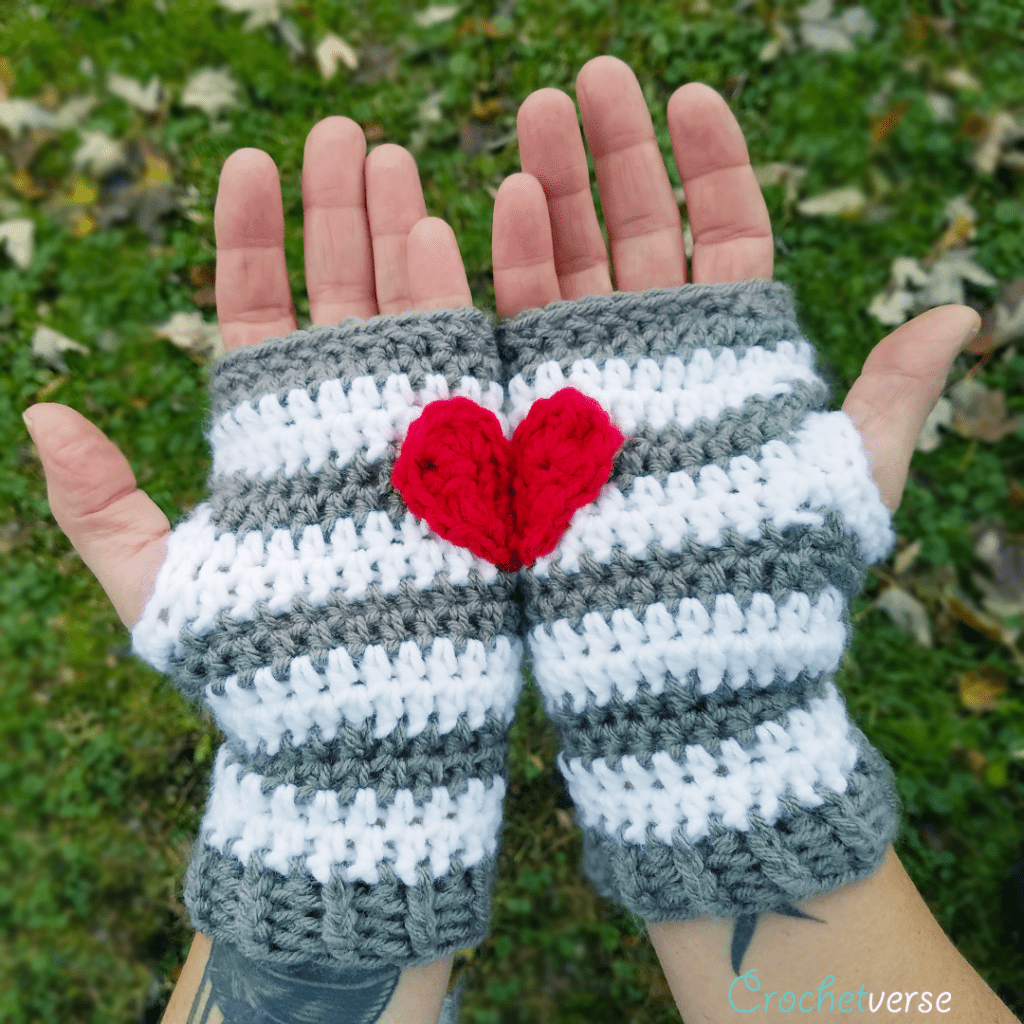
  • Crochet gloves: Similar to knit fingerless gloves, crochet fingerless gloves are handcrafted with a hook and yarn. They are often more delicate and intricate in design, and they can be made from a variety of materials.
  • Lace gloves: Elegant and feminine, lace fingerless gloves add a touch of sophistication to any outfit. They are often worn for special occasions or as part of a costume.

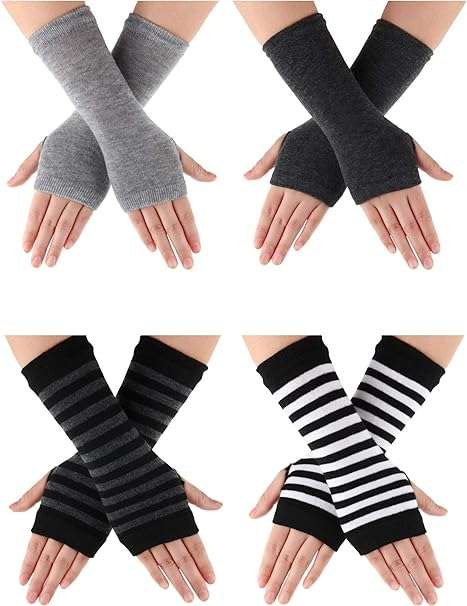
SATINIOR Cashmere Feel Wrist Fingerless Gloves with Thumb HoleĀ 

4 pairs of gloves made of polyester-cotton, soft, elastic, lightweight material. They are comfortable to wear and cover your hands warmly. You can easily put them on and take them off, which can keep you cozy in the cold weather and last for a long time.

Glove Sport & Style

These glove types can be styled in a variety of ways to suit different occasions. Here are a few ideas:

  • Casual: Pair your gloves with a casual outfit such as jeans and a graphic T-Shirt, for a relaxed and stylish look.
  • Dressy: Add a touch of elegance to a dressy outfit with fingerless gloves made from lace, leather, or satin.
  • Professional: Can also be worn in a professional setting. Choose a pair of gloves in a neutral color such as black or brown, and make sure they are well-fitting and polished.
  • Active: Fingerless gloves are a great option for outdoor activities such as hiking, biking, or running. Choose a pair of gloves that are made from a breathable material such as wool or cotton, and make sure they fit snugly but comfortably.

Benefits Of Wearing Fingerless Gloves

  • Dexterity: Allow you to use your fingers freely, making them a great choice for activities such as typing, driving, or using your smartphone.
  • Warmth: Provide warmth to your hands without sacrificing dexterity.
  • Fashion: Add a stylish touch to any outfit.
  • Protection: Can protect your hands from dirt, grime, and the elements.
Fingerless Gloves

Caring For Your Gloves

Your gloves should be washed and cared for according to the care instructions on the label. Some general tips for caring for fingerless gloves include:

  • Hand wash delicate gloves in cold water.
  • Machine wash durable gloves on a gentle cycle with cold water.
  • Lay gloves flat to air dry.
  • Avoid using bleach or harsh detergents.
  • Store gloves in a cool, dry place.

These types of gloves are a versatile and stylish accessory that can be worn in a variety of settings. They offer the warmth and protection of gloves without sacrificing dexterity, making them a great choice for a variety of activities.

Knit Fingerless Gloves

Whether you are looking for a casual pair of gloves to wear around town or a dressy pair to wear for a special occasion, fingerless gloves are a great way to add a touch of style and sophistication to your outfit.

Tribal Nail Art: A Journey Into Cultural Expression

Nail art has become a popular way to express one’s individuality and style. In recent years, tribal nail art has emerged as a unique and captivating trend that blends cultural heritage with modern fashion.

Tribal nail art draws inspiration from the rich traditions and intricate designs of various cultures around the world. These designs often feature bold geometric patterns, vibrant colors, and symbolic motifs that reflect the beliefs and values of the respective cultures.

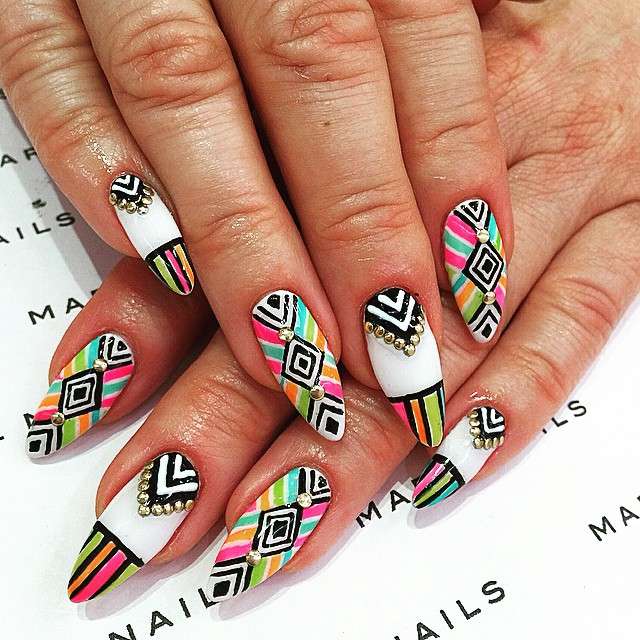
Tribal Nail Art

The Significance of Tribal Nail Art

Tribal nail art goes beyond mere aesthetics; it carries deep cultural significance. The intricate patterns and symbols often represent specific elements of the culture, such as spirituality, nature, and community. For many, tribal nail art is a way to connect with their heritage and honor their ancestors.

Creating Tribal Nail Art Designs

The process of creating tribal nail art can be both therapeutic and rewarding. It requires a steady hand, attention to detail, and a creative spirit. There are various techniques and tools used to achieve the desired look, including nail art pens, brushes, stencils, and stamps.

image

Popular Tribal Nail Art Designs

  • Aztec patterns: Aztec nail art is characterized by bold geometric shapes, often in shades of red, black, and yellow. The designs often incorporate symbols of animals and nature.
  • Polynesian patterns: Polynesian nail art is known for its intricate tribal motifs, often in black and white. The designs often feature elements of nature, such as waves, fish, and shells.
  • Native American patterns: Native American nail art is rich in symbolism and often incorporates elements of nature, such as feathers, animals, and dreamcatchers. The designs often feature earthy tones, such as brown, green, and turquoise.

Tips for Creating Stunning Tribal Nail Art

  • Research the cultural origins of the design: Understanding the meaning and symbolism behind the design will add depth and authenticity to your creation.
  • Use high-quality nail art tools and products: This will ensure a smooth and professional finish.
  • Start with simple designs and gradually work your way up to more complex ones: Practice makes perfect.
  • Be patient and take your time: Creating intricate tribal nail art requires patience and precision.
  • Don’t be afraid to experiment: There are no rules in tribal nail art, so let your creativity flow.

Tribal nail art is a captivating and culturally rich form of nail art that draws inspiration from the rich traditions and symbolism of indigenous cultures worldwide. It encompasses a diverse range of designs, patterns, and color schemes, reflecting the unique artistic expressions of various tribes and ethnic groups.

The Essence of Tribal Nail Art

Tribal nail art is more than just a fashion statement; it’s a profound expression of cultural identity and heritage. The intricate designs and symbols often carry deep meaning and significance, representing tribal beliefs, values, and traditions.

  • Geometric shapes: Bold and symmetrical geometric shapes, such as triangles, squares, and circles, are prevalent in this art form, often symbolizing strength, stability, and balance.
  • Animal motifs: Animal representations, often birds, reptiles, and insects, hold symbolic significance in many cultures. They may represent power, wisdom, or spiritual guidance.
  • Nature-inspired designs: Often draws inspiration from the natural world, incorporating elements such as flowers, plants, and celestial bodies. These designs may symbolize growth, harmony, and the interconnectedness of all life.
  • Vibrant colors: Is often characterized by its use of vibrant and bold colors, such as red, orange, yellow, and blue. These colors often hold symbolic meaning, representing strength, passion, and vitality.

Creating Tribal Nail Art Designs

Tribal nail art can be created using various techniques and tools, including:

  • Freehand painting: Experienced nail artists can create intricate designs directly onto the nails using fine-tipped brushes and nail art pens.
  • Stamping: Nail stamping kits allow for the transfer of pre-designed tribal patterns onto the nails, providing a faster and more precise approach.
  • Stickers and decals: Offer a convenient and easy way to add tribal designs to nails without the need for advanced nail art skills.
  • Highlight the negative space: Often emphasizes the negative space between the painted elements, creating a sense of balance and visual interest.
  • Incorporate metallic accents: Metallic nail polish or glitter can be used to add a touch of glamour and enhance the tribal motifs.
  • Accessorize with tribal jewelry: Pair your tribal nail art with tribal-inspired jewelry, such as rings, bracelets, or earrings, to complete the look.

Tribal nail art offers a unique and captivating way to express your individuality and appreciate the rich cultural heritage of different civilizations.With its rich history, diverse designs, and endless creative possibilities, tribal nail art continues to inspire and captivate nail art enthusiasts worldwide.

With a little practice, creativity, and the right tools, you can create stunning nail art designs that will turn heads and leave a lasting impression.I hope this blog post has inspired you to explore the world of tribal nail art. With its rich cultural significance and endless creative possibilities, it is a trend that is sure to continue to captivate and inspire nail art enthusiasts worldwide.

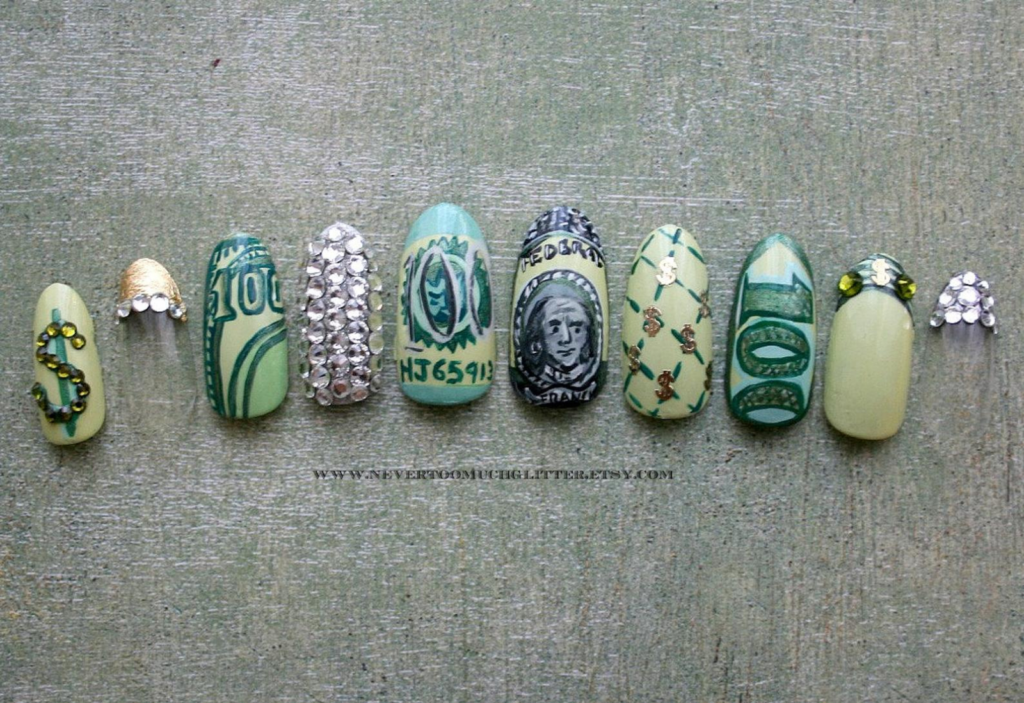
Creating Money Nail Art Designs "For Coins"

In the era of fashion and beauty, nails have become a canvas for self-expression and creativity. Money nail art, in particular, has gained immense popularity, allowing individuals to showcase their unique personalities and styles through intricate designs and vibrant colors. Among the various nail art trends, money-themed designs have emerged as a captivating and sophisticated choice.

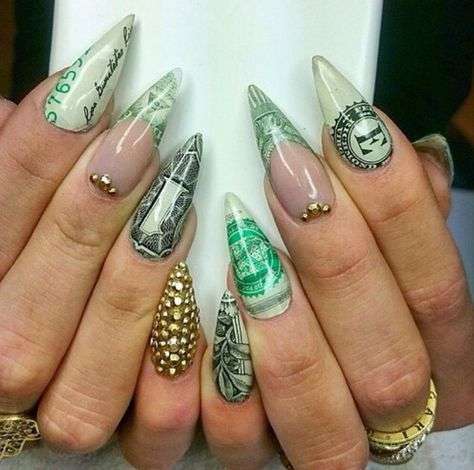
Money-themed nail art encompasses a variety of designs that incorporate elements of currency, such as dollar bills, coins, and cash symbols. These designs can range from simple and subtle to bold and extravagant, catering to a wide range of preferences. Whether you’re a seasoned nail art enthusiast or a beginner just starting out, there are plenty of money nail art ideas to inspire your next manicure.

Creating Money Nail Art On Acrylic Nails

Acrylic nails offer a durable and versatile base for creating intricate money-themed designs. The thickness and strength of acrylics allow for more detailed work and the incorporation of various embellishments. To create money designs on acrylic nails, follow these steps:

  1. Start with a clean and prepped nail surface.
  2. Apply a base coat to create a smooth and even base for the design.
  3. Choose a color palette that complements the money theme. You can use shades of green, gold, silver, and black to create a realistic and sophisticated look.
  4. Use nail art pens or thin brushes to paint dollar bill patterns, cash symbols, or coin outlines.
  5. Add embellishments such as glitter, rhinestones, or metallic foils to enhance the design.
  6. Apply a top coat to seal the design and protect it from chipping and fading.
Money nail art on press on nails

Creating Money Nail Art Designs on Press-On Nails

Press-on nails provide a convenient and non-committal way to experiment with money-themed nail designs. The following steps outline the process of creating money designs on press-on nails:

  1. Choose press-on nails in the desired shape and length.
  2. Clean and prep your natural nails by filing, shaping, and pushing back your cuticles.
  3. Apply a thin layer of nail glue to the back of each press-on nail.
  4. Press the artificial nails onto your natural nails, ensuring a snug fit.
  5. Use nail art pens, fine brushes, or stencils to paint money-themed designs onto the press-on nails.
  6. Apply a top coat to protect the design and add a glossy finish.
Money nail designs

Tips for Creating Eye-Catching Money Nail Art Designs

Here are some additional tips for creating eye-catching money-themed nail designs:

  1. Incorporate different textures and materials to add depth and dimension to the design.
  2. Use varying shades of the same color to create a more realistic and polished look.
  3. Experiment with different placement and scale of the money elements to achieve a unique and personalized style.
  4. Match the money theme to your overall outfit or occasion for a cohesive and stylish look.

Money-themed nail designs offer a creative and eye-catching way to express your personal style and add a touch of sophistication to your manicure. With a variety of techniques and embellishments available, the possibilities for creating unique and memorable designs are endless. Whether you’re a seasoned nail artist or a beginner just starting out, money-themed nail art is an exciting and rewarding trend to explore.

Remember, the key to creating stunning nail art is to have fun and experiment with different ideas. With a bit of creativity and practice, you can achieve salon-quality money-themed nail designs that will turn heads and leave a lasting impression.

I hope this blog post has inspired you to try your hand at creating your own money-themed nail designs. With a little practice and creativity, you can achieve stunning results that will make your nails the talk of the town.

Mizani Press Agent Serum| Top, Press, Smooth

A silk press, a popular hair styling technique, has gained widespread recognition for its ability to transform curly or coily hair into sleek, straight strands. While salon silk presses can be expensive and time-consuming, achieving salon-quality results at home is possible with the right products and techniques.

Mizani Press Agent Serum: Achieving Salon-Quality Silk Press Results at Home

The Mizani Press Agent Spray is one such product that has garnered acclaim for its effectiveness in achieving salon-worthy silk presses on natural hair. Achieving a sleek, long-lasting silk press on natural hair can be challenging. It requires a combination of the right products, techniques, and patience. One product that has gained popularity among natural hair enthusiasts is the Mizani Press Agent Serum Spray.

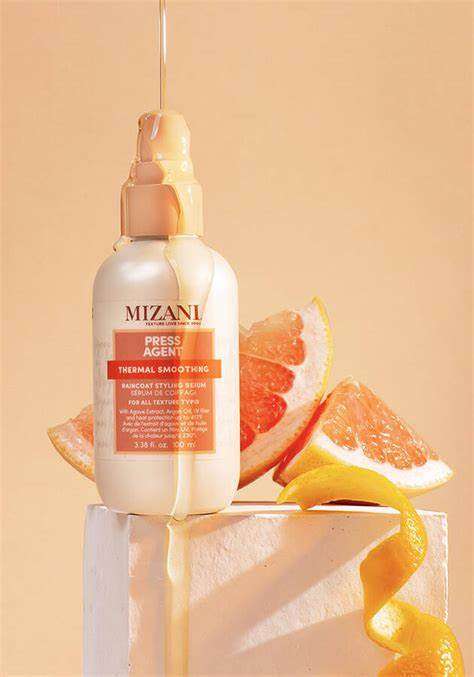
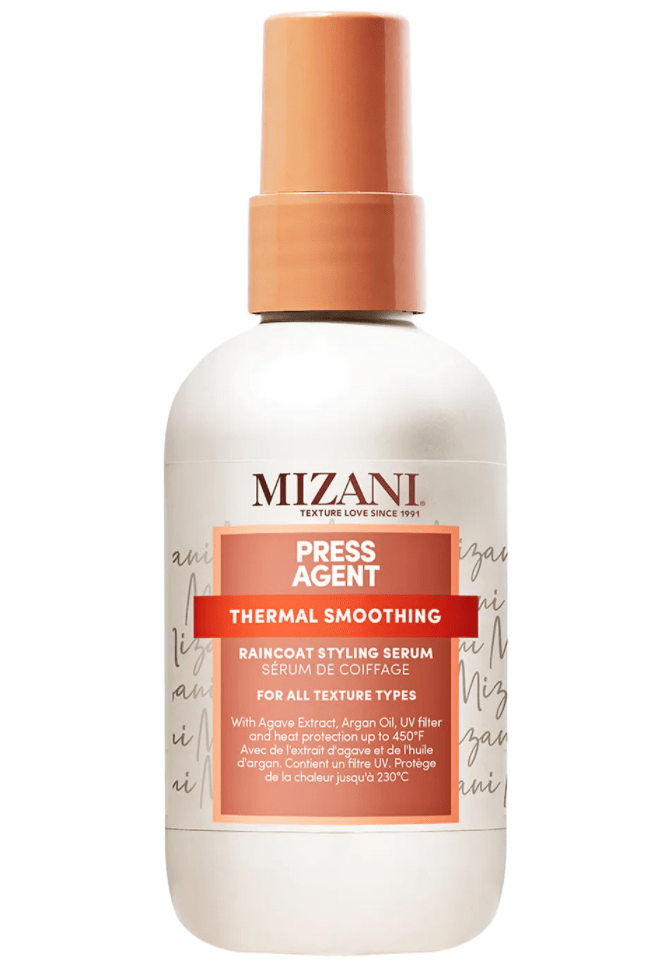
Mizani Press Agent Serum

This thermal styling serum smooths, adds moisture, controls frizz flyaways provides heat protection up to 450F.

What is Mizani Press Agent Serum?

Mizani Press Agent Serum is a thermal smoothing raincoat styling serum specifically designed to protect natural hair from heat damage during styling. Formulated with a blend of nourishing ingredients, including argan oil, this spray acts as a barrier against the intense heat of flat irons and blow dryers, preventing breakage and preserving the natural moisture balance of the hair.

Benefits of Using Mizani Press Agent Serum for Silk Press on Natural Hair

  1. Heat Protection: Mizani Press Agent Serum provides superior heat protection, shielding natural hair from the damaging effects of high temperatures, preventing breakage and split ends.
  2. Smoothness and Shine: The formula enhances the smoothness and shine of the hair, resulting in a sleek, polished finish that resembles a salon silk press.
  3. Humidity Resistance: The spray forms a protective barrier that helps repel moisture, keeping the silk press style intact even in humid conditions.
  4. Reduced Frizz: The spray tames frizz and flyaways, ensuring a polished and controlled appearance.
  5. Lightweight Formula: The lightweight, non-greasy formula does not weigh down the hair, maintaining its natural bounce and movement.
Mizani thermal smoothing agent

How To Use Mizani Press Agent Serum For Silk Press

  1. Preparation: After shampooing and conditioning, detangle the hair thoroughly to ensure even heat distribution.
  2. Sectioning: Divide the hair into manageable sections to ensure thorough application of the spray.
  3. Application: Section by section, mist the hair generously with Mizani Press Agent Serum, ensuring even distribution from roots to ends.
  4. Styling: Proceed with the silk press technique using a flat iron or blow dryer.
  5. Reapplication: Reapply the spray as needed throughout the styling process, especially on thicker or drier sections of hair.

Additional Tips for Achieving a Salon-Quality Silk Press

  1. Use high-quality heat styling tools: Invest in a reputable flat iron or blow dryer with adjustable temperature settings to avoid excessive heat damage.
  2. Maintain proper heat settings: Adjust the heat settings according to your hair type to prevent burning or damage.
  3. Apply even heat: Use slow, even strokes when flat ironing or blow drying to prevent uneven heat distribution and potential damage.
  4. Deep condition regularly: Deep condition your hair weekly or bi-weekly to replenish moisture and maintain its health and elasticity.
  5. Use a silk or satin scarf: Sleeping on a silk or satin scarf helps preserve the silk press style and reduces friction, minimizing frizz and breakage during the night.

Mizani Press Agent Spray is an invaluable tool for achieving salon-quality silk press results at home. Its heat protection properties, smoothing and shine-enhancing effects, and humidity resistance make it an essential product for those seeking to transform their natural hair into sleek, straight strands without compromising its health or beauty. With proper application and care, Mizani Press Agent Spray can help you achieve a professional-looking silk press that lasts for days.