Blog Posts

Top 10 Marble Nail Designs And Nail Art

Marble Nail Designs: A Timeless Classic

Marble nail designs have been around for decades, and they continue to be one of the most sought-after nail designs today. These designs are created by swirling together different shades of nail polish, resulting in a stunning and unique marble effect.

One of the best things about marble nail designs is their versatility. You can choose from a variety of colors to create a look that matches your style and personality perfectly. Additionally, the technique used to create marble nails allows for endless customization and experimentation, making it a fun and creative process. Marble nail designs are also incredibly elegant and sophisticated.

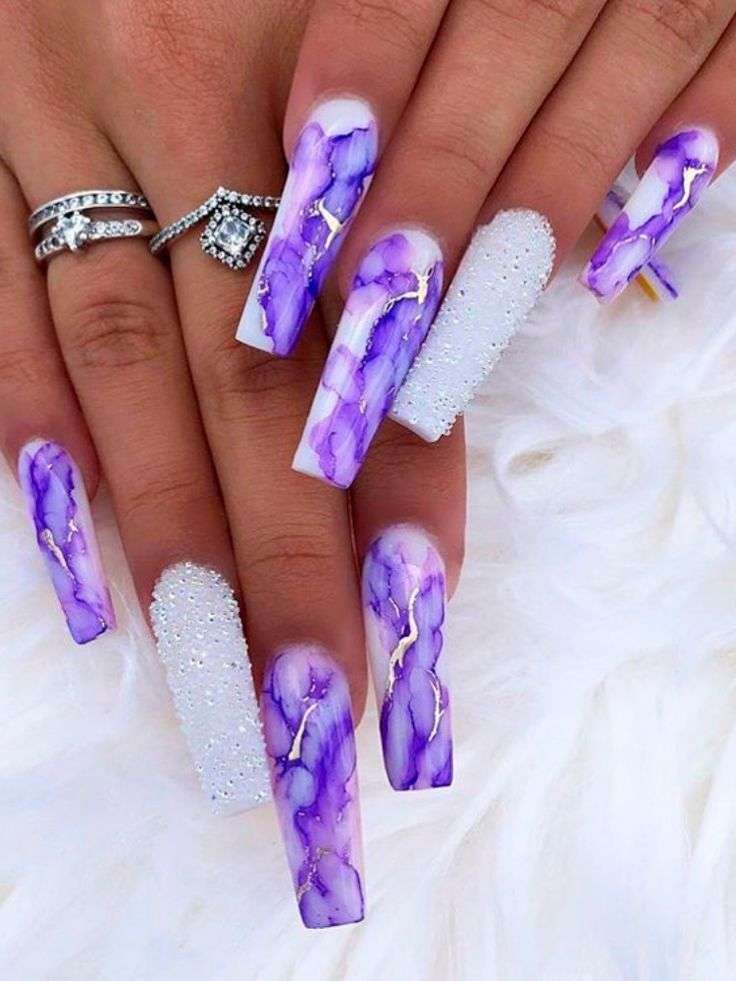
pink marble nails with glitter

They are perfect for any occasion, whether it’s a formal event or a casual day out. The timeless beauty of marble nails is sure to impress anyone who sees them. If you’re looking for a way to elevate your nail game, marble nail designs are definitely worth trying out. With a little practice, you can create your own unique and eye-catching marble nail designs that you’ll love showing off.

Marble Nail Art pink and white

What are marble nail designs?

Marble nail designs are inspired by the look of natural marble. They typically use a combination of two or more colors to create a swirling, veined effect. There are many different ways to create marble nail designs, but some of the most popular nail art techniques include:

  • Water marbling: This technique involves dipping your nails into a pool of water with two or more colors of nail polish. The colors will swirl together to create a marble effect.
  • Dry marbling: This technique is similar to water marbling, but instead of dipping your nails into water, you will apply the polish directly to your nails.
  • Stamping: This technique uses a stamping plate and a stamper to create a marble effect.
  • Freehand: This technique is the most difficult, but it also allows you to create the most unique and customized marble nails.

How to Do marble nail designs

If you want to try your hand at creating your own marble nails, there are a few things you will need:

  • Nail polish in two or more colors
  • A small bowl of water (for water marbling)
  • A stamping plate and a stamper (for stamping)
  • A fine-tipped nail polish brush (for freehand)

Once you have your supplies, you can follow these steps to create marble nails:

  1. Start by applying a base coat to your nails. This will help protect your nails from the polish and make it easier to remove the design later.
  2. If you are using the water marbling technique, fill a small bowl with water. Add a few drops of each color of nail polish to the surface of the water.
  3. Dip your finger into the water, swirling it around to create a marble effect.
  4. Quickly remove your finger from the water and let the polish dry.
  5. Repeat steps 2-4 for each nail.
  6. If you are using the dry marbling technique, apply a thin layer of each color of nail polish to your nails.
  7. Use a dotting tool or a toothpick to create a marble effect.
  8. Let the polish dry.
  9. If you are using the stamping technique, apply a base coat to your nails.
  10. Apply a stamping polish to your stamping plate.
  11. Use a stamper to pick up the polish from the stamping plate.
  12. Stamp the polish onto your nails.
  13. Let the polish dry.
  14. If you are using the freehand technique, apply a base coat to your nails.
  15. Use a fine-tipped nail polish brush to create a marble effect.
  16. Let the polish dry.
  17. You can also add glitter or rhinestones to your marble nails for a more glamorous look.
teal marble nail art

Tips for creating perfect marble nails

Here are a few tips for creating perfect marble nails:

  • Use high-quality nail polish.
  • Apply the polish in thin coats.
  • Be patient and let each layer of polish dry completely before adding the next.
  • Use a steady hand.
  • Practice makes perfect!

Marble nail designs for any occasion

Marble nail designs are perfect for any occasion, from a casual day out to a formal event. They are also a great way to add a touch of personality to your style.
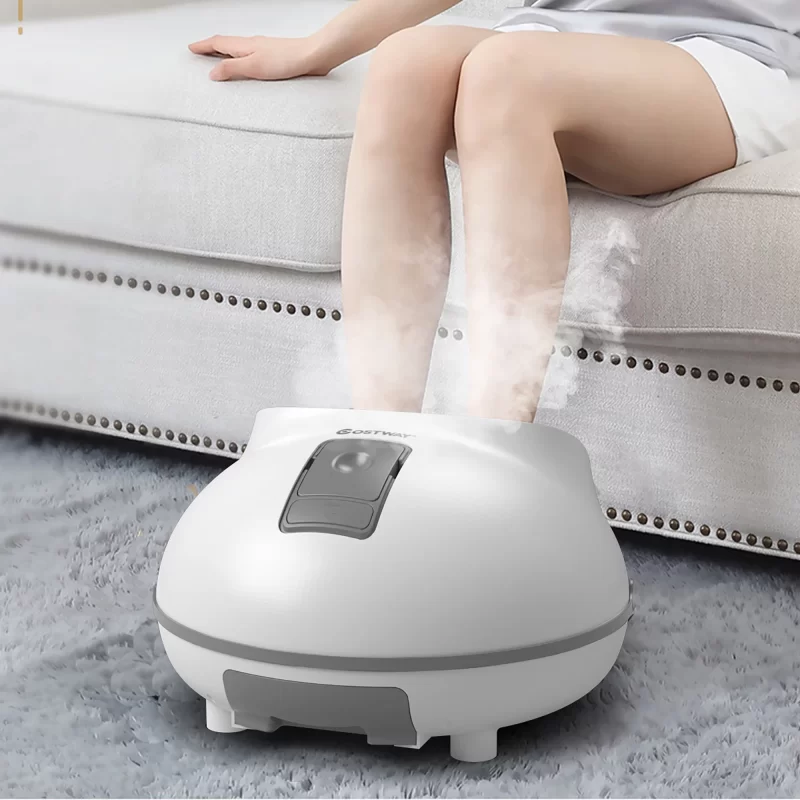
Why Is Winter Foot Care So Important?

Keeping Your Feet Cozy and Comfortable:

Winter foot care should be your top priority during the low temperatures. As the weather outside gets frightful, it’s important to pay attention to our feet, as they can be particularly vulnerable to the cold winter months. Here are some tips for keeping your feet healthy and comfortable all winter long.

Moisturize Daily

Dry, cracked heels are a common winter foot care problem. To prevent this, moisturize your feet daily, especially after showering or bathing. Use a thick, moisturizing cream to keep your skin hydrated.

Winter socks

Wear Warm Socks

Choose socks made from natural fibers like wool or cotton. Synthetic socks can trap moisture and make your feet cold and sweaty. Avoid wearing too-tight socks, as this can restrict circulation and make your feet feel colder.

Winter Foot Care| Protect Your Feet from the Elements

When going outside, wear warm, waterproof boots or shoes. This is a very important element of proper winter foot care! Make sure your shoes fit snugly without being too tight. Avoid wearing high heels or shoes with thin soles, as these can make your feet feel colder. Always wear comfortable socks within your shoes.

In addition to comfort socks, they should be long socks that cover the ankles. Wearing low-cut socks may not become an issue initially, but due to Lyfe-style choices, they can wreak havoc. Low-cut socks may not provide enough skin and foot coverage and may sometimes roll under the foot.

image

Keep Your Feet Active

Even though the weather is cold, it’s important to keep your feet active. Try to walk or exercise for at least 30 minutes most days of the week. This will help to improve circulation and keep your feet warm.

See a Podiatrist if Needed

If you have any foot problems, such as ingrown toenails, athlete’s foot, or diabetic foot ulcers, it’s important to see a podiatrist. They can provide treatment and help to prevent future problems.

Winter foot care massage with hot rocks

Extra Winter Foot Care Tips

  • Avoid using harsh soaps and detergents. These can dry out your skin and make your feet more susceptible to cracking.
  • Trim your toenails straight across. This will help to prevent ingrown toenails.
  • Gently exfoliate your feet once a week. This will help to remove dead skin cells and keep your feet looking healthy.
  • Elevate your feet when you sit down. This will help to reduce swelling.
  • Massage your feet regularly. This will help to improve circulation and relax your muscles.

By following these tips, you can help to keep your feet healthy and comfortable all winter long.

Additional Resources

Breakfast Nooks In A Cozy Kitchen Corner

In the heart of every home, the kitchen serves as a hub for culinary creations, family gatherings, and casual conversations. Enter the breakfast nook, a charming and inviting corner that transforms everyday meals into memorable moments. While kitchens are often associated with meal preparation, they also offer an opportunity to create a dedicated space for intimate dining experiences.

Kitchen Breakfast Nook

Breakfast Nooks: Unveiling the Charm of Cozy Dining Corners

In the heart of any home, the kitchen serves as a hub for culinary creations, However, within this dynamic space, a special corner often emerges the breakfast nook. These intimate dining areas, tucked away from the hustle and bustle of the main kitchen, exude a sense of warmth and coziness, inviting moments of quiet reflection and shared meals. Whether you’re seeking a haven for morning coffee or a cherished spot for intimate dinners, breakfast nooks offer a unique charm that enhances the overall ambiance of your kitchen.

Harnessing the Versatility of Breakfast Nooks

The beauty of breakfast nooks lies in their versatility. They can seamlessly blend into a variety of kitchen designs, from rustic farmhouse styles to sleek modern decors. Their compact size makes them ideal for smaller spaces, while their adaptability allows them to accommodate various seating arrangements. Whether you prefer a classic banquette, a cozy window seat, or a bistro-style table and chairs, breakfast nooks can accommodate your preferences and create a dining experience tailored to your needs.

Maximizing Space and Functionality

Despite their smaller footprint, breakfast nooks can be designed to maximize space and functionality. Built-in banquette seating, for instance, provides ample seating while utilizing vertical space efficiently. Storage solutions, such as built-in shelves, drawers, or benches with hidden compartments, can keep essentials organized and within reach. Additionally, incorporating natural light through windows or skylights can brighten the space and create a sense of airiness.

Kitchen Breakfast nook

Enhancing the Ambiance with Design Elements

Transforming your breakfast nook into a haven of comfort and style requires careful consideration of design elements. Warm and inviting color schemes, such as soft pastels or earthy tones, can create a sense of tranquility. Incorporating natural materials like wood, stone, or wicker can add a touch of rustic charm. Thoughtful lighting, whether through ambient fixtures or task lighting, can set the mood and enhance the overall ambiance.

Breakfast Nooks: A Sanctuary for Shared Moments

Breakfast nooks are more than just dining spaces; they are sanctuaries for shared moments and cherished memories. Whether it’s enjoying a leisurely morning breakfast with family, savoring a cup of coffee with a loved one, or simply indulging in a moment of solitude, breakfast nooks provide a cozy retreat from the daily hustle and bustle. In these intimate corners, conversations flow more freely, laughter echoes more warmly, and the bonds of family and friendship are strengthened.

As you embark on the journey of designing or revamping your kitchen, consider the transformative power of a breakfast nook. With careful planning, creative design, and a sprinkle of personal touches, you can create a dining space that not only enhances the functionality of your kitchen but also cultivates a haven for shared moments and cherished memories.

Breakfast Kitchen Nook

The Allure of the Breakfast Nook

Breakfast nooks possess an undeniable charm, evoking a sense of warmth and nostalgia. They provide a cozy retreat, a place to savor the morning meal away from the hustle and bustle of the kitchen’s main workspace. Imagine sipping coffee while basking in the morning sunlight, surrounded by family and friends, all gathered in this intimate setting.
Design Considerations For Your Breakfast Nook

Creating a breakfast nook that is both functional and aesthetically pleasing requires careful consideration of design elements.

Space Planning

  • Size Matters: Ensure the nook is large enough to comfortably accommodate your desired seating arrangement, allowing for ample legroom and easy movement. Consider the size of your kitchen and the available space.
  • Shape and Layout: Choose a nook shape that complements the overall layout of your kitchen. A classic rectangular shape is always a safe bet, while a bay window or an alcove can add architectural interest.

Seating Arrangements

  • Banquette Seating: Built-in banquette seating offers a luxurious and space-saving option, providing ample seating while maximizing floor space.
  • Chairs and Benches: Opt for comfortable and stylish chairs or benches that complement the overall décor of your kitchen. Consider chairs with cushioned seats and supportive backs for extended dining comfort.
  • Table Selection: Choose a table size that matches the scale of your nook. Round tables create a more intimate atmosphere, while rectangular tables offer a more spacious dining surface.

Enhancing Your Breakfast Nook

Once the fundamental elements are in place, elevate your breakfast nook with thoughtful design touches:

Lighting

  • Natural Light: Maximize natural light by positioning your nook near a window or skylight.
  • Task Lighting: Install pendant lights or wall sconces to provide focused task lighting for dining and reading.

Ambiance

  • Warm Colors: Embrace warm and inviting color schemes that promote a sense of coziness. Use soft hues like creams, whites, and pastels to create a soothing atmosphere.
  • Textiles: Incorporate cozy textiles like curtains, throw pillows, and tablecloths to enhance the comfort and visual appeal of your nook.
  • Décor: Decorate your nook with personal touches that reflect your style and preferences. Display family photos, artwork, or meaningful mementos to add a touch of personality.

Breakfast nooks are more than just designated dining spaces; they are cherished corners where memories are made and connections are strengthened. By carefully considering design elements and adding personal touches, you can transform your kitchen into a haven for intimate dining experiences, creating a space that is both functional and full of charm.

Creating Diaper Cakes For Baby Shower Gifts

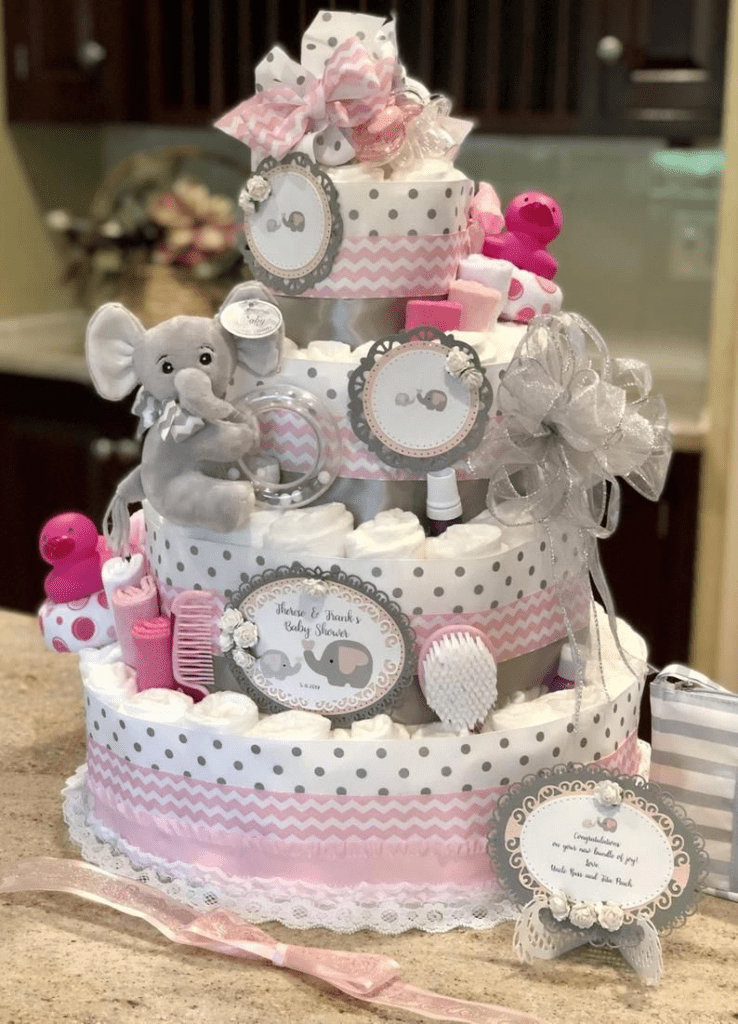
Diaper Cakes: A Practical and Adorable Gift for Baby Showers

Baby showers are a wonderful occasion to celebrate the upcoming arrival of a new life. While traditional gifts like clothes, toys, and blankets are always appreciated, there’s something extra special about presenting a gift that is both practical and adorable—a diaper cake.

Diaper Cakes

Diaper cakes are not just visually appealing; they are also incredibly useful for new parents. A well-constructed diaper cake can provide a significant portion of a baby’s diaper needs during the first few weeks, easing the burden on new parents and providing them with one less thing to worry about.

Creating a diaper cake is a fun and rewarding project that can be personalized to match the baby shower theme or the parents’ preferences. With a few simple materials and a bit of creativity, you can easily create a stunning diaper cake that will be the star of the show.

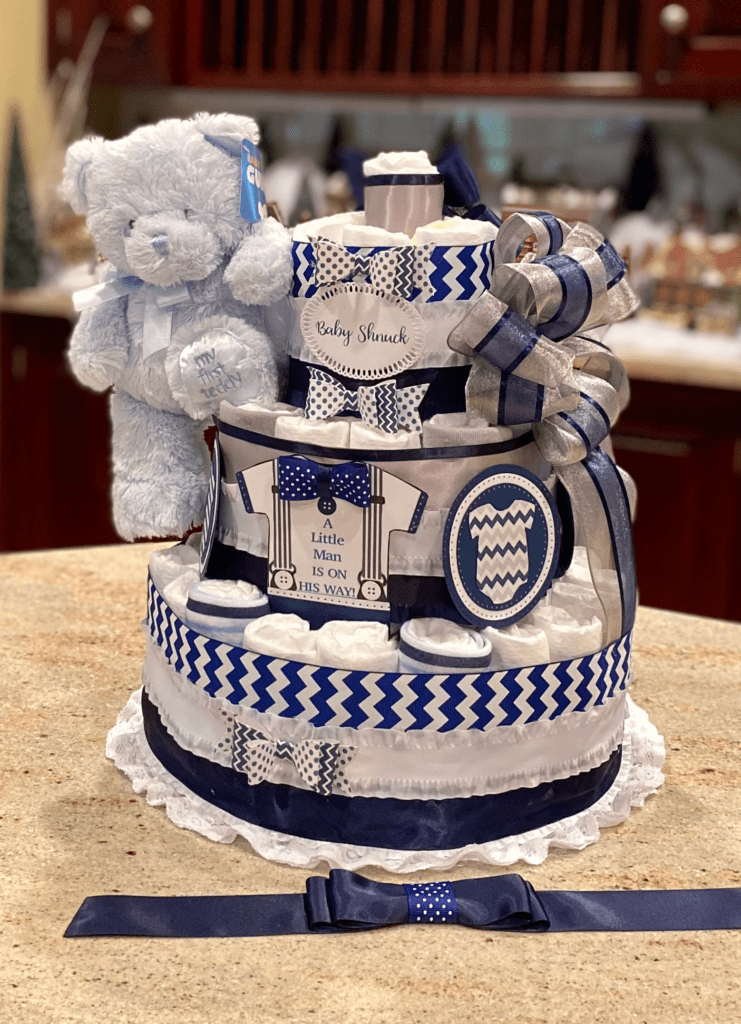
Diaper Cake for a boy

Essential Materials for Diaper Cake Making

Before embarking on your diaper cake-making journey, gather the necessary materials:

  • Diapers: Select a sufficient number of diapers, typically around 50-60, depending on the desired size of the cake. Choose diapers that are appropriate for the baby’s age and size.
  • Rubber bands: Gather a variety of rubber band sizes, including small, medium, and large, to secure the diapers in place.
  • Ribbons: Choose ribbons that complement the baby shower theme or the parents’ preferences. Use a variety of widths and textures to add visual interest.
  • Decorative accessories: Gather a selection of baby-themed decorations, such as stuffed animals, toys, ribbons, and bows, to adorn the diaper cake.
  • Base: A sturdy cardboard base, such as a pizza pan or a cake stand, will provide support for the diaper cake.

Creating the Diaper Cakes:

  1. Roll the diapers: Roll each diaper tightly into a cylinder, securing it with a small rubber band.
  2. Form the base: Place the rolled diapers upright on the base, arranging them in a circular pattern to form the first layer of the cake. Secure the layer with a large rubber band.
  3. Add subsequent layers: Repeat the process of rolling diapers and securing them with rubber bands, adding additional layers to achieve the desired height of the cake.
  4. Decorate the cake: Use ribbons, decorative accessories, and stuffed animals to adorn the cake, adding visual interest and personalization.

Additional Tips:

  • Use a variety of diaper sizes: Incorporate diapers of different sizes to create a more dynamic and realistic cake shape.
  • Experiment with different shapes: Instead of a traditional round cake, consider creating a heart-shaped, rectangular, or tiered diaper cake.
  • Personalize the cake: Add a personal touch by embroidering the baby’s name or initials on a ribbon or a stuffed animal.
  • Wrap the cake: To ensure the cake stays intact during transport, wrap it in clear cellophane or decorative wrapping paper.
Blue diaper cake500

Creating a diaper cake is a fun and creative way to show your love and support for the expectant parents. With a bit of planning, effort, and personalization, you can craft a unique and practical baby shower gift that will be cherished by the new family.

10 How To Use TikTok For Press On Nails Tips

Social media platforms have become powerful tools for businesses of all sizes, including those in the beauty industry, in today’s dynamic digital landscape. Among these platforms, TikTok has emerged as a potent one, with its wide user base and engaging video format. Considering this potency, It can be a great opportunity for you to use TikTok for press on nails business marketing to promote your products and services.

TikTok is mainly used for connecting with potential customers and expanding your brand’s reach. If you’re in the press-on nail business, TikTok offers an incredible opportunity to showcase your creativity, attract new clients, and elevate your brand to new heights.

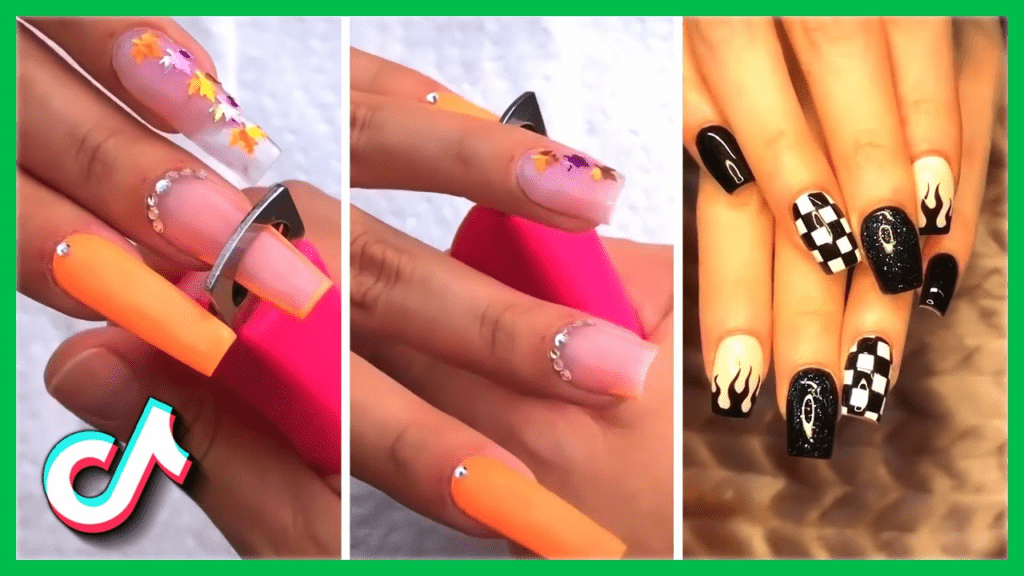
Tiktok nail storytime image

the Power of TikTok for Press On Nails Success

TikTok’s short-form video format is perfectly suited for showcasing the vibrant world of press-on nails. By creating captivating and visually appealing content, you can capture the attention of potential customers and entice them to try your products. Here are some effective strategies to grow your press-on nail business using TikTok:

1. Create Eye-Catching Nail Designs:

Showcase your creativity and skill by creating unique and trendy nail art designs that will wow your viewers. Experiment with different colors, patterns, and embellishments to capture the attention of fashion-forward individuals and nail art enthusiasts.

2. Utilize Tutorials and How-To Videos

Educate your audience on the application and removal process of press-on nails. Create easy-to-follow tutorials that demonstrate the simplicity and convenience of using press-ons, dispelling any misconceptions and encouraging potential customers to try your products.

3. Engage with Trending Sounds and Challenges

Tap into the latest trends and challenges on TikTok to increase your visibility and reach a wider audience. Create videos that showcase your press-on nail designs in a fun and engaging way, incorporating popular sounds and challenges to capture attention and generate buzz.

@monalisa8927

I thought this one came out pretty dope… I’m gonna try to NOT use This color so much but it’s my favorite. “He gon buy me Gucci if I ask for it.” 🤣☺️😅#LateNightVibes #IBeyWorkin #BeginnerNailTech #nailinspo2023 #nailart #practicemakesperfect #firsttrychallenge #NailDesignIdeas #nails #NailArtJunkie

♬ NASTY (Extended Version) – Russ

4. Collaborate with Influencers and Creators

Partner with relevant influencers and creators in the beauty and fashion space to expand your reach and gain exposure to a new audience. Collaborate on creative content that highlights your press-on nails and aligns with the influencer’s brand and audience.

how to use tiktok for press on nails

5. Showcase Customer Testimonials and Reviews

Build trust and credibility by featuring positive customer testimonials and reviews. Share videos of satisfied customers raving about your press-on nails, demonstrating the quality and satisfaction your products provide.

6. Engage with Your Audience

Respond to comments, answer questions, and participate in conversations to build a connection with your audience. Show your appreciation for their support and encourage them to share their experiences with your press-on nails.

7. Utilize Relevant Hashtags

Use relevant hashtags related to press-on nails, beauty, fashion, and nail art to increase the visibility of your content and attract viewers who are actively interested in your products.

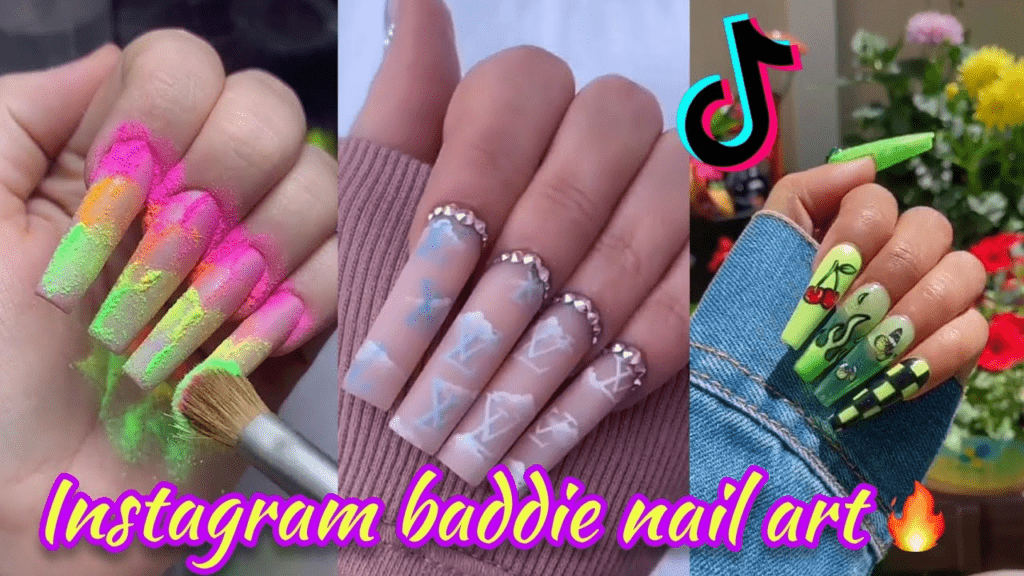
Instagram compilation on tiktok

8. Promote Your TikTok on Other Platforms

Cross-promote your TikTok content on other social media platforms and your website to drive traffic to your TikTok channel and expand your reach.

9. Track Your Analytics

Monitor your TikTok analytics to understand which content resonates best with your audience. Use this data to refine your content strategy and optimize your video performance.

10. Stay Consistent and Engaged

Maintain a consistent posting schedule to keep your audience engaged and coming back for more. Regularly create new content and actively engage with your followers to build a loyal community around your brand.

By implementing these strategies, you can effectively leverage the power of TikTok to grow your press-on nail business, capture the attention of new customers, and establish your brand as a leader in the world of press-on nail artistry.

Remember, creativity, engagement, and consistency are key to success on TikTok. Embrace the platform’s dynamic nature, unleash your creativity, and connect with your audience to elevate your press-on nail business to new heights.

No Wipe Top Coats vs. Regular Top Coat Polish

In the world of nail care, the choice between a regular top coat and a no wipe top coat is a common dilemma faced by many nail techs. Both types of top coats serve the same purpose—to protect and seal the nail polish, preventing chipping and fading. They differ in their application and properties. Understanding the pros and cons of each type can help you make an informed decision based on your preferences and nail care routine.

Regular Top Coat: The Tried-and-True Option

Regular top coats are the classic choice for nail technicians, having been around for decades. They are characterized by their sticky residue, which requires an additional wiping step after application. This sticky layer ensures a strong bond with the nail polish, providing long-lasting protection and a high-gloss finish.

Pros of Regular Top Coat:

  • Durability: Regular top coats typically offer superior durability and chip resistance compared to no-wipe top coats.
  • High-gloss finish: Regular top coats provide a long-lasting, high-gloss finish that enhances the vibrancy of nail polish colors.
  • Versatility: Regular top coats can be used with a wide range of nail polish formulas, including glitter, shimmer, and metallic polishes.

Cons of Regular Top Coat:

  • Sticky residue: The sticky residue requires an additional wiping step, which can be time-consuming and can potentially smudge the nail polish.
  • Dry time: Regular top coats generally have a longer drying time compared to no-wipe top coats.
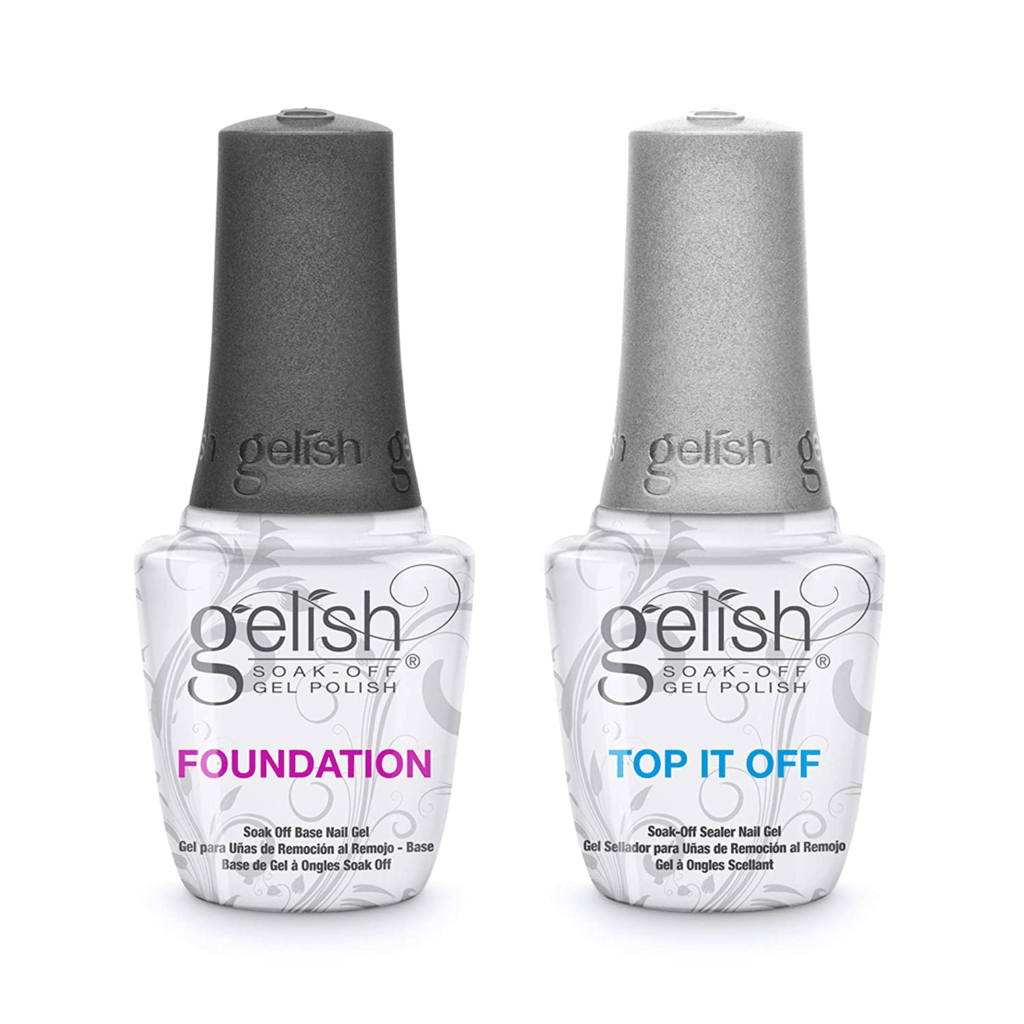
Gelish Top It Off Gel polish

No Wipe Top Coat: A Convenient Alternative

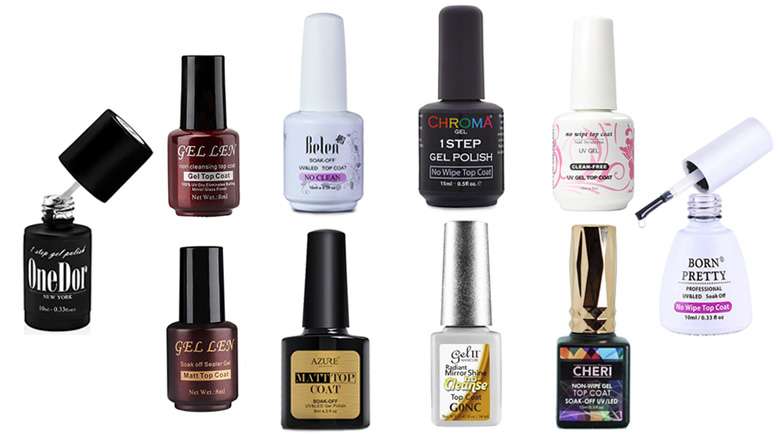
No-wipe top coats have become more and more popular in recent years due to their numerous benefits. These top coats are designed to be simple and convenient to use, allowing users to skip the additional wiping step that is typically required with traditional top coats. They dry quickly, forming a smooth and non-sticky finish that looks great and provides long-lasting protection for your nails.

One of the primary advantages of no-wipe top coats is their ease of use. Because they eliminate the need for an additional wiping step, they save users time and effort. Plus, they dry quickly, making them ideal for those who are short on time or who prefer a faster application process. Another benefit of no-wipe top coats is their durability.

These top coats form a protective layer over your nail polish, helping to prevent chips, cracks, and other types of damage. They are also resistant to smudging and dents, ensuring that your nails look great for days or even weeks after application.Overall, no-wipe top coats are an excellent choice for anyone who loves beautiful, long-lasting nails without the hassle of traditional top coats.

Gelux no wipe top coat

Pros of No-Wipe Top Coat:

  • Convenience: No-wipe top coats eliminate the need for an additional wiping step, saving time and reducing the risk of smudging.
  • Quick-drying: These top coats generally dry much faster than regular top coats, allowing you to get back to your day quickly.
  • Easy application: The no-wipe formula makes application easier, especially for those who struggle with wiping top coats without smudging.

Cons of No-Wipe Top Coat:

  • Durability: No-wipe top coats may not offer the same level of durability as regular top coats, potentially leading to chipping or fading sooner.
  • Gloss finish: No-wipe top coats may not provide the same high-gloss finish as regular top coats, especially with certain nail polish formulas.
  • Versatility: No-wipe top coats may not be as versatile as regular top coats, as they may not work well with all nail polish formulas, such as glitter or shimmer polishes.
image

Making the Right Choice for You

The choice between a regular top coat and a no-wipe top coat ultimately depends on your individual preferences and nail care needs. If you prioritize durability and a high-gloss finish, a regular top coat may be the better choice. If you prefer convenience and a quick-drying formula, a no-wipe top coat may be more suitable.

Consider experimenting with both types of top coats to determine which one works best for your nail polish routine and personal preferences. Remember, the key to achieving beautiful, long-lasting manicures is to use high-quality nail products and follow proper application techniques.

Creating Simple Christmas Mantel Decorations

Transforming Your Fireplace Mantel into a Christmas Wonderland

The fireplace mantel serves as the focal point of the living room, especially during the festive season. Adorned with Christmas decor, it sets the stage for magical gatherings and heartwarming memories. Whether you prefer a traditional or contemporary approach, decorating your Christmas mantel decorations are an opportunity to unleash your creativity and transform your home into a winter wonderland.

Christmas Mantel Decorations

Gathering Inspiration and Planning Your Design

Before getting started on your Christmas mantel decorations journey, gather inspiration from magazines, online resources, or even your own imagination. Consider the overall style of your home and the mood you wish to create. Do you envision a classic Christmas scene with twinkling lights and greenery, or a more modern and minimalist aesthetic with metallic accents and geometric shapes?

Essential Elements for Festive Christmas Mantel Decorations

Regardless of your chosen style, certain elements are essential for creating a festive Christmas mantel:

  • Garland: A lush garland serves as the foundation for your mantel décor, providing a base for other decorations. Choose a natural or artificial garland, depending on your preference, and consider incorporating pinecones, berries, or ribbons for added texture and color.
  • Lights: String lights add a touch of warmth and sparkle to your mantel. Opt for warm white or fairy lights to create a cozy ambiance, or use colored lights for a more vibrant display.
  • Stockings: Hang stockings in a variety of sizes and patterns to represent each member of the family. Choose stockings that complement your overall theme and add a touch of personality.
  • Figurines and Ornaments: Add a touch of whimsy with figurines and ornaments. Consider traditional Christmas characters, animals, or unique pieces that reflect your personal interests.
  • Ornaments: Hang ornaments of various shapes and sizes on the garland or around the fireplace for a touch of sparkle.
  • Figurines: Place small Christmas figurines, such as reindeer, snowmen, or angels, on the mantel or around the centerpiece for a whimsical touch.
  • Natural Elements: Bring the outdoors in with natural elements like pinecones, cinnamon sticks, or dried oranges. Arrange them in bowls, baskets, or on the garland for a rustic and festive touch.
  • Ribbons and Bows: Add a touch of elegance with ribbons and bows in your chosen color scheme. Drape them around the garland, tie them around stockings, or attach them to ornaments.
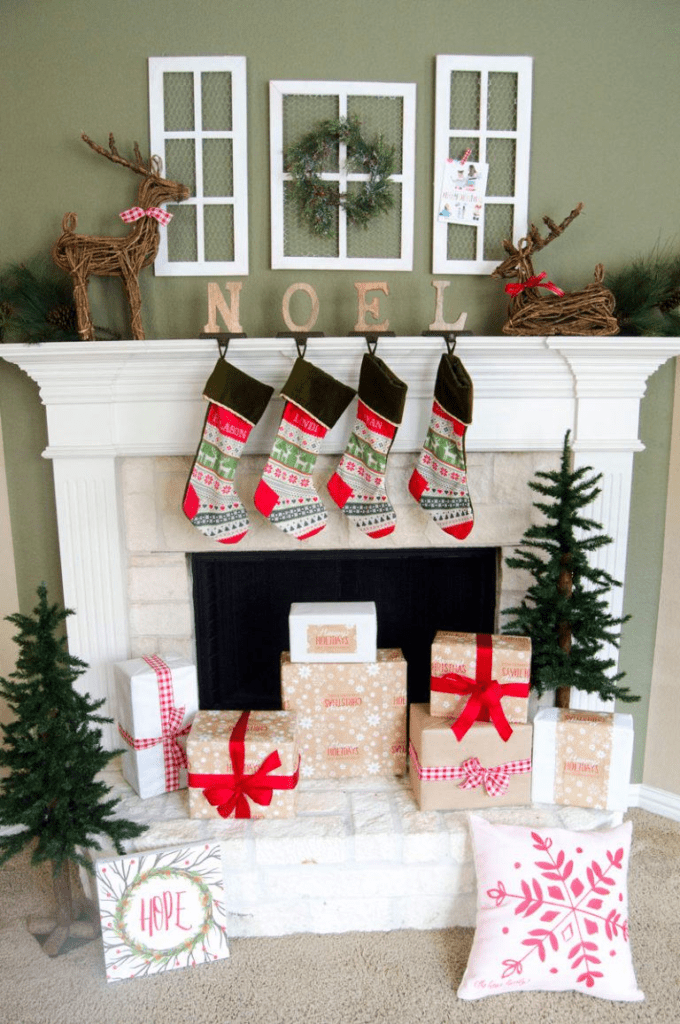
Christmas mantel decorations

Tips for Creating a Cohesive and Balanced Design

  • Maintain a sense of balance: Arrange your Christmas decor items symmetrically or employ a staggered approach, ensuring a harmonious composition.
  • Vary the heights of your decorations: Use risers or different-sized ornaments to create visual interest and avoid a flat appearance.
  • Leave some empty space: Allow negative space to balance the abundance of décor, preventing a cluttered look.
  • Incorporate natural elements: Incorporate pinecones, branches, or other natural elements to create a rustic and inviting feel.
  • Consider the scale of your mantel: Choose mantel decorations that are proportionate to the size of your mantel, avoiding overwhelming it with overly large or small pieces.
Christmas fireplace stocking decor

Personalizing Your Mantel Décor

Personalize your mantel décor by incorporating elements that reflect your family’s traditions, interests, and cherished memories. Handmade ornaments, vintage pieces, or photos can add a touch of sentimentality and make your mantel truly unique.

Enjoying the Festive Transformation

Once your mantel is adorned with festive cheer, step back and admire your creation. Gather your loved ones around the fireplace, enjoy the warm glow of the lights, and let the spirit of Christmas fill your home with joy and togetherness.

Easy DIY Snow Globes For Christmas Decor

Creating Enchanting Snow Globes: A Step-by-Step Guide to DIY Magic

Snow globes, those mesmerizing miniature worlds filled with swirling snowflakes, have a timeless charm that captures the essence of winter. While store-bought snow globes can be delightful, crafting your own DIY snow globes offers a personalized touch and a sense of accomplishment. Whether you’re a craft enthusiast or a beginner seeking a fun activity, creating your own snow globes is a rewarding and creative endeavor.

Adding contents to a DIY Snow globe

Gathering the Essential Supplies

Before embarking on your snow globe-making journey, gather the necessary materials:

  • Glass jars: Choose clear glass jars with tightly fitting lids. Various sizes and shapes can add visual interest.
  • Water: Distilled water is recommended for its purity and lack of impurities that could affect clarity.
  • Glycerin: Glycerin helps slow down the snowflakes’ descent, creating a more enchanting snowfall effect.
  • Glitter: Opt for non-toxic glitter in shades of white, silver, or iridescent to mimic snow.
  • Miniature figurines: Select small figurines that complement the snow globe’s theme. Consider Christmas characters, animals, or winter scenery.
  • Glue: Strong adhesive is essential to secure the figurine to the jar’s lid.
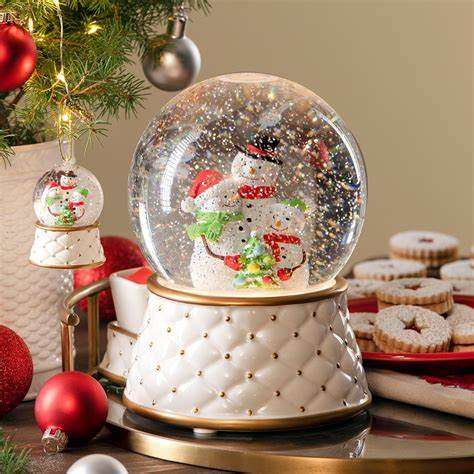
Christmas Snow Globes

Steps to Craft Your DIY Snow Globes

  1. Clean and Dry the Jar: Thoroughly wash and dry the jar to remove any dust or debris that could interfere with the snow globe’s appearance.
  2. Attach the Figurine: Using the glue, securely attach the chosen figurine to the underside of the jar’s lid. Allow the glue to dry completely before proceeding.
  3. Fill with Water and Glycerin: Carefully pour distilled water into the jar, filling it almost to the brim. Add a few drops of glycerin, gently swirling the jar to distribute it evenly.
  4. Incorporate Glitter: Sprinkle glitter into the jar, adding more or less depending on the desired snow intensity. A pinch of fine glitter can create a subtle snowfall, while a generous amount will result in a denser, snowier effect.
  5. Seal the Jar: Secure the lid tightly onto the jar, ensuring no water or glitter can escape. Wipe away any excess glitter that may have fallen onto the rim.
  6. Embellish the Exterior: For an extra touch of personalization, decorate the jar’s exterior with ribbons, stickers, or paint. Get creative and let your artistic flair shine through.
DIY Snow Globe

Tips for Enhancing Your Snow Globes

  • Experiment with different glitter colors: Try using various shades of white, silver, and iridescent glitter to create a more dynamic snowfall effect.
  • Incorporate color-changing glitter: Opt for glitter that reacts to temperature changes, adding an element of surprise and delight to your snow globe.
  • Utilize multiple figurines: Combine a variety of small figurines to create a miniature scene within your snow globe.
  • Personalize the lid: Hand-paint the jar’s lid with a wintery motif or write a special message to make your snow globe extra special.

Creating DIY snow globes is a fun and rewarding experience that can be enjoyed by individuals of all ages and crafting skill levels. With a bit of creativity and imagination, you can transform ordinary glass jars into enchanting miniature worlds that capture the spirit of winter and bring joy to your home.

The Best Christmas Traditions For The Winter

Creative Christmas Traditions to Make Your Holidays More Memorable

Christmas traditions usually include a time for family, friends, and creating lasting memories. While many traditional Christmas activities are beloved and cherished, there’s always room to add a touch of creativity and personalization to your holiday celebrations. Here are some creative Christmas traditions to make your holidays more memorable:

Christmas candles and ornaments

1. Start a Family Advent Calendar

Instead of relying on store-bought advent calendars, create your own personalized version. Fill small boxes or envelopes with special treats, activities, or messages for each day leading up to Christmas. This is a fun way to build anticipation and excitement for the holiday.

2. Host an Ugly Sweater Party

Gather your friends and family for an evening of laughter and festive fashion. Encourage everyone to wear their ugliest, tackiest Christmas sweaters. Award prizes for the most outrageous and creative designs.

3. Organize a Gingerbread House Decorating Competition

Get into the spirit of the season by hosting a gingerbread house decorating competition. Provide participants with gingerbread house kits, frosting, and an assortment of candies and sprinkles. Let their imaginations run wild as they create their own edible masterpieces.

Christmas Traditions, Home decorated with Christmas lights

4. Embark on a Christmas Caroling Adventure

Gather your neighbors, friends, or family members and go caroling around your neighborhood. Spread the joy of Christmas by singing traditional carols and bringing holiday cheer to your community.

5. Create a Family Recipe Book

Compile a collection of your family’s favorite Christmas recipes. Include handwritten versions from loved ones, stories behind the dishes, and special memories associated with each recipe. This is a treasured keepsake that can be passed down through generations.

6. Host a Christmas Movie Marathon

Cuddle up with loved ones on a cozy night and indulge in a Christmas movie marathon. Pop some popcorn, make some hot chocolate, and settle in for hours of holiday cheer.

7. Create a Personalized Christmas Ornament

Make personalized Christmas ornaments that reflect your family’s interests and hobbies. Use dough, clay, or other materials to create unique ornaments that represent your loved ones.

8. Plant a Family Christmas Tree

Instead of buying a pre-cut Christmas tree, consider planting a family Christmas tree in your yard. This is a meaningful tradition that can be enjoyed for years to come.

9. Volunteer Together

Spread the holiday spirit by volunteering together as a family. Help out at a local soup kitchen, donate gifts to a charity, or participate in a community service project.

Sleeping puppy wearing santa hat

10. Write and Share Family Stories

Gather around the fireplace and share stories about past Christmases. Encourage your children to write down their own Christmas memories. This is a beautiful way to preserve family traditions and create lasting memories.

These are just a few ideas to get you started on creating your own unique and memorable Christmas traditions. The most important thing is to have fun, spend time with loved ones, and make cherished memories that will last a lifetime.

Easy Custom Christmas Ornament Keepsakes

Custom Christmas Ornaments: Cherished Keepsakes for Every Family

The holiday season is a time for family, friends, and creating lasting memories. The best way to commemorate those special moments can be done by creating custom Christmas ornaments. These unique pieces can be personalized to reflect your family’s interests, traditions, and personalities, making them truly cherished keepsakes.

Front yard custom Christmas ornament keepsakes

Why Choose Custom Christmas Ornaments?

There are many reasons why custom holiday ornaments are so popular. For one, they are a great way to add a touch of personalization to your Christmas tree. Unlike store-bought ornaments that are often mass-produced, custom Christmas ornaments are one-of-a-kind, making them even more special.

Another great reason to choose custom holiday ornaments is that they can be a fun and creative way to express your family’s unique personality. Whether you prefer classic designs or something more whimsical, there are endless possibilities when it comes to creating custom ornaments.

Custom ornaments can also be a meaningful way to commemorate special occasions, such as a child’s first Christmas, a wedding, or a family vacation. These personalized keepsakes will serve as a reminder of those special moments for years to come.

Custom Christmas ornament Family portrait

Getting Started with Custom Holiday Ornaments

If you’re thinking about creating custom holiday ornaments for your family, there are a few things you’ll need to do first.

1. Choose a Material

There are many different materials that can be used to create custom ornaments, such as glass, ceramic, wood, metal, and dough. Consider your family’s style and preferences when choosing a material.

2. Select a Design

Once you’ve chosen a material, you’ll need to decide on a design for your ornaments. You can either create your own design or have someone else design it for you. There are also many online resources where you can find inspiration and templates for custom ornaments.

3. Personalize Your Ornaments

Once you have a design, you can personalize your ornaments with your family’s names, initials, or a special message. You can also add photos, stickers, or other embellishments to make your ornaments even more unique.

Christmas ornaments customized for the holidays

Ways to Create Custom Christmas Ornaments

There are many different ways to create custom holiday ornaments. You can purchase blank ornaments and decorate them yourself, or you can hire a professional to create them for you.

1. DIY Ornaments

If you’re feeling crafty, you can create your own custom ornaments using a variety of materials and techniques. There are many online tutorials and kits that can help you get started.

2. Professional Ornaments

If you’re short on time or don’t have the artistic skills to create your own ornaments, you can hire a professional to do it for you. Many online retailers and craft stores offer custom ornament design and printing services.

Making Custom Ornaments a Tradition

Creating custom holiday ornaments can be a fun and rewarding family tradition. It’s a great way to spend time together, express your creativity, and create lasting memories that will be cherished for years to come. So get your supplies ready, gather your loved ones, and start creating your own unique custom holiday ornaments today!

The Top Benefits Of Epsom Salt For Your Feet

What is Epsom salt?

Epsom salt is a mineral compound called magnesium sulfate. It is not actually salt, but it gets its name from the town of Epsom in England, where it was first discovered. This type of salt is available in most drugstores and grocery stores.

Benefits of using Epsom salt for your feet

Epsom salt is a popular home remedy for a variety of ailments, including foot pain, muscle soreness, and skin problems. It is also a great way to relax and de-stress. When you dissolve the salt in water, it releases magnesium and sulfate ions. These ions can be absorbed by your skin and help to reduce inflammation and pain. This salt can also help to draw out toxins and impurities from your skin.

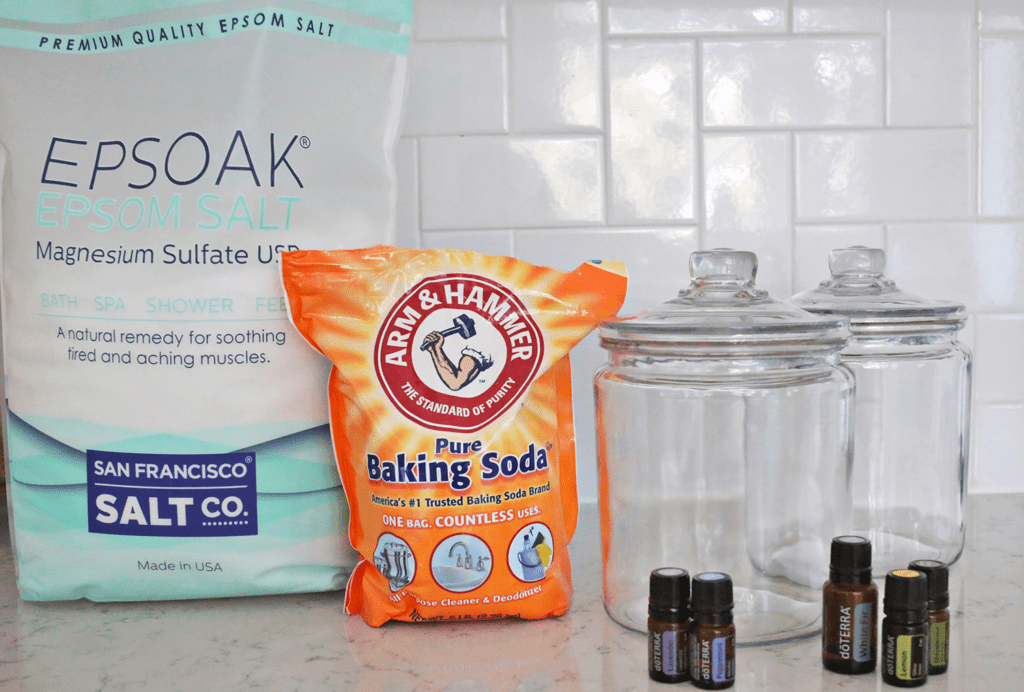
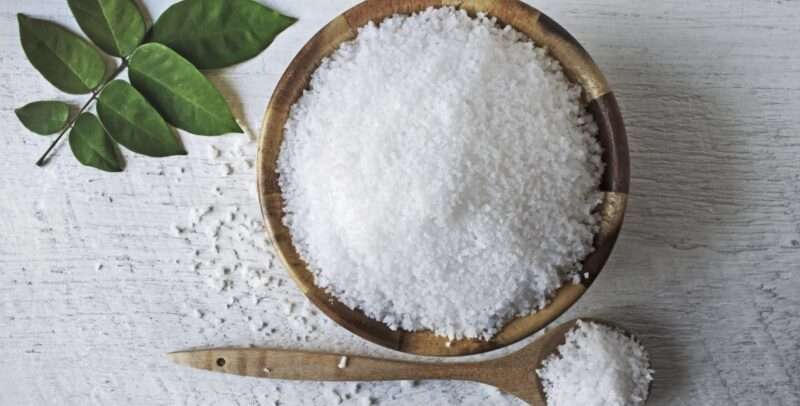
Epsom salts

There are many benefits to using Epsom salt for your feet, including:

  • Relieves foot pain and muscle soreness: It can help to reduce inflammation and pain in your feet and muscles. This can be especially helpful if you have been on your feet for a long time or if you have been exercising.
  • Softens hard skin and calluses: This salt can help to soften hard skin and calluses on your feet. This can make it easier to remove them with a pumice stone or foot file.
  • Treats fungal infections: It also has antifungal properties that can help to treat fungal infections of the feet, such as athlete’s foot.
  • Reduces foot odor: Salt can help to reduce foot odor by drawing out toxins and impurities from your skin.
  • Promotes relaxation: Epsom salt can help to promote relaxation by reducing stress and tension.

How to use Epsom salt for your feet

There are two main ways to use salts for your feet:

Foot SoakFoot Scrub
1. Fill a basin with warm water1. Mix 1/4 cup of Epsom salt with 1/4 cup of olive oil.
2. Add 1/2 cup of Epsom salt to the water.2. Massage the mixture into your feet.
3. Soak your feet in the water for 10-20 minutes.3. Rinse your feet with warm water and pat them dry.
4. Rinse your feet with warm water and pat them dry.

Tips for using Epsom salt for your feet

  • Use warm, not hot, water.
  • Don’t use the salts if you have open wounds or cuts on your feet.
  • If you have diabetes, talk to your doctor before using Epsom salt for your feet.
  • Be careful not to get salt in your eyes.

Epsom salt, also known as magnesium sulfate, is a natural mineral compound that has been used for centuries for its various health benefits. It is commonly used as a bath soak to relieve muscle aches and pains, but it also has a wide range of other applications, including exfoliating the skin, promoting sleep, and easing constipation.

There are two main types of Epsom salt: Food grade and Technical grade. Food grade Epsom salt is safe for human consumption and can be used in cooking and baking. Technical grade Epsom salt is not safe for human consumption and is used for industrial purposes.

 Food Grade Epsom Salt

Food Grade Epsom Salt

Food grade Epsom salt is the most common type of Epsom salt and is readily available in drugstores, grocery stores, and online retailers. It is typically sold in a white, crystalline powder form. Food grade salt is safe for human consumption and can be used in cooking, baking, and medicinal applications.

Technical Grade Epsom Salt

Technical grade Epsom salt is not safe for human consumption and is used for industrial purposes. It is typically sold in larger quantities and has a grayish-white color. Technical grade salt is not as pure as food grade salts and may contain impurities.

Uses of Epsom Salt

Epsom salt has a wide range of uses, including:

  • Relieving muscle aches and pains: Epsom salt is a popular home remedy for muscle aches and pains. It is often used as a bath soak to relieve pain and inflammation.
  • Exfoliating the skin: Can be used as a gentle exfoliator to remove dead skin cells and promote healthy skin.
  • Promoting sleep: Helps to promote relaxation and sleep. It can be added to a bath or used as a foot soak.
  • Easing constipation: Can be used as a laxative to relieve constipation. It can be taken orally or added to a bath.
  • Treating fungal infections: Has antifungal properties that can help to treat fungal infections of the skin, such as athlete’s foot.
  • Reducing inflammation: Helps to reduce inflammation throughout the body.
  • Improving circulation: Improves circulation by drawing out toxins and impurities from the body.
  • Relieving stress: Can help to relieve stress and anxiety. It can be added to a bath or used as a foot soak.
Epsom salt and essential oils

How to Use Epsom Salt

Epsom salt can be used in a variety of ways, depending on the desired effect. Here are a few general guidelines:

  • For a bath soak: Add 1-2 cups of salt to a warm bath. Soak for 15-20 minutes.
  • For a foot soak: Add 1/2 cup of salt to a basin of warm water. Use the foot bath to soak your feet for 10-15 minutes.
  • For a scrub: Mix 1/4 cup of salt with 1/4 cup of olive oil. Massage the mixture into your skin.
  • For oral use: Dissolve 1-2 teaspoons of salt in a glass of water. Take orally as directed.

Safety Precautions

Epsom salt is generally safe for most people. However, it is important to follow these safety precautions:

  • Do not use salt on open wounds or cuts.
  • Do not use this product if you have an allergic reaction to magnesium sulfate.
  • If you are pregnant or breastfeeding, talk to your doctor before using this product.
  • Do not exceed the recommended salt dosage.

This salt is a versatile and affordable remedy that can be used for a variety of health and wellness purposes. It is a safe and effective way to relieve muscle aches and pains, exfoliate the skin, promote sleep, ease constipation, and treat fungal infections. If you are looking for a natural way to improve your health and well-being, Epsom salt is a great option to consider.

This salt is a safe and effective home remedy for a variety of foot problems. It is a great way to relieve pain, soften hard skin, treat fungal infections, reduce foot odor, and promote relaxation. If you are looking for a natural way to pamper your feet, try using this type of salt.

Please note that these are just general guidelines. It is always best to talk to your doctor before using these salts for any medical condition.

8 Types Of Foot Baths Used For Pedicures

Soaking Your Way to Soft, Smooth Feet: Different Types Of Foot Baths for Pedicures

A foot bath is a simple yet effective way to pamper your feet and improve their overall health. There are many different types of foot baths to cure your foot ailments, as it is an essential part of any pedicure. It helps to soften the skin and make it easier to remove dead skin cells and calluses.

Soaking your feet in warm water can help to soften callouses, relieve pain, improve circulation and reduce stress. There are many different types of foot baths available, each with its own benefits. Here are a few of the most popular options:

1. Basic Foot Bath

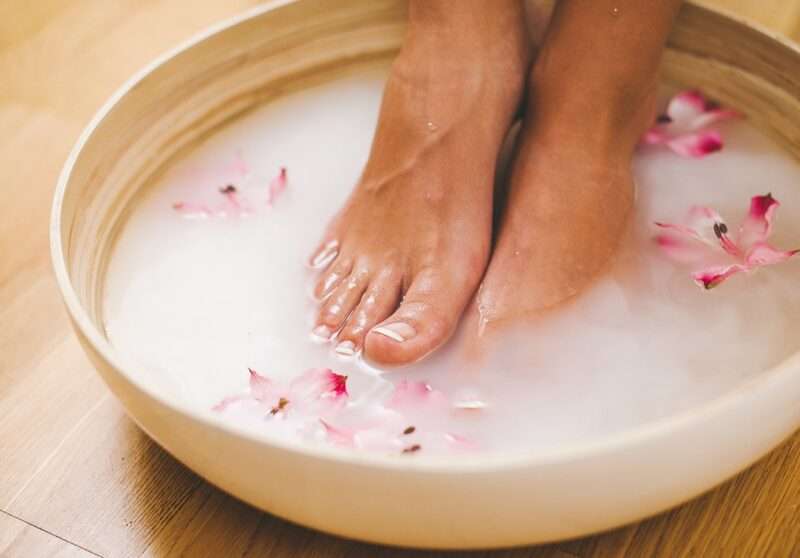
The most basic type of foot bath is simply a basin of warm water. You can add Epsom salts, essential oils, or other ingredients to enhance the experience. A basic foot bath is a simple and effective way to pamper your feet. All you need is a basin of warm water and some Epsom salts. Epsom salts are a natural mineral that has anti-inflammatory and pain-relieving properties.

Benefits:

  • Inexpensive and easy to prepare
  • Can be used at home
  • Effective for softening callouses and relieving pain

2. Heated Foot Bath

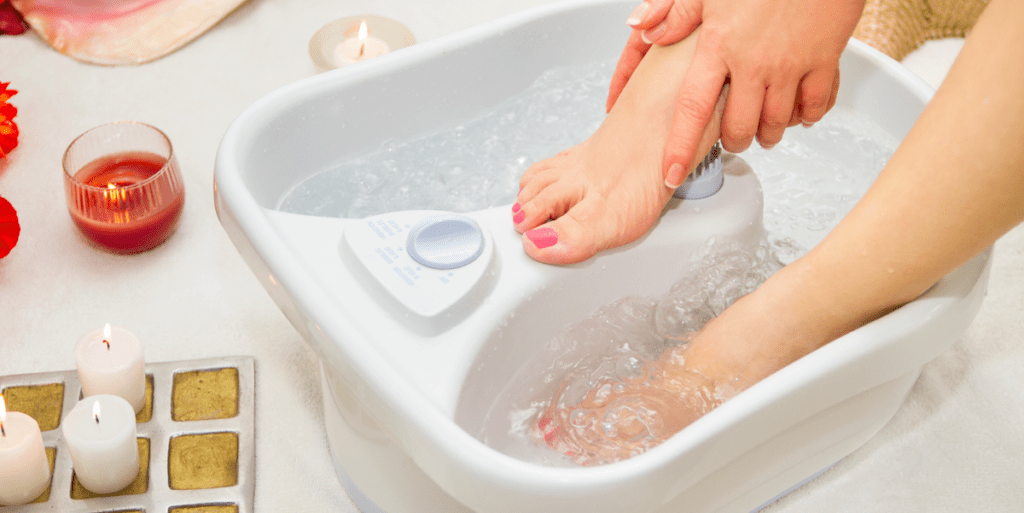
Heated foot baths are a great way to relax your muscles and improve circulation. They typically have a built-in heater that keeps the water warm throughout your soak.

Benefits:

  • Provides more heat and relaxation
  • Can help to relieve muscle tension
  • Can be used to treat chronic pain conditions
Shiatsu foot bath

3. Shiatsu Foot Bath

Shiatsu foot baths have massage rollers that provide a deep-tissue massage to your feet. This can help to improve circulation, reduce pain, and relieve stress.

Benefits:

  • Provides a deep-tissue massage
  • Can help to improve circulation
  • Can help to reduce pain and stress

4. Bubble Foot Bath

Bubble foot baths are a fun and relaxing way to pamper your feet. The bubbles help to stimulate circulation and provide a gentle massage.

Benefits:

  • Provides a fun and relaxing experience
  • Can help to stimulate circulation
  • Can help to reduce stress

5. Herbal Foot Bath

Herbal foot baths are a great way to use the healing power of herbs to improve your foot health. An herbal foot bath is a great way to add some extra relaxation to your pedicure. You can add any herbs that you like, but some popular choices include dried herbs, such as lavender, chamomile, tea tree oil or peppermint.

image

6. Citrus Foot Bath

A citrus foot bath is a great way to invigorate your feet and improve circulation. You can add any citrus fruits that you like, but some popular choices include lemon, orange, and grapefruit.

7. Essential Oil Foot Bath

An essential oil foot bath is a great way to add some extra aromatherapy to your pedicure. You can add any essential oils that you like, but some popular choices include lavender, peppermint, and tea tree.

8. Salt Scrub Foot Bath

A salt scrub foot bath is a great way to exfoliate your feet and remove dead skin cells. You can use any type of salt, but some popular choices include sea salt and Epsom salts.

How to Give Yourself a Foot Bath

  1. Fill a basin with warm water. The water should be warm, but not too hot.
  2. Add your choice of foot bath ingredients.
  3. Soak your feet in the foot bath for 10-15 minutes.
  4. Rinse your feet with warm water and pat them dry.
  5. Follow up with a pedicure.
types of foot baths for your pedicure

Tips for Getting the Most Out of Your Foot Bath

  • Use warm, not hot, water.
  • Add your choice of foot bath ingredients.
  • Soak your feet for 10-15 minutes.
  • Rinse your feet with warm water and pat them dry.
  • Follow up with a pedicure.

A foot bath is a great way to pamper your feet and improve your overall health and well-being. By following these tips, you can get the most out of your foot bath and enjoy soft, smooth feet all year long.

Benefits:

  • Provides the healing power of herbs
  • Can help to improve circulation
  • Can help to reduce pain and inflammation

How to Choose the Right Foot Bath for You

The best foot bath for you will depend on your individual needs and preferences. Consider the following factors when making your decision:

  • Your budget: Foot baths range in price from a few dollars to over $100.
  • Your needs: If you have specific foot problems, such as pain or circulation issues, you may need a specialized foot bath.
  • Your preferences: Some people prefer the simplicity of a basic foot bath, while others prefer the added features of a heated, shiatsu, or bubble foot bath.

No matter which type of foot bath you choose, make sure to soak your feet for at least 15 minutes to get the most benefits. You can also add your favorite scented soap or lotion to the water for an extra touch of pampering.

I hope this blog post has helped you learn more about the different types of foot baths and how to choose the right one for you. Enjoy your foot baths and pamper your feet!